[ESP-ING] DIY, Blusa de manga larga en color negro, una prenda que no puede faltar en tu closet. 🖤 || DIY, Long sleeve blouse in black color, a garment that can not miss in your closet. 🖤
¡Hola comunidad de Hive!
Hello Hive community!
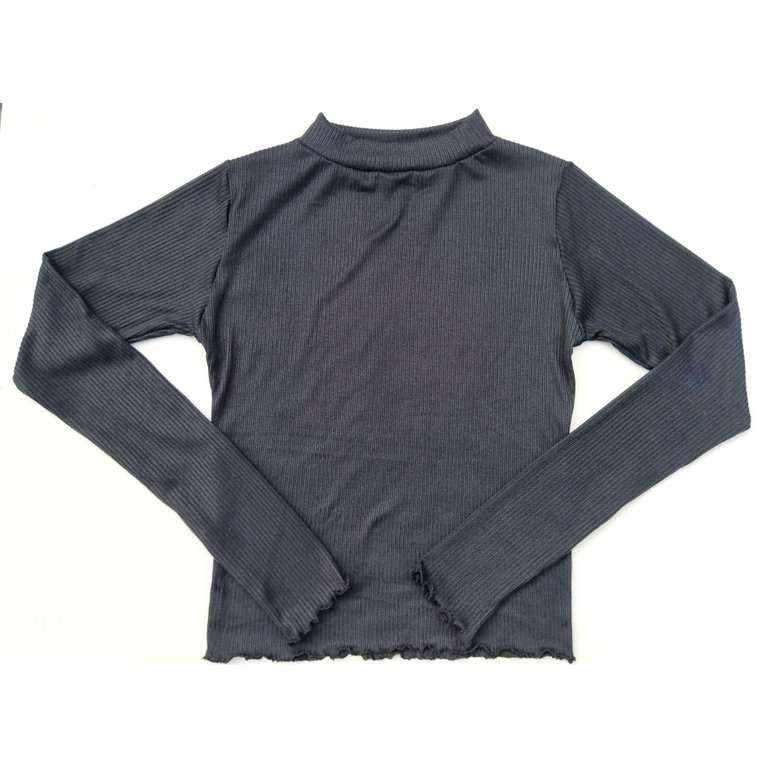
Hola queridos amantes de la costura, feliz lunes de agujas por la noche, es lunes y el cuerpo lo sabe 😂 así que desde temprano me puse a trabajar y pude por fin terminar una prenda que tenía tiempo queriendo hacer para mí, se trata de una bellísima blusa manga larga y cuello alto en color negro, este tipo de blusas viste bastante y me hacía falta algo así en mi clóset, esto fascinada con este trabajo.
Hello dear sewing lovers, happy Monday night needlework, it's Monday and the body knows it 😂 so I started to work early and I could finally finish a garment that I had long wanted to do for me, this is a beautiful long sleeve blouse and high neck in black, this type of blouse dresses quite a lot and I needed something like this in my closet, I am fascinated with this work.
Este tipo de blusa va perfecto con un mom jean o algún pantalón a la cintura, así que si quieres aprender a realizar esta hermosa blusa ve por tu hilo, tela y aguja.
This type of blouse goes perfect with a mom jean or some pants at the waist, so if you want to learn how to make this beautiful blouse go get your thread, fabric and needle.
🧵🧷🧵🧷🧵🧷🧵🧷🧵🧷🧵🧷🧵🧷🧵🧷🧵
Necesitaremos || We will need
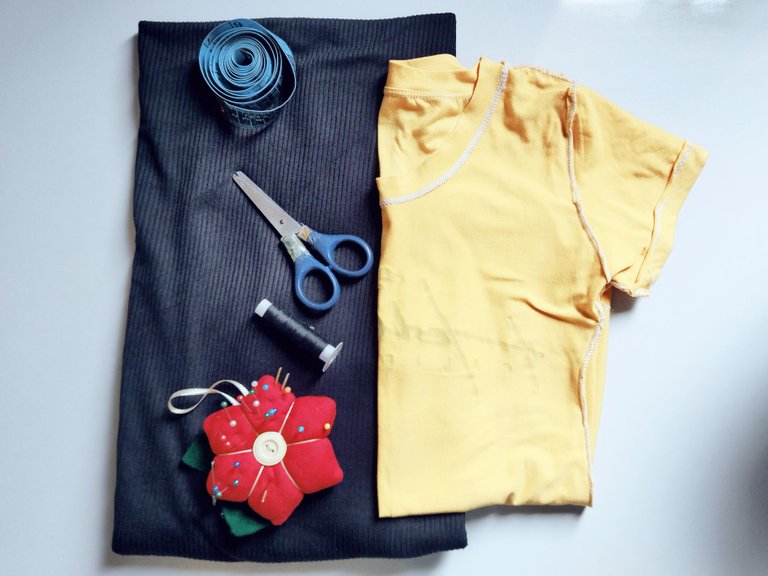
- Medio metro de tela micro rib negro
- Hilo negro
- Alfileres
- Tijera
- Cinta métrica
- Patrón
- Aguja y máquina de coser
- Medio metro de tela micro rib negro
- Hilo negro
- Alfileres
- Tijera
- Cinta métrica
- Patrón
- Aguja y máquina de coser
🧵🧷🧵🧷🧵🧷🧵🧷🧵🧷🧵🧷🧵🧷🧵🧷🧵
Paso 1 || Step 1
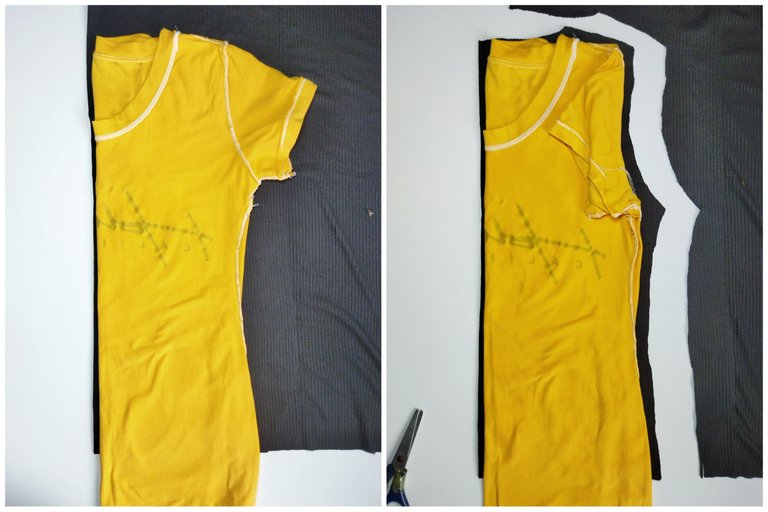
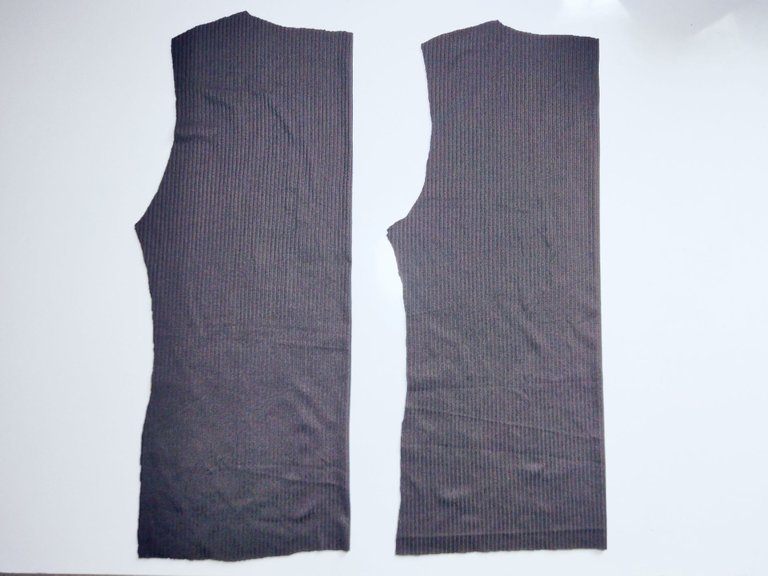
- Comenzamos doblando la tela y colocándola en una superficie plana, colocamos la camisa patrón sobre la tela y lo sujetamos con alfileres, vamos a cortar de la tela colocando el lado que más estira en dirección horizontal, necesitamos sacar dos piezas (1 pieza delantera y 1 pieza trasera), Debemos tener en cuenta del centímetro que debemos dejar para el margen de costura.
- We start by folding the fabric and placing it on a flat surface, we place the pattern shirt on the fabric and pin it, we will cut the fabric by placing the side that stretches the most horizontally, we need to take out two pieces (1 front piece and 1 back piece), we must take into account the centimeter that we must leave for the seam allowance.
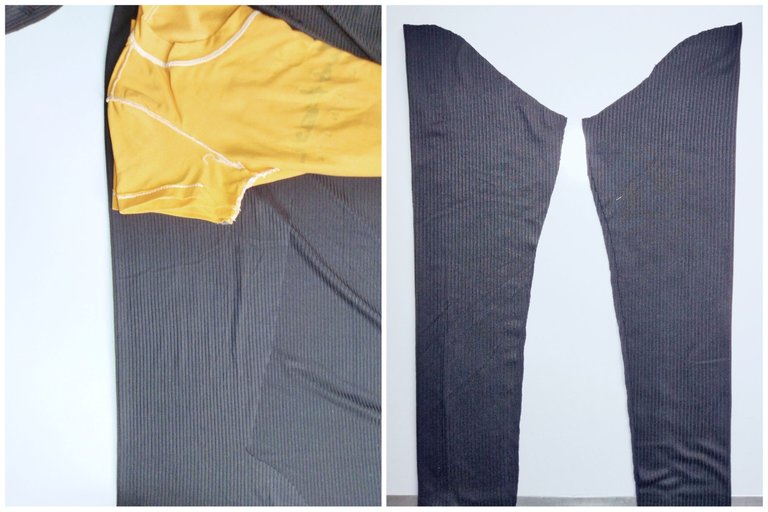
- Cortamos las mangas también, coloqué la camisa patrón sobre la tela y corté la curva del hombro, luego medí el largo de mi brazo, y corté dos piezas para las mangas.
- We cut the sleeves as well, I placed the pattern shirt on the fabric and cut the curve of the shoulder, then measured the length of my arm, and cut two pieces for the sleeves.
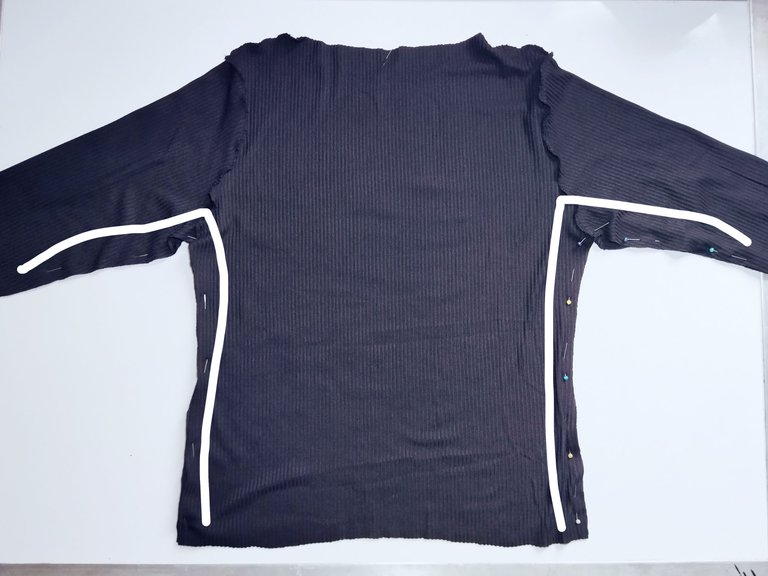
Paso 2 || Step 2
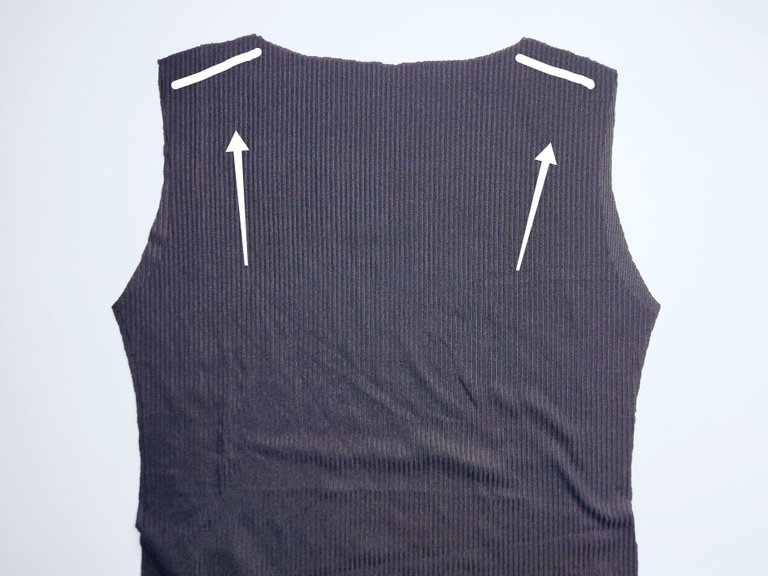
Después de tener la dos piezas cortadas (Delantera y trasera), enfrentamos los derechos de ambas piezas. Y sujetamos con alfileres las hombros de la blusa, como te muestro en la imagen. Pasamos costura recta y luego zigzag para rematar la costura en los hombros.
Teniendo los hombros de la blusa ya cosidos vamos a sujetar las manga a la sisa, me ayude con alfileres y luego fuí a la máquina y pasé costura recta y zigzag para un mejor acabado en los bordes (👀 OJO!!! Muy pendiente de la dirección de la tela, el derecho y el revés).
- After having the two pieces cut (front and back), we face the right sides of both pieces. And pin the shoulders of the blouse, as shown in the picture. We pass straight seam and then zigzag to finish the seam on the shoulders.
- Having the shoulders of the blouse already sewn we are going to attach the sleeves to the armhole, I helped myself with pins and then went to the machine and passed straight stitching and zigzag for a better finish on the edges (👀 EYE!!! Very attentive to the direction of the fabric, the right and the back).
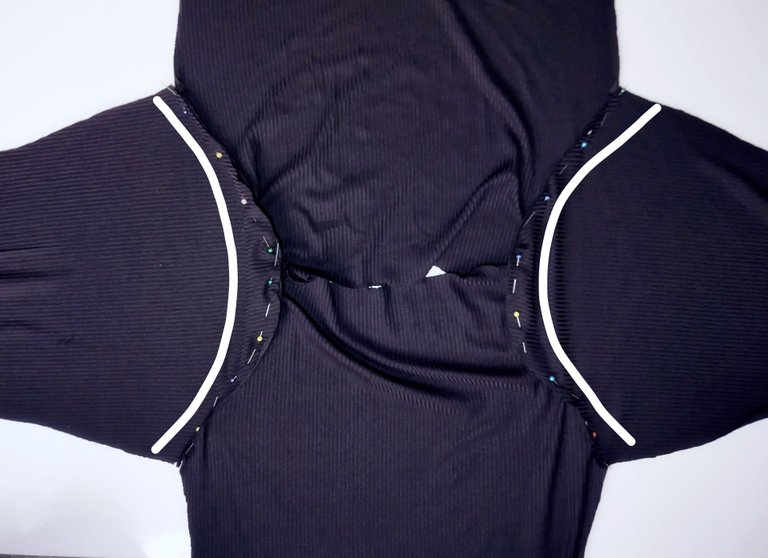
Paso 3 || Step 3
Proseguimos enfrentando los derechos de la blusa con las mangas cosidas y vamos a pasar costura desde el borde de las mangas hasta los costados cerrando los dos lados, acostumbró a pasar costura recta y zigzag.
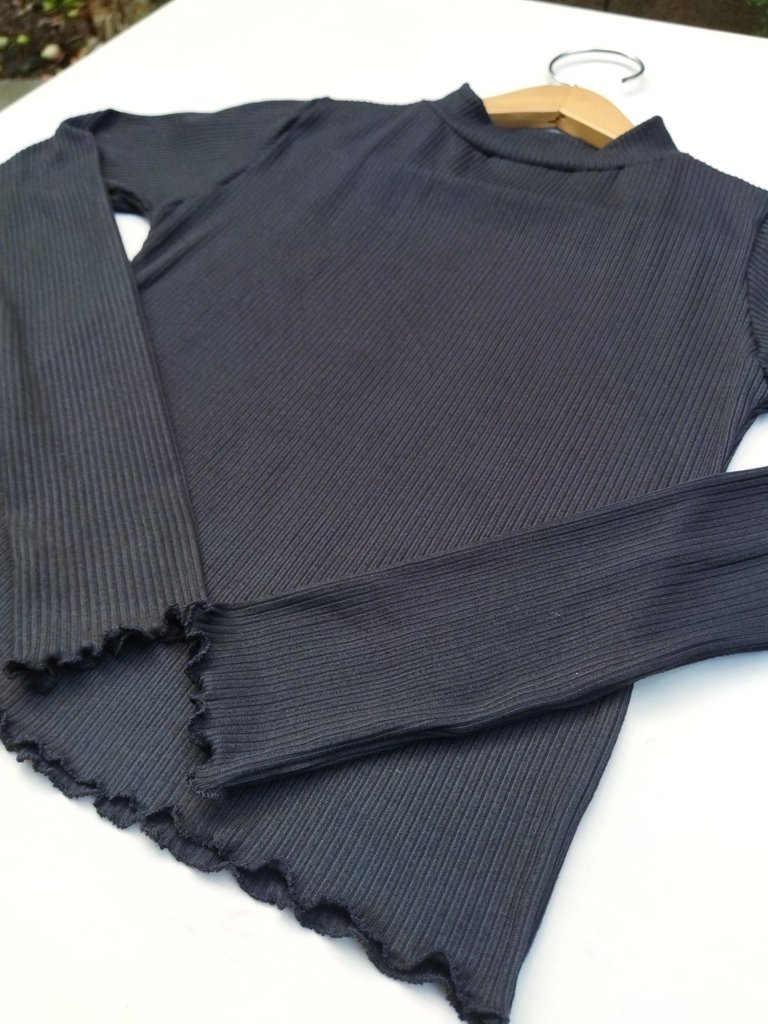
Luego volteamos la blusa y pasamos costura de overlock en los bordes de las mangas y el ruedo, si no tenemos overlock como en mi caso podemos colocar la costura en zigzag con el largo de puntada en 1,5 y pasamos estirando la orilla de la tela lo más que podemos para que nos quedé un lindo faralao.
We continue by facing the blouse with the sleeves sewn and we will sew from the edge of the sleeves to the sides closing both sides, I used to sew straight and zigzag seams.
- Then we turn the blouse over and overlock the edges of the sleeves and the hem, if we do not have overlock as in my case we can place the zigzag seam with the stitch length in 1.5 and we pass stretching the edge of the fabric as much as we can so that we have a nice faralao.
Paso 4 || Step 4
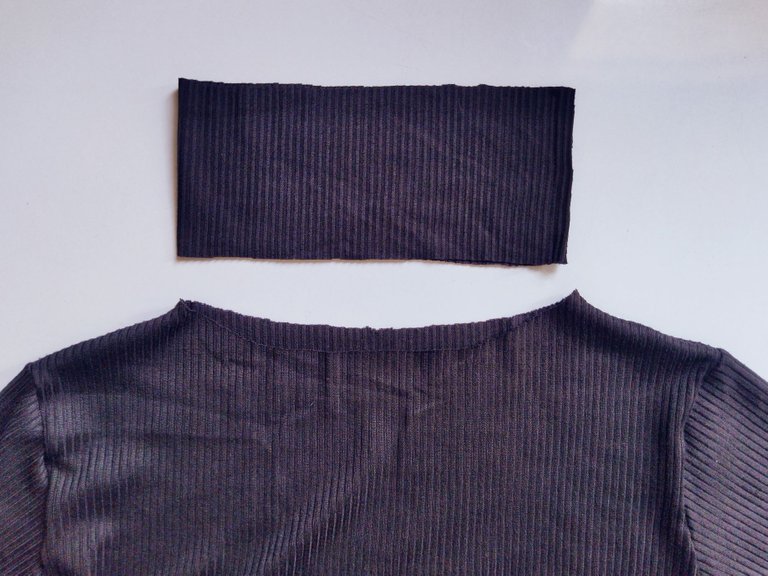
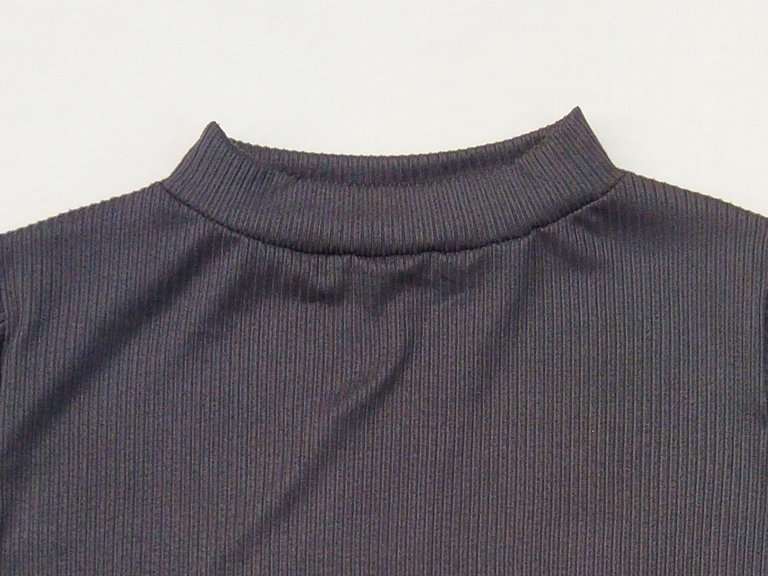
- Cortamos una tira de 8 cm de ancho para coser el vivo del cuello, doblé la tira a la mitad y la sujeté con alfileres al contorno del cuello enfrentando derechos y luego cosí a máquina, y ya tendríamos el vivo del cuello alto listo.
- We cut an 8 cm wide strip to sew the neckline, I folded the strip in half and pinned it to the contour of the neckline facing right sides together and then machine stitched, and we would have the high neckline ready.
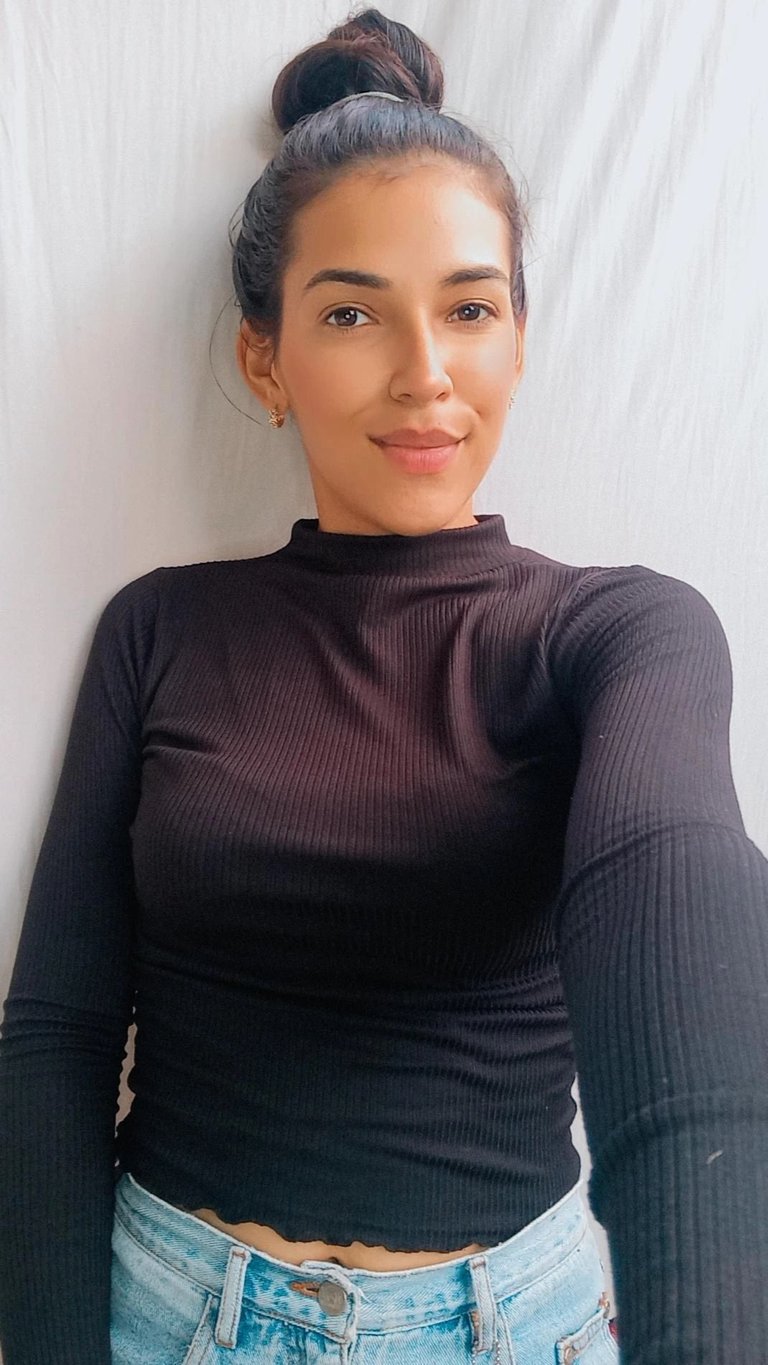
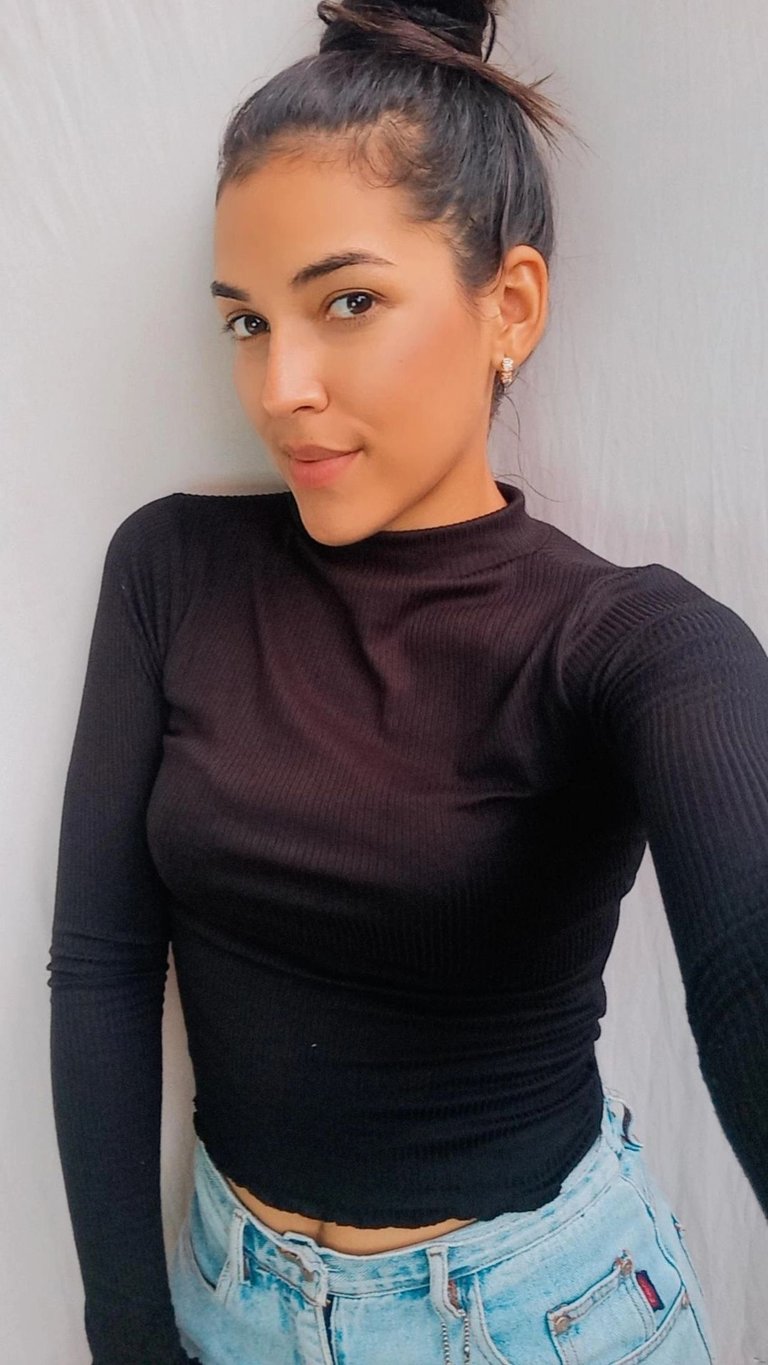
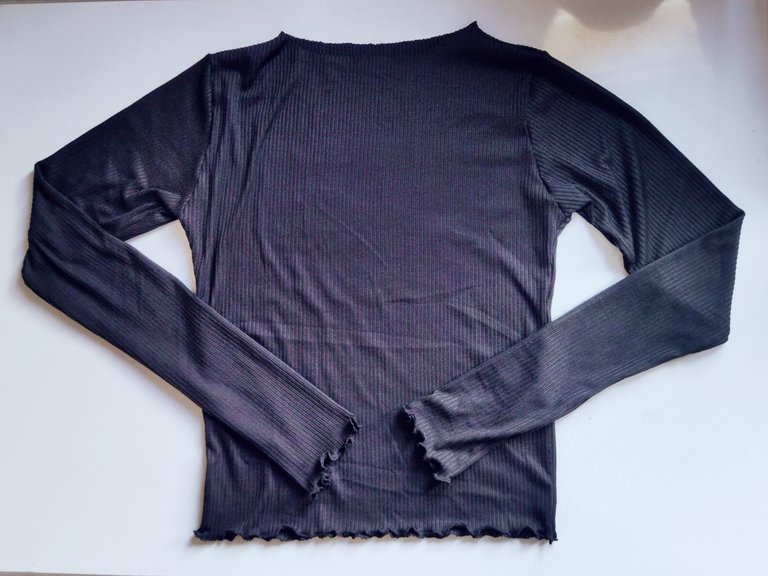
Resultado final.
Final result.
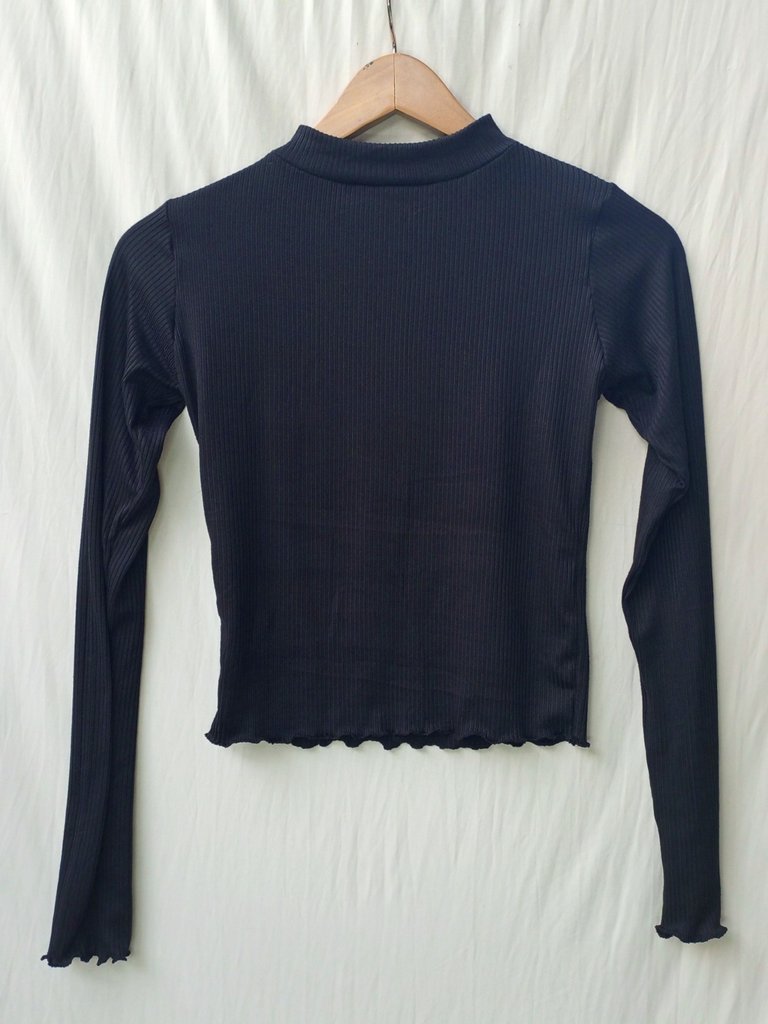
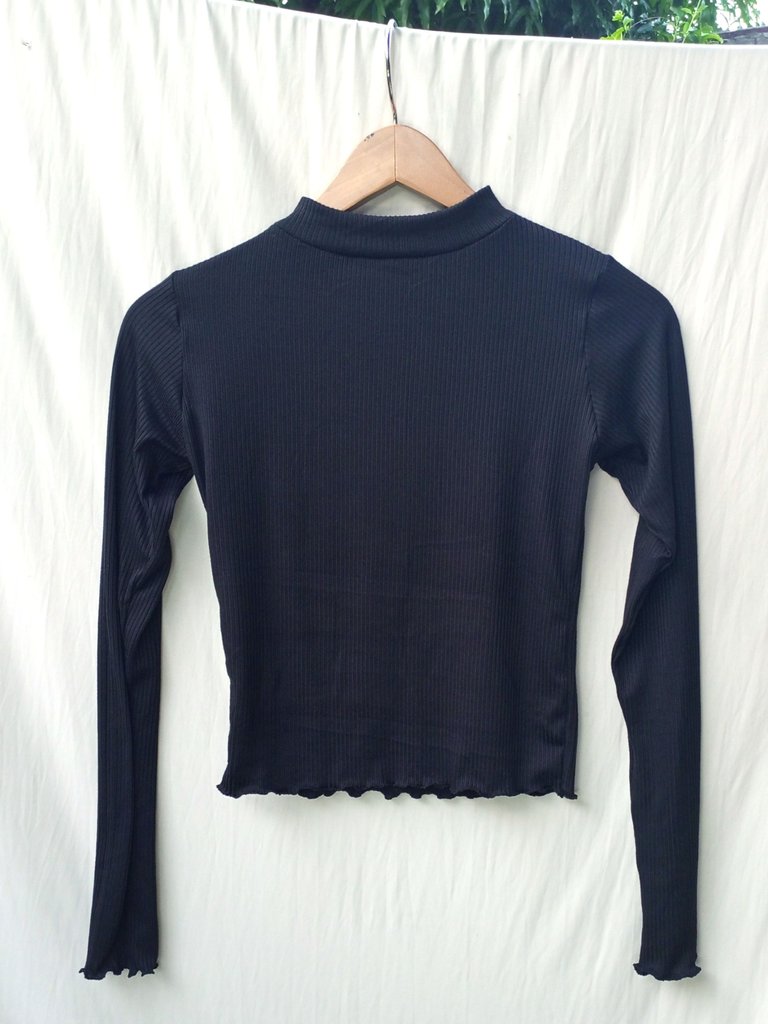

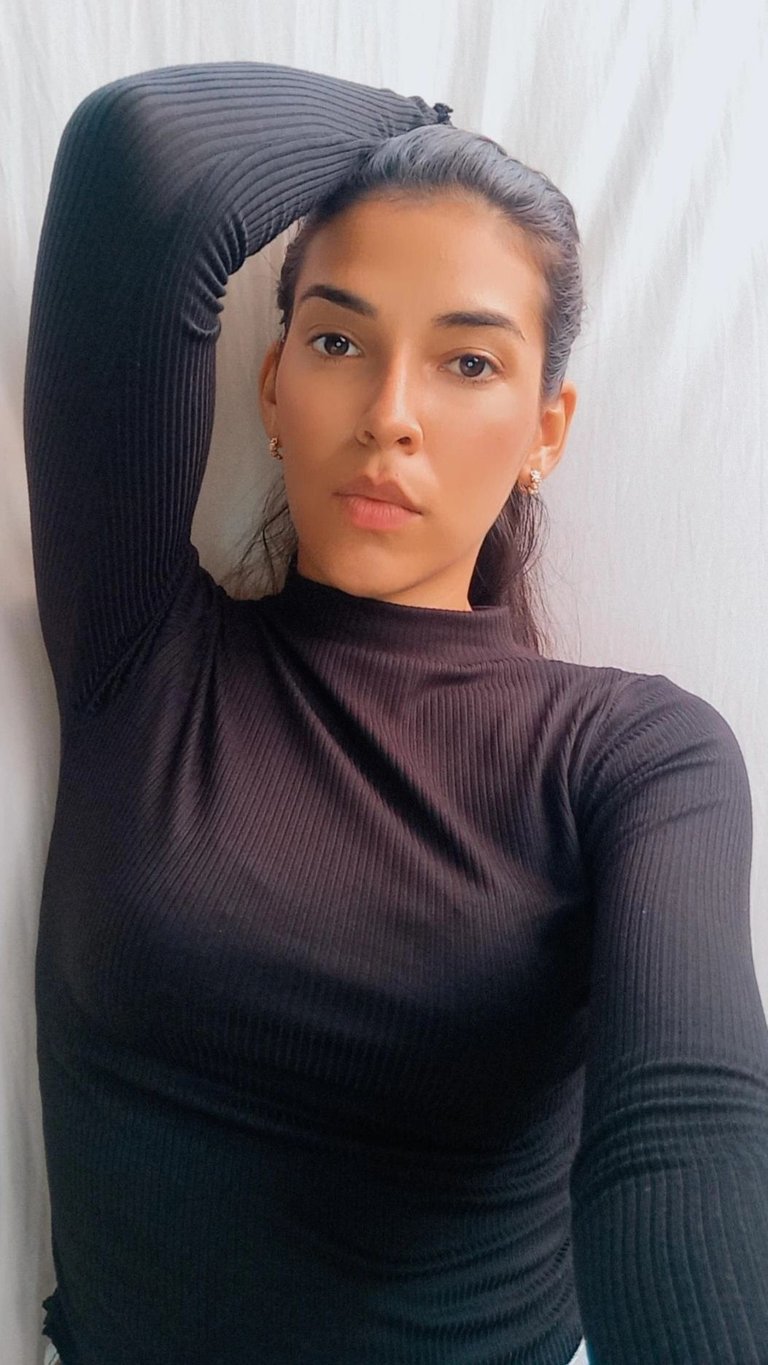
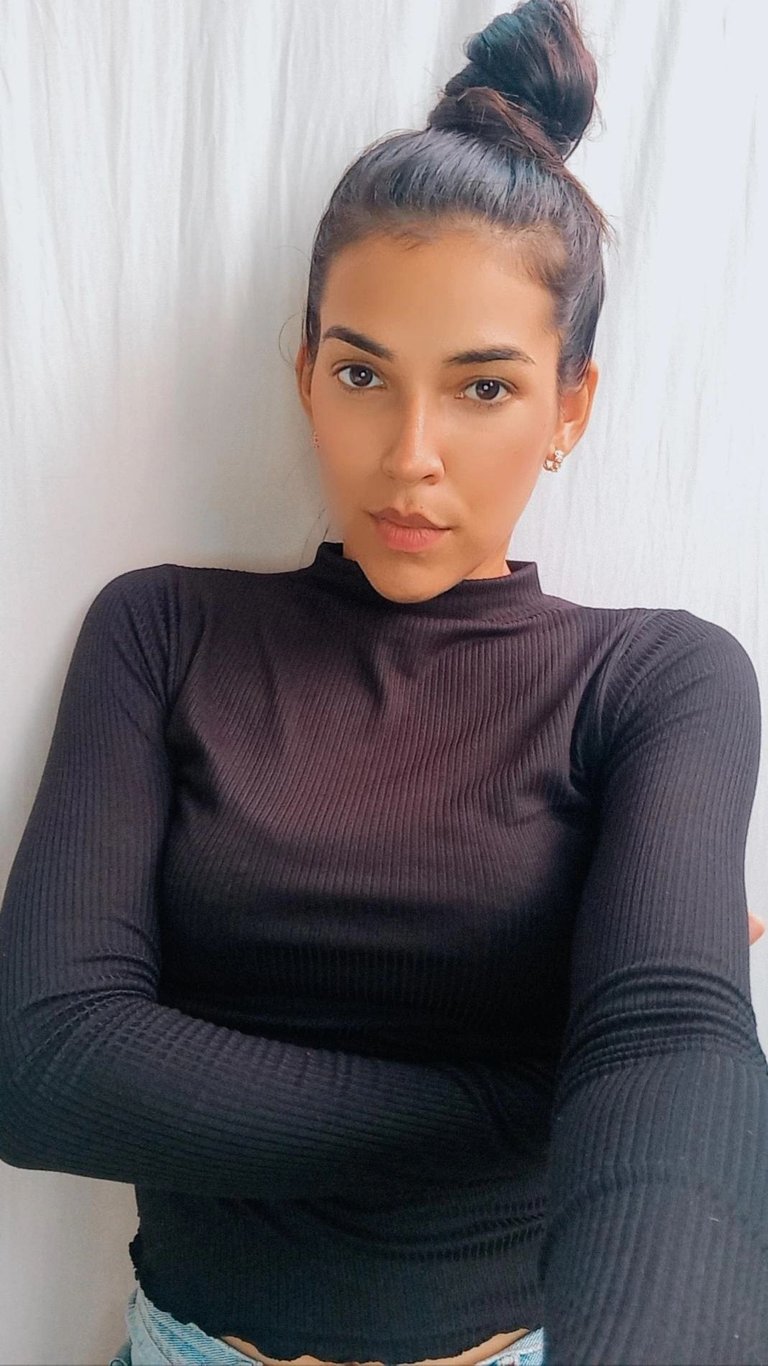

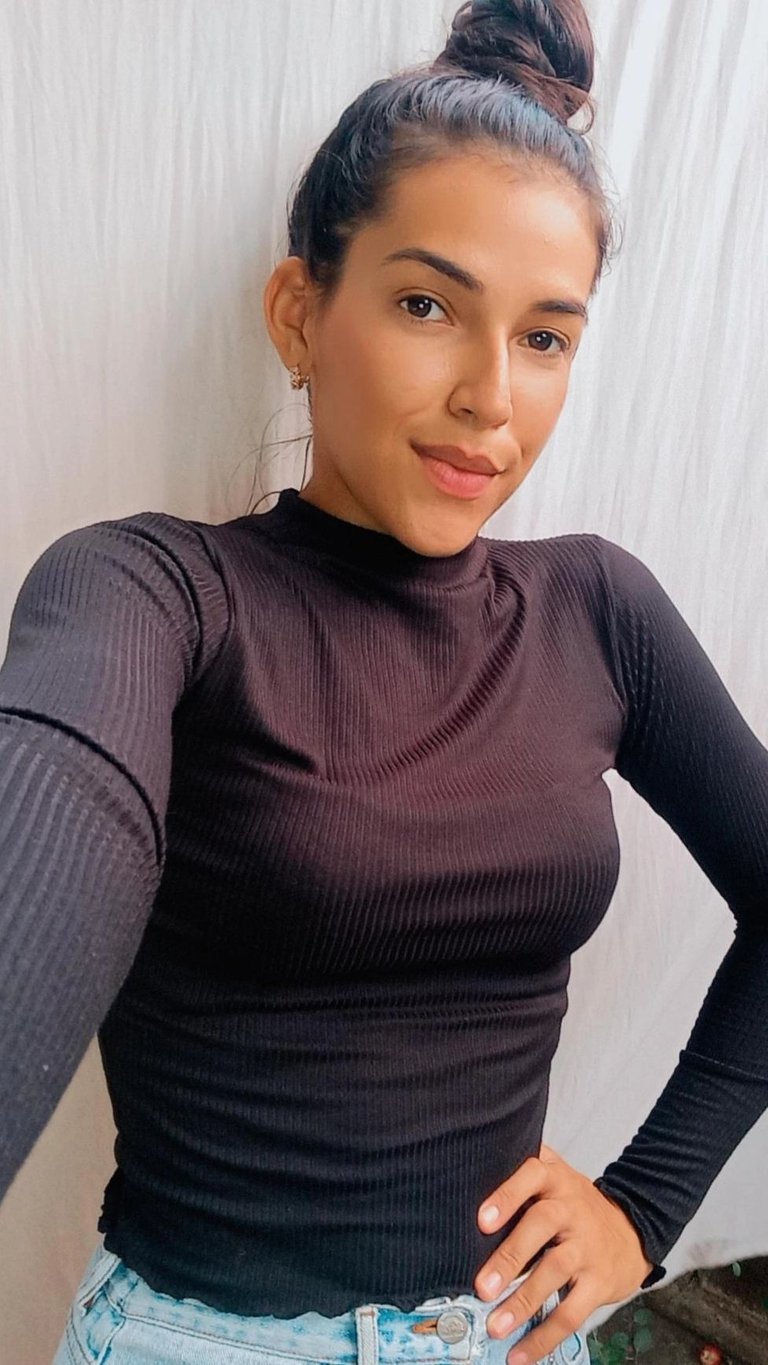
Amigos así quedó el resultado final de esta hermosa blusa manga larga en color negro, sin duda me encantó, no pude esperar para probarmela y me quedó muy bien, hasta aquí esta publicación espero que les hay gustado tanto como a mí y si llegaste hasta aquí mil gracias por leer mi post ❤️🥰 un fuerte abrazo.
Friends this was the final result of this beautiful long sleeve blouse in black, no doubt I loved it, I could not wait to try it on and it looked great, so far this publication I hope you liked it as much as I did and if you got this far thank you for reading my post ❤️🥰 a big hug.
All images are my property / Todas las imágenes son de mi propiedad
Camera: Xiaomi Redmi 9T.
Translation: Deepl.com
!discovery 35
This post was shared and voted inside the discord by the curators team of discovery-it
Join our community! hive-193212
Discovery-it is also a Witness, vote for us here
Delegate to us for passive income. Check our 80% fee-back Program
Your content has been voted as a part of Encouragement program. Keep up the good work!
Use Ecency daily to boost your growth on platform!
Support Ecency
Vote for new Proposal
Delegate HP and earn more
https://twitter.com/EmiliGil4/status/1549222209796935681
The rewards earned on this comment will go directly to the people sharing the post on Twitter as long as they are registered with @poshtoken. Sign up at https://hiveposh.com.
Quedó hermosa, he aprendido varios términos técnicos al ver tu tutorial y también aprendo que puedo hacer una blusa teniendo como base una franela que tengo. Genial todo me encantó.
Me alegra mucho que puedas aprender un poquito conmigo, la idea es mostrarles lo poquito que se, gracias por tu comentario ☺️ saludos 😊😁😘
Lovely thanks for sharing @yulilemus02
Wow excellent work, the outcome fix you so much, and you are so beautiful with the dress
Thank you for sharing this amazing post on HIVE!
Your content got selected by our fellow curator @stevenson7 & you just received a little thank you via an upvote from our non-profit curation initiative!
You will be featured in one of our recurring curation compilations and on our pinterest boards! Both are aiming to offer you a stage to widen your audience within and outside of the DIY scene of hive.
Join the official DIYHub community on HIVE and show us more of your amazing work and feel free to connect with us and other DIYers via our discord server: https://discord.gg/mY5uCfQ !
If you want to support our goal to motivate other DIY/art/music/homesteading/... creators just delegate to us and earn 100% of your curation rewards!
Stay creative & hive on!