Origami snowflakes - step by step [ENG-ESP]
Saludos nuevamente quería comunidad el día de hoy les presento un nuevo origami que aprendí hace unos días y es hermoso, se trata de unos bonitos copos de nieve, y aunque me encantó la verdad es algo largo y enrevesado por eso procure tomar fotos muy detalladas de cada paso y haré mi mejor esfuerzo en dar las instrucciones, espero que sea útil y de su agrado.
Greetings again wanted community today I present a new origami that I learned a few days ago and is beautiful, it is a beautiful snowflakes, and although I loved the truth is something long and convoluted so try to take very detailed photos of each step and I will do my best to give the instructions, I hope it is useful and to your liking.
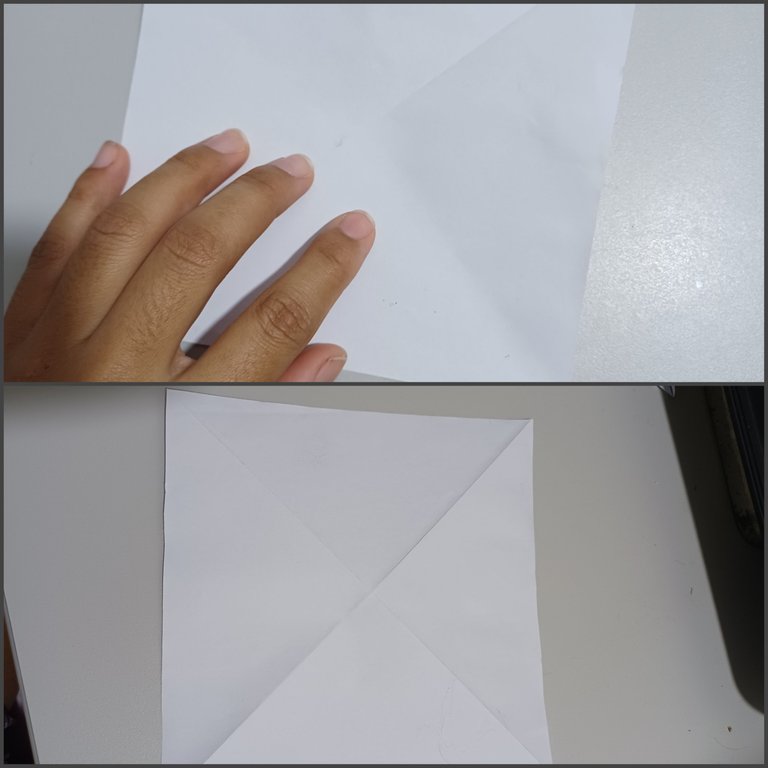
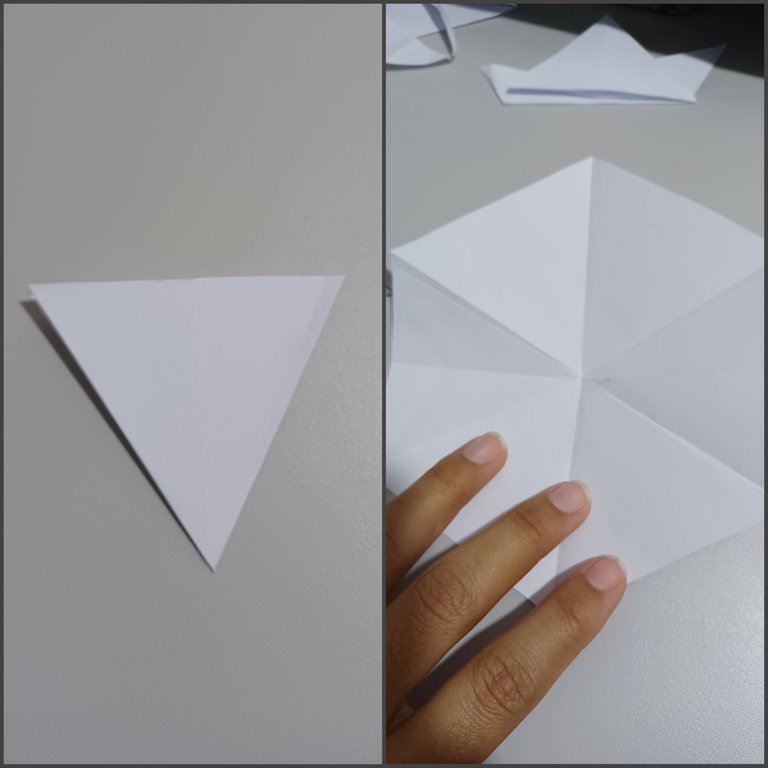
❄️Para ello solo emplee papel blanco de tamaño carta el cual corte para que quedase cuadrado, el cual doble de forma perpendicular desde ambas esquinas y lo dejaré doblado en uno de los lados.
For this I only used white letter size paper which I cut to be square, which I folded perpendicularly from both corners and left it folded on one side.
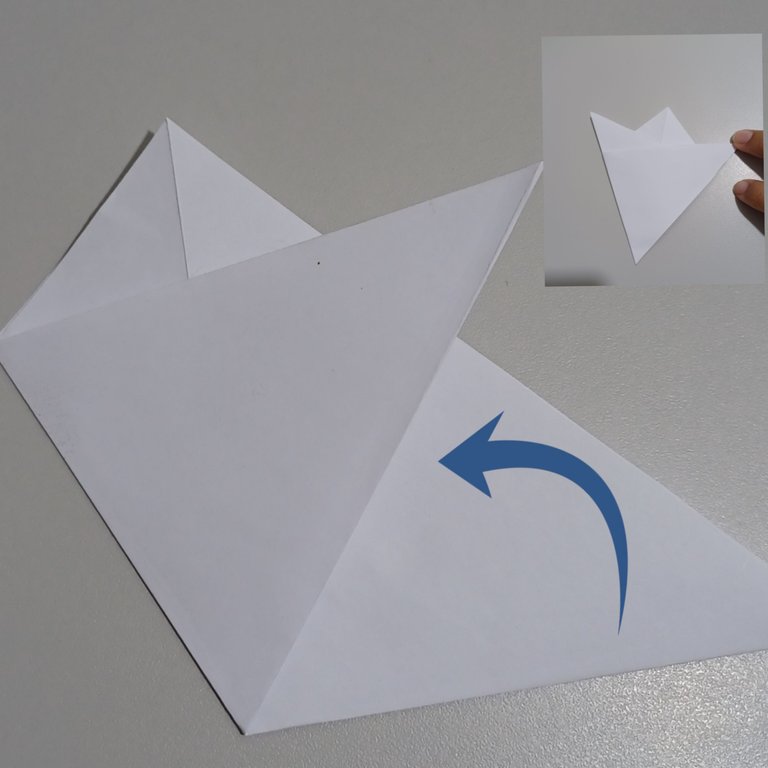
❄️Desde el centro doble hacia al centro en el ángulo que se muestra en la imagen, luego se repite con el otro lado.
From the center bend towards the center at the angle shown in the image, then repeat with the other side.
❄️En la pestaña restante en el centro de la página, la doblo hacia afuera y en la marca que se forma por el doblez recortar, y debe resultar en un triángulo isósceles
On the remaining tab in the center of the page, fold it outward and at the mark formed by the fold cut out, and it should result in an isosceles triangle.
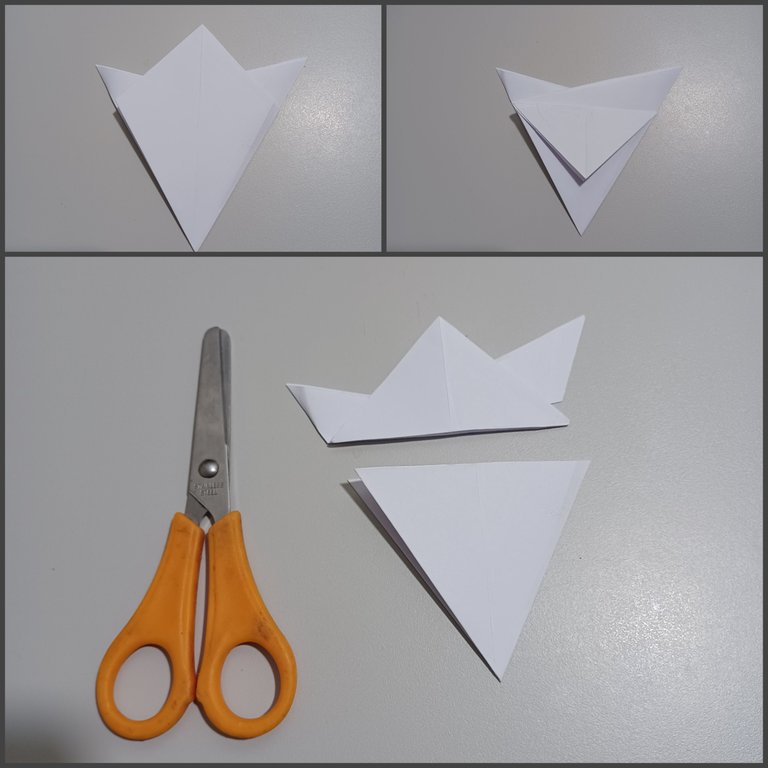
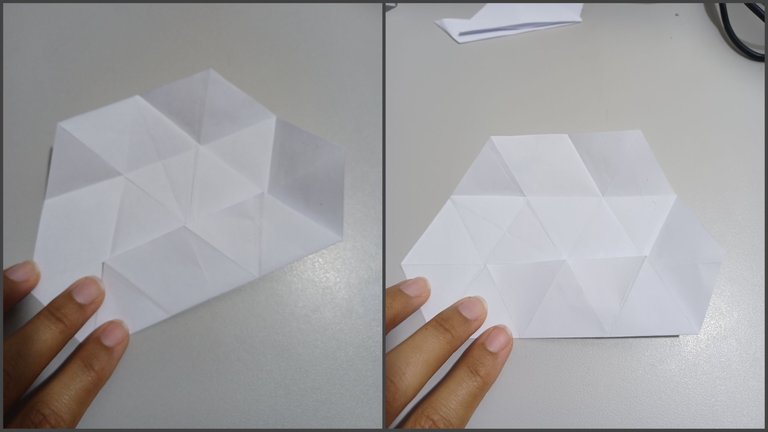
❄️Al abrir el triángulo debe resultar un hexágono
Opening the triangle should result in a hexagon.
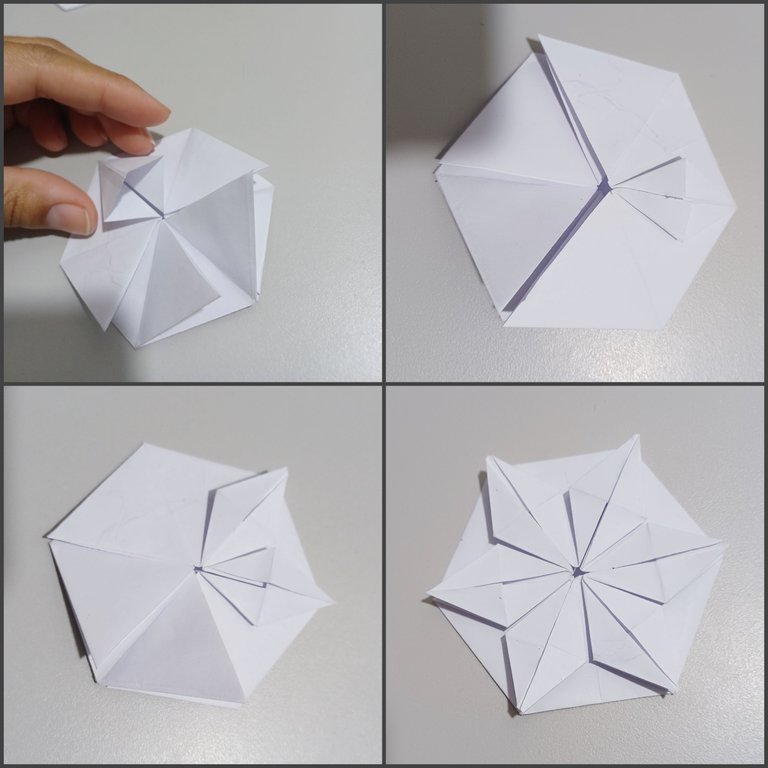
❄️Seguidamente se debe doblar cada uno de los lados hasta el centro de la hoja, resultando en un patrón de dobleces en todo el papel, el cual será la guía para el siguiente paso.
Next, fold each of the sides to the center of the sheet, resulting in a pattern of folds all over the paper, which will be the guide for the next step.
❄️Luego se debe doblar nuevamente todos los lados hacia el centro, lo cual formará nuevamente un hexágono más pequeño.
Then all sides should be folded back to the center, which will again form a smaller hexagon.

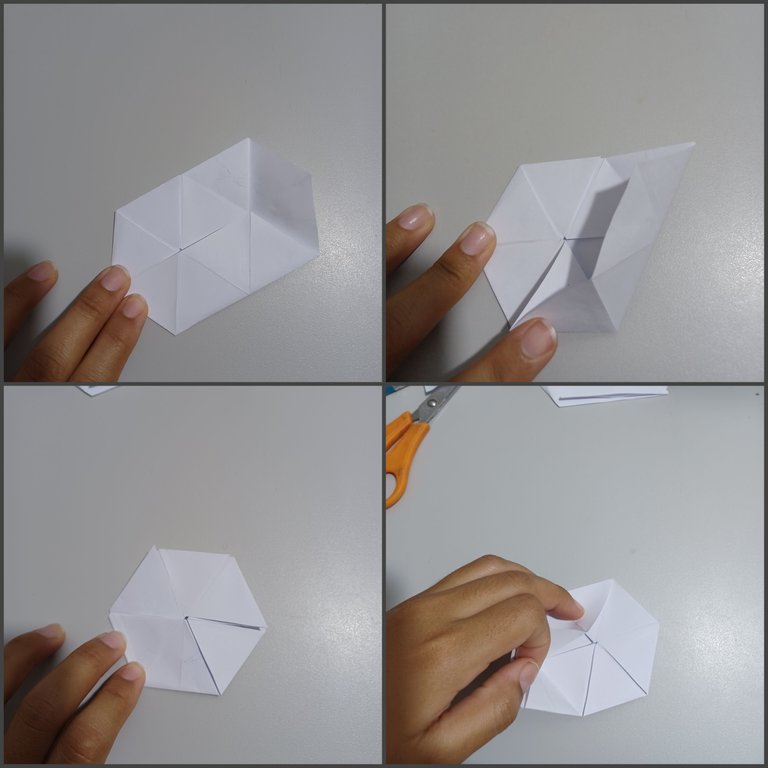
❄️En el último doblez se debe abrir para dejar todas las pestañas hacia afuera como se muestra en la última imagen de este collage.
The last fold should be opened to leave all the tabs facing outward as shown in the last image of this collage.
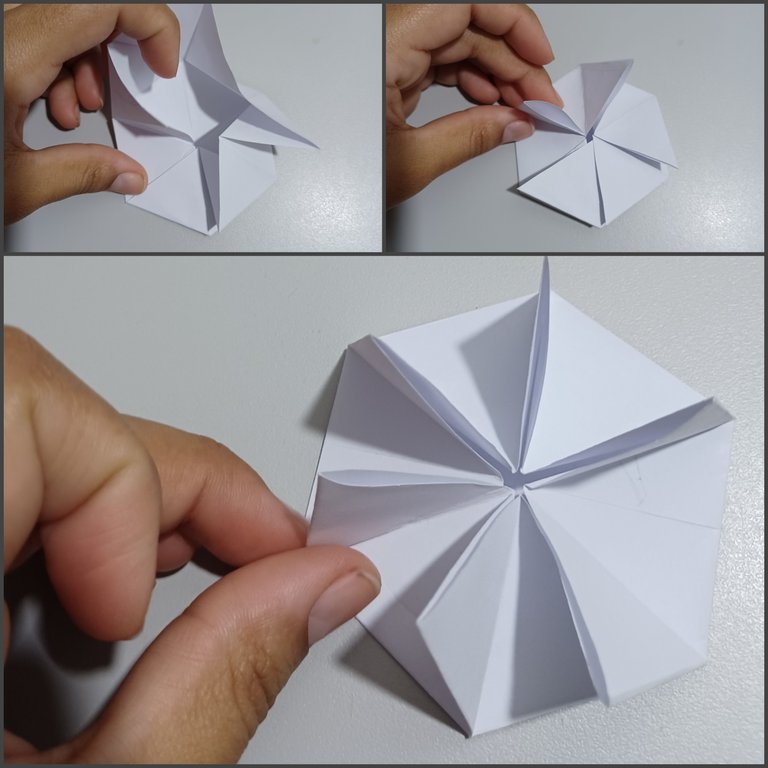
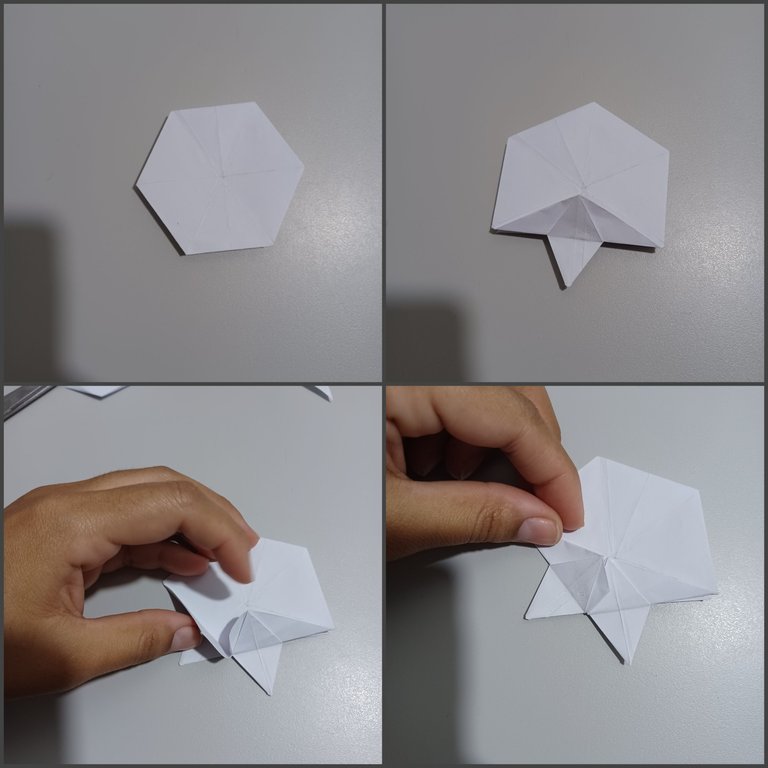
❄️Luego se dobla cada una de las pestañas justo por el centro, luego doble hasta afuera hasta formar seis rombos uno en cada una de las pestañas.
Then fold each lash right down the center, then fold all the way out to form six diamonds, one on each lash.
❄️Se debe girar nuevamente la forma y doblar nuevamente hacia adentro esta vez serán las esquinas, hay que doblar cada una de ellas hasta que la forma resultante sea una estrella de seis puntas.
The shape should be turned again and folded inward again, this time it will be the corners, fold each one of them until the resulting shape is a six-pointed star.
❄️Luego de cada una de las pestañas resultantes he vuelto a abrir cada una formando un triángulo en la parte superior.
Then from each of the resulting tabs I have reopened each one forming a triangle at the top.
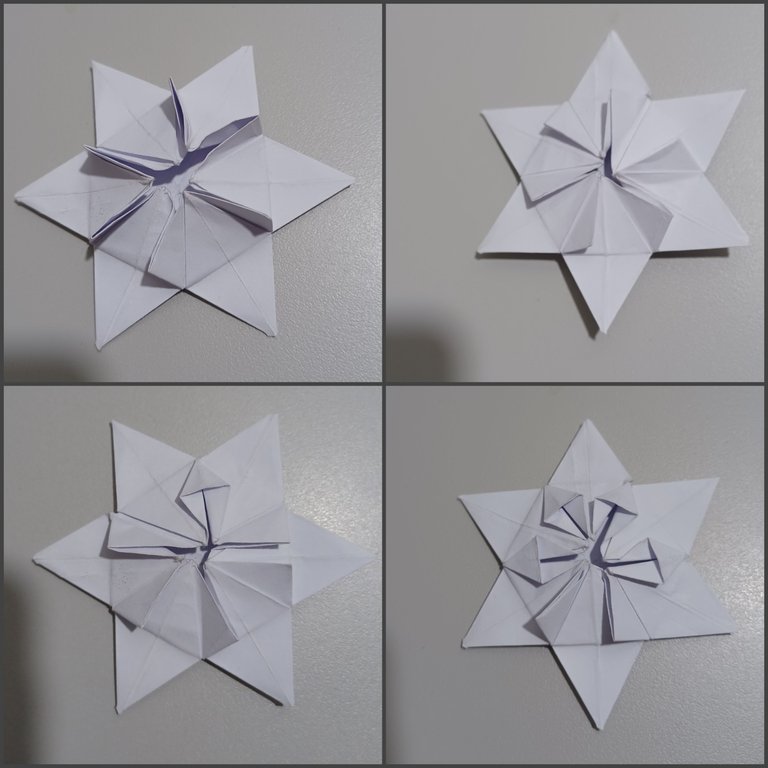
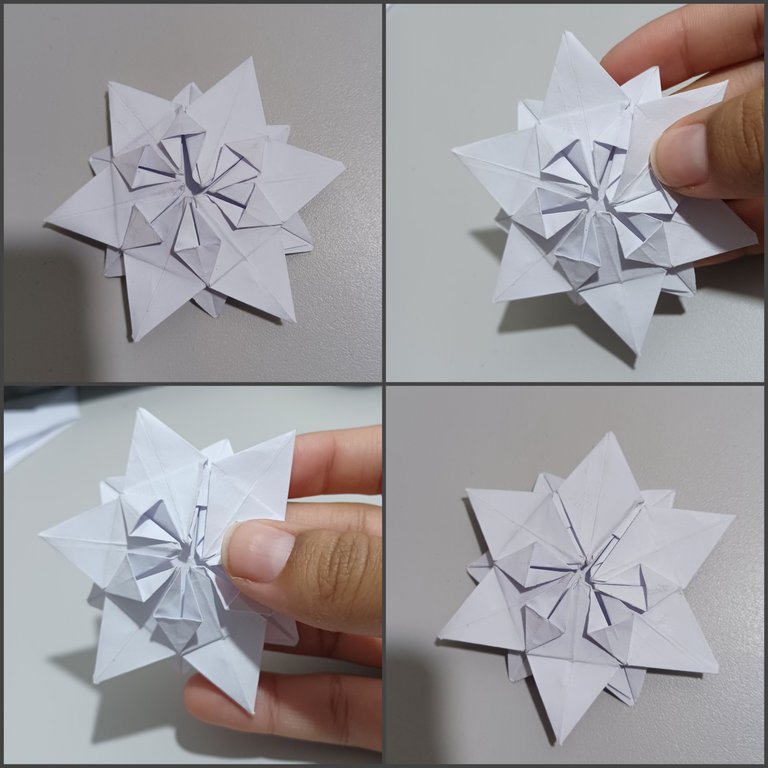
❄️Luego vuelvo a girar la forma y esta vez dobló hacia afuera cada una de las puntas internas hacía afuera.
Then I turn the shape again and this time I fold out each of the inner ends outward.
❄️Vuelvo a girar nuevamente la forma, y esta vez oculto los triángulo que forma anteriormente entre las pestañas a los lados, esta vez use una pinza de cejas para poder tomarlos sin problemas.
I turn the shape again, and this time I hide the triangles that formed before between the eyelashes on the sides, this time I use an eyebrow tweezers to be able to take them without problems.
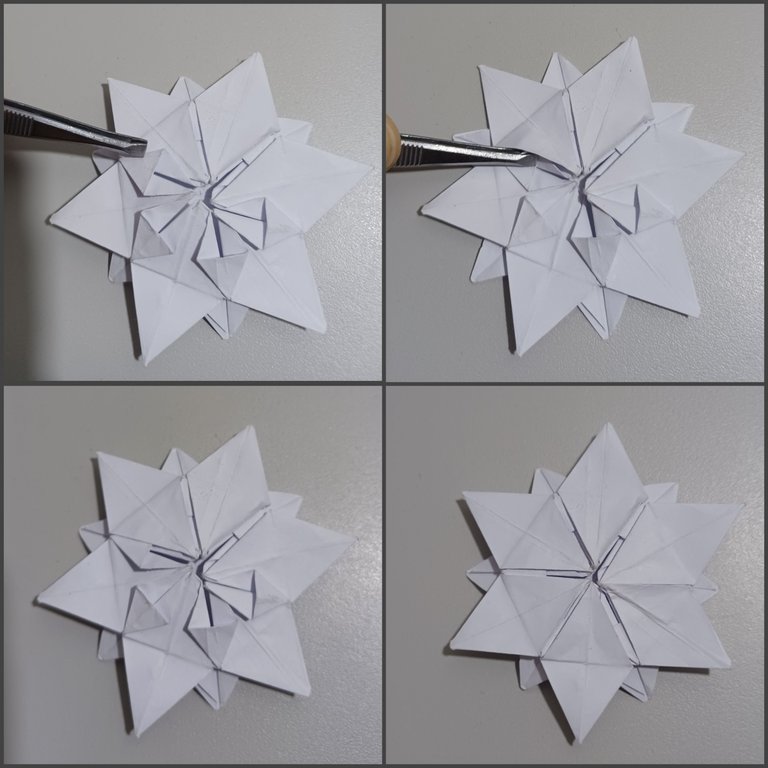
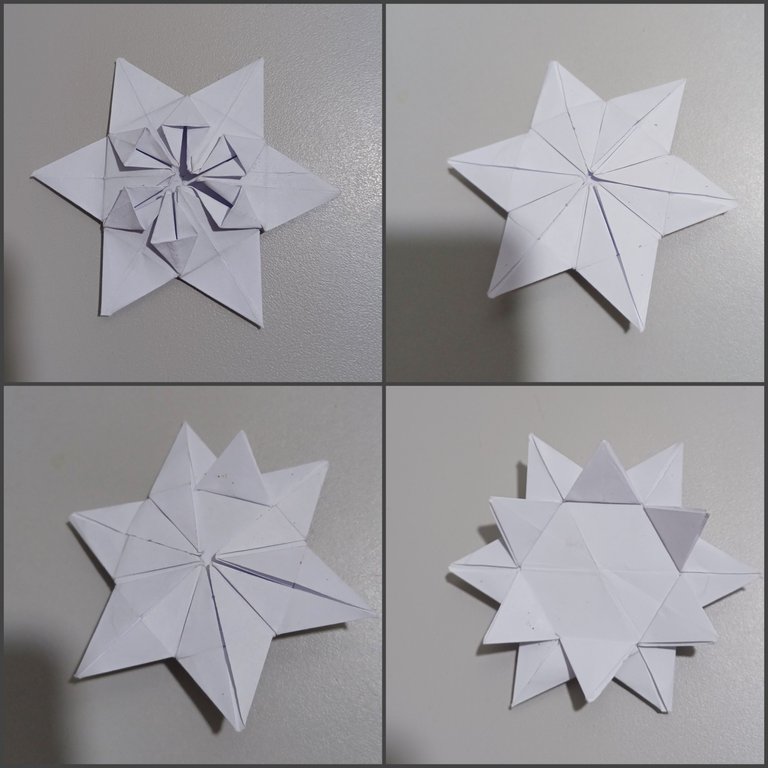
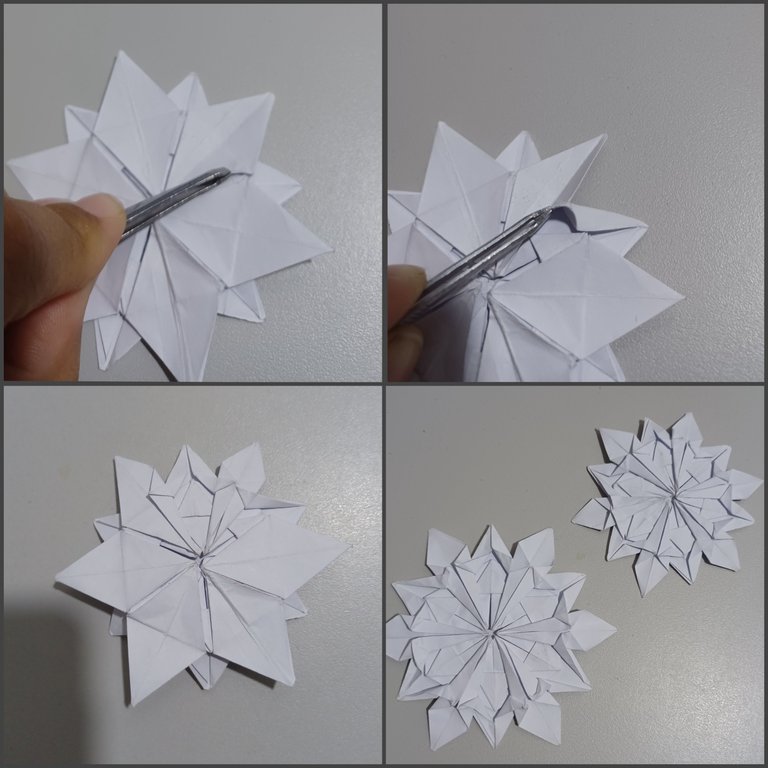
❄️Por último con ayuda de la pinza, tomé la pestaña que se muestra en la primera imagen y la doble hacia adentro formando un triángulo para finalmente dar la forma al copito.
Finally, with the help of the tweezers, I took the tab shown in the first image and folded it inward forming a triangle to finally give the shape of the flake.
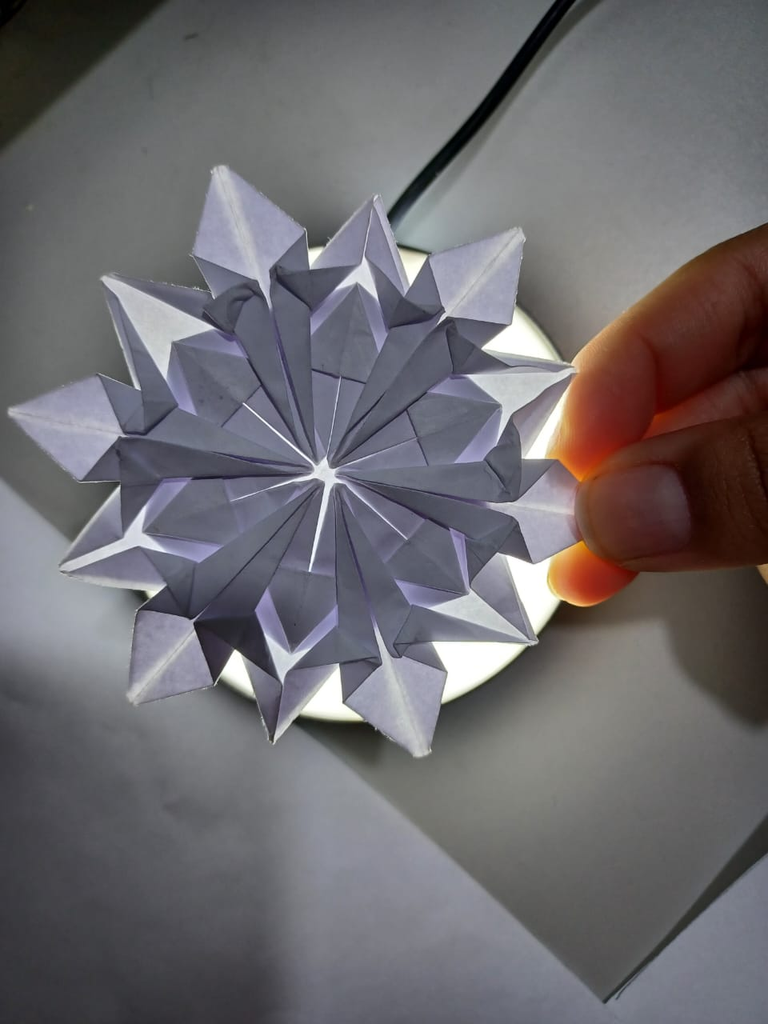
A pesar de ser un origami tan largo me encanto, me encanto ver que resultara tan preciosa la forma de los copos de nieve, pero especialmente cuando son vistos a contra luz los imagino colgando del techo para una ambientación con esta temática y aunque tuve que realizar varios para lograr un resultado optimo fue muy satisfactorio todo el proceso, espero que se animen y que este tutorial sea útil
Despite being such a long origami I loved it, I was delighted to see that the shape of the snowflakes was so beautiful, but especially when they are seen against the light I imagine them hanging from the ceiling for a setting with this theme and although I had to make several to achieve an optimal result was very satisfactory throughout the process, I hope you are encouraged and that this tutorial will be useful.
¡Hasta la próxima!
¡Feliz día!
❄️
Until next time!
Happy day!
Traducciones en DeepL.com | Mosaicos Picsart.app
¡Felicidades! Esta publicación obtuvo upvote y fue compartido por @la-colmena, un proyecto de Curación Manual para la comunidad hispana de Hive que cuenta con el respaldo de @curie.
Si te gusta el trabajo que hacemos, te invitamos a darle tu voto a este comentario y a votar como testigo por La Colmena.
Si quieres saber más sobre nuestro proyecto, te invitamos a acompañarnos en nuestro servidor de Discord.
Gracias por su apoyo @la-colmena ✨️
https://twitter.com/1241409678543904770/status/1649449404267470849
https://twitter.com/3152522968/status/1649525993063809026
https://twitter.com/2471487180/status/1649600272186916865
The rewards earned on this comment will go directly to the people( @gaboamc2393, @ramisey, @irenenavarroart ) sharing the post on Twitter as long as they are registered with @poshtoken. Sign up at https://hiveposh.com.
Gracias chicos!🤩🥰
Wow se ve precioso, yo no creo poder hacerlo con un resultado así de bien. Felicitaciones 😊
Pero el origami es de repetición, yo tampoco lo he logrado a la primera, la repetición me hizo hacerlo cada vez mejor
Se ve bellísimo con la luz, es genial!
!discovery 35
Siii! Luce precioso a contraluz, gracias por el apoyo @gaboamc2393
This post was shared and voted inside the discord by the curators team of discovery-it
Join our Community and follow our Curation Trail
Discovery-it is also a Witness, vote for us here
Delegate to us for passive income. Check our 80% fee-back Program
Your content has been voted as a part of Encouragement program. Keep up the good work!
Use Ecency daily to boost your growth on platform!
Support Ecency
Vote for new Proposal
Delegate HP and earn more
Thank you!
¡Wow! ¡Pero que precioso quedan! Tengo unas ganas inmensas de decorar el sitio en donde me encuentro y estaba pensando en hacerlo sin gastar tanto y luego de haber visto estas hermosas flores, se me ha ocurrido una idea bastante interesante. Sólo espero que me salgan tan bonitas como a ti je je Excelente post, súper bien explicado y el resultado: Maravilloso ✨💚
Me alegra que haya sido de tu agrado Sue! Y ojalá lleves a cabo tu idea por estos copitos, El origami es de repetición amiga si no te sale a la primera intenta de nuevo y estoy a la orden para cualquier duda!
this is so beautiful. The detailing and pattern is an absolute delight. Nicely
Thank you so much, for your support and comment! 🤩
Excelente este tutorial, me encantó el resultado. Saludos.
Gracias amiga! Me alegro que te haya gustado🥰
posh
https://twitter.com/miuriel2015/status/1649525993063809026
@yetsimar, thank you for supporting the HiveBuzz project by voting for our witness.
Click on the badge to view your board.
Once again, thanks for your support!
Check out our last posts:
Wow a contraluz dan un efecto espectacular 😍
Siii! Es genial! 🤩🤩