Sloshing Through The Mud Is A Go!

Well Hello There Fellow Technicians And Hivers!
Things are finally going our way! Finally! The work is flowing better than expected this week, actually phenomenally better! I can't even stress that enough! Although we need to tie the knot on some jobs which we've been waiting for parts for but the parts did come and now we can tackle it and finish the job and get the vehicle back on the farm working and making money for the owner!
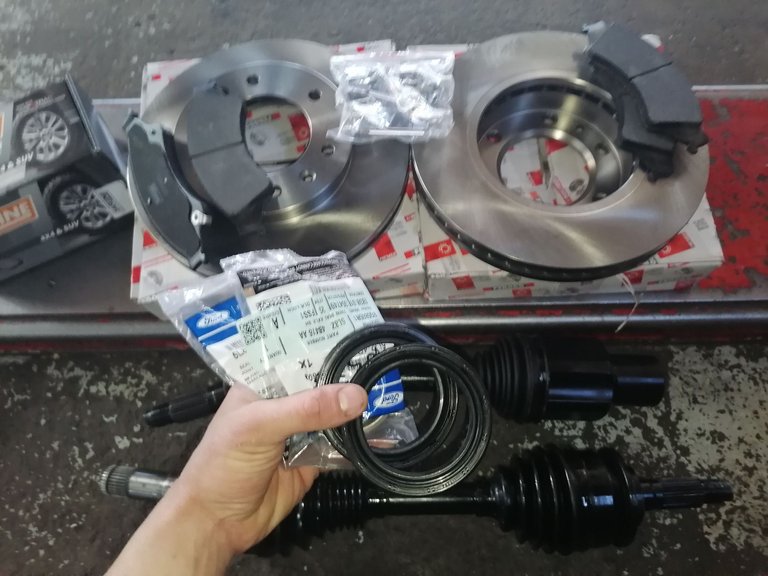
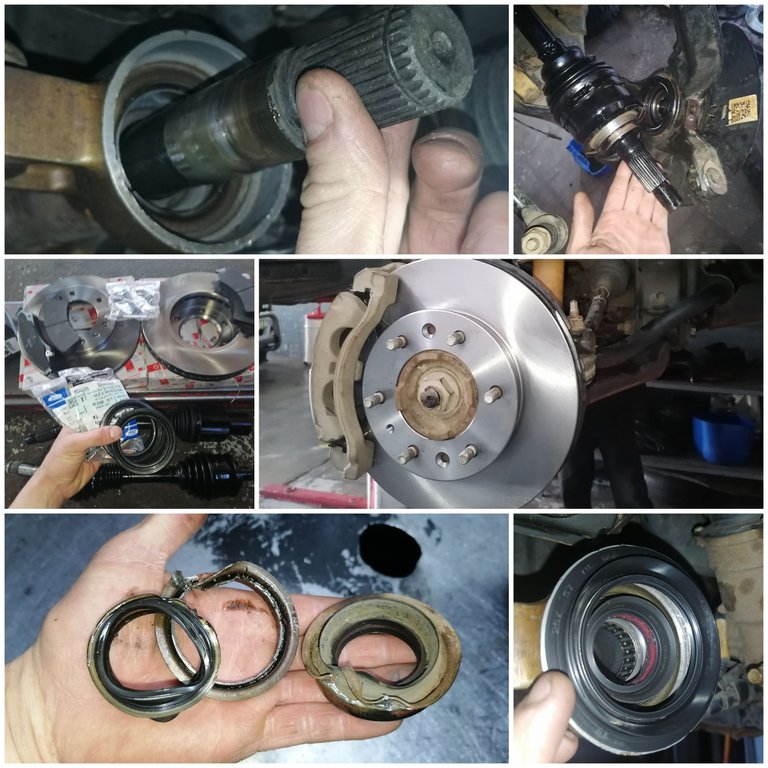
Honestly I can't believe we've waited almost a week for these parts and it's simple parts it's not like we've ordered something out of the ordinary here. It's a brake kit (Two discs and two sets of pads) then we've waited for two seals to arrive along with everything. The seals aren't something special either. The last thing we waited for was the CV's which was at a different local.
The reason that I can't believe this is simple, we have a HUGE Ford workshop in our town, they run through what I assume must be 40 vehicles a day! So they need to be pretty stacked on service parts right?
The Seals Are The Most Important On This Job.
After all it's the seals that have been giving in one after the other, but them you can't expect them to last if you slosh them through the mud on a daily basis and not just mud alone but twigs and rocks and all that crap. Especially if you drive through it, the sticks tend to stick through the seals because they are so overly exposed.
None the less we got the seals now and they must just go.
I've been in a real hurry to get this job done and out of the shop but with seal you really shouldn't rush life hey, one nick too hard and you end up bending the seal and well then we are back to square one right? We've got to wait all over again for the seals to come and if we send it out it'll just come back sooner than we expect.
I'm sure no one really wants that right!
One thing I love to do is add a little bit of grease on the lip of the seal where it makes contact with the surface that needs to be sealed off. Some say it's not needed and some say it is but in my opinion everything just slides into place and therefore nothing can be torn or damaged. Unless it gets hit with force that is.
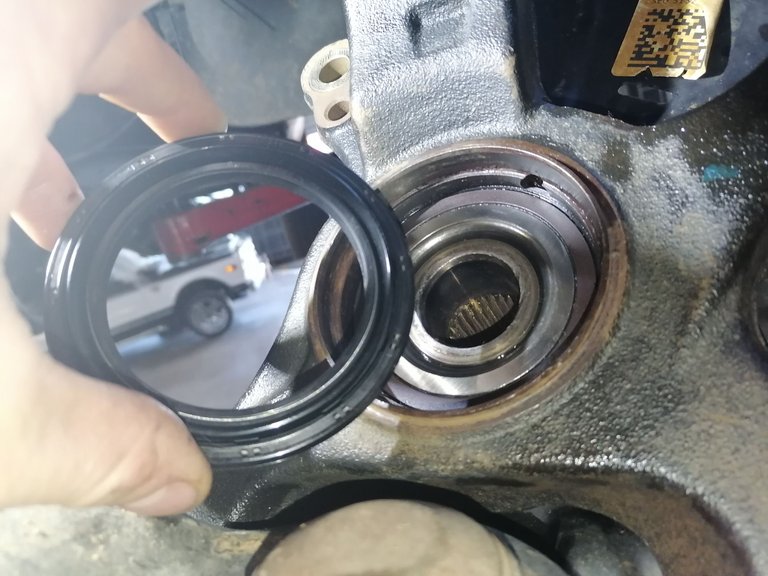
The Differential Seals.
Now honestly I had a real struggle with these to get them removed, this side not so much as the other side (I never got pictures of the other side but that side kept me busy for about 45 minutes if not longer!)
I literally had to beat the entire flanging or seating area of it with a beat up screwdriver! It's both a good thing and a bad thing because at-least the seals that I put in wont just fall out right!
One thing that somewhat upset me was the fact that the differential got some dust inside with each punch of the hammer, but that I sorted out after draining the differential and then rinsing it out with some Q20. Which I really hope got everything out there.
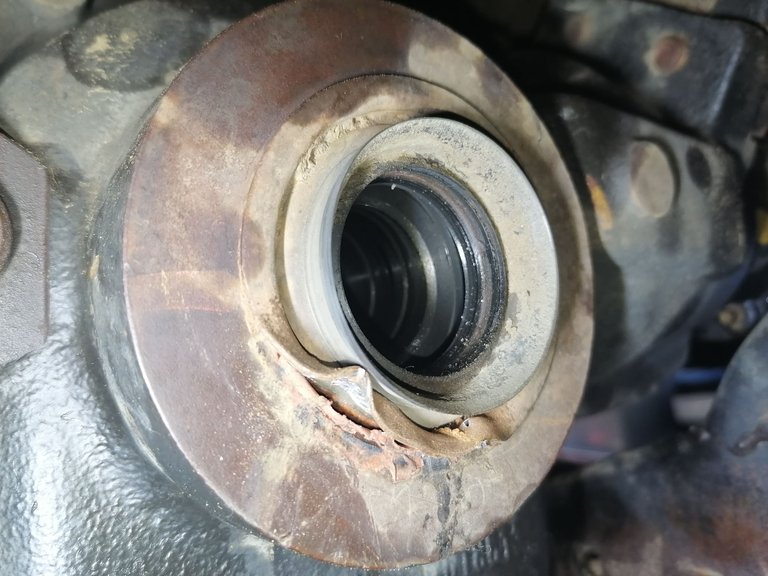
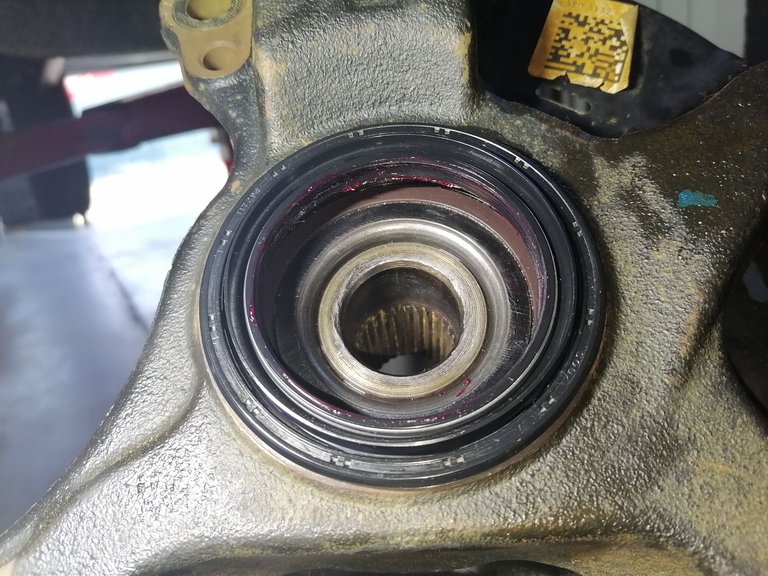
Before fitting the new seal I had to clean up all the silicone sealant that remained on the casing. I also took some sanding paper and sanded all the paper of the surface, that will only help the new seal to fit in properly into place.

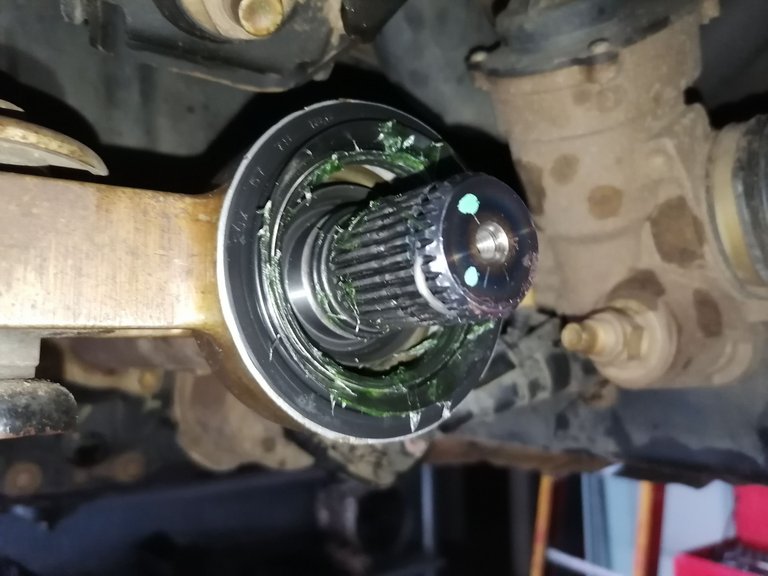
Now there's the very first front differential seal on a Ford Ranger that I've ever installed!
Honestly I didn't expect to have such a struggle with fitting it! The seal itself has a silicone layer on the outside and that makes it bite down hard and there fore it doesn't just slide into place.
It's easy to say that you can just hit it a little harder with the hammer but hit it too hard and you end up bending it into oblivion!
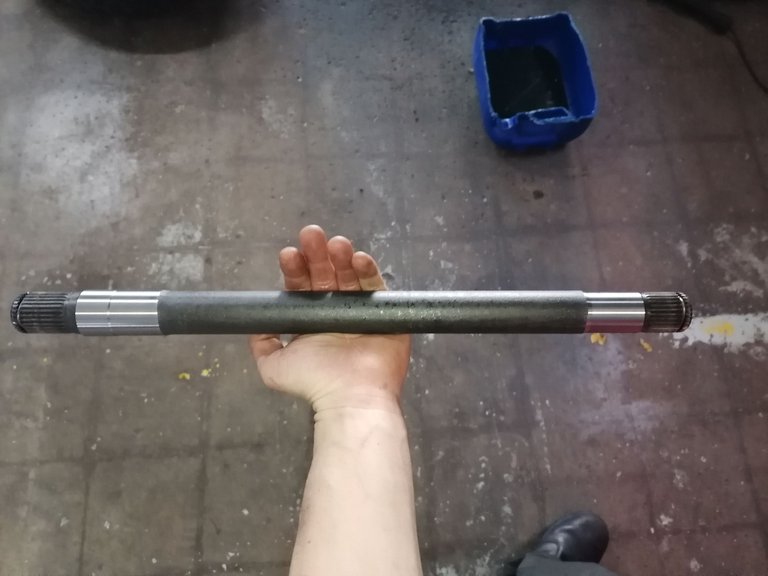
The next phase of our work is to slam that newly built CV joint in there! It took about three big copper hammer blows for that new cir-clip to pop into place but once it's in you need a wedge to get it out of place again!
If I sent in my CV joints I'd ask them not to spray them, I like to have a original look on my parts. This black spraying of stuff or just the general spraying of casings and such I do not like it at all! But for the clients I think they like it.
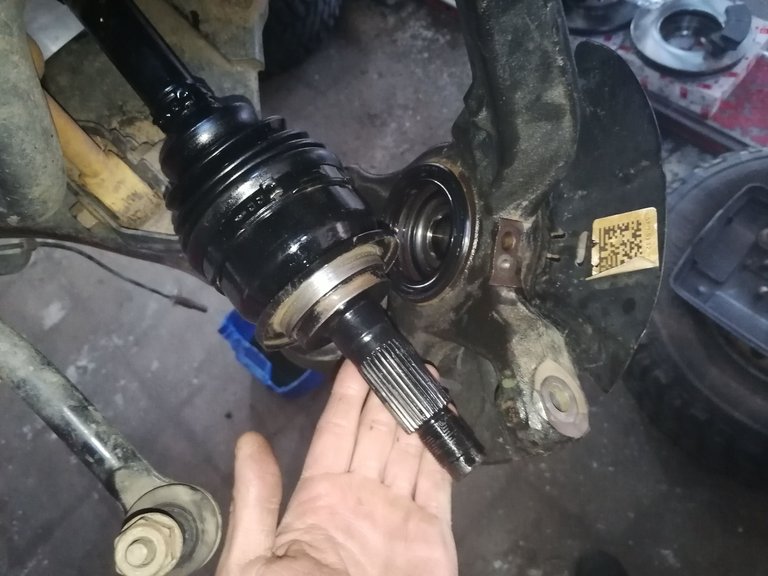
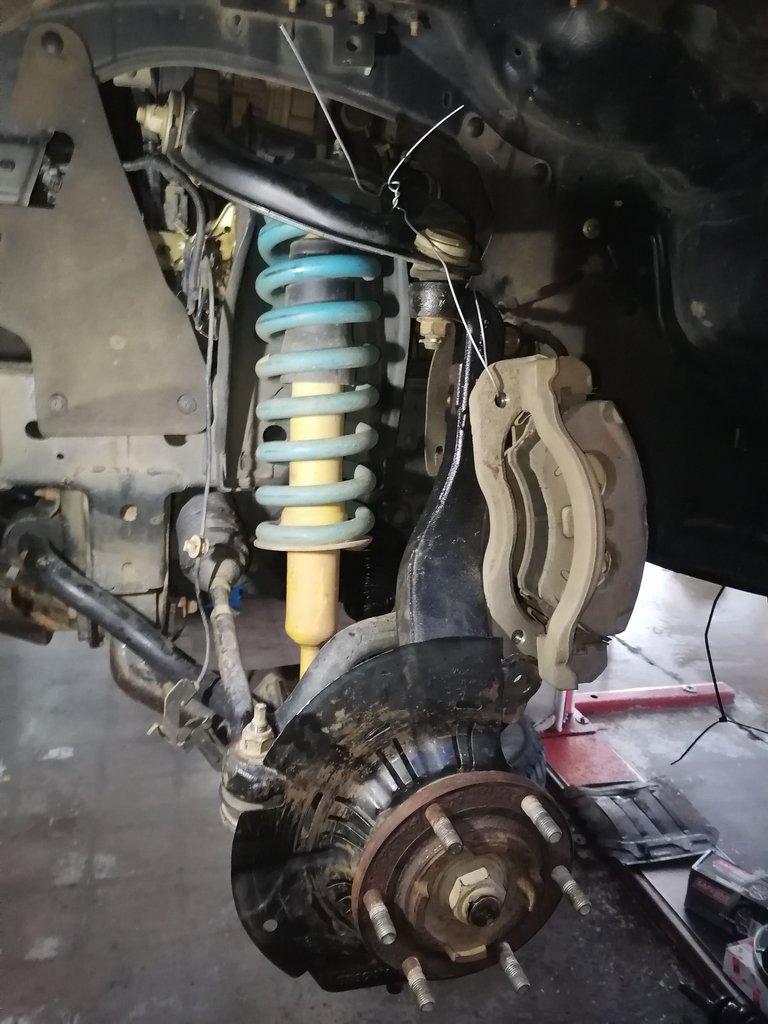
I didn't want to assemble the whole wheel hub assembly just yet so I rather just fitted the knuckle onto the top control arm ball-joint and let it hang there while I finish up on the other side.
The thing is I didn't want to add anything yet while I was still hammering away on the other side. I like finishing up on one thing that I do before going to the next so for now it's the seals and the CV joints and then fitting the knuckle back onto the upper control arm.
Onto The Problematic Side!
To think that this job started out as just a simple seal replacement, just one little seal.
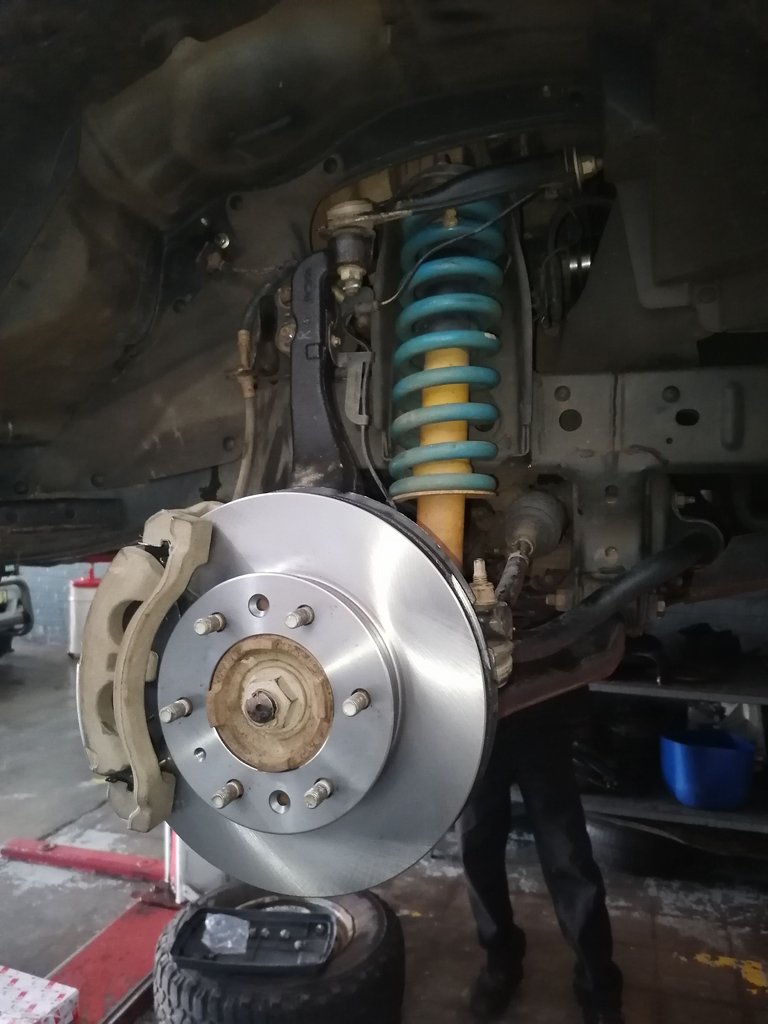
Now look at where we are! We've sent the CV's in for a rebuild, we've done both wheel bearings on the front, we replaced the wheel bearing seals and the differential seals. Then we had to replace the differential shaft that pushes the power to the wheels because it was stripped out and then we replaced the brake discs and pads!
Insane right! Imagine taking your vehicle to the shop for a oil leak and then you are handed such a long list!
We've Got A Plan!
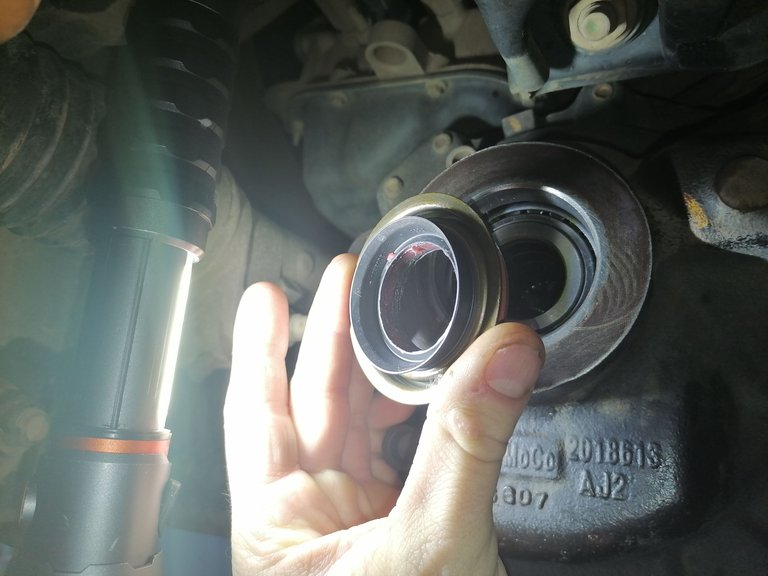
So originally this was the seal that went down!
If you had any idea how I had to hammer that thing to bits you'd be somewhat shocked! There was almost no space to work with and I had to make it work!
It was a do or die situation!
Once I've gotten the old seal removed, which took 45 minutes by the way I decided to clean up the surface on this side as well and it was even more needed because of my banging on the aluminum!
Well there we have the new seal fitted! But that's isn't quite just that!
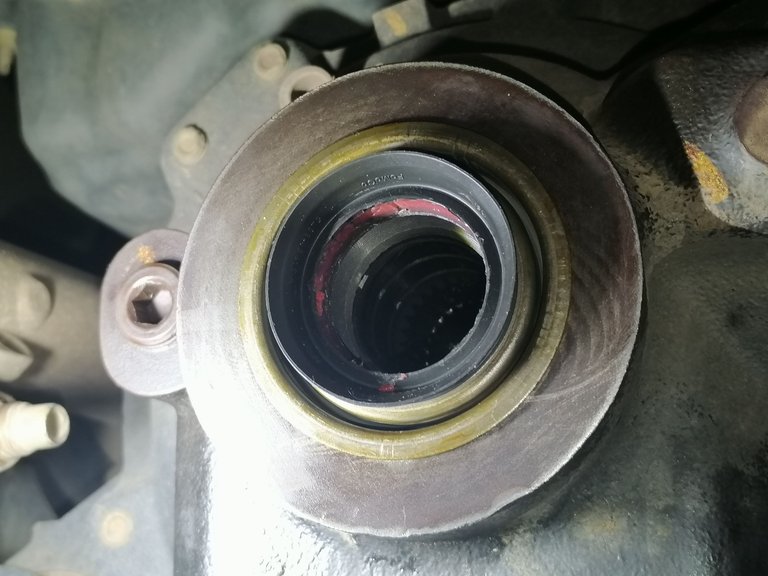
Making It Better Than Factory!
While we did fit a nice new seal and it should last a couple of months considering the conditions the vehicle has to work in, but with that we decided to add another seal on top of that one that seals on the CV itself!
It's not going to make the vehicle bullet proof but it might make it more resistant to the bullets it has to eat, but it might delay the degrading process by a substantial amount! Or it might even make it last forever.
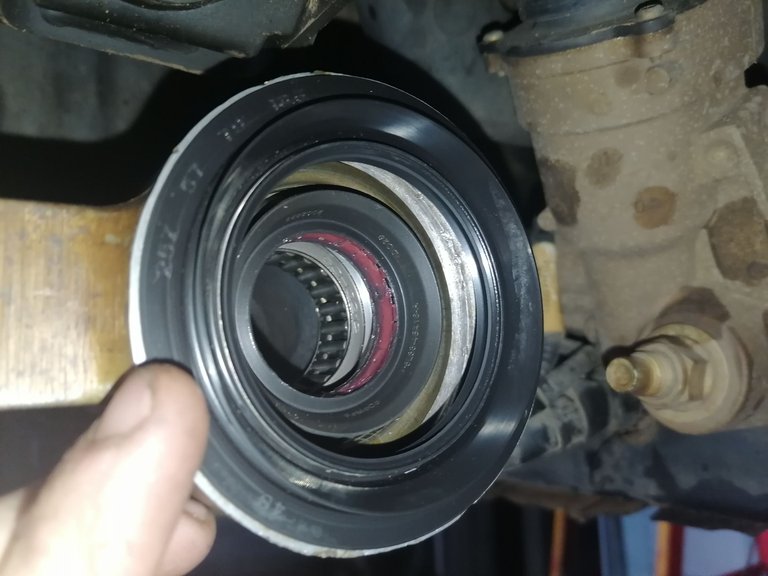
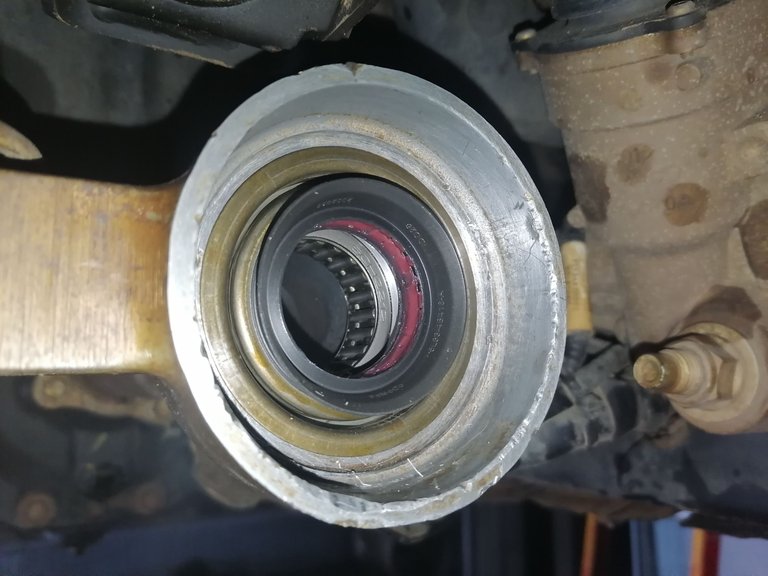
No It's Not Dirty!
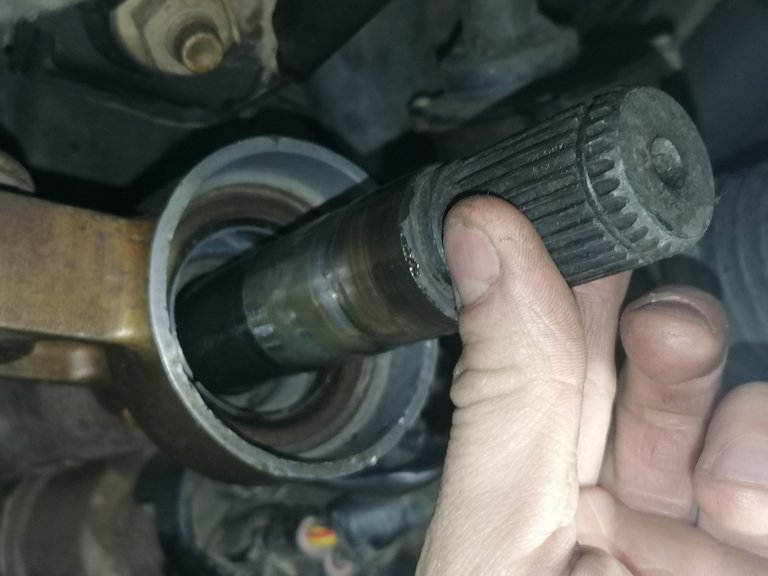
Before I pushed in the new shaft I added some assembly goo onto the inside of the seals, where the lip has to seal on the machined surface of the shaft. It just makes everything slide and turn without heating up too much, in general it just gives some lubrication to everything!
It is indeed a very beautifull sight to see, well for those who know exactly what's going on there!
The Final Steps!
After the assembling of everything around the differential we were now ready to stack up on those brakes!
My old man tackled the left side and I tackled the right side and before we knew it the job was done!
Filling up the differential with oil and testing the vehicle was all that was left to do, but it's surely a damned beautifull sight to see all these new pieces of metal being fitted!
Damn I Am So Glad To Be Done With This Job!
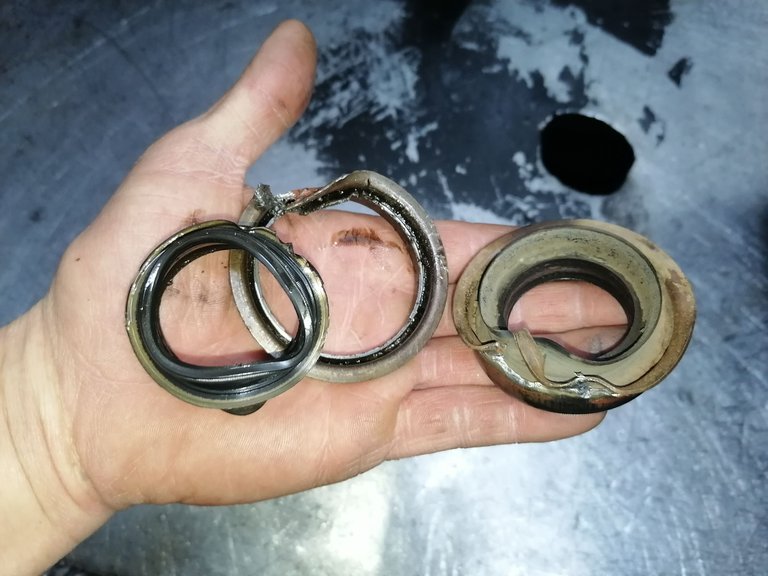
The two seals that I had to remove from the differential, look how bent I beat them! I've legitly never had as much trouble to remove a seal than I have with these!
Well I'm glad that is done and dusted with!
Dated 31/08/2023


Connecting the people of #HIVE across South Africa. #hive
!ALIVE | !BBH | !CTP
@technicalside! Your Content Is Awesome so I just sent 1 $BBH (Bitcoin Backed Hive) to your account on behalf of @vocup. (5/20)
@technicalside! You Are Alive so I just staked 0.1 $ALIVE to your account on behalf of @ vocup. (6/20)
The tip has been paid for by the We Are Alive Tribe through the earnings on @alive.chat, feel free to swing by our daily chat any time you want, plus you can win Hive Power (2x 50 HP) and Alive Power (2x 500 AP) delegations (4 weeks), and Ecency Points (4x 50 EP), in our chat every day.

Yay! 🤗
Your content has been boosted with Ecency Points, by @technicalside.
Use Ecency daily to boost your growth on platform!
Support Ecency
Vote for new Proposal
Delegate HP and earn more
Congratulations @technicalside! You have completed the following achievement on the Hive blockchain And have been rewarded with New badge(s)
You can view your badges on your board and compare yourself to others in the Ranking
If you no longer want to receive notifications, reply to this comment with the word
STOPCheck out our last posts: