Tutorial on Sewing a Brocade Robe For a Party
Sewing is one of my profession besides being a housewife. every day I have to sew, because lately there are always stitches. To the point that I don't even have time to hold a cellphone, let alone make a post. How many days have I not made a post, because I am very busy. The housewife's work very many overrides sewing a lot, not like other outside workers who are just a kind of job. Unlike housewives, the work varies. Starting from getting up early to cook for the family, then cleaning the house, washing, looking after the children. Even though housewives are known as sitting at home, their jobs vary. Not just sitting pretty. People outside think that housewife work is the easiest job. In fact, it's the opposite. Coupled with the profession as a home tailor. So just be grateful for what has been destined and live it with enthusiasm and positive thinking.
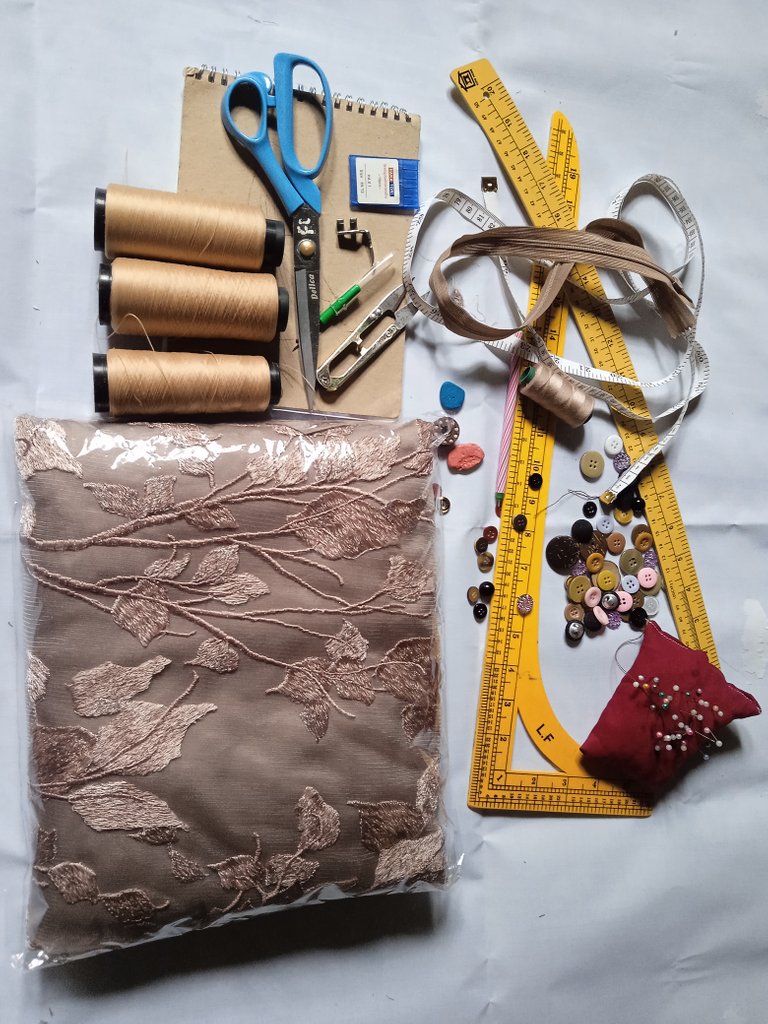
Well, I want to share about how to sew a brocade robe. Here I have 2 meters of lining and 2 meters of brocade. So, the brocade here is a brocade that has legged flower motifs, so the method of cutting the cloth is different than usual. With a layer of 2 meters of cloth, it can be said that it is enough for clothes users who have a body size of 100 cm and below, but for those who have a body size of over 100 cm, the cloth may not be enough. The amount of brocade cloth is 2 meters, enough for the body but not enough for the length of the arms.
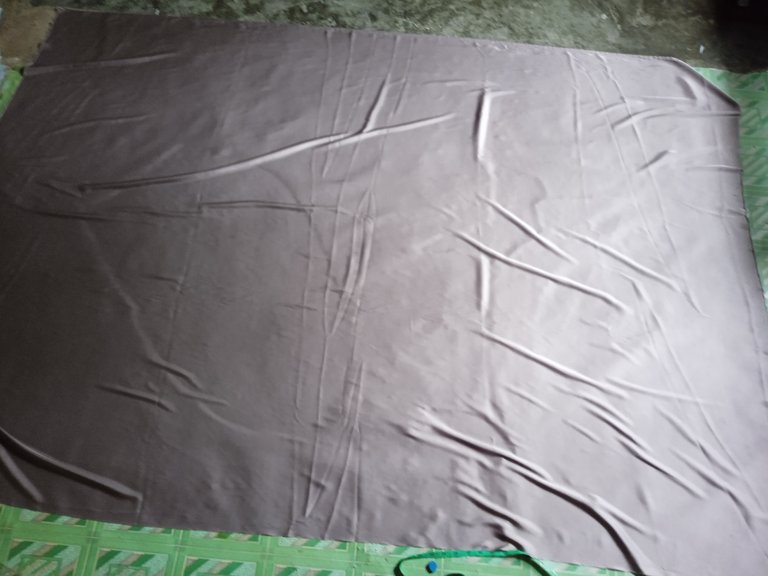
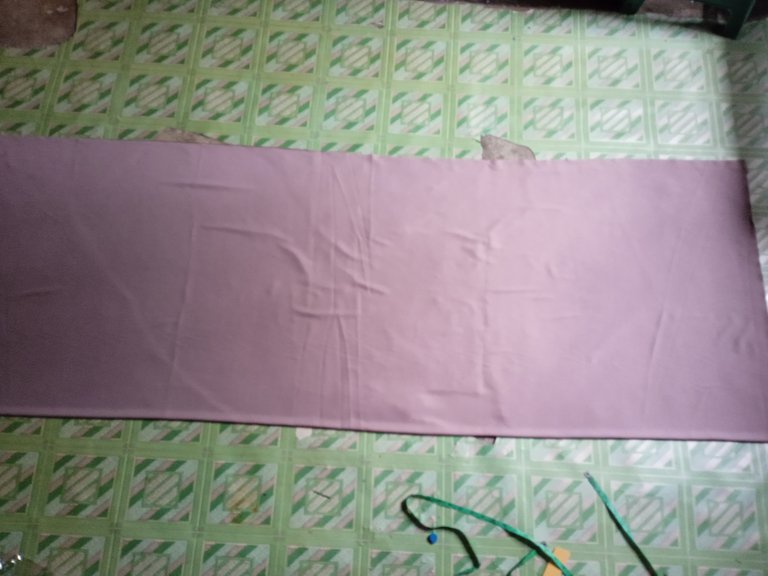
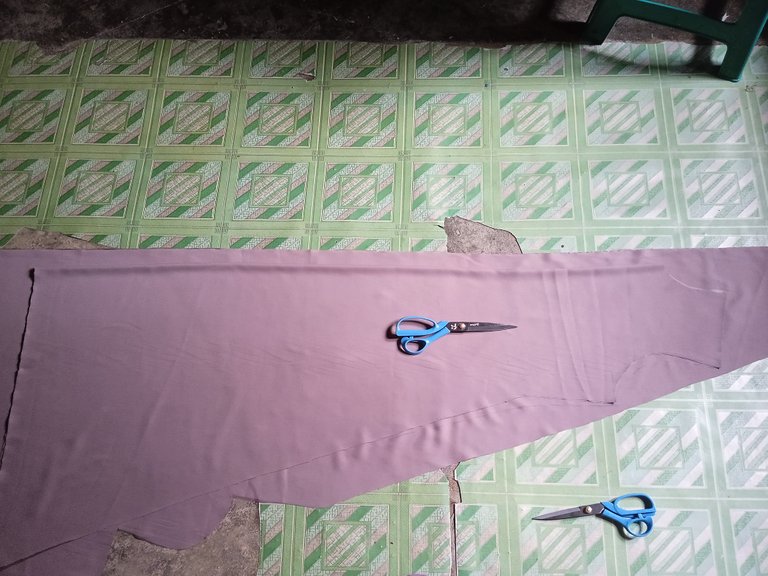
The way to fold the cloth is that I fold it in a rectangular shape, because I'm using the basic pattern of women's clothes. The way to measure clothes in the basic pattern starts from the middle down, not from the top to the middle by exaggerating the tray by 1.5 inches. If I start from the top to the middle, the cloth that I only have 2 meters won't be enough. As for the basic pattern, everything is the same starting from folding the cloth, measuring and cutting the cloth. The method that I use also applies to saving the cloth that I have. This is the basic pattern of the front of the shirt.
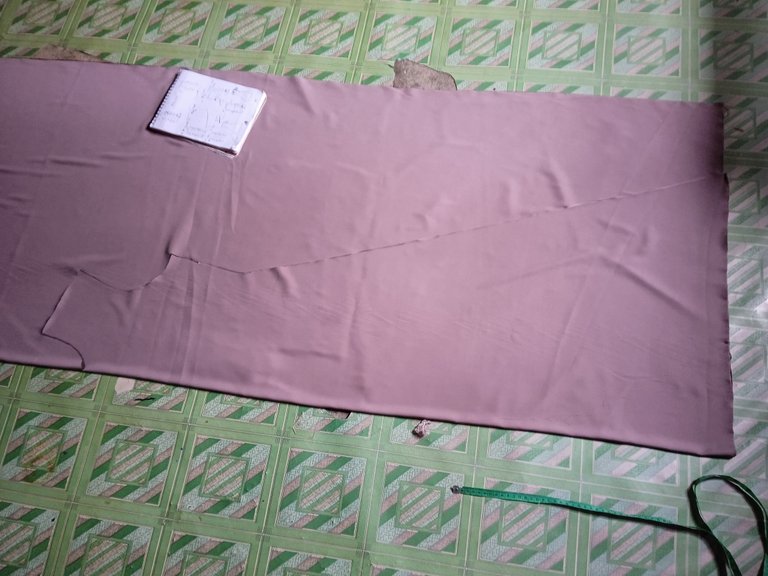
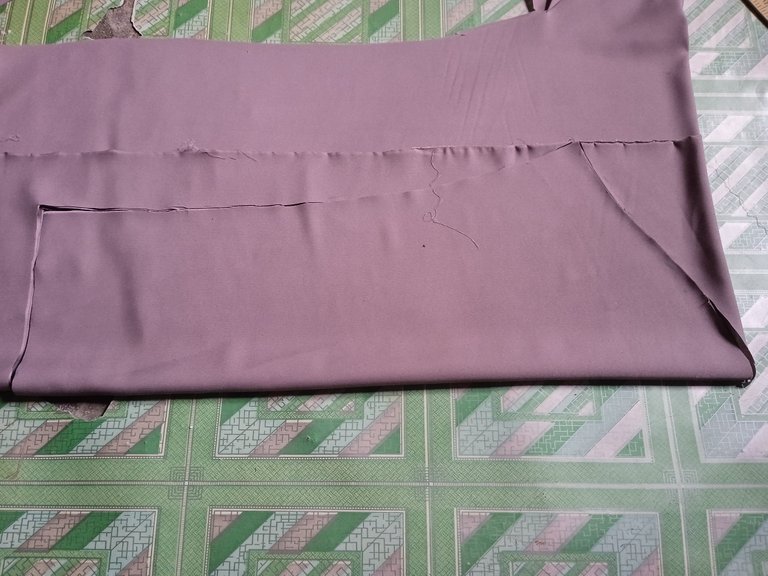
After cutting the front pattern, now I want to make the back pattern. All that's left is to trace it, place the front pattern on the cloth to make the back pattern. Then lower the neck pattern back 1 inch, raise shoulders 1/2 inch, add 1/2 inch to armpits and waist 1/2 inch to hips. After the back pattern measurement is complete, then cut the fabric according to that measurement, don't add more trays because the tray is already on the front pattern.

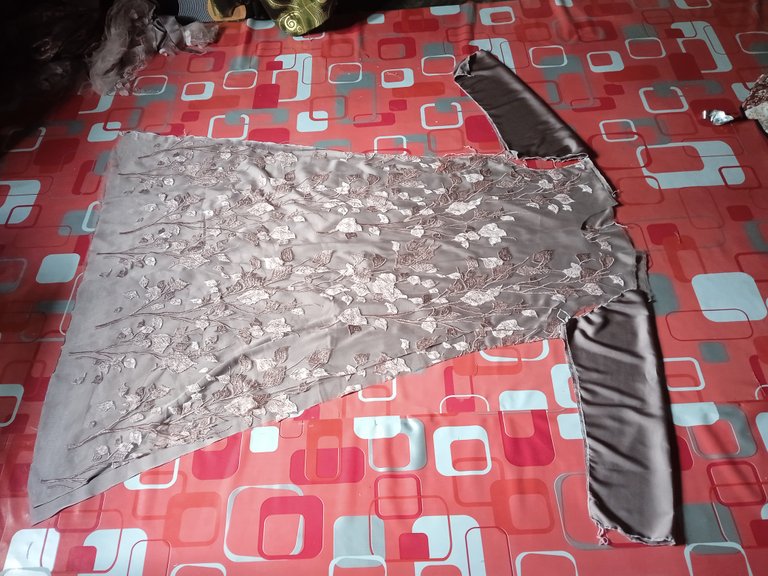
Then making the sleeve pattern. The sleeve pattern is shaped like an S letter, so the folding of the fabric and the cutting are like the picture I show below.
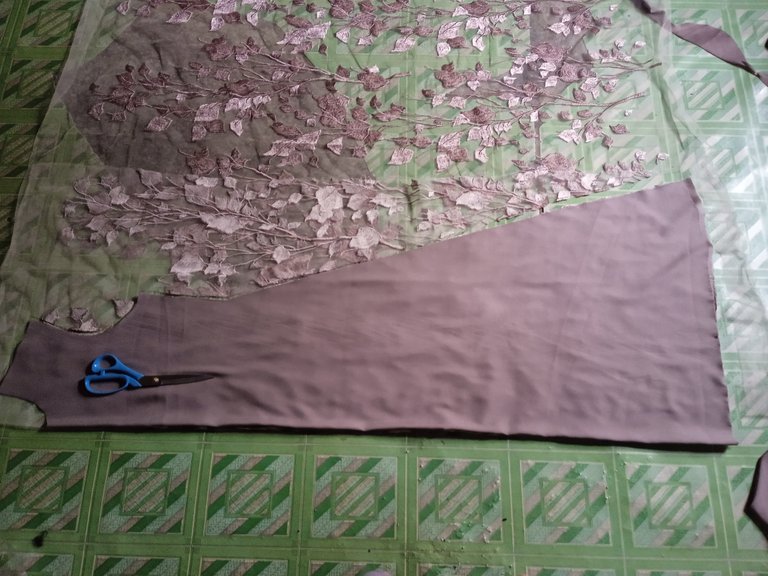
After cutting the lining cloth, then cutting the brocade cloth. This brocade cloth must be placed with the foot motif down. No need to measure again because the measurement is already in the layer earlier. so just put a layer on top of the brocade and cut it according to the pattern, as shown below.
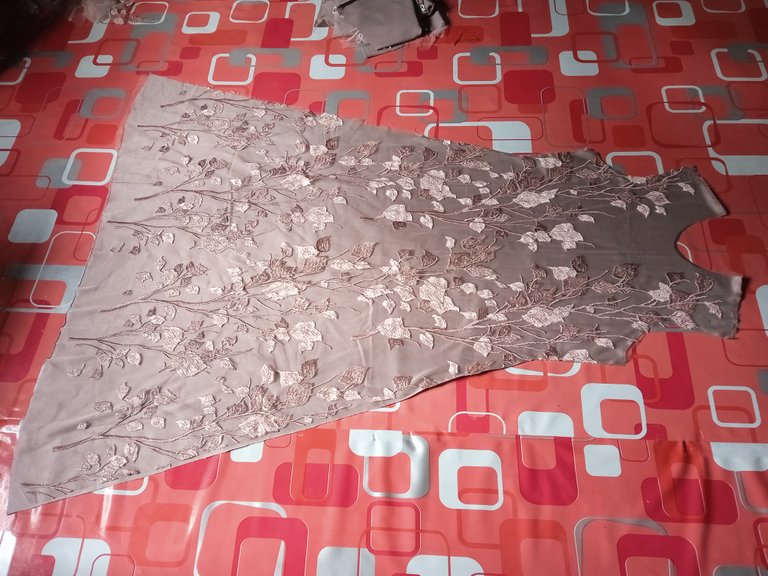
So, after everything was finished, I first sewed the pattern on the front and back of the same layer as the brocade first, so that when I overlocked the fabric, it wouldn't bunch up and become flat.
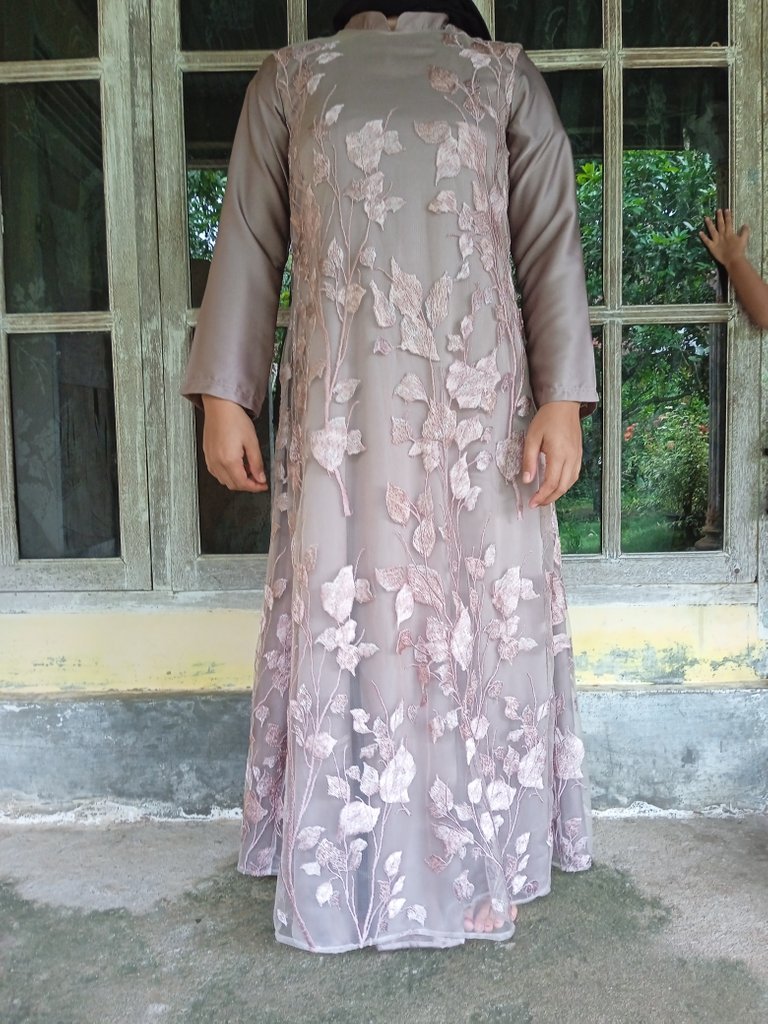
Finally, the brocade robe is finished for the wedding reception party, I hope the person wearing this shirt can be proud of himself in front of the crowd so that he will be more confident when attending the wedding held by his brother and I am very satisfied because I have finished the clothes from my customer I hope so too My customers are satisfied with the results of the clothes I sew.

https://twitter.com/1453422906373926917/status/1605286714029015040
The rewards earned on this comment will go directly to the people( @neoseven ) sharing the post on Twitter as long as they are registered with @poshtoken. Sign up at https://hiveposh.com.
The brocade robe you made is very nice. I have never learned to sew, but it's something I would like to learn to do sometime. I think your customer will be satisfied.
Thank you very much, learning to sew can train patience, thoroughness and creative ideas in everyday life.
Thank you for sharing this post on HIVE!
Your content got selected by our fellow curator desro & you just received a little thank you upvote from us for your great work! Your post will be featured in one of our recurring compilations which are aiming to offer you a stage to widen your audience within the DIY scene of Hive. Stay creative & HIVE ON!
Please vote for our hive witness <3
Thank you very much for the support from diyhub team
Congratulations @honeyflow! You have completed the following achievement on the Hive blockchain And have been rewarded with New badge(s)
Your next target is to reach 900 upvotes.
You can view your badges on your board and compare yourself to others in the Ranking
If you no longer want to receive notifications, reply to this comment with the word
STOPCheck out our last posts:
Support the HiveBuzz project. Vote for our proposal!
Tutorial on how to make a robe that is easy for us to learn.
True, this is one of the easiest ways to understand for beginners.
I wish i have that skill . Huhu.. I was into designer but i cant do even a little sewing. TT
I'm also not too advanced need to learn a lot more, hopefully you can learn to sew in the future and become proficient.
Ok . 2023 resolution :).
Congratulations, your post has been upvoted by @dsc-r2cornell, which is the curating account for @R2cornell's Discord Community.
Thank you very much for your support.
⋆ ᴛʜᴇ ᴘʟᴀᴄᴇ ғᴏʀ sᴏᴜᴛʜᴇᴀsᴛ ᴀsɪᴀɴ ᴄᴏɴᴛᴇɴᴛ ᴏɴ ʜɪᴠᴇ
⋆ sᴜʙsᴄʀɪʙᴇ ᴛᴏ ᴛʜᴇ ᴀsᴇᴀɴ ʜɪᴠᴇ ᴄᴏᴍᴍᴜɴɪᴛʏ
⋆ ғᴏʟʟᴏᴡ ᴛʜᴇ ᴀsᴇᴀɴ ʜɪᴠᴇ ᴄᴏᴍᴍᴜɴɪᴛʏ ᴠᴏᴛɪɴɢ ᴛʀᴀɪʟ
⋆ ᴅᴇʟᴇɢᴀᴛɪᴏɴ ʟɪɴᴋs 25 ʜᴘ⇾50 ʜᴘ⇾100 ʜᴘ⇾500 ʜᴘ⇾1,000 ʜᴘ
Wow, it is so beautiful and I really like the color. Thank you so much for sharing and have a nice day.
thank you also for visiting my blog. have a nice day too