DIY I Just Built a 3 by 6 Socket Extension for my Neighbor
One of the greatest things ever is to always cherish some of the skills one acquired either through education or by training because no knowledge is a waste as far as life is concerned. Before I will proceed in this writing, I will like to thank every member of this community, and most especially @build-it and @pialejoana for their effort in making sure that things are done properly within the community just like others. This will be the second time I’ll be posting in this community but from now on, I’ll be sharing posts on weekly basis in the community.
Like I said from the beginning how I made a 3 by 6 socket extension for my neighbor. It came as a surprise to my neighbor because he never knew that I have some knowledge about electrical and how it works not until today when he was complaining to me that most of the extensions that he has been buying from the market used to burn within some weeks from the day it was bought.
After his explanations to me about how his extensions used to burn. According to his explanations, I understood that it was not really his fault but on the type of extensions he used to buy from the market and based on the current capacity of the appliances he is always using with the extensions.

I also explained to him that most extension gotten from the market has their voltage input and output current capacity and if you plug any higher appliances than the strength voltage capacity that the extension was properly designed by the manufacturers to carry that it could lead to such extension burning.

I told him that appliances like electrical iron, electrical cooker, boiler, air conditioning, freezer, washing machine, and some other strong electrical appliances must be avoided to be used with the extensions will use to buy from the market if you really need the extension to last for you. Extensions are only meant to carry low voltage appliances like television, sound system, laptops, phone chargers, and a few more.
After my explanations to my neighbor about how some extensions function. I also told him that I will build 3 by 6 socket extensions for him today to enable him be plugging strong appliances. Sometimes, people don’t like going for this type of extension but as an electrical technician, I’ll advise that this is the best to be used for strong appliances because it is built with strong voltage output and it also tolerates strong current flow through its 2.5mm single wire attached to it.

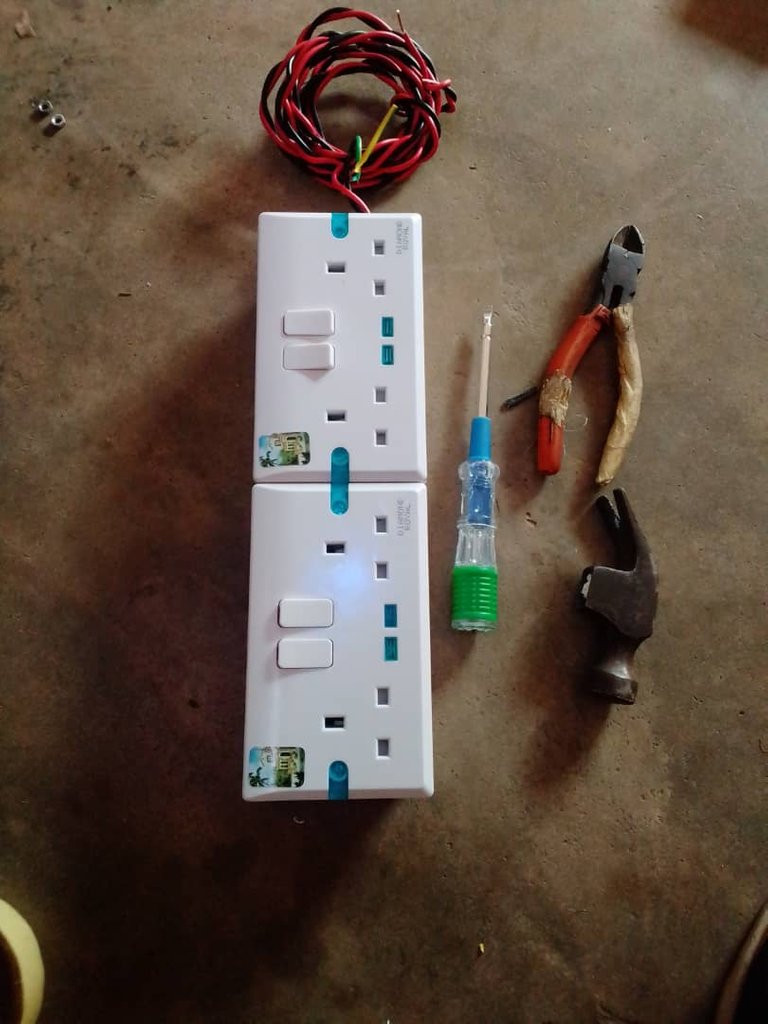
Materials and tools used in building the 3 by 6 socket extension:
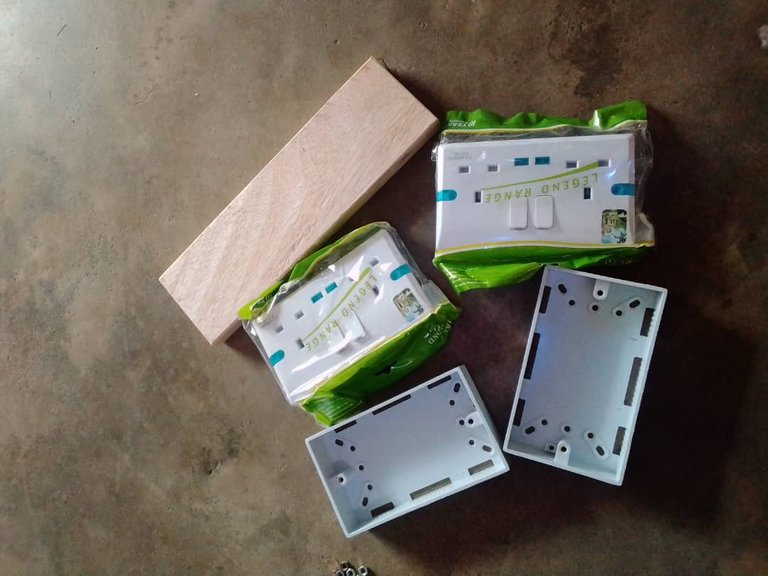
A 3 by 6 patress was used.
A 3 by 6 flush socket was also used.
2.5mm single cuitice wire was used.
Wood was used.
Screw and nails were used.
Tester and screwdrivers were used.
Plier was also used.
Procedures on how the 3 by 6 socket was made:
I first determine the type of socket extension to make.
I also determined the type of electrical materials and tools to be used.
I have to open the mouth of the wooden material used to enable the easy flow of the screw.
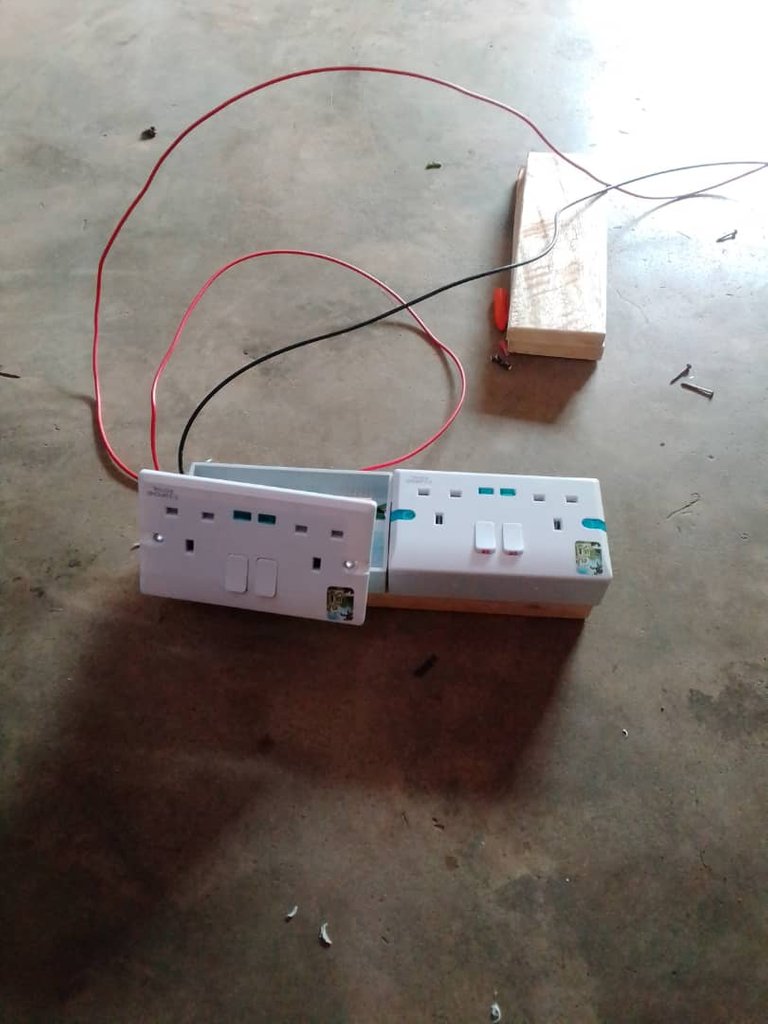
I have to tight the 3 by 6 patress to the wood using a screw.
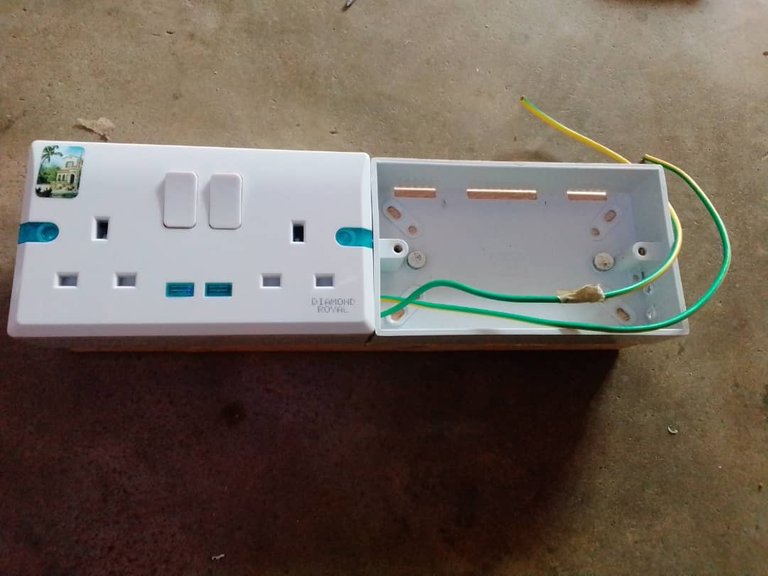
I have to open one side of the patress where the wire can pass through.
I have to fix the 2.5mm single cuitice wire to the flush socket by fixing one single wire to the N symbol and the other to the L symbol.
I have to test run the wire by plugging it into the light.
I have to use a tester to make sure that there’s a current flow in the socket extension built.
I have to cover the 3 by 6 socket built.
I love this, @apunawu ! I also have done some homemade electrical solutions in my big old house - it is very satisfying, eh! Good wishes to you.
I'm happy that I meet good people like you here in the community to share some electrical stuff together. Nice meeting you once more!
Congratulations @apunawu! You have completed the following achievement on the Hive blockchain and have been rewarded with new badge(s):
You can view your badges on your board and compare yourself to others in the Ranking
If you no longer want to receive notifications, reply to this comment with the word
STOPCheck out the last post from @hivebuzz:
Support the HiveBuzz project. Vote for our proposal!
Hello! Thanks for the mention, that's very kind of you. And congratulations, I'm glad to see that in addition to creating an object that meets the needs of your neighbor, this is accompanied by useful and preventive advice. I am sure that now your neighbor will enjoy a long-lasting and safe extension. Greetings.
Hola! Gracias por la mención, es muy amable de tu parte. Y felicidades, me da gusto ver qué además de crear un objeto que satisface las necesidades de tu vecino, este vaya acompañado de consejos útiles y preventivos. Estoy segura que ahora tu vecino disfrutará de una extensión duradera y segura. Saludos.
!discovery 25
Big thanks for your courageous advice on the community and n my skill.
This post was shared and voted inside the discord by the curators team of discovery-it
Join our community! hive-193212
Discovery-it is also a Witness, vote for us here
Delegate to us for passive income. Check our 80% fee-back Program
Your content has been voted as a part of Encouragement program. Keep up the good work!
Use Ecency daily to boost your growth on platform!
Support Ecency
Vote for new Proposal
Delegate HP and earn more
Good job bro keep it up
That's nice of you.
Nice on bro 😁
You're welcome.
I didn't know there is a community for this and this article brought back memories of how I do build things for school projects when I was younger.
There is joy in doing things to help people around us and I am certain your neighbor will be very happy and grateful for this.
I'm grateful that you can comfortably display what you got from school here and have fun.
That's true, keep flourishing buddy. It's nice meeting you.