[React] Mobx-state-tree 학습하기 #13 : References와 Identifiers를 사용하여 데이터에 Relationships 만들기
이전글 "[React] Mobx-state-tree 학습하기 #12 : Flow를 사용하여 비동기 프로세스 정의하기"에서 이어지는 내용입니다. 참고로 이 포스팅은 제가 학습한 내용을 노트에 정리하듯이 기록하여 올리는 글이기 때문에 보팅 안해주셔서 됩니다. 많은 분들이 코딩에 흥미를 느꼈으면 좋겠습니다. ㅋ

Create Relationships in your Data with mobx-state-tree Using References and Identifiers
13번째 레슨입니다. MST stores all data in a tree, where each piece of data lives at one unique location. In most state management solutions, this means you need to introduce weakly typed, primitive 'foreign keys' to refer to other parts of the state tree. But in MST you can leverage the concepts of references and identifiers to relate model instances to each other. MST will do the normalization behind the scenes for you.
우리는 이번 레슨에서 다음을 배우게 됩니다.
types.identifier를 사용하여 특정 타입의 인스턴스를 유니크하게 식별한다.types.reference를 사용하여 다른 데이터를 참조하고 트리의 다른 부분과 상호 작용할 수 있다.types.maybe를 사용하여 ".. 또는 null" 타입을 만들 수 있다.types.late를 사용하여 circular 타입을 정의할 수 있다.
types.optional과 types.maybe의 차이
x : types.optional (types.number, 3)에서x는 항상 숫자이고, 제공되지 않으면 3임을 의미합니다. 반대로x : types.maybe (types.number)는x가 숫자 일 수도 있지만 "null"일 수도 있음을 의미합니다. 그리고 types.optional은 값이 스냅 샷에서 제외 될 수 있음을 의미합니다.
이제 누구를 위해 선물을 사야하고 어떤 선물을 사야하는지 확인할 수 있는 기능을 만들어 봅겠습니다.
types.reference 사용하기
Group.js 파일을 수정합니다. 그리고 User 모델에 recipient 필드를 추가합니다. recipient에는 선물을 받는 사람을 저장할 것입니다.
모델 참조에는 types.reference 를 사용합니다. recipient는 User를 참조하도록 정의합니다. 일종의 재귀 모델의 형태를 가지게 됩니다.
recipient: types.reference(User)
하지만 User 모델이 아직 정의되지 않았습니다. 그래서 User 상수가 아직 할당 되지 않았다는 오류가 발생합니다. types.late를 사용하면 유형 참조를 연기할 수 있습니다. types.late 를 사용하여 다시 정의합니다.
recipient: types.reference(types.late(() => User))
그리고 User 가 처음 생성될때는 recipient가 비어있을 것이기 때문에 types.maybe를 사용하여 문제를 해결합니다.
recipient: types.maybe(types.reference(types.late(() => User)))
그래서 User 모델은 다음과 같이 작성됩니다.
src/models/Group.js
export const User = types
  .model({
    id: types.identifier, // add here
    name: types.string,
    gender: types.enumeration("gender", ["m", "f"]),
    wishList: types.optional(WishList, {}),
    recipient: types.maybe(types.reference(types.late(() => User))), // add here
  })
  .actions(self => ({
    // ...
  }));
UI 수정하기
이제 UI 를 수정할 차례입니다. 다음과 같이 User 컴포넌트를 분리합니다.
src/components/App.js
import { observer } from 'mobx-react';

//...

class App extends React.Component {
  //...

  render() {
    //...
    return (
      <div>
        <h1 className="App-title">WishList</h1>

        <select onChange={this.onSelectUser}>
          <option value="">- Select user -</option>
          {values(group.users).map(user => (
            <option key={user.id} value={user.id}>
              {user.name}
            </option>
          ))}
        </select>
        {selectedUser && <User user={selectedUser} />}
      </div>
    );
  }

  //...
}

const User = observer(({ user }) => (
  <div>
    <WishListView wishList={user.wishList} />
    <button onClick={user.getSuggestions}>Suggestions</button>
    <hr/>
    <h2>{user.recipient && user.recipient.name}</h2>
  </div>
));

export default App;
그리고 선물 받을 사람(recipient)의 위시 리스트를 보여주기 위해 User 컴포넌트에 WishListView 컴포넌트를 추가합니다. 참고로 WishListView에 readonly 속성이 추가되었습니다.
src/components/App.js
const User = observer(({ user }) => (
  <div>
    <WishListView wishList={user.wishList} />
    <button onClick={user.getSuggestions}>Suggestions</button>
    <hr/>
    <h2>{user.recipient && user.recipient.name}</h2>
    {user.recipient && <WishListView wishList={user.recipient.wishList} readonly />}
  </div>
));
나머지 컴포넌트도 차례대로 수정합니다.
src/components/WishListView.js
// ...

const WishListView = ({ wishList, readonly }) => (
  <div className="list">
    <ul>
      {wishList.items.map((item, idx) => (
        <WishListItemView key={idx} item={item} readonly={readonly} />
      ))}
    </ul>
    Total: {wishList.totalPrice} 💲
    {!readonly && <WishListItemEntry wishList={wishList} />}
  </div>
);
src/components/WishListItemView.js
  // ...

  render() {
    const { item, readonly } = this.props;
    return this.state.isEditing ? (
      this.renderEditable()
    ) : (
      <li className="item">
        {item.image && <img src={item.image} alt="" />}
        <h3>{item.name}</h3>
        <span>{item.price}</span><br/>
        {!readonly && (
          <span>
            <button onClick={this.onTooleEdit}>✏️</button>
            {/* add here */}
            <button onClick={item.remove}>❎</button>
          </span>
        )}
      </li>
    );
  }
실행화면
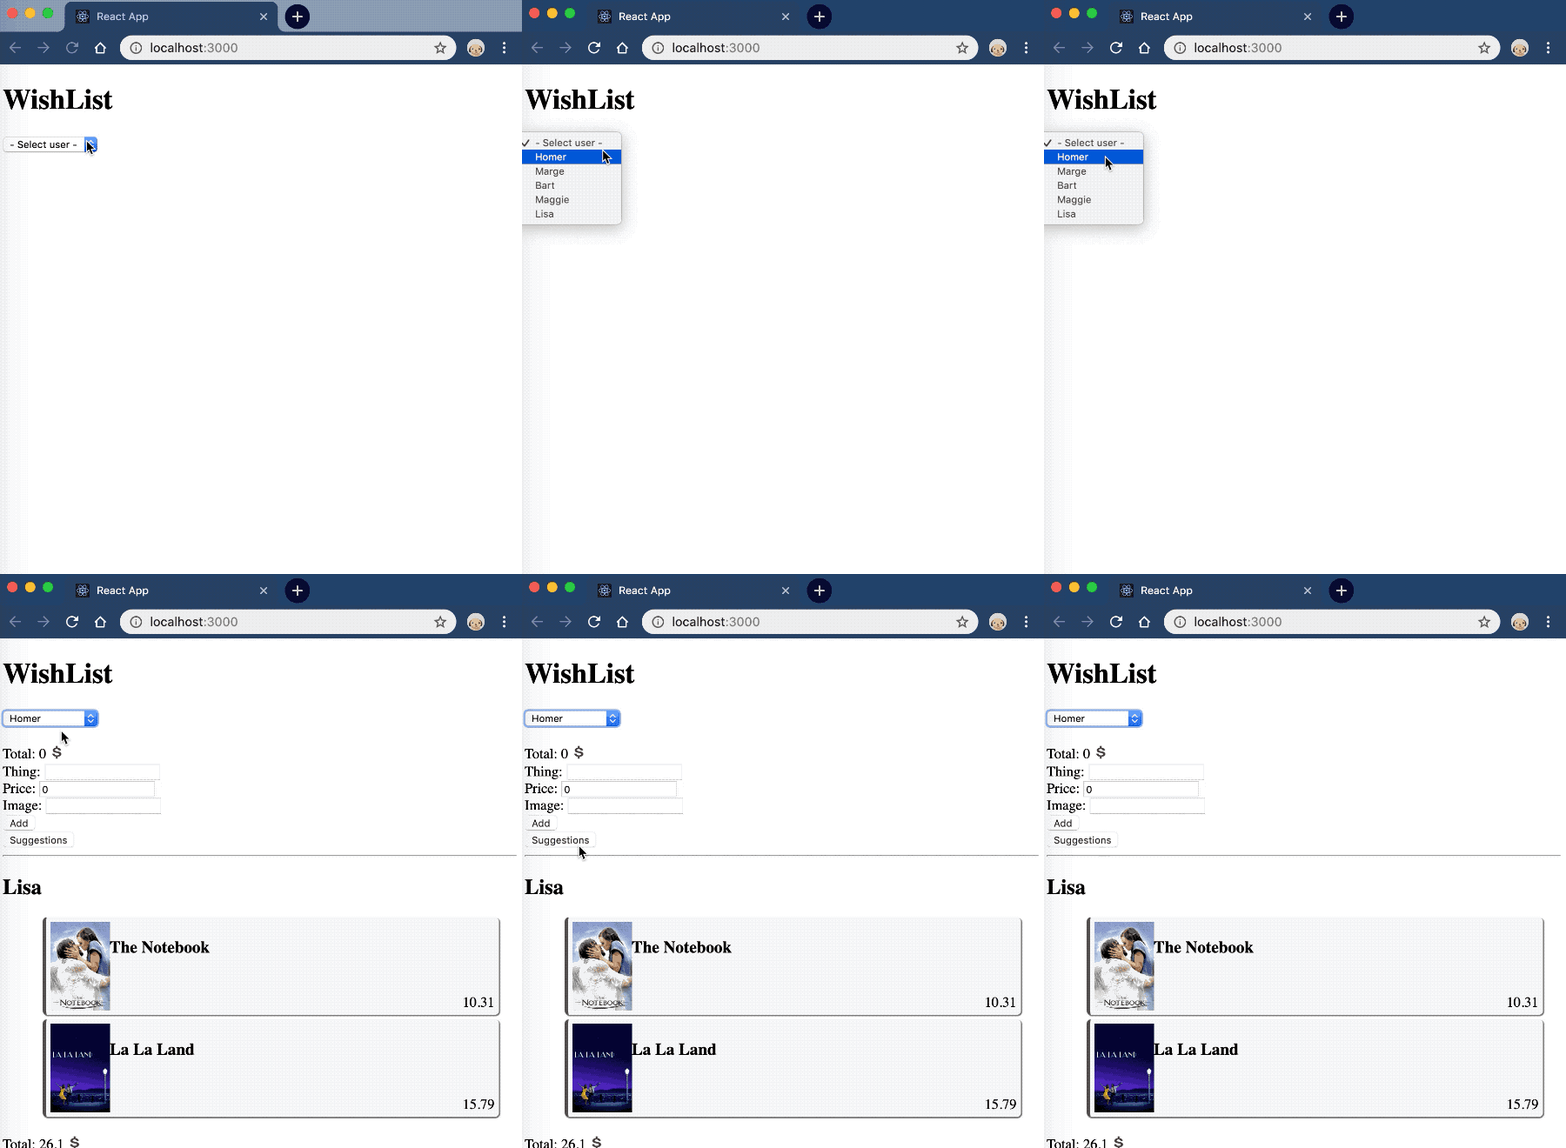
이제 선택박스에서 사용자를 선택하면, 선물할 사람과 그 사람의 위시 리스트를 볼수 있습니다.

오늘 수업 끝.
댓글, 팔로우, 좋아요 해 주시는 모든 분께 감사합니다.
항상 행복한 하루 보내시길 바랍니다.

wonsama.zzan님의 [ZZAN] DAILY REPORT 2019-08-30
Thank you for your continued support towards JJM. For each 1000 JJM you are holding, you can get an additional 1% of upvote. 10,000JJM would give you a 11% daily voting from the 700K SP virus707 account.