[React] Mobx-state-tree 학습하기 #12 : Flow를 사용하여 비동기 프로세스 정의하기
이전글 "[React] Mobx-state-tree 학습하기 #11 : 더 많은 mobx-state-tree Types 배우기: map, literal, union, enumeration"에서 이어지는 내용입니다. 참고로 이 포스팅은 제가 학습한 내용을 노트에 정리하듯이 기록하여 올리는 글이기 때문에 보팅 안해주셔서 됩니다. 많은 분들이 코딩에 흥미를 느꼈으면 좋겠습니다. ㅋ

Defining Asynchronous Processes Using Flow
12번째 레슨입니다. 실제 시나리오에서는 데이터를 가져오는 작업이 대부분 비동기 방식입니다. 예를 들면 get fetched를 사용하여 서버에서 additional recourses을 가져옵니다.
MST는 asynchronous actions에 대한 first class support을 제공합니다. 우리는 이제 naively implemented async process부터 시작하여 MST flows와 generators로 async / await 과정을 배우게 됩니다.
우리는 이번 레슨에서 다음을 배우게 됩니다.
- 이 비동기 프로세스는 MST의 'only actions can modify'의 semantics를 respect해야 하는 경우 painful합니다.(사실 무슨말인지 저도 잘모르겠습니다.ㅠ)
- Flows은 MST에서 비동기 프로세스를 describe하는 idiomatic way입니다.
- Flows는 robust합니다. 프로세스 lifecycle을 완벽하게 control 할 수 있습니다.
간단한 API 서비스 만들기
비동기 작업을 위해서 간단한 API 서비스를 먼저 구현하겠습니다. json-server 모듈을 사용하면 JSON API 서비스를 쉽고 빠르게 만들 수 있습니다. json-server는 JSON 파일을 사용하여 API 서비스를 생성 할 수 있습니다.
json-server 모듈 설치
$ yarn add json-server
그다음 샘플 json 파일을 생성합니다. 이 json 파일을 사용하여 간단한 JSON API 서비스를 시작할 수 있습니다.
db.json
{
    "suggestions_m": [
        {
            "name": "Machine Gun Preacher",
            "price": 7.35,
            "image": "https://image.tmdb.org/t/p/w185_and_h278_bestv2/1gEP9ZC7jpSiuMWNfbOfXTWWF5n.jpg"
        },
        {
            "name": "Avengers: Endgame",
            "price": 17.29,
            "image": "https://image.tmdb.org/t/p/w185_and_h278_bestv2/or06FN3Dka5tukK1e9sl16pB3iy.jpg"
        }
    ],
    "suggestions_f": [
        {
            "name": "The Notebook",
            "price": 10.31,
            "image": "https://image.tmdb.org/t/p/w185_and_h278_bestv2/gMfstesBXKdsHToAUXVPHujUDfb.jpg"
        },
        {
            "name": "La La Land",
            "price": 15.79,
            "image": "https://image.tmdb.org/t/p/w185_and_h278_bestv2/ylXCdC106IKiarftHkcacasaAcb.jpg"
        }
    ]
}
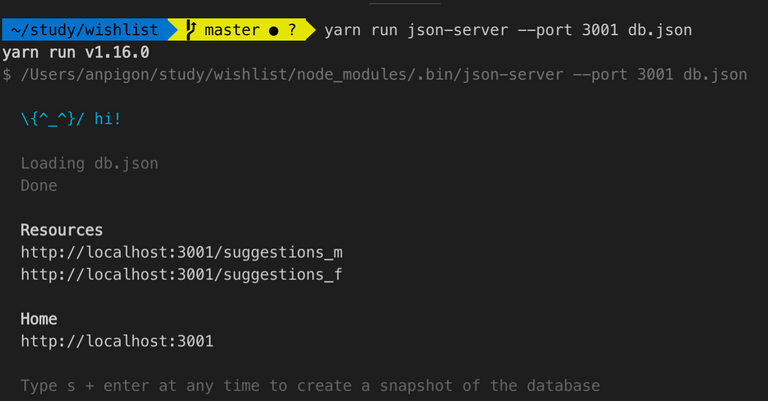
포트 3000은 리액트앱이 사용하고 있기 때문에, 포트 3001를 사용하여 json-server를 구동합니다.
$ yarn run json-server --port 3001 db.json
실행화면
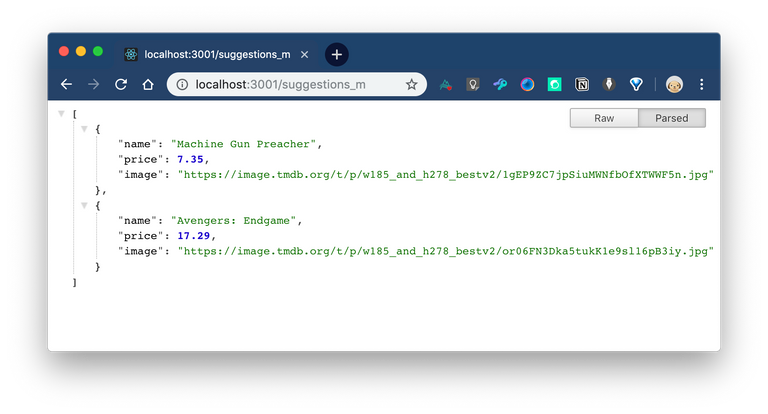
이제 브라우저에서 http://localhost:3001/suggestions_m 를 호출해서 데이터를 확인해봅시다.
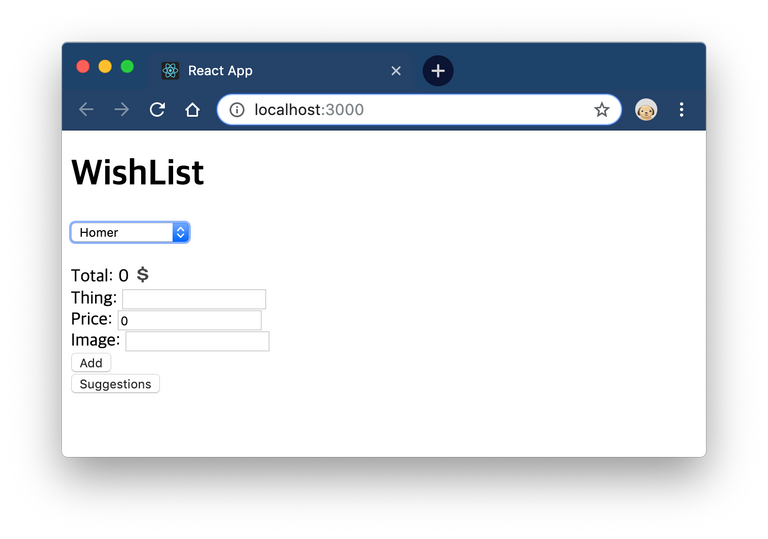
UI 수정하기
App.js 을 열고 UI 를 수정합니다. App 컴포넌트 맨 아래에 [Suggestions] 버튼을 추가합니다.
src/components/App.js
// ...

class App extends React.Component {
    constructor(props) {
      // ...
    }

    render() {
      const { group } = this.props;
      const selectedUser = group.users.get(this.state.selectUser);

      return (
        <div>
          <h1 className="App-title">WishList</h1>
          <select onChange={this.onSelectUser}>
            <option value="">- Select user -</option>
            {values(group.users).map(user => (
              <option key={user.id} value={user.id}>
                {user.name}
              </option>
            ))}
          </select>
          {selectedUser && <WishListView wishList={selectedUser.wishList} />}

          {selectedUser && <button onClick={selectedUser.getSuggestions}>Suggestions</button>}
        </div>
      );
    }

// ...
이제 화면에 [Suggestions] 버튼이 보입니다. 하지만 아직은 버튼을 눌러도 아무런 일이 발생하지 않습니다.
액션 추가하기
이제 User 모델로 가서 새로운 액션을 만들겠습니다. Group.js 파일을 열고 getSuggestions 액션을 추가합니다. 비동기 액션을 위해서는 generators 함수를 사용해야합니다. 그리고 generators 함수를 사용하기 위해서, mobx-state-tree에서 제공하는 flow를 사용합니다. flow는 이것이 비동기 프로세스임을 나타냅니다. generators 함수는 async / await와 동일하게 작동합니다.
src/models/Group.js
import { types, flow } from "mobx-state-tree"; // add here

// ...

export const User = types
  .model({
    // ...
  })
  .actions(self => ({
    getSuggestions: flow(function*() {
      const response = yield window.fetch(
        `http://localhost:3001/suggestions_${self.gender}`
      );
      const suggestions = yield response.json();
      self.wishList.items.push(...suggestions);
    })
  }));

// ...
미들웨어 사용하기
간단한 미들웨어를 추가하고 이 호출에 대한 로그를 기록하여 살펴보겠습니다. index.js 파일을 수정합니다. 그리고 mobx-state-tree 패키지에서 addMiddleware를 가져옵니다. 그다음 addMiddleware를 사용하여 group 모델에서 호출되는 액션 type과 name을 콘솔 로그에 출력합니다.
src/index.js
// ...

import { getSnapshot, addMiddleware } from 'mobx-state-tree';

// ...

let group = Group.create(initialState);
addMiddleware(group, (call, next) => {
  console.log(`[${call.type}] [${call.name}]`);
  next(call);
});

// ...
마지막으로 테스트 하기
[Suggestions] 버튼을 눌러서 getSuggestions 액션을 호출합니다. 콘솔 로그를 살펴보면, 첫 번째 yield 후에 resumes하고 두 번째 yield 후에 다시 resumes한 다음 returns 합니다.
오늘 수업 끝.
댓글, 팔로우, 좋아요 해 주시는 모든 분께 감사합니다.
항상 행복한 하루 보내시길 바랍니다.

eonwarped님의 All In One Claim in Nitrous Instances
Hi @anpigon!
Your post was upvoted by @steem-ua, new Steem dApp, using UserAuthority for algorithmic post curation!
Your UA account score is currently 3.421 which ranks you at #7520 across all Steem accounts.
Your rank has improved 2 places in the last three days (old rank 7522).
In our last Algorithmic Curation Round, consisting of 127 contributions, your post is ranked at #54.
Evaluation of your UA score:
Feel free to join our @steem-ua Discord server
Thank you for your continued support towards JJM. For each 1000 JJM you are holding, you can get an additional 1% of upvote. 10,000JJM would give you a 11% daily voting from the 700K SP virus707 account.