Weekend With My Family, I baked Delicious Butter Bread
Hello Hivians,
I assume you all had a nice time during the weekend, especially with family members. I'm sorry for making this post late, it is not an easy task to put all these together in a day or two.
Over the weekend, I decided to bake bread for the family because it has been a while since they tasted something different. Though we eat commercial bread regularly, homemade bread is incredibly tasty because of the type of additives used to prepare it.
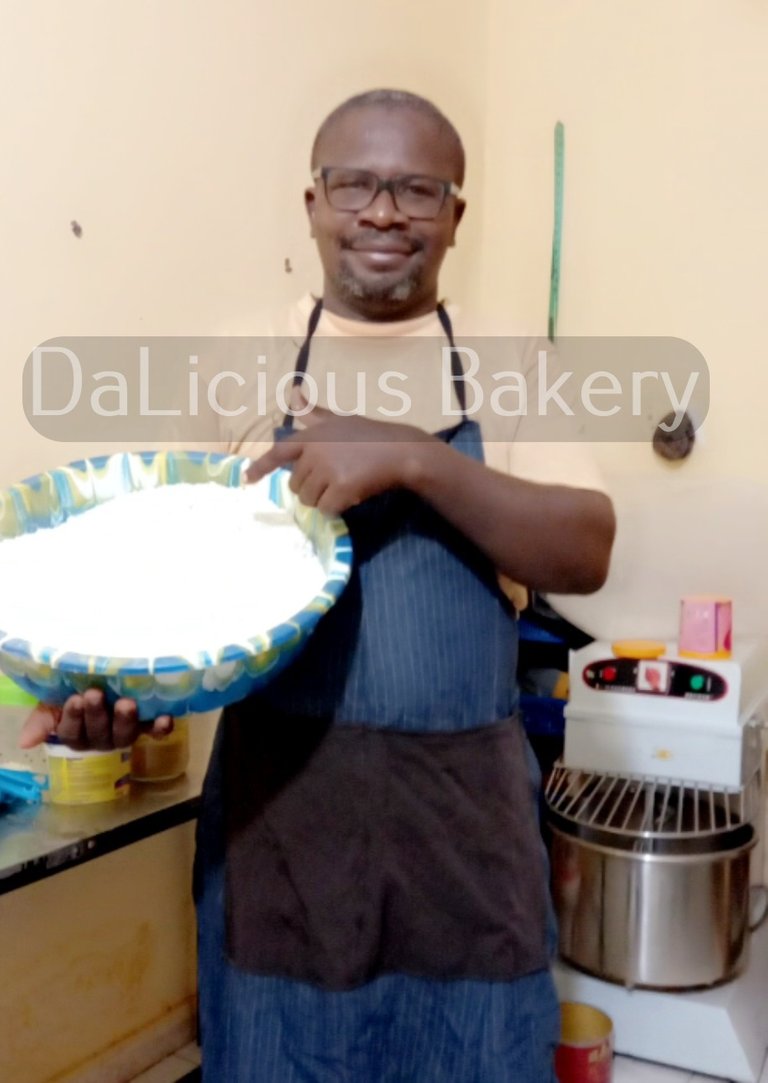
In this post I am going to share my homemade butter bread recipe and also take you through the baking process, should you wish to give it a try at home too.
Ok, let's get down to work. For proper hygiene practice, you have to wash all equipment and maintain a clean environment.
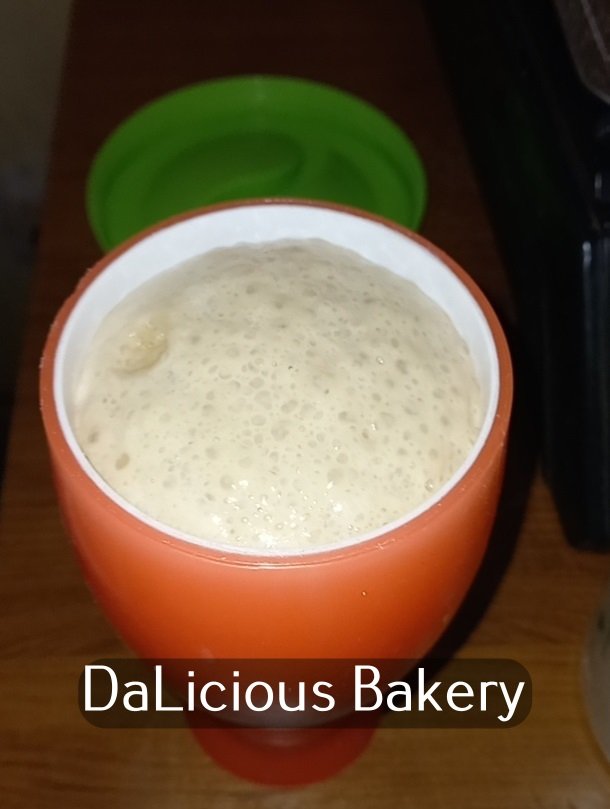
Step 1. Test your yeast, If your yeast is not well active, you might have trouble with your final product. To do so, prepare and add a small amount of lukewarm water in a measuring cup or anything that can be covered, add 1 or 2 tsp of instant dry yeast and a little quantity of sugar, cover and allow to rest for 5 to 10 minutes. If after the rest period the mixture foams and rises to the cup mark with yeast aroma smell, then you have good yeast, else go get another one.
Step 2. Make sure all ingredients are measured out and kept aside before starting. I advise you use a scale in measuring your ingredients if you are not guided by an expert.
Ingredients
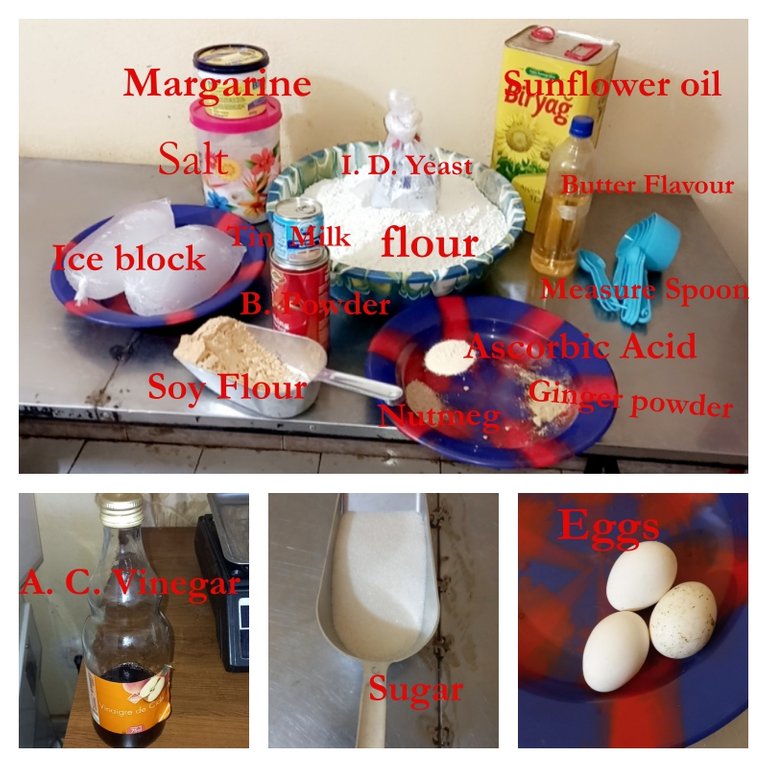
Please take note of this. You can't use Ascorbic acid together with any kind of vinegar. Though they're on my list of ingredients for a reason, I only used one of them (Apple Cider Vinegar)
Butter Bread Recipe
| Flour = 3500kg Recipie dough after mixing = 6255g | ||
| Description | Baker's % | Quantite |
| Flour / kg | 100 | 3500 |
| Sugar / kg in grams | 5 | 175 |
| Magarine/Butter in grams | 14 | 490 |
| Yeast/450g 0,5, 1.34 % -1.6% recomend: 10g for every 1kg flour | 1,9 | 66,5 |
| Milk / kg: liquid in gram | 5 | 175 |
| Egg sometimes I use 1 egg for 3kg flour, but for preservation and dough elasticity I added more | 3 | |
| Salt 25kg 0,7% - 1,5% | 0,6 | 21 |
| Nutmeg - 1/2 tbsp or my baker's percentage | 0,1 | 0,5 |
| Soy flour / kg 1% to 5% | 2 | 70 |
| Baking Powder I used 1/2 tbsp or my baker's percentage | 0,17 | 5,95 |
| Apple Cider Venigar 1/2 tsp or less depdning on the strenght of the ACV | 0 | 0 |
| Vegetable oil sunflower oil used during milling | 2 | 70 |
| Ginger Powder I used 1/2 tbsp don't go beyond this | 0 | 0 |
| Ice block - 90% & cold water 10% Ice block and cold water helps in developing gluten and retard fermentation | 45 | 1575 |
| Butter flavour | 1 | 30 |
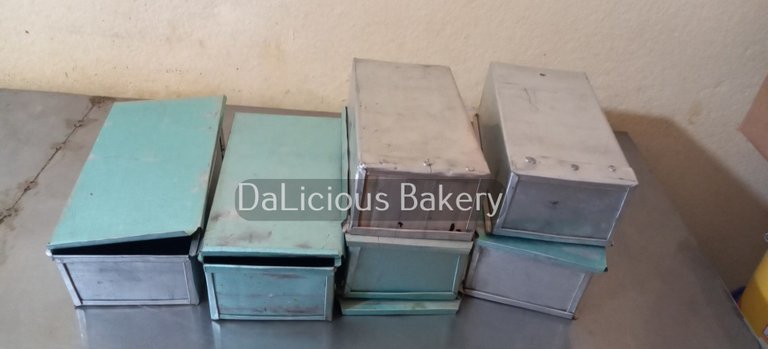
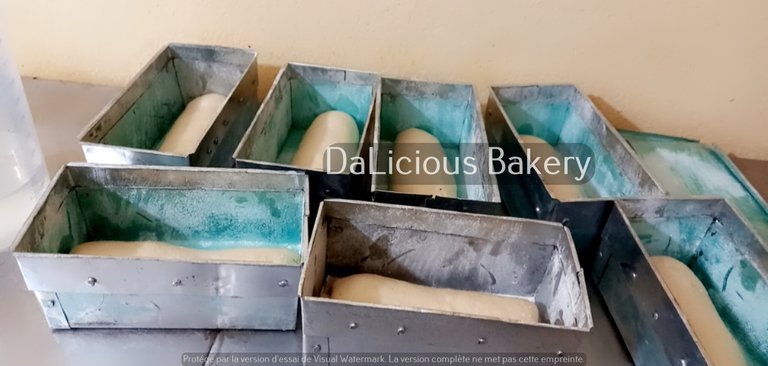
Step 3. Get your pans ready, in my case I used covered pans, though some were not covered you need to use galvanized pans with cover.
Step 4. Mixing process. please note this: I am using a semi-double speed mixer. If you are using a stand mixer, it is the same process with a slight difference, you cannot use Ice-cube in a stand mixer so get very cold or iced water for mixing. I mixed all dry ingredients in the mixer except for yeast and margarine. The wet ingredients were added to the ice cube/ice water.
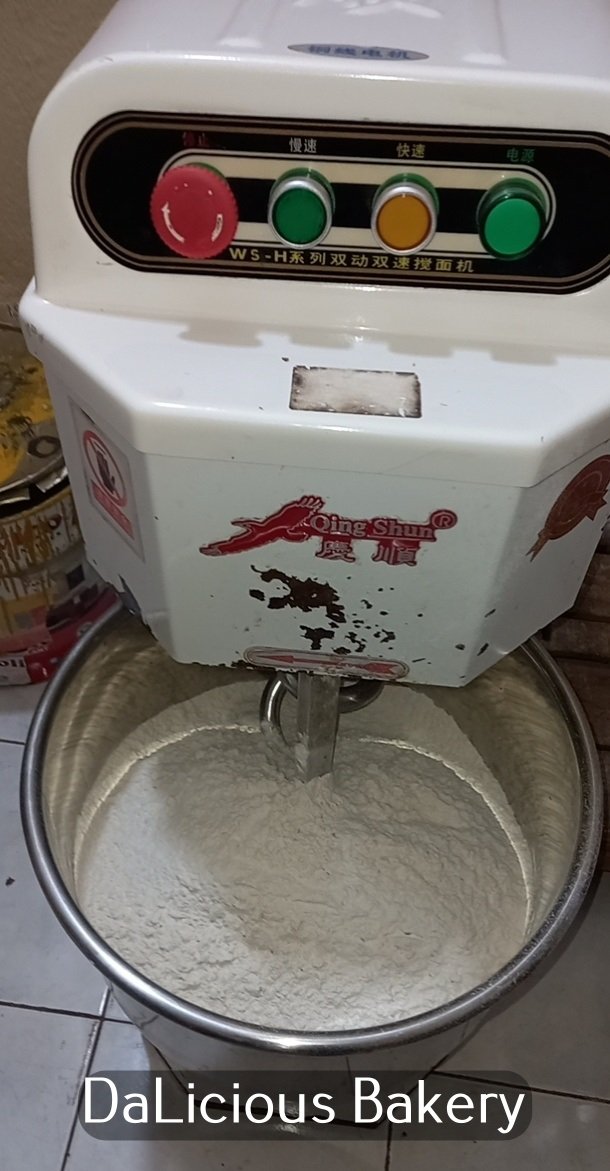
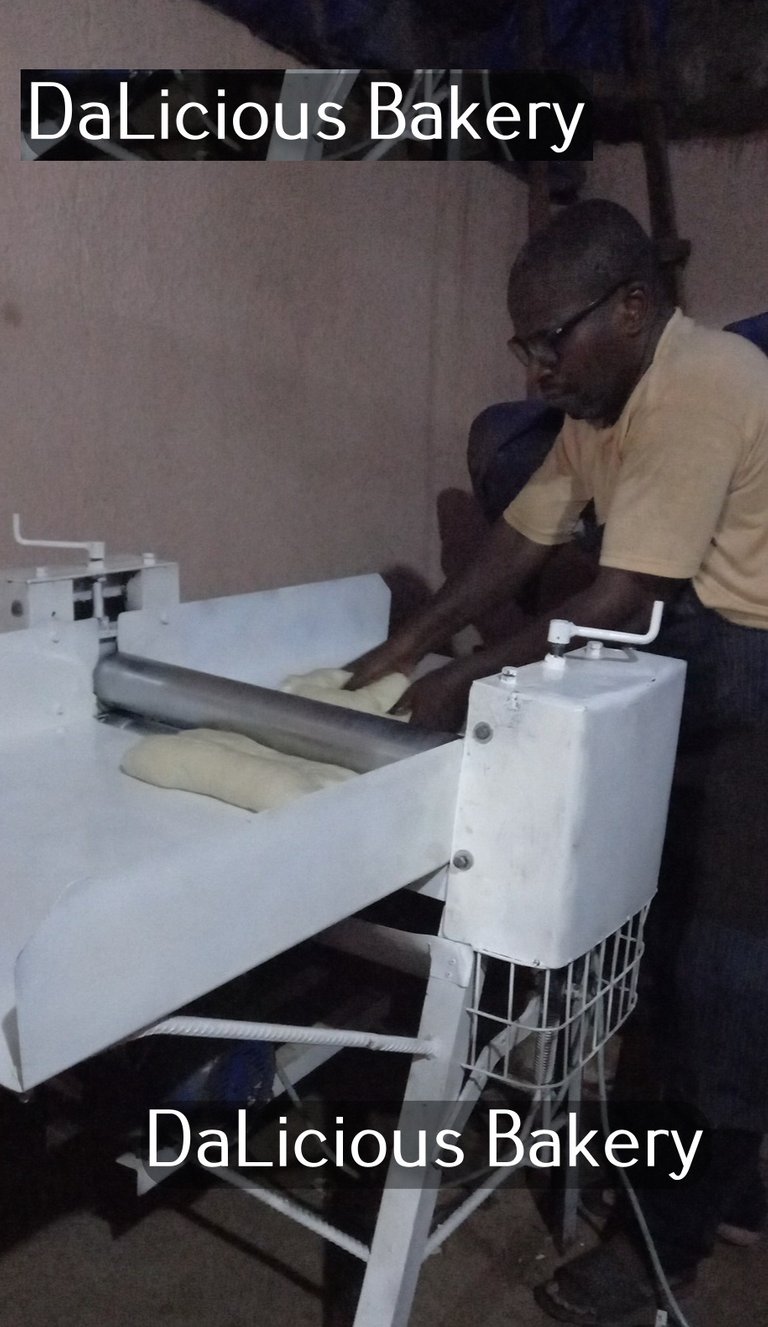
in my case, I mixed on first speed for 1 minute and second speed for 5 minutes because I also used a dough sheeter called local dough miller to develop gluten and make the dough smoother and elastic.
If using a stand mixer, start mixing on the first speed for 3 minutes while adding the wet ingredient gradually, then switch to the next speed, add the rest of the wet ingredient and mix for 15 minutes, 10 minutes into mixing, add yeast. Once the yeast is well incorporated into the dough, add margarine and mix. Your dough should be ready at this point.

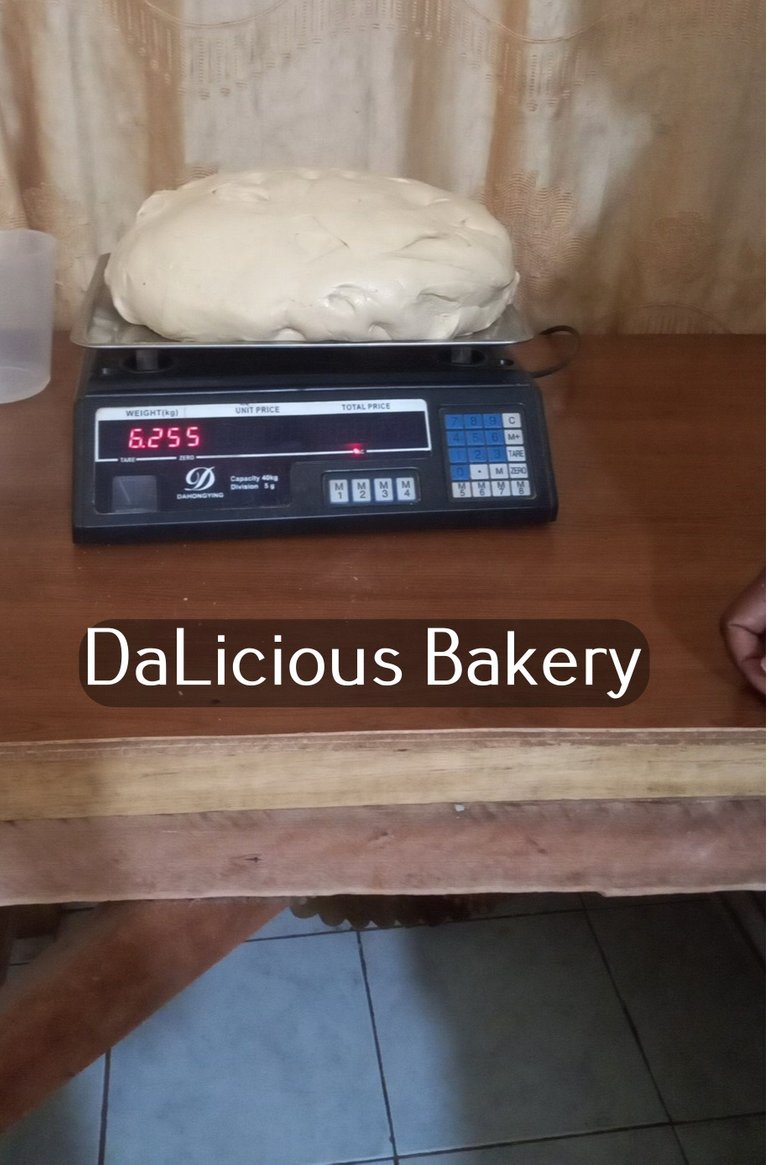
Step 5. Measure the dough: My 3.500kg of flour gave me 6.255kg bread dough after mixing.
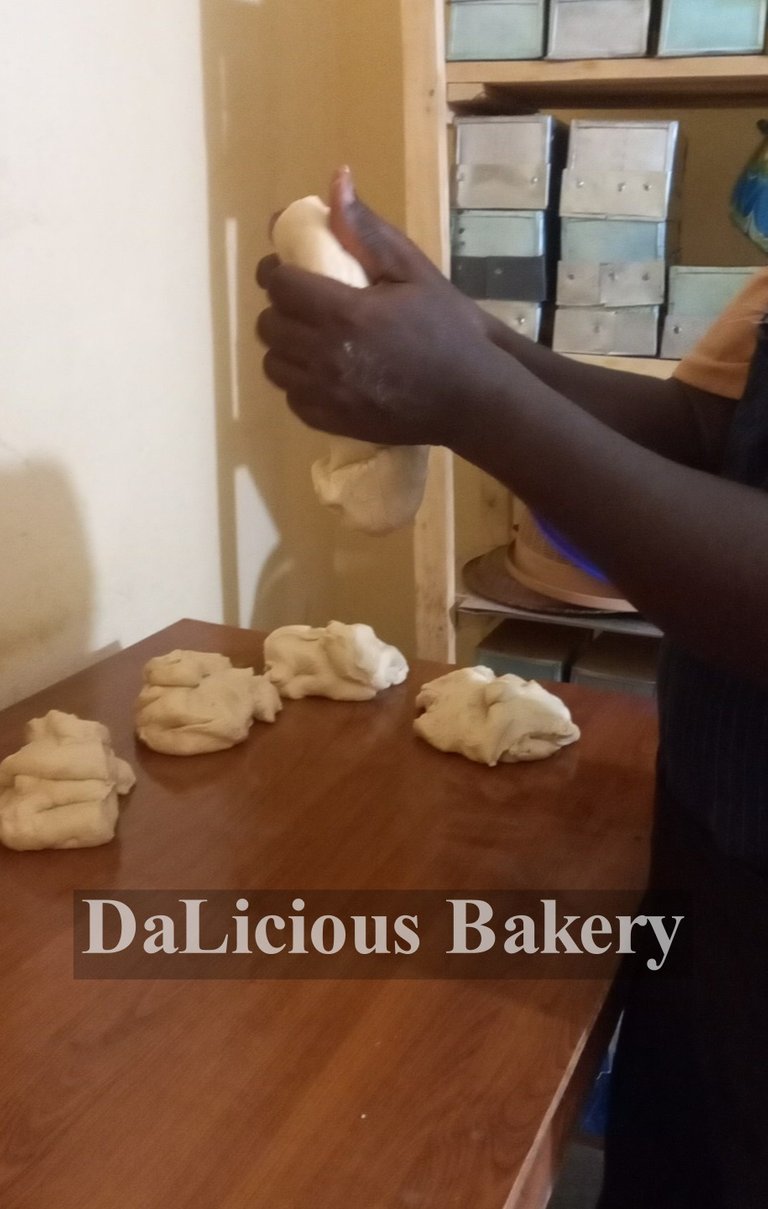
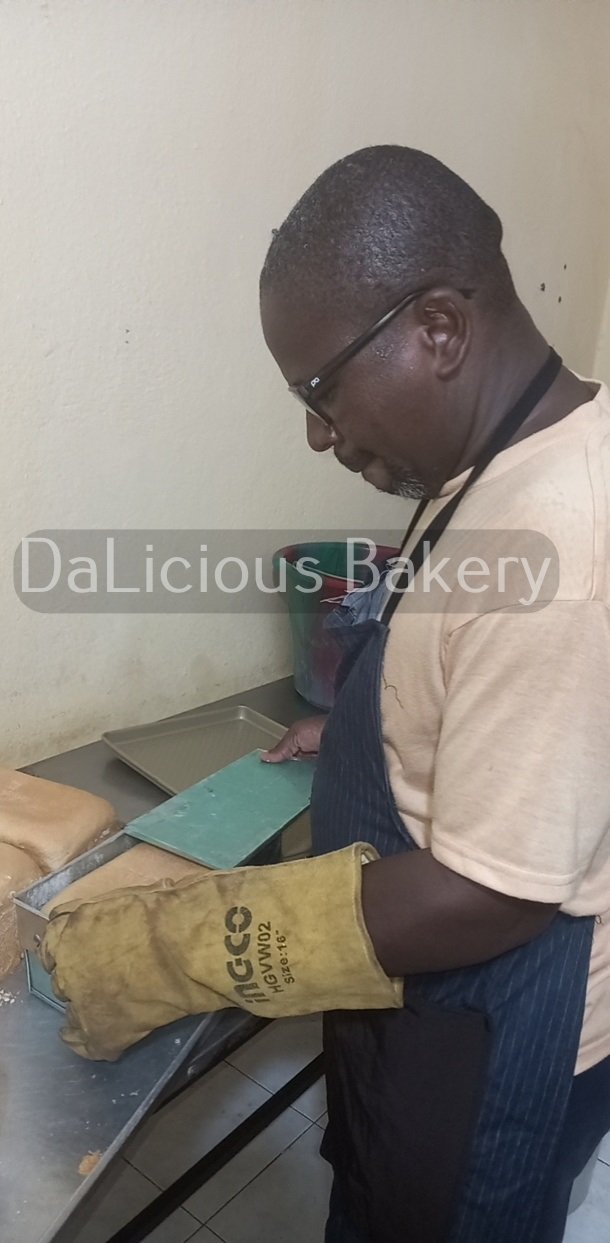
Step 6. dividing, shaping.
Step 7. Panning. Make sure your pan is well greased.
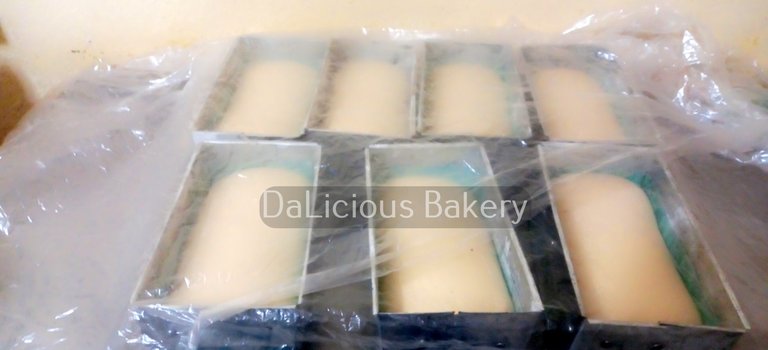
Pan the dough for proofing. With my method, my dough was proofed for 3 hours before going into the oven.
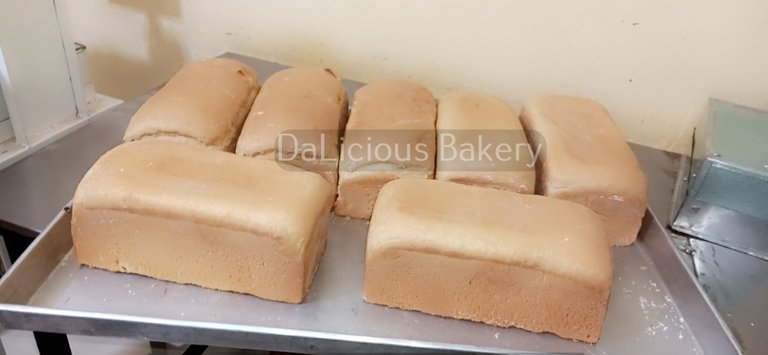
Step 8. Dough is well proofed and ready to go to be baked. I baked mine for 50 minutes.
Step 9. Remove from oven once it is well baked, mine baked within 50 minutes. There could be a slight difference with yours due to many factors which I might not be able to detail here.
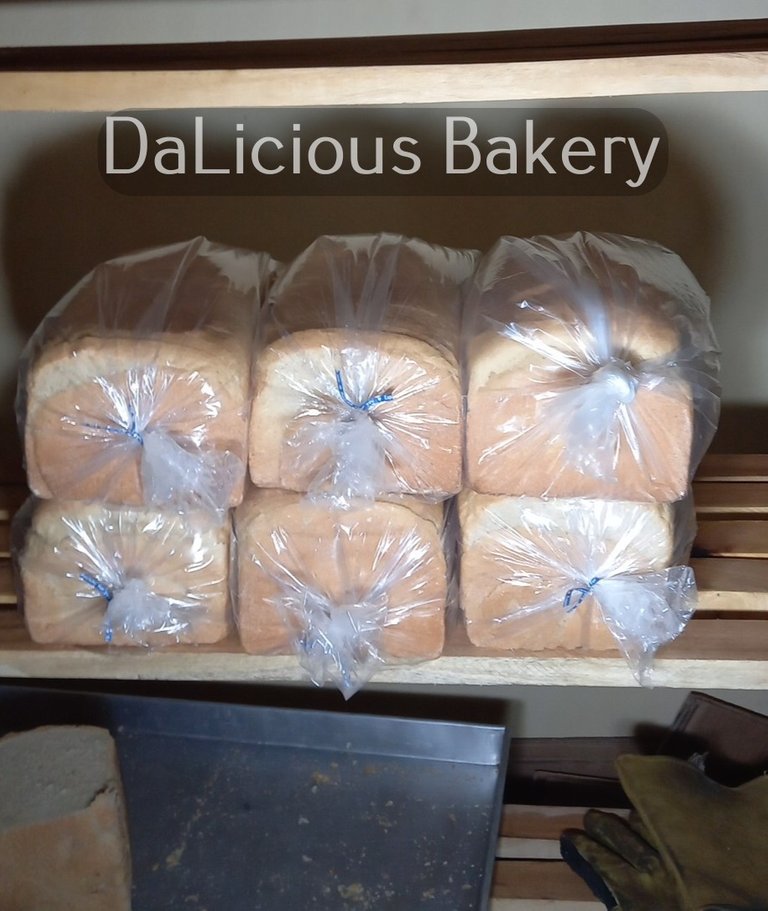
Step 10. Cooling. I allow my bread to cool for at least 5 hours before slicing and or packaging.
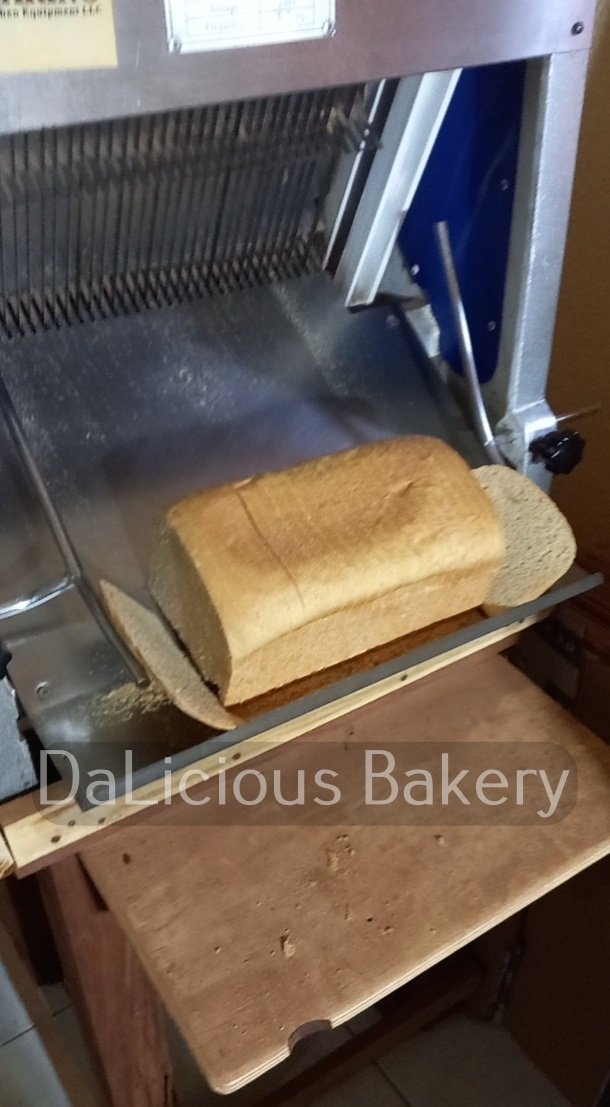
Step 11. Slicing and packaging.
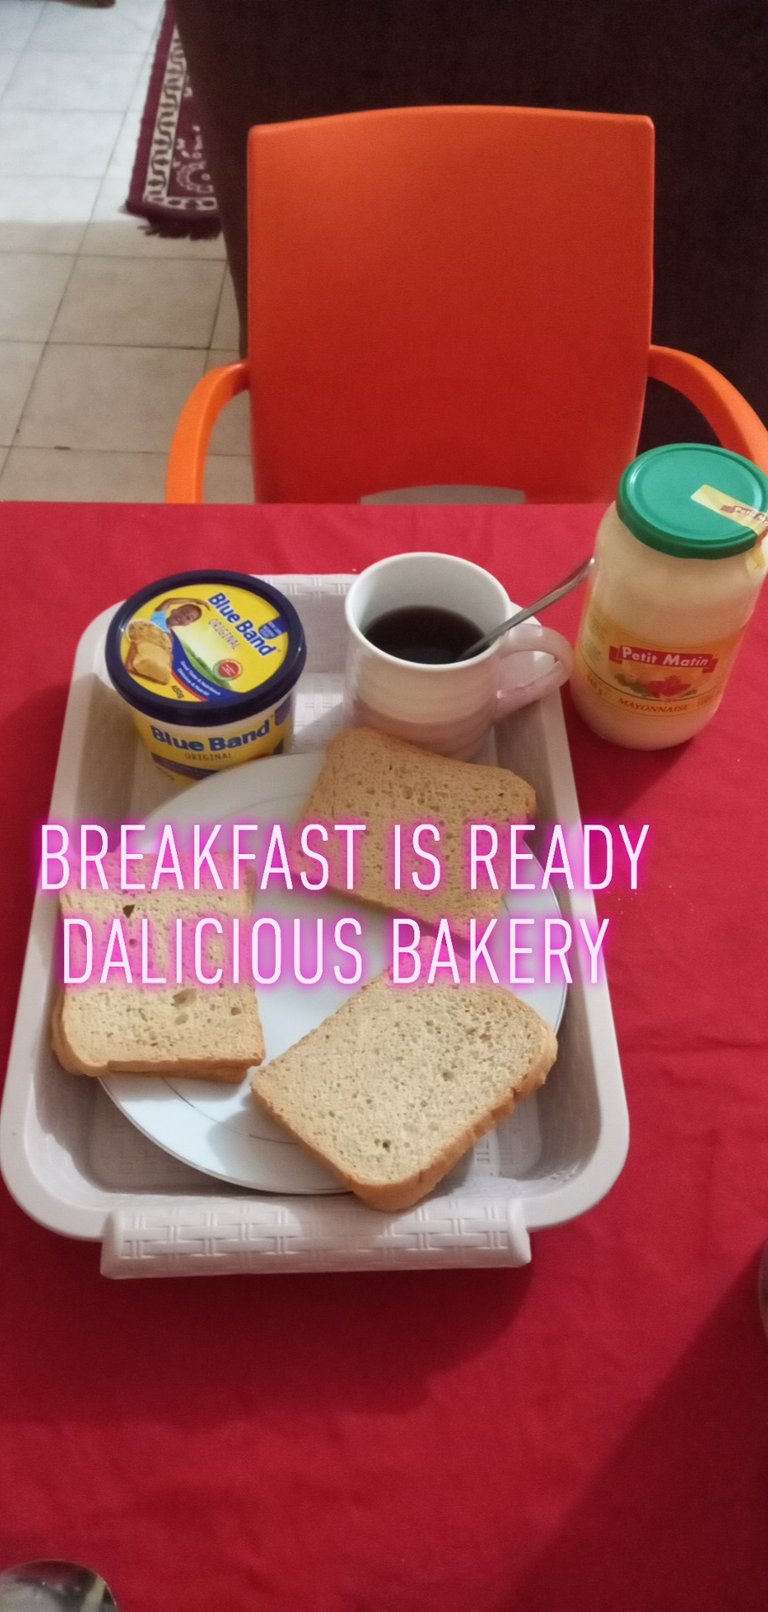
And the next step?
Breakfast was served.
Thank you for taking your time to read, hope you love this.
If you have any questions, please send them in, I'm at your service.
Congratulations @zealous4ever! You have completed the following achievement on the Hive blockchain and have been rewarded with new badge(s):
Your next target is to reach 100 comments.
You can view your badges on your board and compare yourself to others in the Ranking
If you no longer want to receive notifications, reply to this comment with the word
STOPTo support your work, I also upvoted your post!
Check out the last post from @hivebuzz:
https://twitter.com/GDcryptobitz/status/1534288370737811457
The rewards earned on this comment will go directly to the people(@zealous4ever) sharing the post on Twitter as long as they are registered with @poshtoken. Sign up at https://hiveposh.com.
Yay! 🤗
Your content has been boosted with Ecency Points, by @zealous4ever.
Use Ecency daily to boost your growth on platform!
Support Ecency
Vote for new Proposal
Delegate HP and earn more
thank you @ecency I do appreciate the consideration
I have voted for your delegation and proposal last week
Cool... I hope I can make it also some day 😋👌👌👌🍷
Thanks buddy, sure you can it's a simple and if you can't am always here to help.
Thank you!! :)
Wow! It looks good!
I need to learn to bake bread so I can make my own oversized rolls for making Gatsbys
You can start right away, not that hard if you have basic tools
I will check back on this post and try it out.
I need BREAD reminder.
I need to learn to bake so I can begin my own process and make large ones for myself 😜