DIY Car Mirror Hanging Accessory.
One of my favourite things to stare at when I was a kid was the dangling ornaments in my parents cars. It was beautiful to watch these ornaments sway from left to right, following the rhythm of the car. They were usually hung on the internal mirror.
Last week, while making the wall clock with plastic caps, an idea to make a dangling ornament crossed my mind. Luckily, I had some remaining plastic caps and I had this image in my mind which I wanted to recreate using some of my scrap yarns.
Materials Used
- Scrap yarn
- Botton
- Plastic caps
- Glue
- A sharp pin
Procedure

I started by piercing a hole through every bottle cap I intended to use. I used one of my crochet hooks with a broken mouth. I knew this broken hook would come in handy someday.
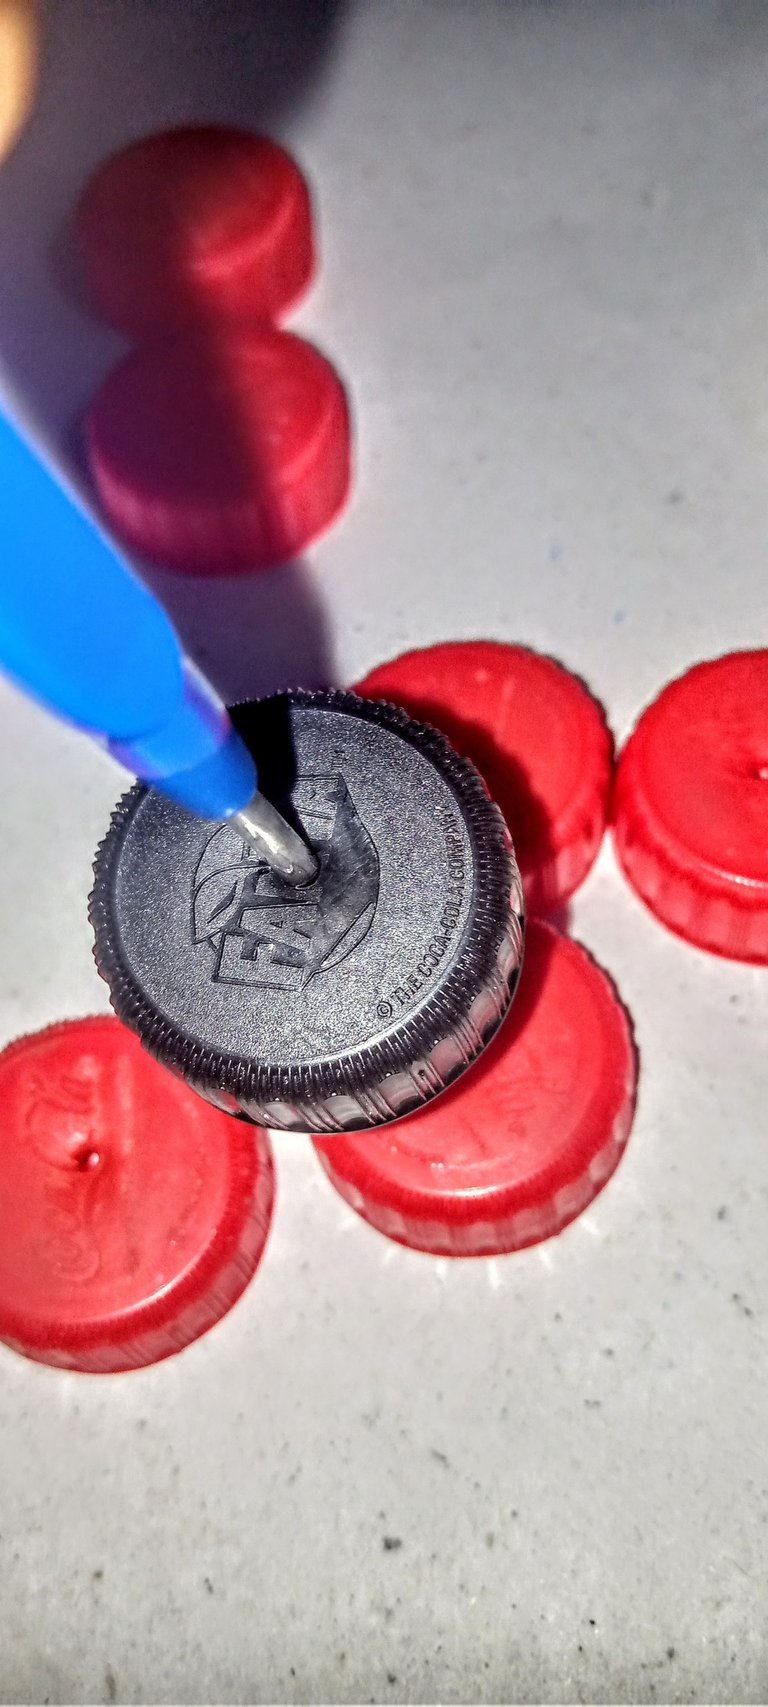
It's best to be careful while piercing to avoid unwanted injuries. Also, I ensured that each hole was in the middle, to promote asymmetry.
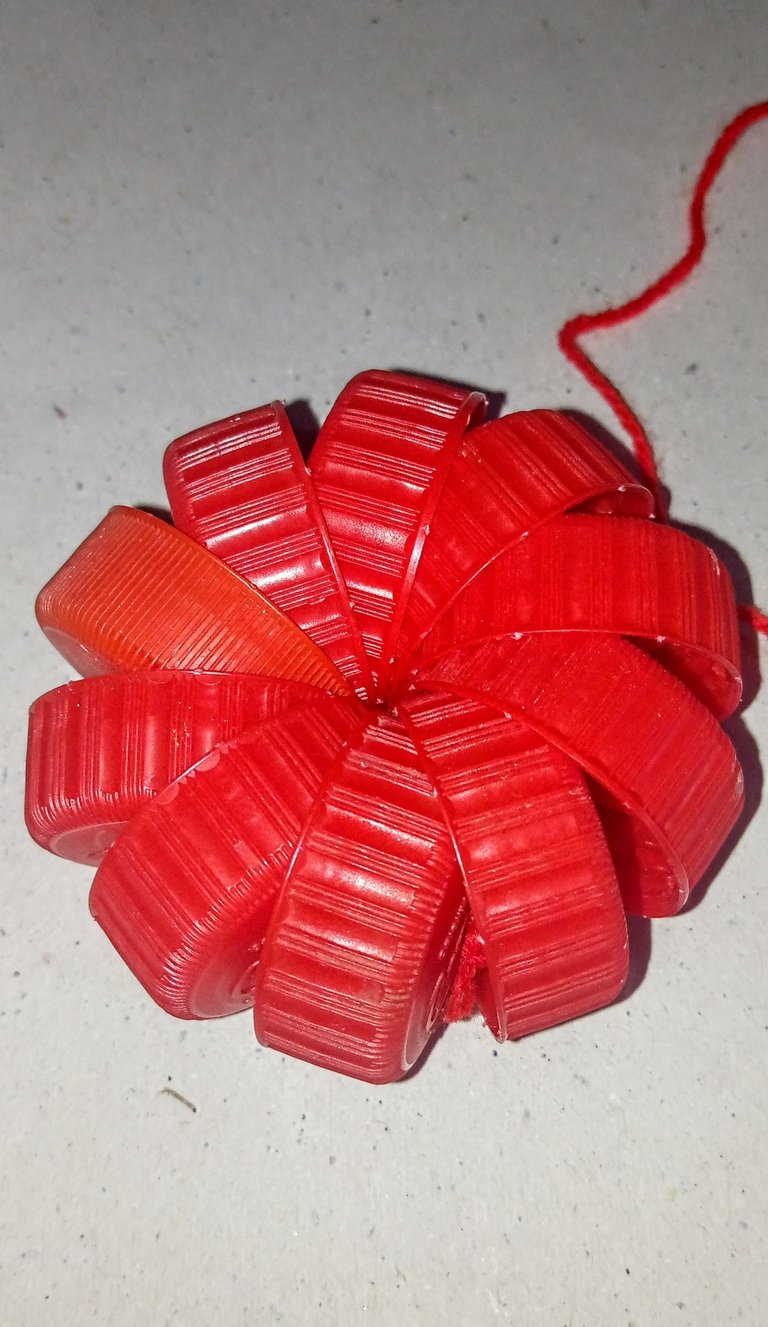
After I pierced through all the caps and sustained no injuries, I moved on to the next part. With a single red yarn, I attached all the bottle caps courtesy of the holes I made in the middle. Each cap went in the same direction.

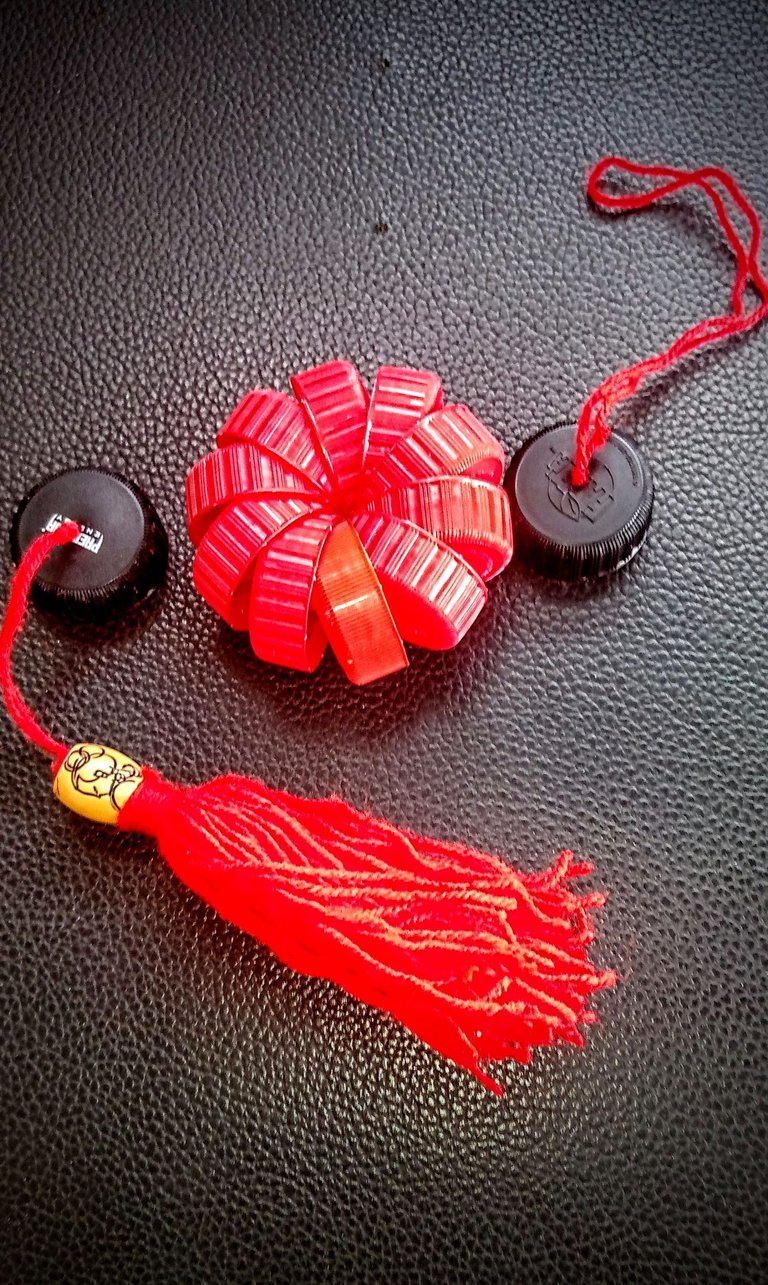
With all the plastic caps stringed in, I pulled them close together and tied a tight knot. After tying the knot, I cut off what was left of the string and the middle part of my craft was pretty much done.
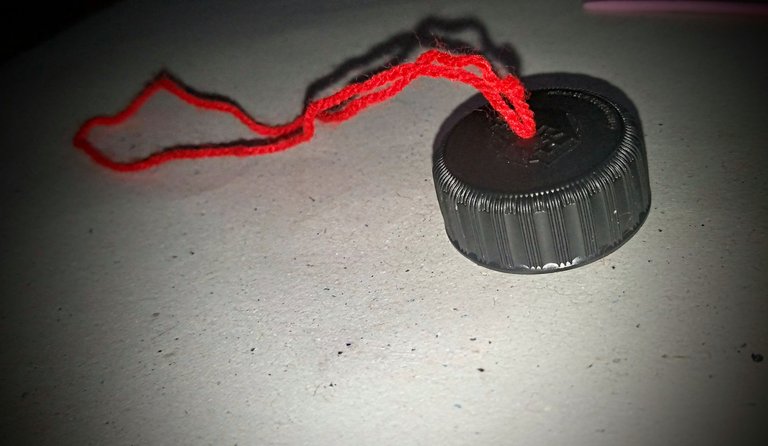
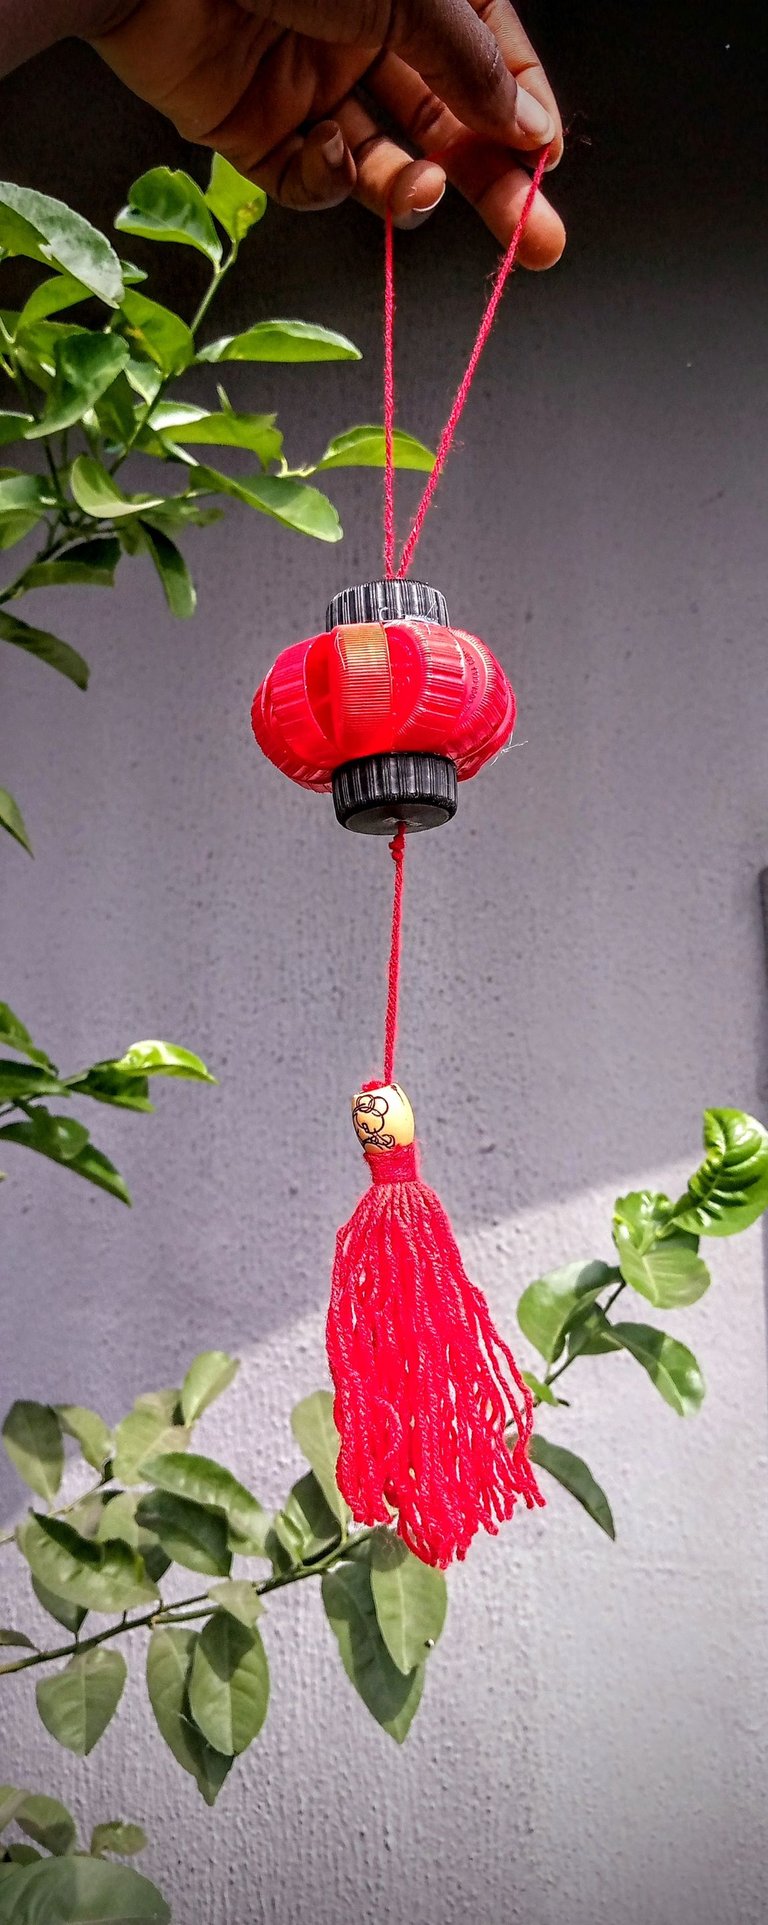
The next part was the top part. I passed a folded yarn through the hole which I made on the plastic cap, tied a double knot and the top part was ready.
For the bottom, I made the ruffle first. I wound my red yarn twenty times over a rectangular surface and then cut it off. Afterwards, I used a loose string to tie the top. I added a bead to it and made sure I left a long loose yarn.
With the loose ends, I attached the bottle cap and made a knot to fasten off.
After this, I glue the bottom cap and the top cap simultaneously and let them dry properly.
Since I started working with plastics, I've realized that they need some extra time to dry up properly else, the project becomes a mess and you would have to start from scratch.
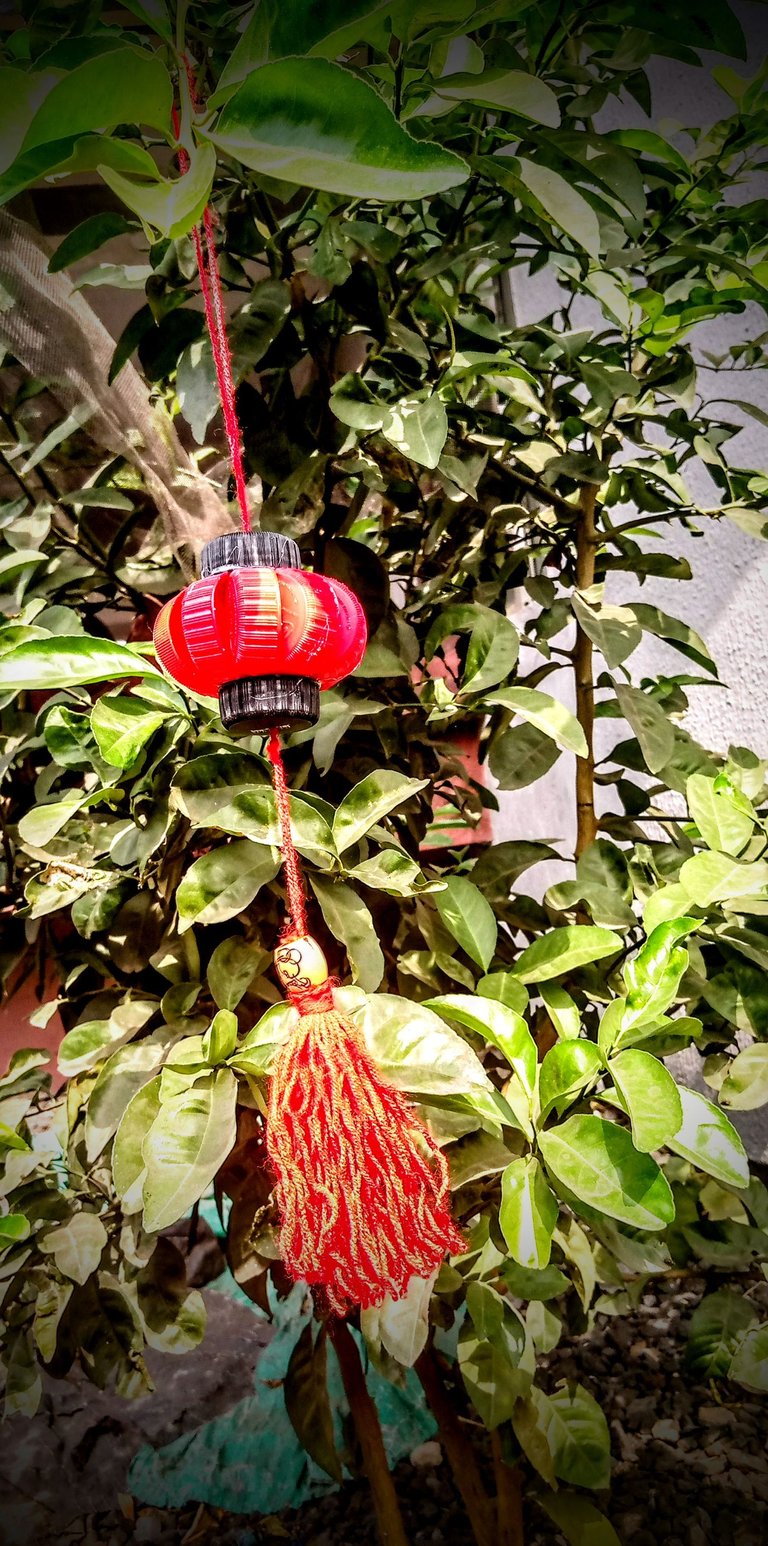
With this, I came to the end of the craft and I would be hanging this in my mom's car first thing tomorrow morning.
What do you think of the craft? Is there anything I could have done better? If you have any suggestions, please share.
All images used belong to me and were taken with my mobile device
Love🤍
Posted Using InLeo Alpha
wongi, pixresteemer sent you LUV. 🙂 (10/10) tools | trade | connect | daily
Made with LUV by crrdlx.
Your car accessory is delightful. Looks like one of those lights from Indian carnivals.
Thank you very much 😊
This one that you’re already making diy for cars is there any good news coming?🥰
You had my attention all throughout the tutorial
I’m amazed by how innovative you are and I love the fact that you used plastics.
Thank you for helping to reduce waste.
There is always good news coming babygirl 😄.
Thank you so much for appreciating this tutorial.
!LUV
abenad, wongi sent you LUV. 🙂 (1/3) tools | trade | connect | daily
Made with LUV by crrdlx.
You’re welcome
What a beautiful pendant and recycling materials 👍👌❤️
Thank you very much