😱 Recreando Eye-Makeup de Instagram l Recreating Instagram Eye-Makeup [ESP-ENG] 😱


ESPAÑOL
¿Qué tal mi gente hermosa? ¿Cómo se preparan para el inicio de semana? Yo me encuentro con un poco de gripe pero nada serio ni que me detenga. El día de hoy quise hacerles una recreación de un maquillaje que hizo una de mis MUA favorita perteneciente a Trinidad y Tobago, la sigo hace 3 años aproximadamente, la conocí mediante publicidad que me salía en la app y debo decir que apenas vi su arte me enamoré y espero que ustedes lo hagan, en serio tiene un talento increíble, lamentablemente ella perdió el acceso a su cuenta anterior que es donde tenia todo su inicio, pero no tardo nada en volver al ruedo con una nueva.
ENGLISH
How are you beautiful people, how are you preparing for the start of the week? I'm coming down with a little flu but nothing serious or anything to stop me. Today I wanted to do a recreation of a makeup that made one of my favorite MUA from Trinidad and Tobago, I follow her for about 3 years, I met her through advertising that came out in the app and I must say that as soon as I saw her art I fell in love and I hope you do, seriously she has an incredible talent, unfortunately she lost access to her previous account which is where she had all her start, but it did not take anything to get back in the game with a new one.
El collage lo hice con mi telefono pero las imagenes las saque de esa fuente / The collage was made with my phone but the images were taken from that source.
Estaba hace poco haciendo un screen roll, vi este maquillaje y quise hacerlo de inmediato, no es uno de los maquillajes favoritos que me hecho, pero lo que cuenta es la intención, no? Esto me ayudó para seguir practicando en lo que me gusta y quise compartirlo con ustedes, así que, sin mas que agregar, ¡comencemos!
I was recently doing a screen roll, I saw this makeup and wanted to do it right away, it's not one of my favorite makeup looks, but it's the thought that counts, right? This helped me to keep practicing what I love and I wanted to share it with you, so, without nothing more to add, let's get started!
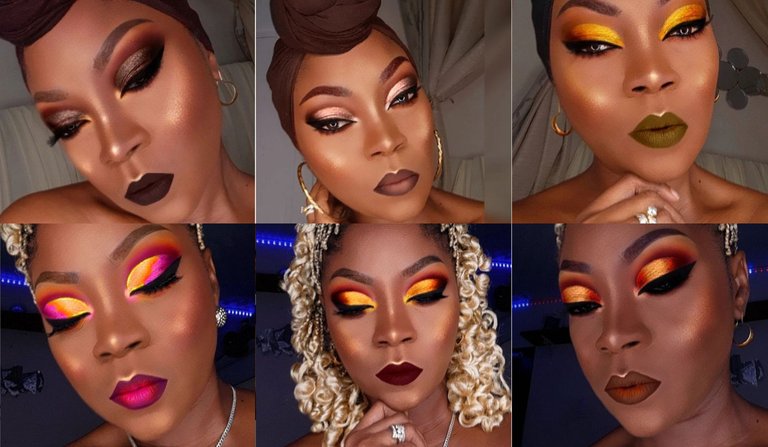
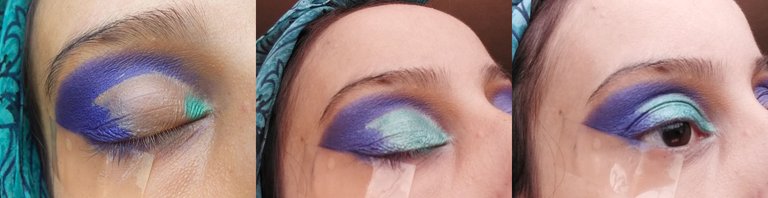
Maquillaje que recrearé - Makeup that I will recreate :

Materiales:
⚜️ Base M.A.C
⚜️ Polvo compacto
⚜️ Crema Hidratante
⚜️ Corrector L.A Girl
⚜️ Brochas para ojos: Difuminar, precisión, lengua de gato
⚜️ Q-Tips
⚜️ Elsa Palette
⚜️ Delineador negro
⚜️ Kit para cejas
⚜️ Cinta Adhesiva
Nota: No estaré aplicando nada en las pestañas, porque actualmente tengo un problema de caída.
Materials:
⚜️ M.A.C Base.
⚜️ Compact Powder
⚜️ Moisturizing Cream.
⚜️ Concealer L.A Girl
⚜️ Eye brushes: blending, precision, cat tongue.
⚜️ Q-Tips.
⚜️ Elsa Palette
⚜️ Black Eyeliner.
⚜️ Eyebrow Kit.
⚜️ Adhesive Tape.
Note: I won't be applying anything on my lashes, because I currently have a problem with falling out.
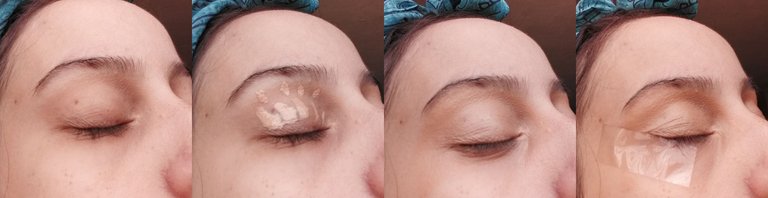
📀 Paso 1:
Luego de hidratar mi piel con la crema, aplique el corrector L.A Girl en el párpado móvil, difuminé muy bien con una esponjita y pasé a colocarme un pequeño pedazo de cinta adhesiva en lado externo del ojo
📀 Step 1:
After moisturizing my skin with the cream, I applied the L.A Girl concealer on the mobile eyelid, blended very well with a little sponge and switched to place a small piece of tape on the lateral side of the eye.
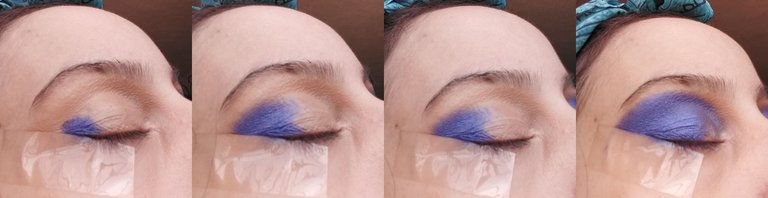
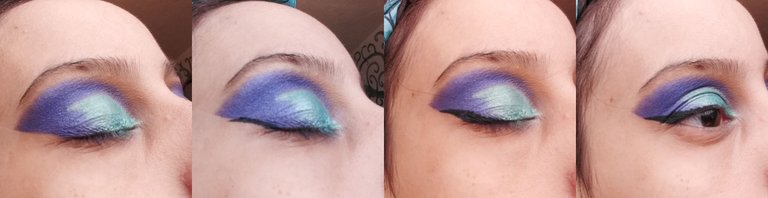
📀 Paso 2:
Busque un color azul lo más parecido al que utilizó la MUA, solo tenia uno metalizado no encontré uno matte, lei que lo podía matizar agregándole un poco de polvo translúcido pero la verdad le quitó bastante el tono azul, asi que, desisti de la idea y seguí con mi azul metalizado.
Empecé aplicándolo en el lado exterior del párpado y lo fui llevando poco a poco hacia el lagrimal, puse 2 capas de este color para que se notara bastante
📀 Step 2:
I looked for a blue color as close as possible to the one the MUA used, I only had a metallic one I couldn't find a matte one, I read that I could shade it by adding some translucent powder but the truth is that it took away quite a bit of the blue tone, so, I gave up on the idea and went with my metallic blue only.
I started applying it on the outer side of the eyelid and gradually moved it towards the tear trough, I applied 2 coats of this color to make it more noticeable.
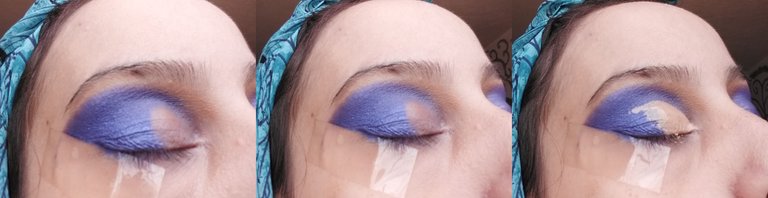
📀Paso 3:
Con un Q-tip/Hisopo/Cotonete/Varilla/etc, limpie desde el lagrimal hasta la mitad del párpado móvil para luego hacer un corte de cuenca con corrector
📀 Step 3:
With a Q-tip/Hisopo/Cotonete/Varilla/etc, I cleaned from the tear trough to the middle of the mobile eyelid to then do a cutcrease with concealer.
📀 Paso 4:
Para hacer este cutcrease se necesitaba un color verde aqua, yo me aplique un tono más azul turquesa y metalizado, este lo mezcle con un toque de agua para poderlo aplicar sin que soltara mucho polvo y así se pigmentara más
📀 Step 4:
To make this cutcrease an aqua green color was needed, I applied a more turquoise and metallic blue tone, I mixed it with a touch of water to be able to apply it without releasing too much powder so it would pigment more.
📀 Paso 5:
Me retiré la cinta adhesiva e hice una linea para empezar el delineado, hice un pequeño triángulo y rellené, si quieren que haga un mini-tutorial de delineado, dejamelo saber en los comentarios
📀 Step 5:
I removed the tape and made a line to start the eyeliner, made a small triangle and filled in, if you want me to do a mini eyeliner tutorial, let me know in the comments.
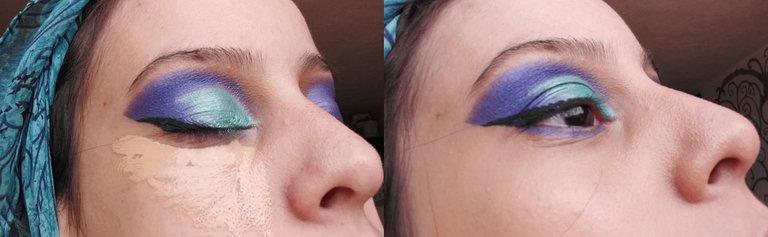
📀 Paso 6:
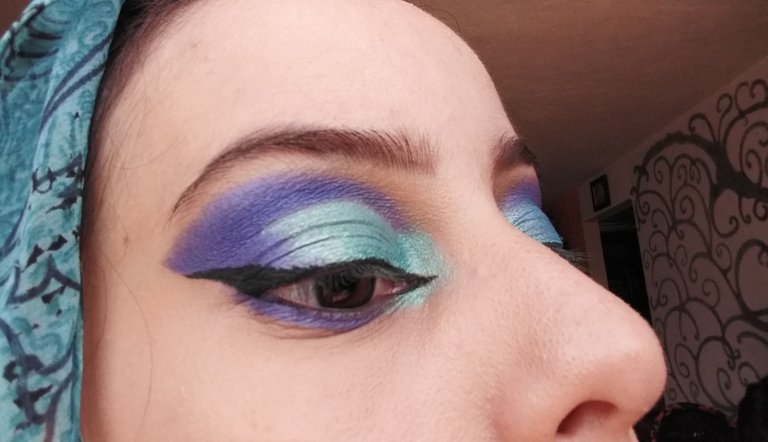
Con el delineado ya listo, apliqué corrector debajo de mis ojos y agregué la misma sombra azul que utilice como para el párpado en la línea de agua inferior, tal cual tiene la MUA en la imagen.
📀 Step 6:
With the eyeliner done, I applied concealer under my eyes and added the same blue shadow I used as for the eyelid on the lower waterline, just like the MUA has in the image.
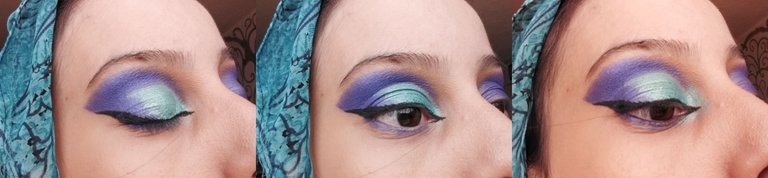
📀 Paso 7:
Después de haber terminado el paso anterior, me fijé bien en la imagen y noté que en realidad la MUA tenia un delineado foxy, así que, continúe el delineado que había dejado a la mitad hasta llegar al lagrimal e hice un doble delineado que forma un triángulo y agregué alrededor de este la sombra turquesa para darle luminosidad, la verdad no se si esto contaría como un paso pero asi lo pondré jajajaja
📀 Step 7:
After finishing the previous step, I looked closely at the image and noticed that the MUA actually had a foxy eyeliner, so, I continued the eyeliner that I had left in the middle until I reached the eyelid and made a double eyeliner that forms a triangle and added around it the turquoise shadow to give it luminosity, I really don't know if this would count as a step but I'll put it that way hahaha.
📷 Detalles fuera de cámara:
Me hice las cejas y agregue profundidad con un lápiz negro al ojo
📷 Off-camera details:
I did my eyebrows and added depth with a black pencil to my eye.
Un poco de polvo, iluminador... LUZ, CAMARA Y ¡ACCION! 📷
A little bit of powder, highlighter... LIGHT, CAMERA AND ACTION! 📷
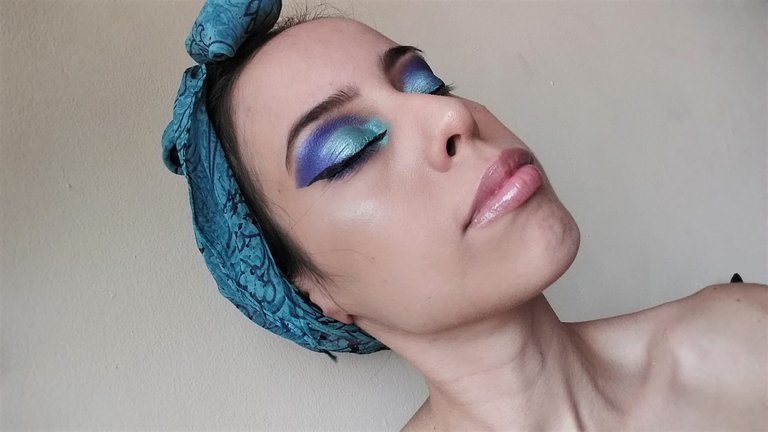
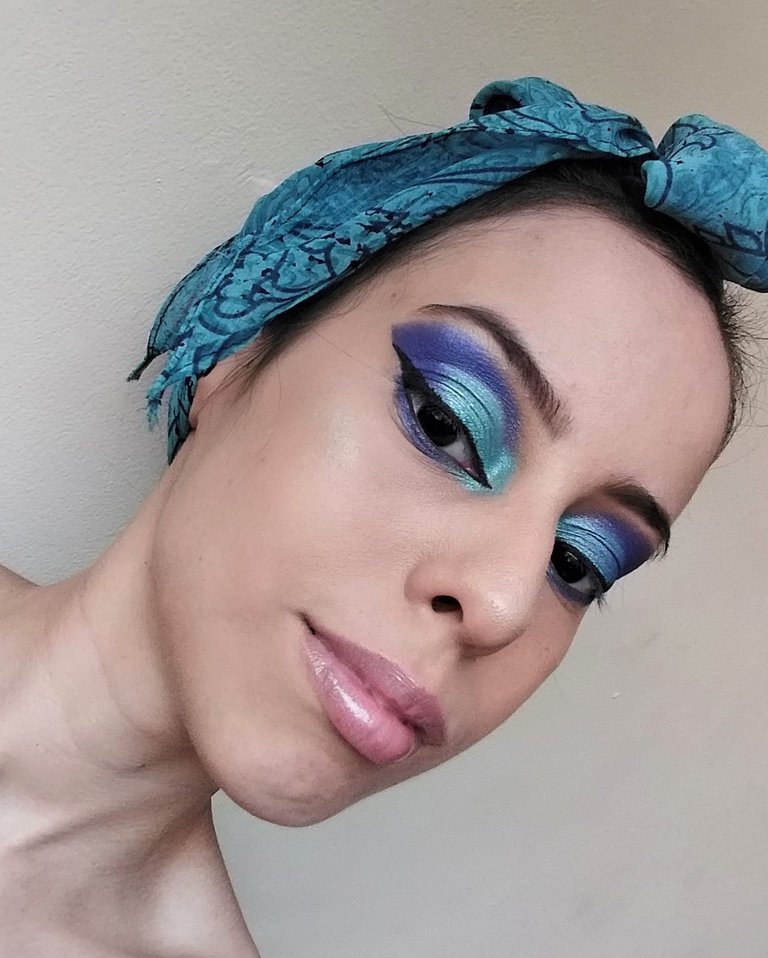
¡Y estamos listos! Ahora, aquí yo no vengo a mentirles, ya luego de haber terminado el maquillaje sentí que no se parecía al de la imagen, y mucho menos me gustó el acabado. Pero en realidad termine feliz porque antes no me hubiese atrevido a hacerlo y hoy si, eso me demuestra a mi misma que si estoy trabajando duro por mejorar y salir de mi zona por muy sencillo que parezca, asi que, igual lo comparto con ustedes por lo mismo que dije en el post anterior, quiero documentarlo todo y que ustedes me acompañen en esto.
Hasta aquí llegamos el dia de hoy, muchas gracias por leerme
And we are ready! Now, I'm not here to lie to you, after I finished the makeup I felt that it didn't look like the one in the picture, and I didn't like the finish at all. But actually I ended up happy because before I wouldn't have dared to do it and today I do, it shows me that I am working hard to improve and get out of my zone, as simple as it may seem, so, I still share it with you for the same reason I said in the previous post, I want to document everything and that you join me in this.
So here we are today, thank you very much for reading me.