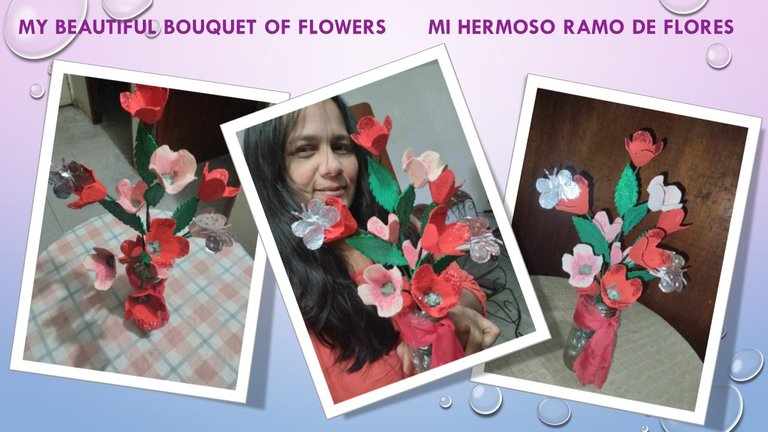
FLORAL BOUQUET MADE FROM RECYCLED MATERIAL / BOUQUET FLORAL HECHO DE MATERIAL RECICLADO
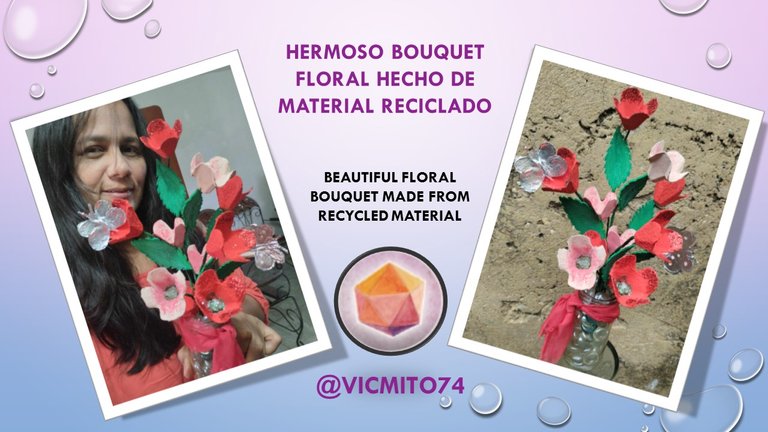
Warm greetings to the entire @DIYHub community, I hope today is a beautiful day for everyone. I got up early this day to collect clear water, so goes the saying, today I bring for all of you the elaboration of a beautiful floral bouquet that I made with cardboard (egg cup), since I started my journey in Hive there have been several posts that I have made with useful material, I think it is a very nice practice, which allows us to give back to the planet everything it gives us daily, I really enjoy creating new things from these materials, which for many have already fulfilled their role, every detail in its development, is a respite that I give because I know I am contributing a grain of sand for the conservation of our earth, I hope you like my work.
Saludos cordiales a toda la comunidad de @DIYHub, espero que hoy sea un hermoso día para todos. Yo me levante bien temprano en este día a recoger agua clara, así reza el dicho, hoy traigo para todos ustedes la elaboración de un hermoso bouquet floral que realice con cartón (huevera), desde que comencé mi andar en Hive han sido varios los post que he elaborado con material de provecho, pienso que es una práctica muy bonita, la cual nos permite devolver al planeta todo lo que a diario nos regala, yo la verdad que disfruto mucho creer cosas nuevas de esos materiales, que para muchos ya cumplieron su rol, cada detalle en su elaboración, es un respiro que doy porque se que estoy aportando un granito de arena para la conservación de nuestra tierra, espero que a ustedes les guste mi trabajo.

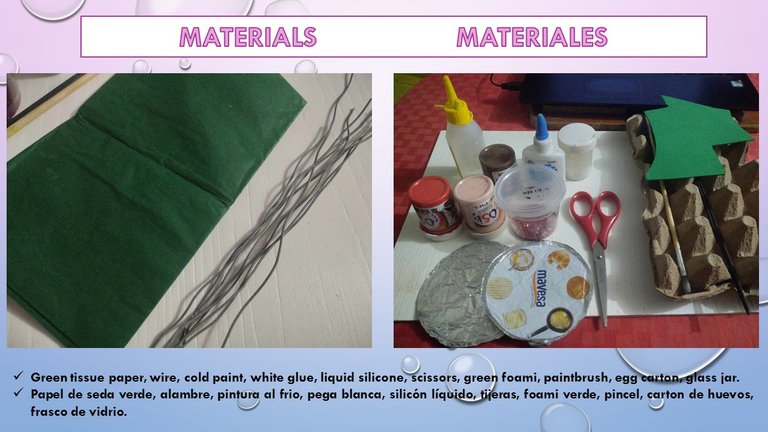
To make this beautiful floral bouquet, I used a series of materials that had already fulfilled their function in certain aspects and moments of my daily life, such as: the carton where we bought the eggs (egg cup), margarine lids, wire from an old clothesline, a mayonnaise container, scraps of foami, cold paints, frosting, liquid silicone, white glue, tissue paper, scissors and a paintbrush.
Para la elaboración de este hermoso bouquet floral, utilice una serie de materiales que ya habían cumplido su función en ciertos aspectos y momentos de mi vida cotidiana, como por ejemplo: El cartón donde compramos los huevos (huevera), tapas de las margarinas, alambre de una cuerda vieja para tender ropa, un envase de mayonesa, retazos de foami, pinturas al frio, escarcha, silicón liquido, cola blanca, papel de seda, tijeras y pincel.
STEP BY STEP / PASO A PASO
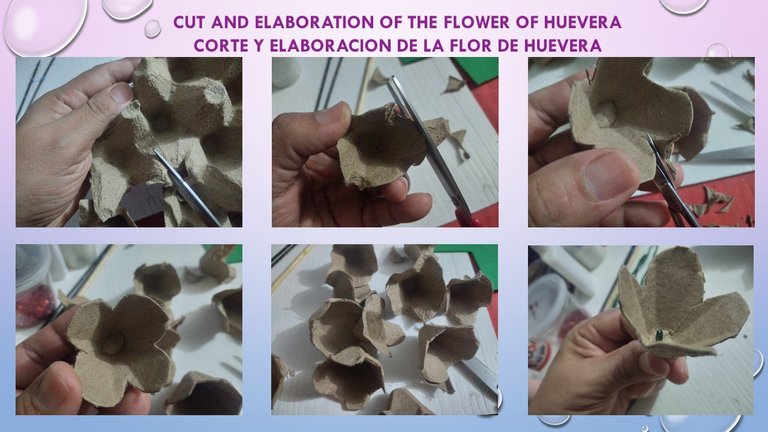
With the scissors, we take the cardboard (egg cup) and cut at the edge of each indentation, to remove each triangle where the egg rests, then with a smaller scissors, we cut each side to shape the petals of each flower, as shown in the images.
Con las tijeras, tomamos el cartón (huevera) y cortamos al borde de cada hendidura, para ir sacando cada triangulo donde reposa el huevo, luego con una tijera mas pequeña, recortamos cada lado para ir dando forma de los pétalos de cada flor, como se observa en las imágenes.
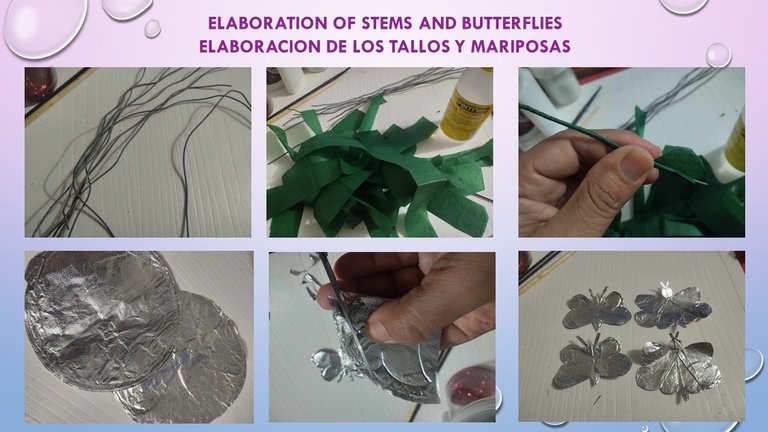
To make the stems, we take the wire and straighten it, and with strips of green tissue paper, we proceed to cover each of the wires.
To make the butterflies, we take the aluminum stamps (the ones that come with the butter) and fold them in half, trace the shape of a half butterfly and cut.
Para elaborar los tallos, tomamos el alambre y lo enderezamos, y con tiras de papel de seda color verde, procedemos a forrar cada uno de los alambres.
Para elaborar las mariposas, tomamos los sellos de aluminio (son los que traen las mantequillas) y los doblamos a la mitad, trazamos la forma de una media mariposa y cortamos.
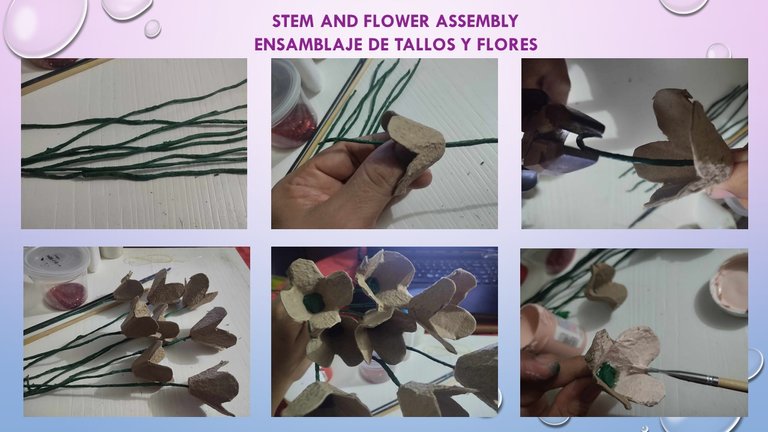
Once the stems and flowers are finished, we proceed to assemble the flowers, we take the wire and pass it through the center of the flower, once the tip is out, with tweezers, we bend the wire in an O shape and adjust the flower a little, for better grip, we make a ball of tissue paper and with white glue we glue it to the center of it.
Una vez terminados los tallos y las flores, procedemos a ensamblar las flores, tomamos el alambre y lo pasamos por el centro de la flor, una vez haya salido la punta, con una pinza, doblamos el alambre en forma de O y ajustamos un poco la flor, para mejor agarre, hacemos una bolita de papel de seda y con cola blanca lo pegamos al centro de la misma.
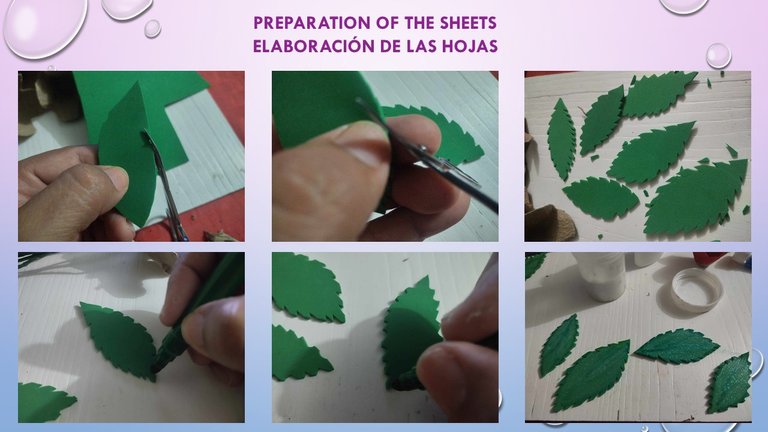
For the leaves, with the scissors we cut the shape directly to the foami, and with smaller scissors, we make small picks to give it shape.
With a green marker, we give it shape, painting the edges and shapes inside the leaf, and finally, we add some glue with white frosting.
Para las hojas, con las tijeras cortamos la forma directamente al foami, y con unas tijeras mas pequeña, hacemos pequeños piquetes para darle forma.
Con un marcador verde, le damos forma, pintando los bordes y formas dentro de la hoja, por ultimo, le agregamos un poco de pega con escarcha blanca.
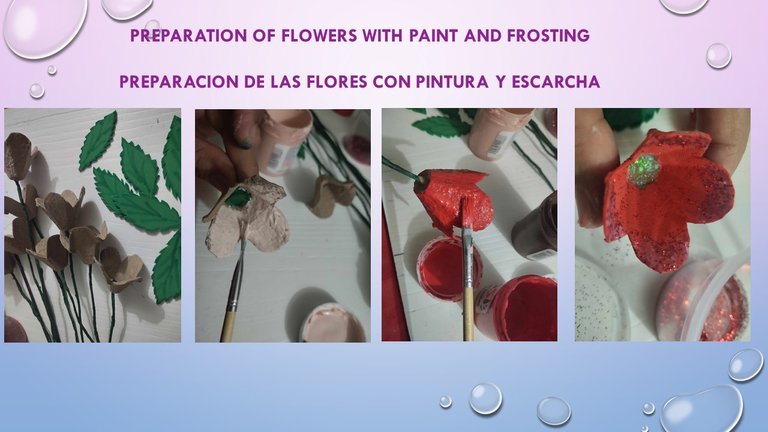
Once the flowers and leaves are ready, we proceed to paint the flowers with red and pink cold paint, then we put some red frost on each flower.
Ya listas las flores y hojas, procedemos a pintar las flores con pintura al frío roja y rosada, después colocamos un poco de escarcha roja a cada flor
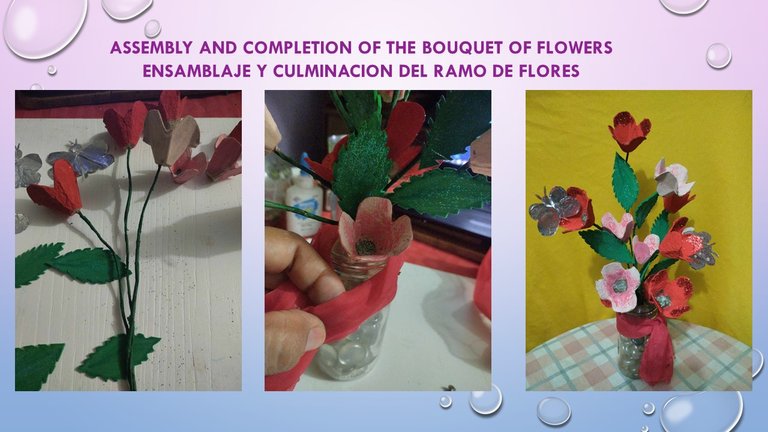
Finally, we glue the leaves to the stems and begin to assemble the bouquet of flowers, to give it better stability, we fix it to a glass base (mayonnaise container) and we place glass stones and decorate it with red fabric, as shown in the images.
Por ultimo, pegamos las hojas a los tallos y comenzamos a armar el bouquet de flores, para darle mejor estabilidad, lo fijamos a una base de vidrio(envase de mayonesa) y le colocamos piedras de vidrio y adornamos con tela roja, como se muestra en las imágenes.
So the Bouquet I hope you liked it, I want to thank you for your time. The images are of my authorship, the separator is from @eve66, I used for the translation Deepl.
Así que el Bouquet espero les haya gustado, quiero agradecer por su tiempo. Las imágenes son de mi autoría, el separador es de @eve66, utilice para la traducción Deepl.
Hola.
Está precioso este bouquet de flores rojas. Me encanta saber que eres amante del reciclaje, estamos de acuerdo en que al planeta hay que darle siempre una manita.
Trabajar con hueveras no es tan fácil como siempre lo hacen ver las expertas como tú, te lo digo porque he realizado muy pocos proyectos debido a lo duro que es el cartón. Quizá a mi me cuesta porque mis tijeras no cortan mucho, pero además hay que tener precisión en el corte.
Lo bueno es que lo que se haga con este cartón siempre será muy duradero y eso es genial. Así que estas flores serán casi eternas. Se ven muy lindas.
Gracias, si no se va a marchitar tan fácilmente, no te creas a veces me cuesta un poco manejar las tijeras, pero se hace el intento y los resultados son buenos, abrazos!
Saludos.
Thank you
lindura de flores ademas reutilisastes canastas de huevo y eso estuvo genial el color rojo me gusta mucho
Si a mi también me encanta el rojo, gracias por pasar, saludos!
Excellent job of recycling, you knew how to take advantage of it very well, you got very nice this centerpiece. I congratulate you. Thanks for sharing in our community ✨ // Excelente trabajo de reciclaje, supiste aprovecharlo muy bien, te quedo muy lindo este centro de mesa. Te felicito. Gracias por compartir en nuestra comunidad ✨
Un gran trabajo @vicmito74, con un excelente proceso creativo, que lindo como utilizaste estos materiales reciclables y obtuviste un maravilloso resultado final. Me encanto este centro de mesa. Te felicito...
!DIY
Saludos, gracias por pasar, me encanta trabajar con materiales de provecho.
You can query your personal balance by
!DIYSTATShttps://leofinance.io/threads/dayadam/re-leothreads-jk2v8jgb
The rewards earned on this comment will go directly to the people ( dayadam ) sharing the post on LeoThreads,LikeTu,dBuzz.
Saludos, amiga que bonito trabajo, he visto flores de este material, pero estas realmente son las más lindas, te felicito. También coincido con una amiga que dice que no es nada fácil trabajar este material porque hay que tener precisión en los cortes. Gracias por compartir, me encanto totalmente.😘
Greetings, friend, what a beautiful job, I have seen flowers of this material, but these are really the most beautiful, congratulations. I also agree with a friend who says that it is not easy to work this material because you have to have precision in the cuts. Thank you for sharing, I love it.
gRACIAS A TI POR PASAR, ME ALEGRA TE HAYA GUSTADO EL TRABAJO, BENDICIONES