Mi primer adorno decembrino (Reno para decorar la puerta de mi habitación) / My first Christmas ornament (Reindeer to decorate my bedroom door)
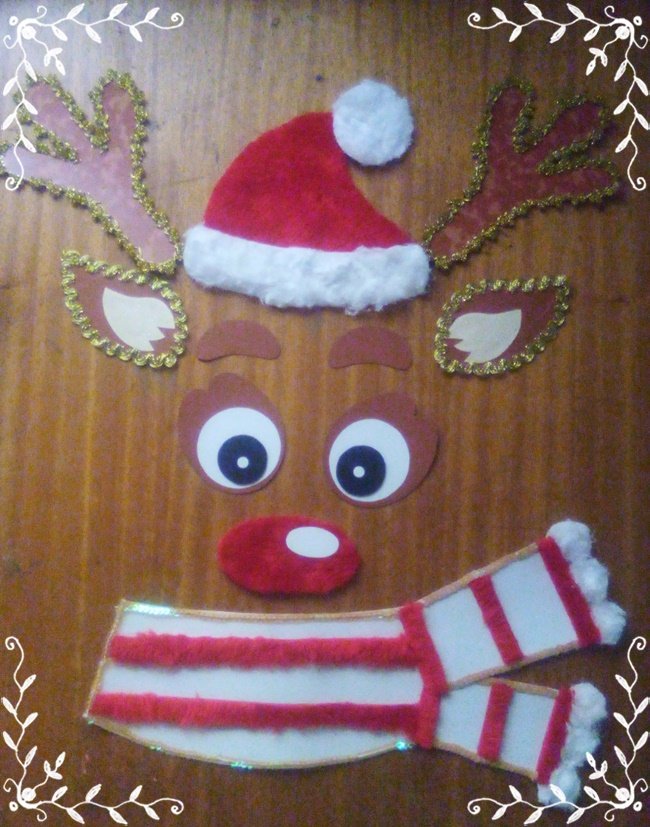
A pleasure to greet you my dear community. I want to share with you my first holiday craft. My mother loves Christmas and we have already started to make our own decorations for this celebration, she infects me with her enthusiasm and joy. This time I will show you how I made a reindeer to decorate the door of my room, I used useful materials and others that I found in my house, it is always good to recycle for moments like these. This idea is also very practical to decorate the fridge and it would look beautiful, the difference is that we would place magnets behind it so as not to damage the surface.We could use snowman figures.
Materiales
-Carpetas marrones
-Cartulinas blancas
-Silicón frío
-Pega blanca
-Tijera
-Lápiz
-Pincel
-Hojas recicladas
-Encaje dorado
-Tela de peluche roja
-Guata
-Foami negro
-Escarcha
-Tachuelas
-Lentejuelas transparentes
Materials
-Brown folders
-White cardboard
-Cold sylicon
-White glue
-Scissor
-Pencil
-Brush
-Recycled paper
-Golden lace
-Red plush fabric
-Wadding
-Foami black
-Frost
-Tacks
-Transparent sequins
Procedimiento
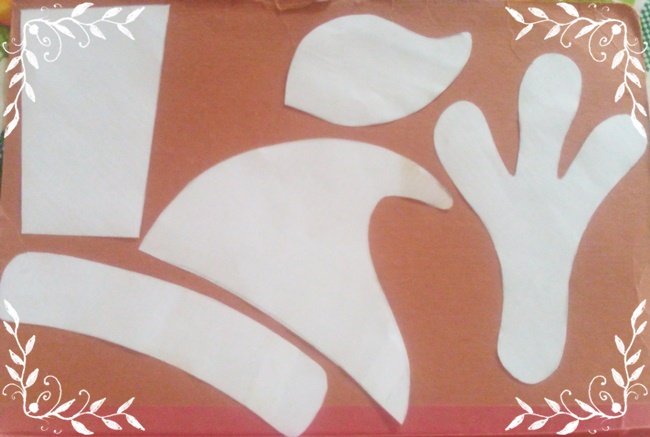
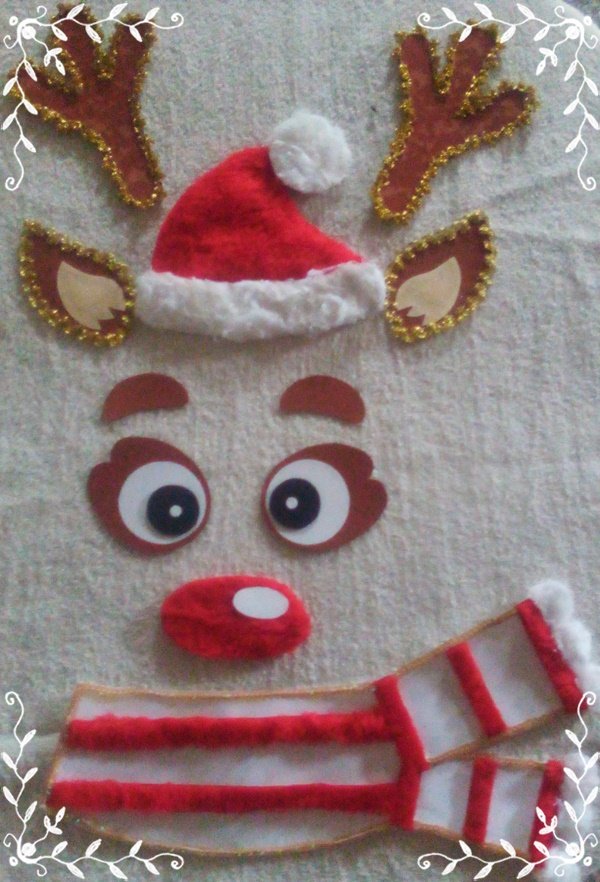
1.- Escogí una imagen de reno en internet. Me pareció muy original sacarlo por piezas, así realicé los moldes en hojas recicladas.
Procedure
1.- I chose an image of a reindeer on the internet. I thought it was very original to take it out in pieces, so I made the molds out of recycled sheets.
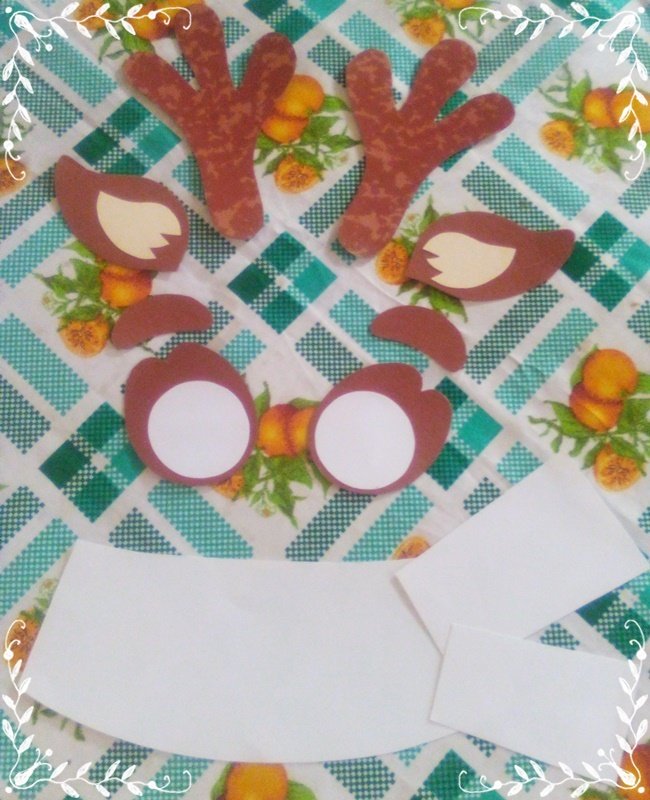
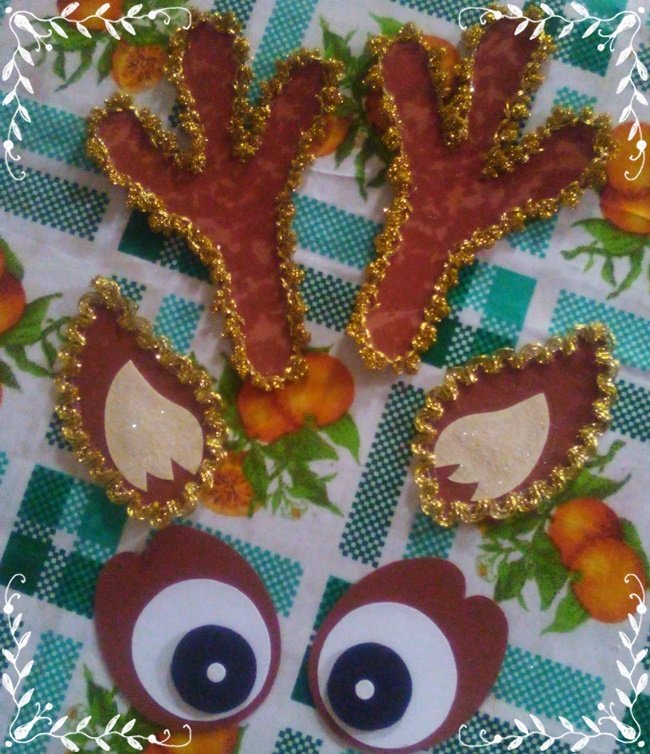
2.- Los cachos, las orejas y los ojos del reno los saqué en carpetas marrones para obtener el color deseado. Posteriormente, corté la pieza interior de las orejas en material manila y con la ayuda de un pincel le unté pega blanca y escarcha.
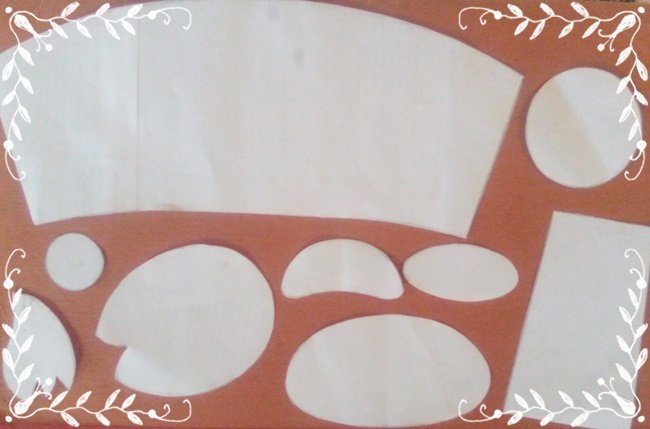
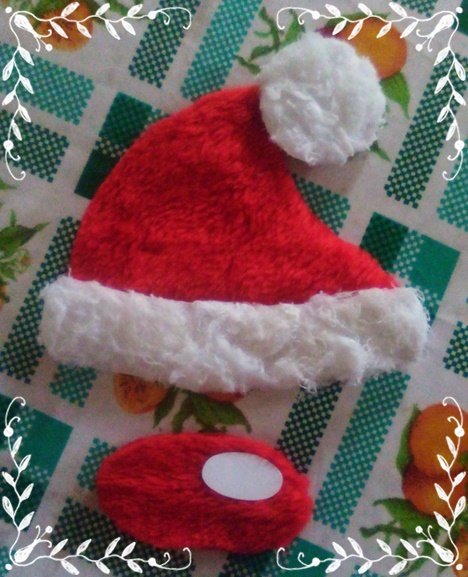
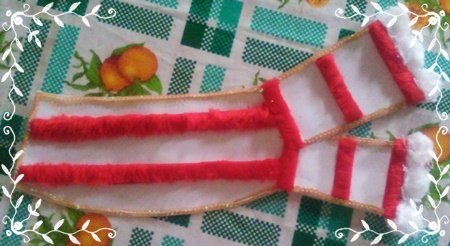
3.-Marqué y recorté en cartulina blanca la bufanda, la otra parte de ojos y las piezas del gorro navideño correspondientes a este color. A estas últimas las cubrí con guata para darle volumen, el silicón frío fue ideal para realizar este proceso.
2.- I took out the horns, ears and eyes of the reindeer in brown folders to obtain the desired color. Subsequently, I took out the inner piece of the ears in manila coverage and with the help of a brush I spread white paste and glitter on it.
3.-I marked and cut out the scarf, the other part of the eyes and the pieces of the Christmas hat corresponding to this color on white cardboard. I covered the latter with wadding to give it volume, the cold silicone was ideal for this process.
4.- Utilicé la tela de peluche rojo para sacar la estructura más amplia del gorro y las tiras de la bufanda.
5.- Los cachos del reno y sus orejas los decoré con encaje dorado por los bordes. Con esto se logró un toqué brillante muy llamativo.
4.- I used the red plush fabric to remove the wider structure of the hat and the straps of the scarf.
5.- I decorated the horns of the reindeer and its ears with gold lace around the edges. With this, a very striking bright touch was achieved.
6.- Adorné los bordes de la bufanda con lentejuelas transparentes para dar luminosidad.
7.- Utilicé el foami negro para terminar de hacer los ojos y le coloqué dos círculos blancos pequeños, los cuales moldeé en cartulina.
8.- Por último, utilizaremos las tachuelas para sujetar las piezas en la puerta de madera.
6.- I adorned the edges of the scarf with transparent sequins to give luminosity.
7.- I used the black foam to finish making the eyes and I placed two small white circles on it, which I molded out of cardboard.
8.- Finally, we will use the tacks to hold the pieces on the wooden door.


#posh
https://twitter.com/miuriel2015/status/1454072714029850624
https://twitter.com/miuriel2015/status/1454072714029850624
The rewards earned on this comment will go directly to the person sharing the post on Twitter as long as they are registered with @poshtoken. Sign up at https://hiveposh.com.
Congratulations @ramisey! You have completed the following achievement on the Hive blockchain and have been rewarded with new badge(s) :
Your next target is to reach 150 posts.
You can view your badges on your board and compare yourself to others in the Ranking
If you no longer want to receive notifications, reply to this comment with the word
STOPTo support your work, I also upvoted your post!
Check out the last post from @hivebuzz:
Support the HiveBuzz project. Vote for our proposal!
que bello el reno, ¡te quedó hermoso!
Gracias amiga
genial!!!. quedó muy lindo
Agradecida con tu comentario. Saludos
ohh!! Que agradable que a tu mami le guste la navidad, que bonito que decoren toda la casa..
Aprovecho para darle amor a tu post 😀
MALOMI LOVE ❤️
Gracias por comentar. Saludos y mis mejores deseos para ti.