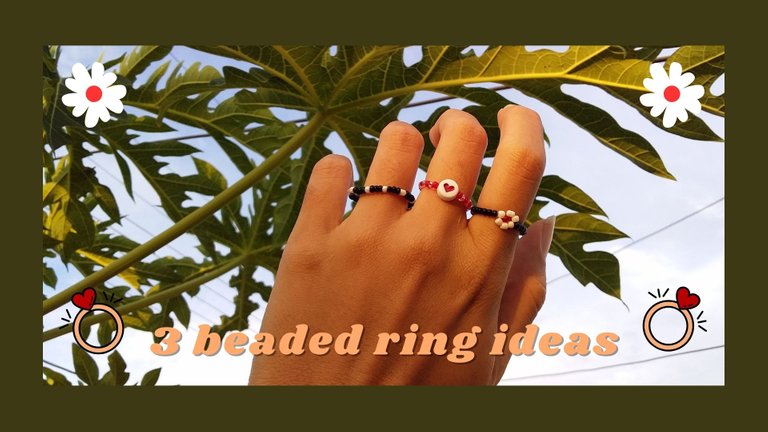
[ESP/ENG] 💍 3 ideas de anillos con cuentas | 3 beaded ring ideas 💍
💍 BIENVENIDOS A MI BLOG | WELCOME TO MY BLOG 💍
Saludos, gente bonita de hive, espero se encuentren muy bien. El día de hoy traigo para ustedes 3 lindas ideas de anillos elaborados con cuentas. Últimamente han estado muy de moda este tipo de accesorios con esa onda ''aesthetic'' así que me animé a elegir 3 diseños y recrearlos para ustedes. Son mega sencillos de hacer y no se requiere de muchos materiales, así que empecemos.
Greetings, beautiful people of hive, I hope you are very well. Today I bring for you 3 nice ideas of rings made with beads. Lately have been very fashionable this kind of accessories with that ''aesthetic'' vibe so I decided to choose 3 designs and recreate them for you. They are mega simple to make and do not require many materials, so let's get started.
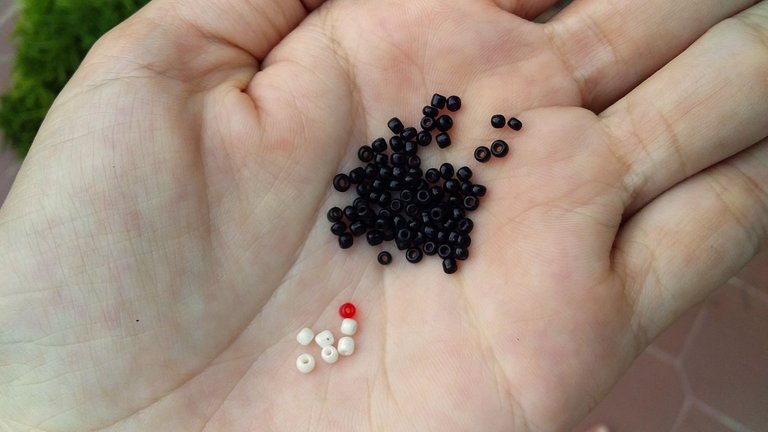
Materiales | Materials:
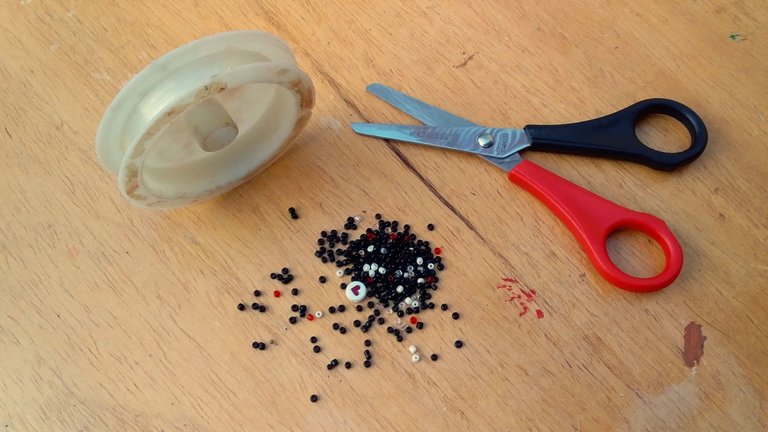
| Cuentas | Hilo de nylon | Tijeras |
|---|
| Beads | Nylon thread | Scissors |
|---|
💓 PRIMERA IDEA | FIRST IDEA 💓

Para este primer anillo necesitaremos cuentas de dos colores diferentes y una blanca con algún diseño. En mi caso utilicé rojas, transparentes y una con diseño de corazón. Me pareció que todas combinadas se verían muy bien, además que las transparentes darían una vibra más ''aesthetic''.
For this first ring we will need beads of two different colors and a white one with some design. In my case I used red, transparent and one with a heart design. I thought that all of them combined would look great, plus the transparent ones would give a more ''aesthetic'' look.
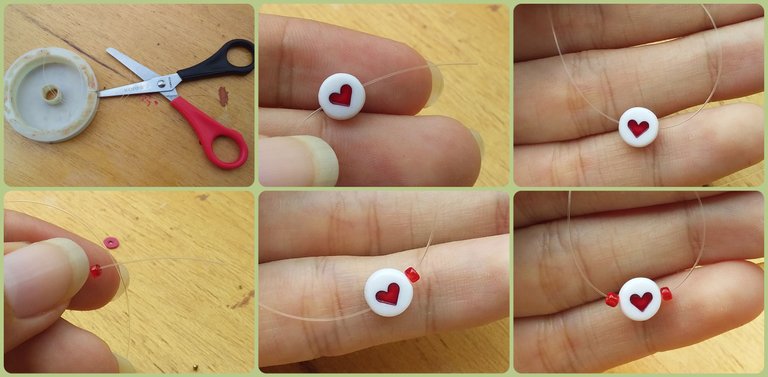
Empezaremos por cortar un trozo de nylon y pondremos primero la cuenta con diseño, luego una cuenta del mismo color a cada lado.
We will start by cutting a piece of nylon and we will put first the bead with design, then a bead of the same color on each side.
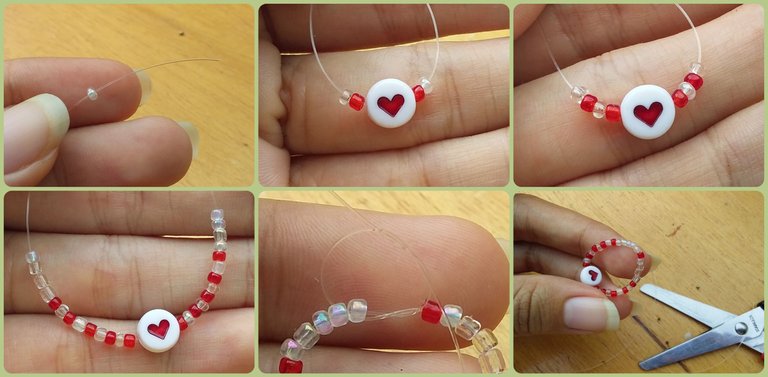
Pondremos una de otro color a cada lado y poco a poco iremos alternando colores hasta llegar a la medida de nuestro dedo. Para terminar ataremos un nudo doble y cortamos los excesos.
We will put one of another color on each side and little by little we will alternate colors until we reach the size of our finger. To finish we tie a double knot and cut off the excess.
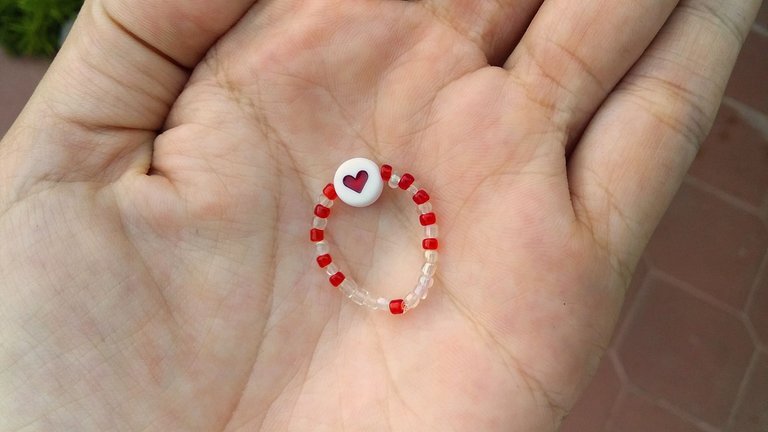
Y listo nuestro anillo!
And our ring is ready!
🌼 SEGUNDA IDEA | SECOND IDEA 🌼
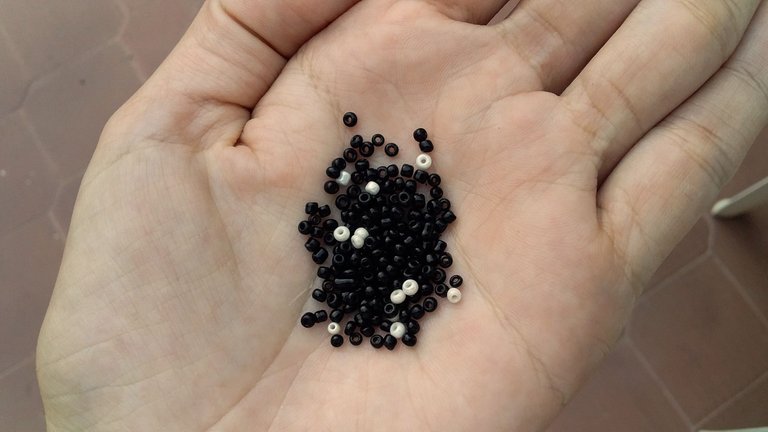
En esta segunda idea (y mi favorita) haremos un anillo de margarita, para ello necesitaremos 6 cuentas blancas para los pétalos, 1 de cualquier color para el centro y el resto pueden ser de otro color.
En mi caso utilicé rojo para el centro y negro para el resto del anillo.
In this second idea (and my favorite) we will make a daisy ring, for this we will need 6 white beads for the petals, 1 of any color for the center and the rest can be of another color.
In my case I used red for the center and black for the rest of the ring.
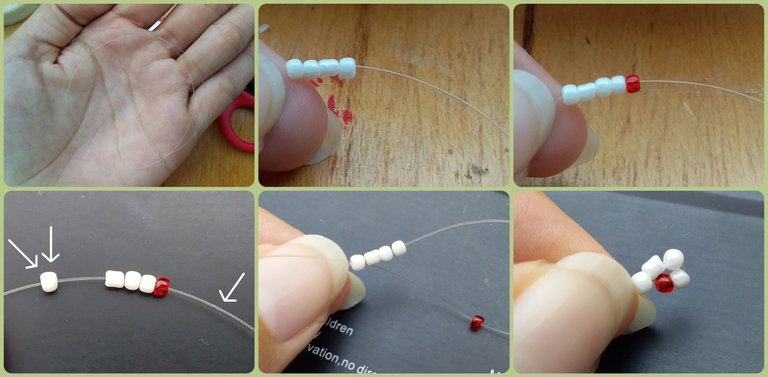
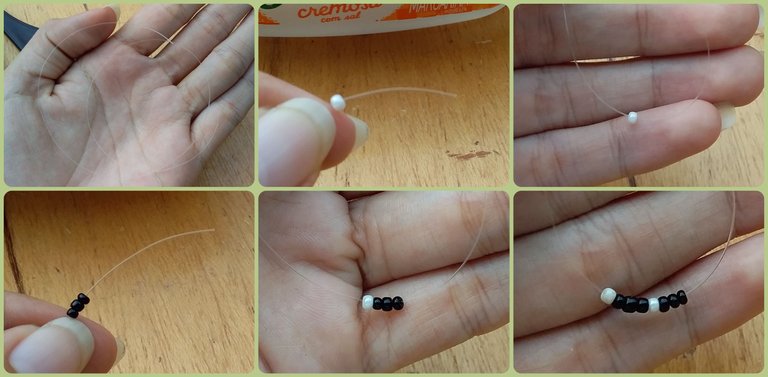
Cortaremos un trozo de nylon, pondremos 4 cuentas blancas y luego la cuenta que irá en el centro.
Lo siguiente será pasar el hilo del lado derecho a través de la primera cuenta blanca (como se muestra en las fotos) y halar hasta que quede la forma de media flor.
We will cut a piece of nylon, we will put 4 white beads and then the bead that will go in the center.
Next, pass the thread on the right side through the first white bead (as shown in the pictures) and pull until you get a half flower shape.
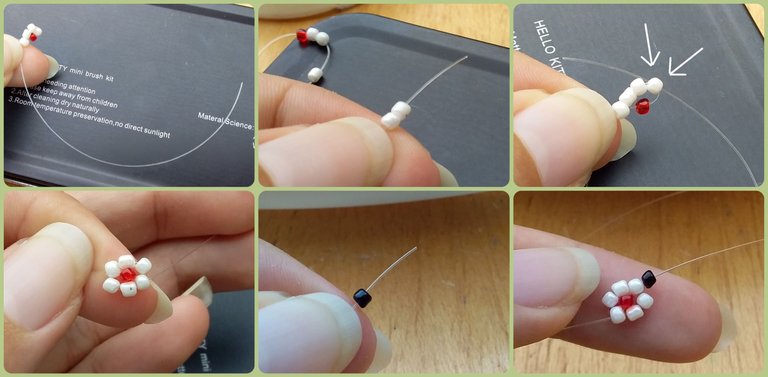
Tomaremos el mismo hilo y le pondremos las otras 2 cuentas blancas. Lo pasamos a través de la cuenta del lado derecho (que marca la flecha) y halamos. Una vez con nuestra margarita lista, iremos pasando cuentas de cada lado...
We will take the same thread and attach the other 2 white beads to it. We pass it through the bead on the right side (marked by the arrow) and pull. Once we have our daisy ready, we will pass the beads on each side...
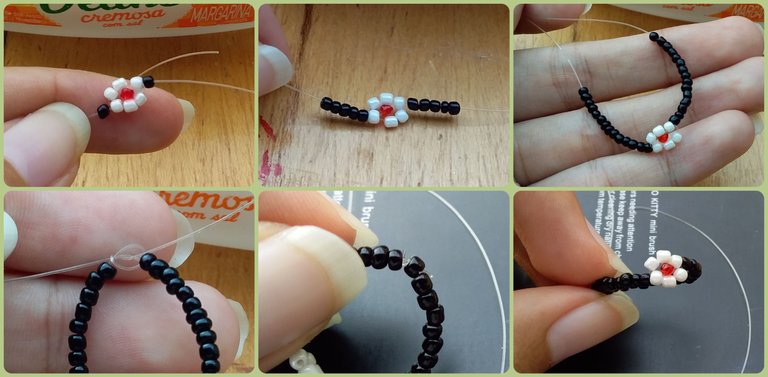
hasta llegar a la medida de nuestro dedo. Hacemos doble nudo, cortamos y listo.
until we reach the size of our finger. We make a double knot, cut and ready.
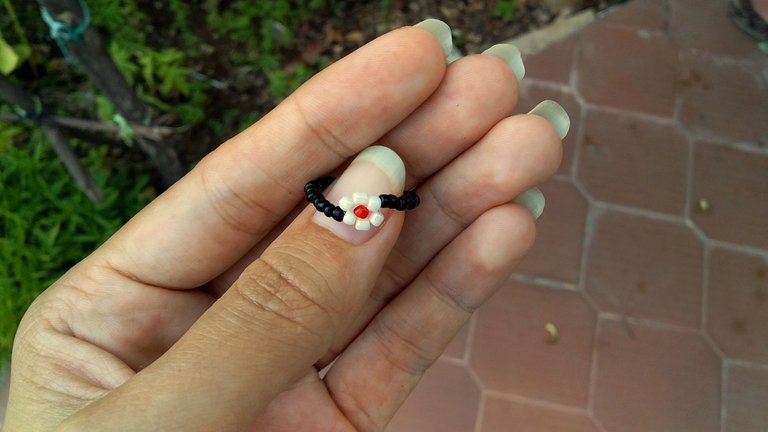
Listo nuestro segundo anillo (este es mi favorito por mucho)
Ready our second ring.
💍 TERCERA IDEA | THIRD IDEA 💍
Este es el más sencillo de todos, pero junto con los dos anteriores siento que se complementan muy bien. Necesitaremos cuentas de solo 2 colores para este modelo.
This is the simplest of them all, but together with the previous two I think they complement each other very well. We will need beads of only 2 colors for this idea.
Lo único que haremos será pasar 1 cuenta de un color primero y luego 3 de otro color.
The only thing we will do is to pass 1 bead of one color first and then 3 of another color.
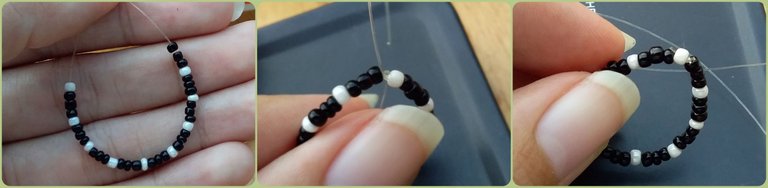
Asi iremos hasta llegar a la medida de nuestro dedo, hacemos doble nudo y cortamos el excedente.
This way we will go until we reach the measure of our finger, we make a double knot and cut the excess.
💍 🌼 💓 RESULTADO | RESULT 💓 🌼 💍
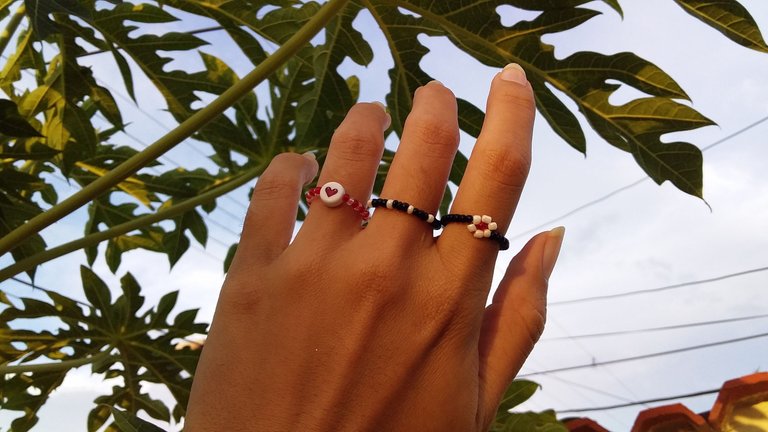
Listo nuestros anillos.
Amé totalmente como se ven todos juntos y espero que a ustedes también les haya gustado. Esto ha sido todo por hoy, gracias por leerme!
Ready our rings.
I totally loved how they all look together and I hope you guys liked it too. That's all for today, thanks for reading!

Congratulations @paugomez! You have completed the following achievement on the Hive blockchain and have been rewarded with new badge(s) :
Your next target is to reach 40 posts.
You can view your badges on your board and compare yourself to others in the Ranking
If you no longer want to receive notifications, reply to this comment with the word
STOPTo support your work, I also upvoted your post!
Check out the last post from @hivebuzz:
Que cutie! Recordé mi infancia cuando las piezas de este tipo estaban súper de moda, especialmente las pulseras de 1 sola cadenita de mostacilla. Te quedaron muy lindos 🥰
Muchas gracias, a mi igual me recuerda mi infancia. Cuando peque había hecho un curso de bisutería con swarovski y mostacilla, hacer esto me llevó a esa época y me sentí feliz. Me alegra que te haya gustado n.n💖