Chocolate Treats #2 - No-Bake Chocolate Cheesecake
I love baking and every once in a while, I get myself to take some pictures of the process to post here on HIVE! So far, I've posted a Lava Cake that I make for my friends and I will stay on the path of chocolate-y things. In fact, I doubt that I will post much non-chocolate stuff at all, as baking is way more fun than cooking.
Add to that the fact that my girlfriend absolutely loves chocolate, I get inspired to try new interesting recipes every week! This time, I finally got myself to document making a dish that can apparently be a little controversial, at least according to my family - a no-bake cheesecake! Chocolate, of course.
The Recipe

I don't know why the cocoa is there.. But the rest are all the needed ingredients!
The recipe for this cheesecake is extremely easy and mostly includes ingredients that you have at home - or can find them at the nearest store! The cake is made in two parts: the bottom crust and the cheesecake proper. Here's the recipe - keep in mind I eyeball pretty much everything so adjust the numbers to your liking!
Crust:
~125g Melted Butter
~50g Sugar - You can totally skip sugar or just add almost none - my target group for this cheesecake is a bunch of sweettooth people.
-350g Chocolate crackers crushed - the degree of crushed is up to you - some like it almost like big sand, but I enjoy when there is quite a bit of the bigger pieces.
Cheesecake:
~700g Cream Cheese
~200g Powder Sugar
200g Milk Chocolate
150g Dark Chocolate
60g Sour Cream
1 tsp Vanilla Extract
The Process
So we got the ingredients, but what do we need to do to make this into a decadent chocolate treat? Well, let's dive in!
For the crust, start by crushing the crackers. I do it by simply putting them in a rather airtight plastic bag and then mashing them with my hammer, but you can also use a rolling pin or a food processor. Put them into a bowl and add sugar. While doing that, melt the butter and while it is still hot, pour it into the bowl. Stir the mixture until the texture is a bit like big wet grains of sand, after which you can fill out the bottom with a cake form with it. Let it cool in the fridge.
Then we can start with the real exciting part. Get a large bowl and put all the cream cheese into it. Mix it with a mixer until it is smooth, then add the powder sugar. Repeat and then you can finish off the easy part by mixing in the sour cream and vanilla extract. Here's when the fun starts, as we need to get the chocolate in.
First of all, we need to melt the chocolate. The way I do it is heat up water in a dish, after which I place a bowl with chocolate in it on top. This way the heat slowly melts the chocolate in an extremely satisfying fashion. Then once it's melted, let it cool down to room temperature and pour into the bowl with the rest of the mixture. Mix it for a few minutes until it is almost silky.. but do not overmix, as that could ruin the chocolate!
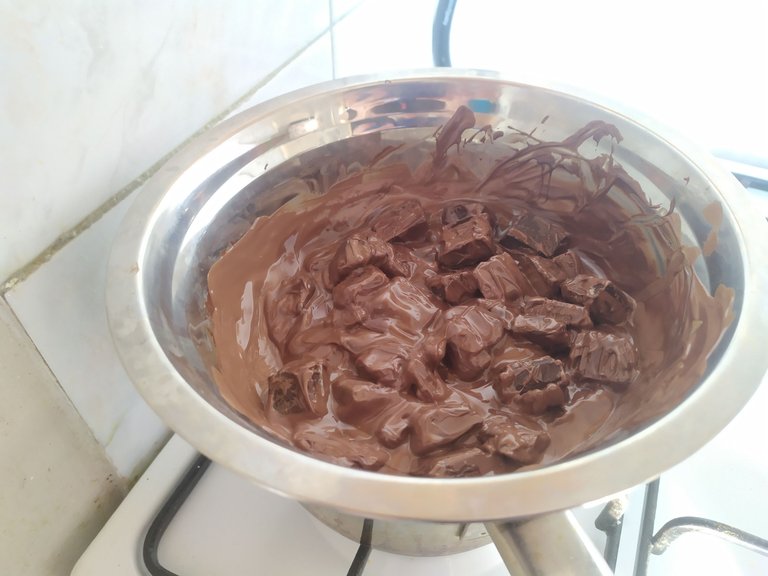
Just look at this melting goodness.
That's it for the recipe, all you need to do is let it cool in the fridge for 2-3 hours before it's at its best! I absolutely love this cheesecake and my girlfriend could eat it without stopping - it's an absolutely awesome treat! I believe the general idea for this recipe is one that my friend found on the internet. I couldn't find it right now, but whoever it was - thank you so much, as I couldn't imagine life without it!
Pictures
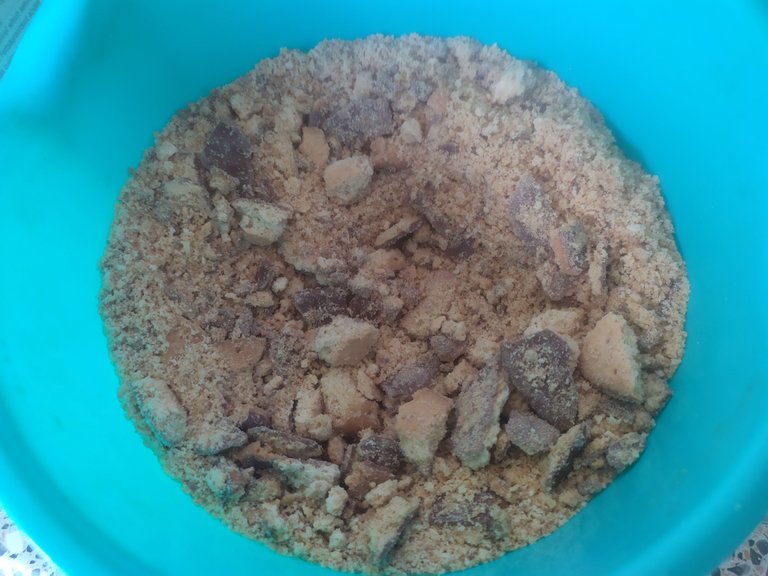
The crushed cookies.
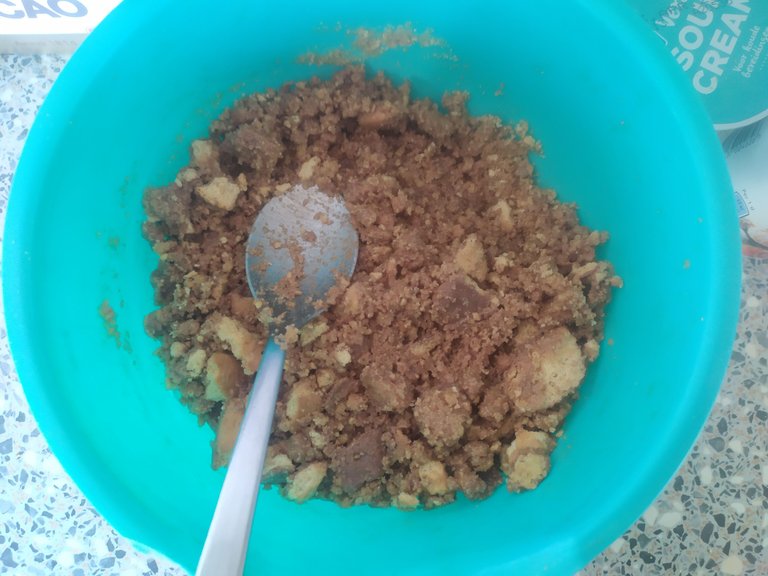
The final texture of the bottom crust.
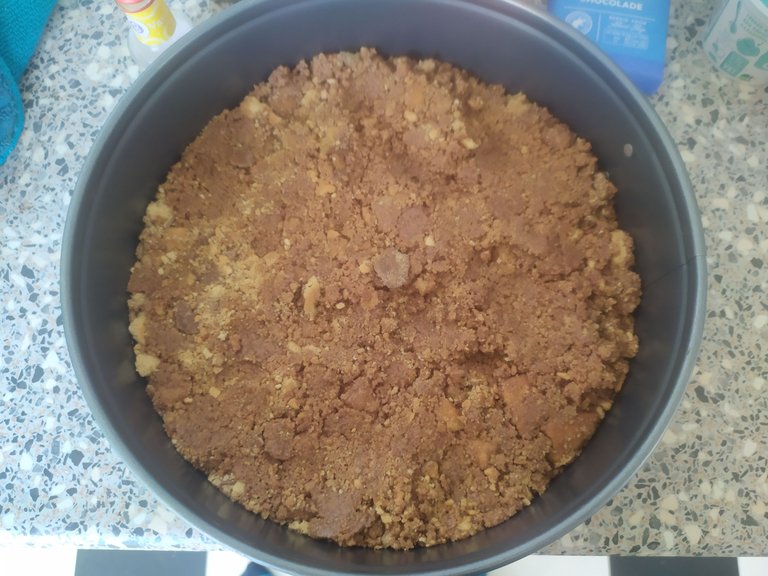
The crust in the cakeform!
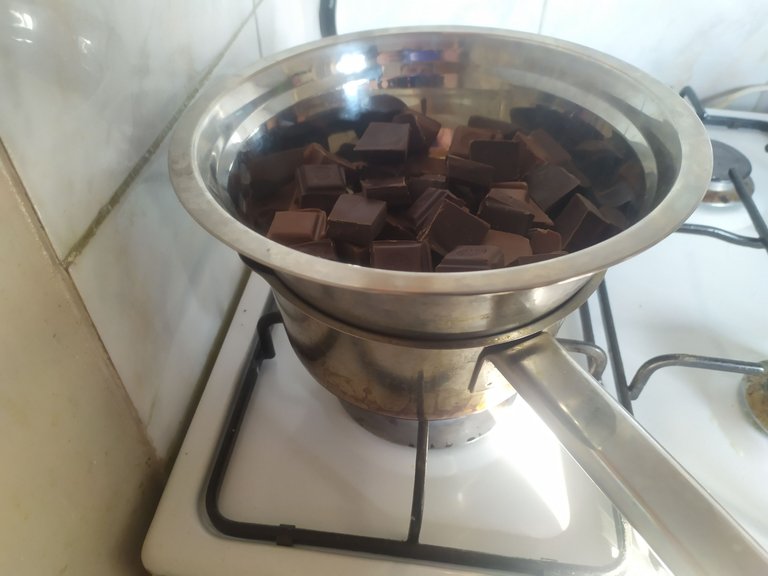
Chocolate ready to be melted.
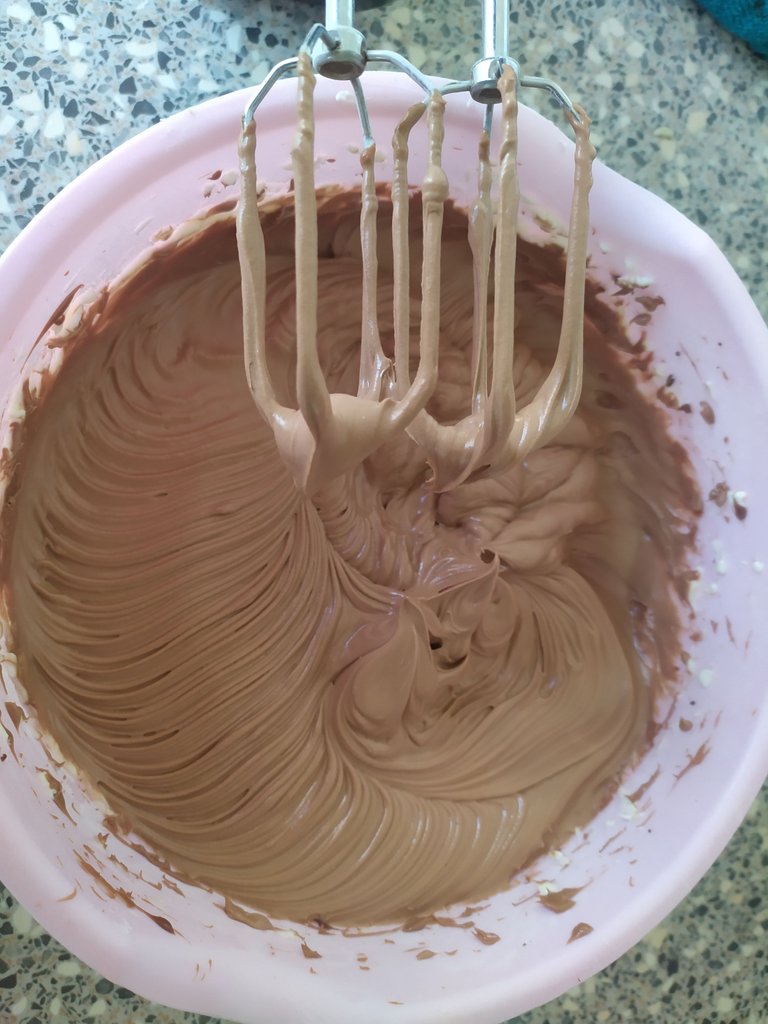
Silky and smooth, ready to be put on top of the crust.
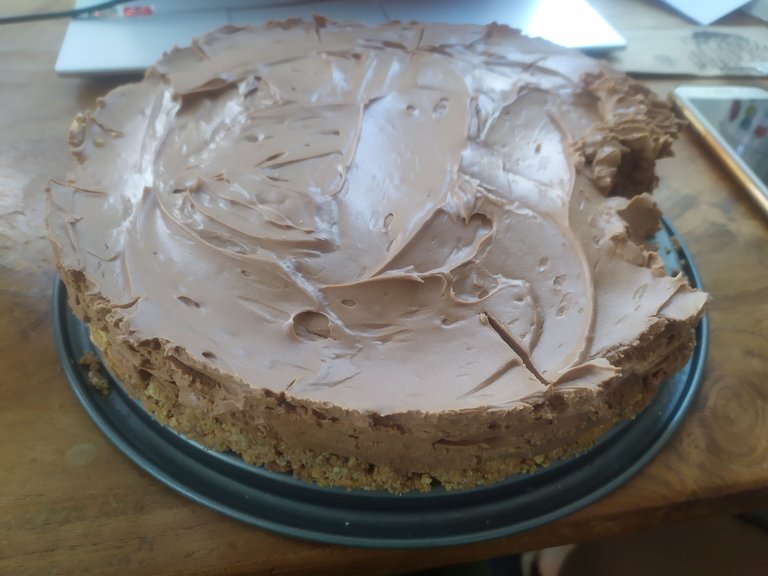
The final look of the cheesecake - well, someone already dove in!
That looks REALLYYYYY good.
The melting process is lovely, the final Process after being put on the crust is amazing. Do you by any chance put it in the refrigerator after that?
yes yes, it's 30 mins for crust in the fridge, and then the whole thing goes into the refrigerator for 2-3 hours! I thought I put it in text, might have missed it!
Yum! You have been curated @anggreklestari on behalf of FoodiesUnite.net on #Hive. Thanks for using the #foodie tag. We are a tribe for the Foodie community with a unique approach to content and community and we are here on #Hive.
Join the foodie fun! We've given you a FOODIE boost. Come check it out at @foodiesunite for the latest community updates. Spread your gastronomic delights on and claim your tokens.
Join and Post through the Community and you can earn a FOODIE reward.
Your content has been voted as a part of Encouragement program. Keep up the good work!
Use Ecency daily to boost your growth on platform!
Support Ecency
Vote for new Proposal
Delegate HP and earn more