[Esp/Eng] DIY: Ramo de rosas eternas 🌹🥀 || Bouquet of eternal roses 🌹🥀

Spanish
Hola hola gente bonita de hive, paso por aquí una vez más. Esta vez para mostrarles está creación de mi nuevo emprendimiento VELVET.
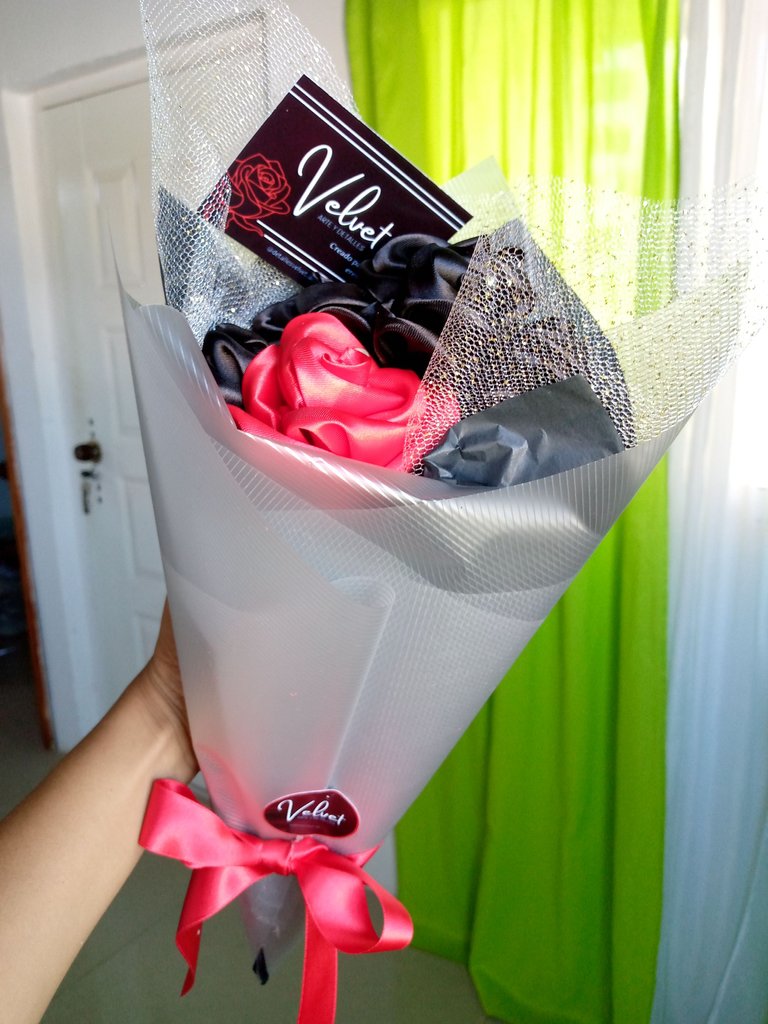
Un hermoso Ramo de rosas eternas, ideales para regalar🌹Y aprovechando que viene el dia de las madres les comparto el tutorial.
Hello hello beautiful people of hive, I stop by here once again. This time to show you this creation of my new venture [VELVET](https://www.instagram.com/detallesvelvet.art?igsh=MWhhcGZyaWh4N3c4ZA==).
A beautiful bouquet of eternal roses, ideal for giving as a gift🌹And taking advantage of Mother's Day coming, I share the tutorial with you.
Necesitamos:
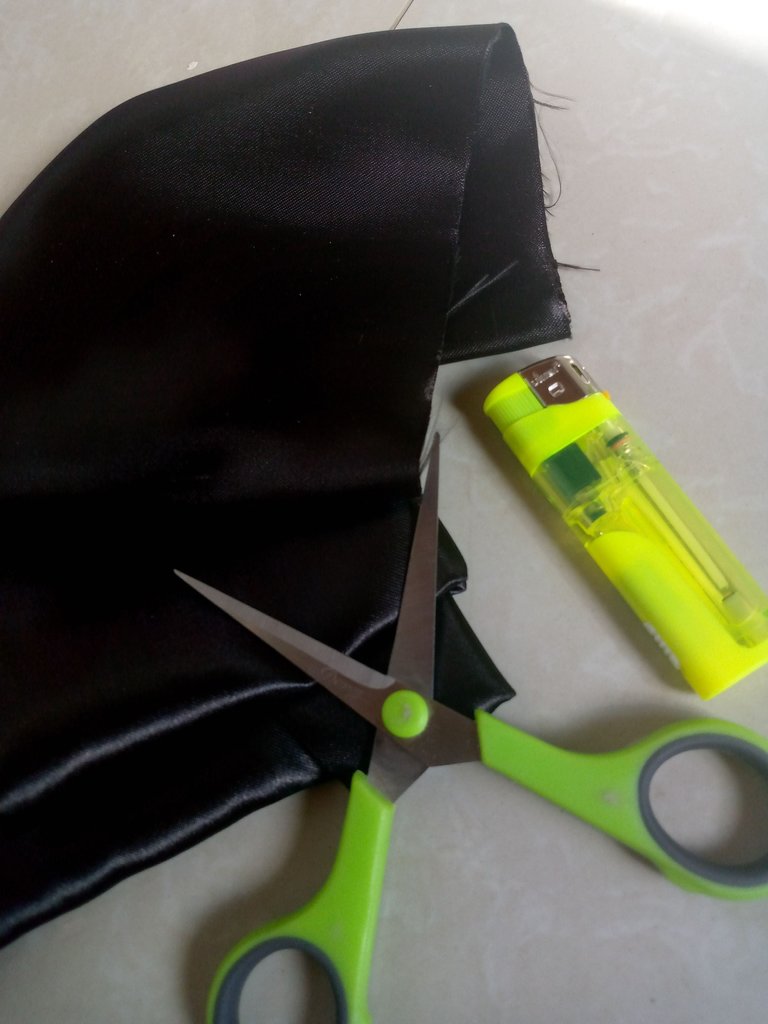
Tela de Razo o cinta de Razo.
Silicón
Palillos de altura
Papel coreano
Papel de seda
Procedimiento:
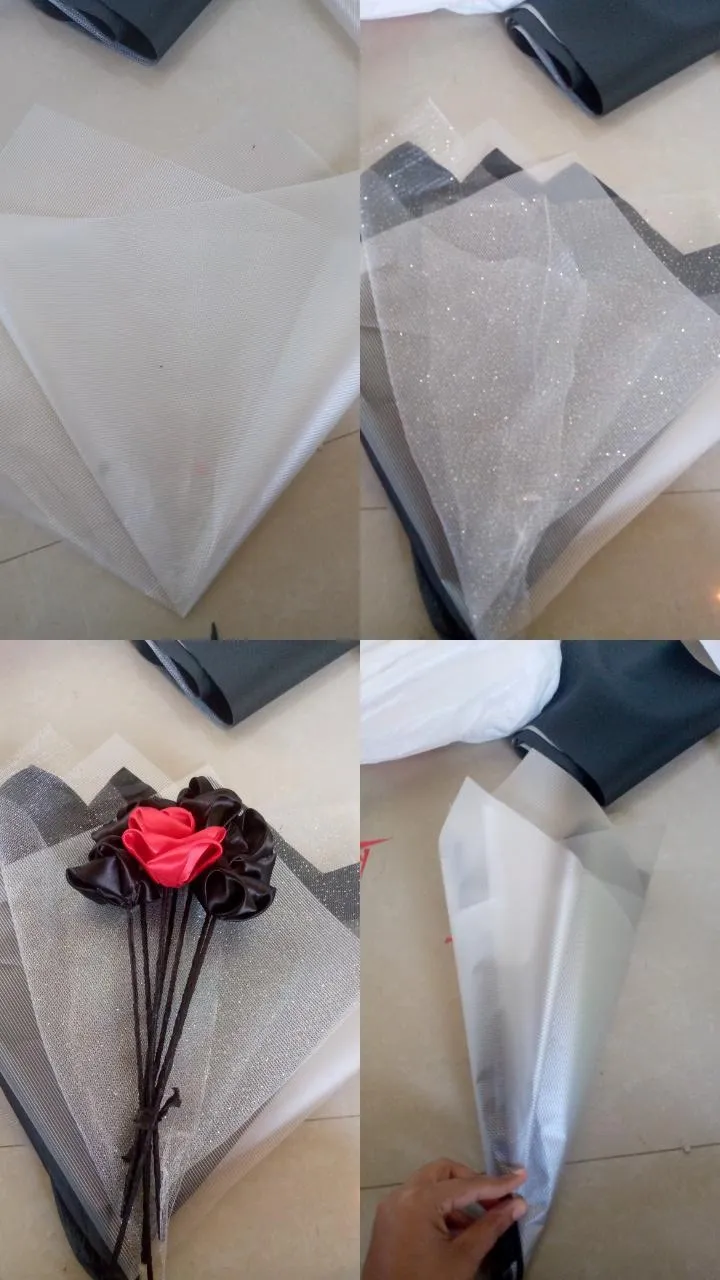
•Lo principal es cortar la tela de Razo en cuadros del tamaño que más te guste, yo utilicé una medida de 8x8cm.
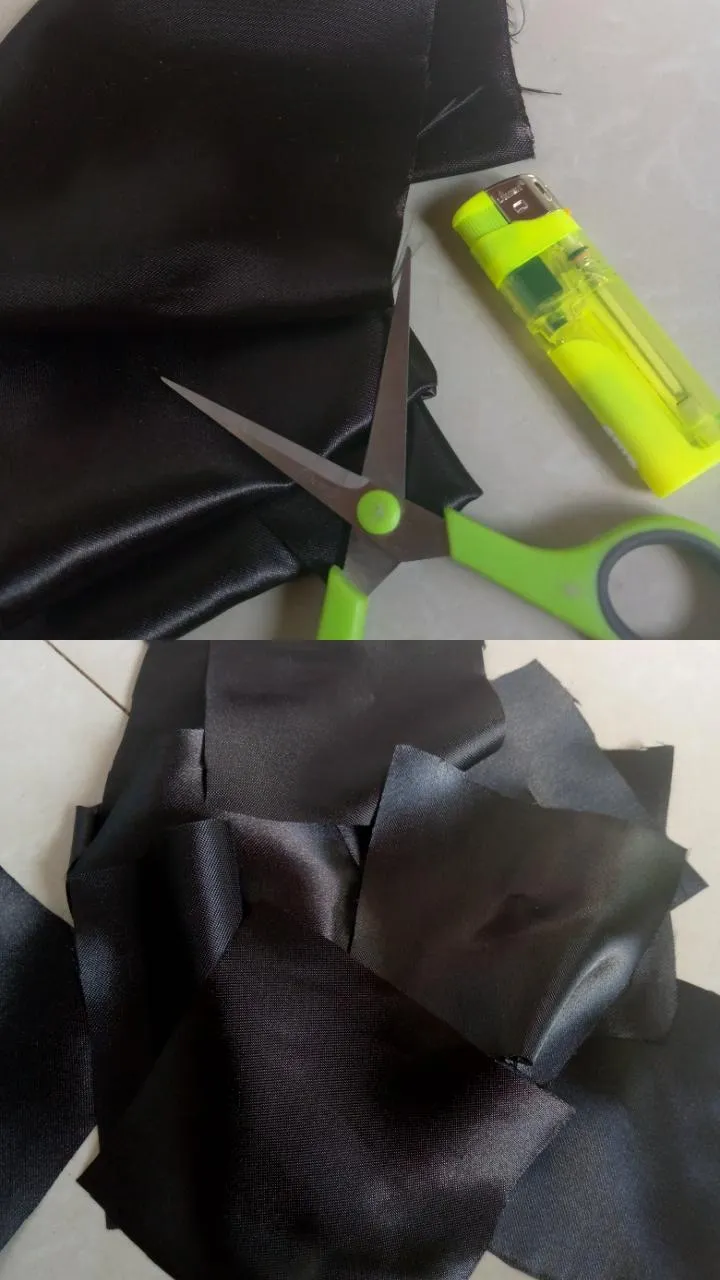
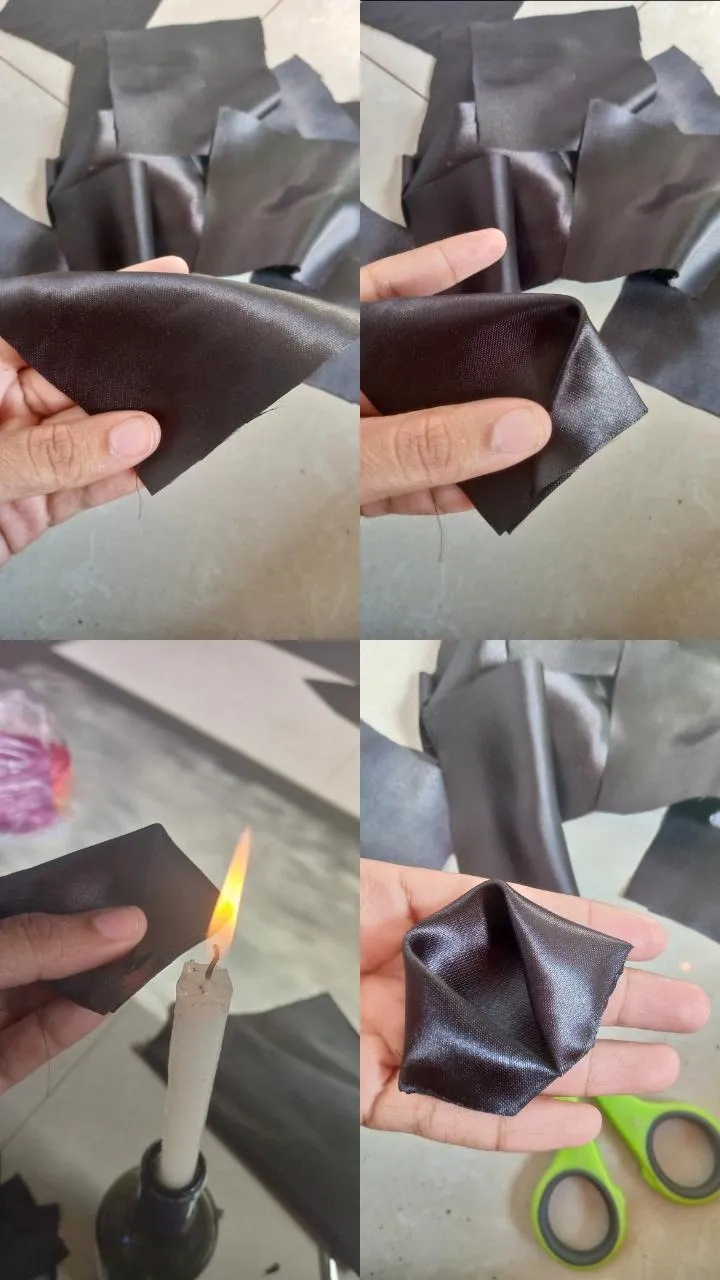
•Después hacemos los pétalos uno a uno como muestra en la imagen👇👇, los lados los vamos a quemar con el yesquero o vela para unirlos. En este caso yo utilicé tela negra y roja, y 6 pétalos para las rosas negras y 8 para la roja.
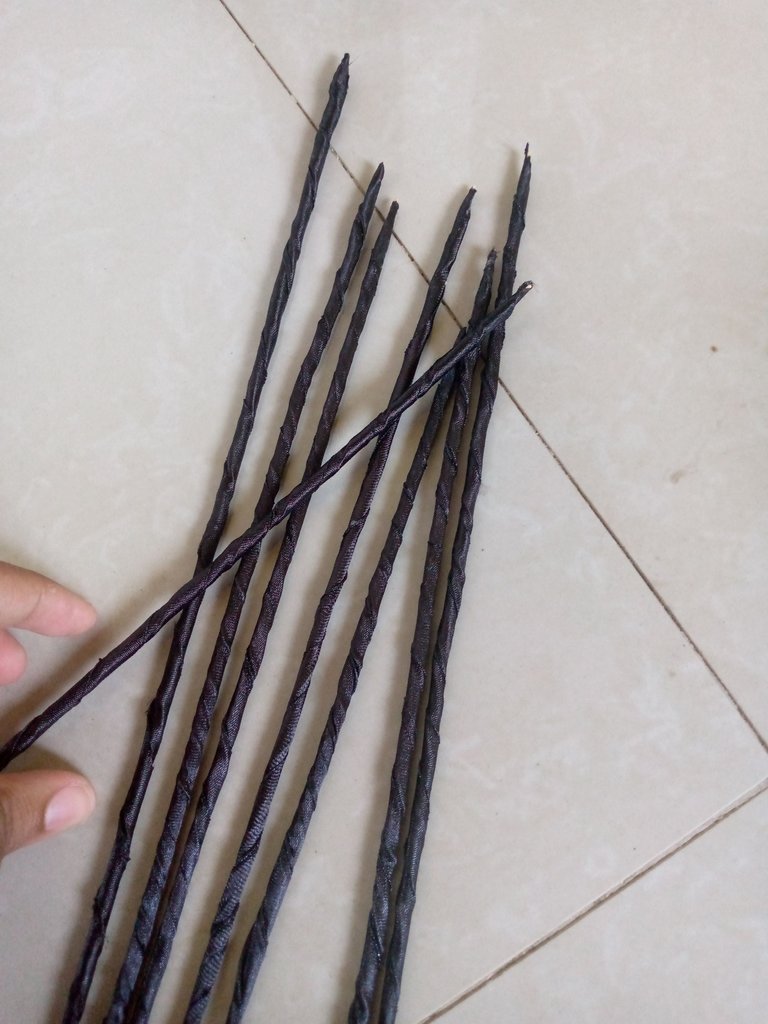
•Ahora forramos con palillos con tela o cinta
•Llegó la hora de armar las rosas, empezamos enrollando el primer pétalo con el doblez hacia adentro en el palillo de esta forma.
•Pegamos los pétalos uno a uno, de esta forma y empezamos a enrollar en el capullo ya listo.
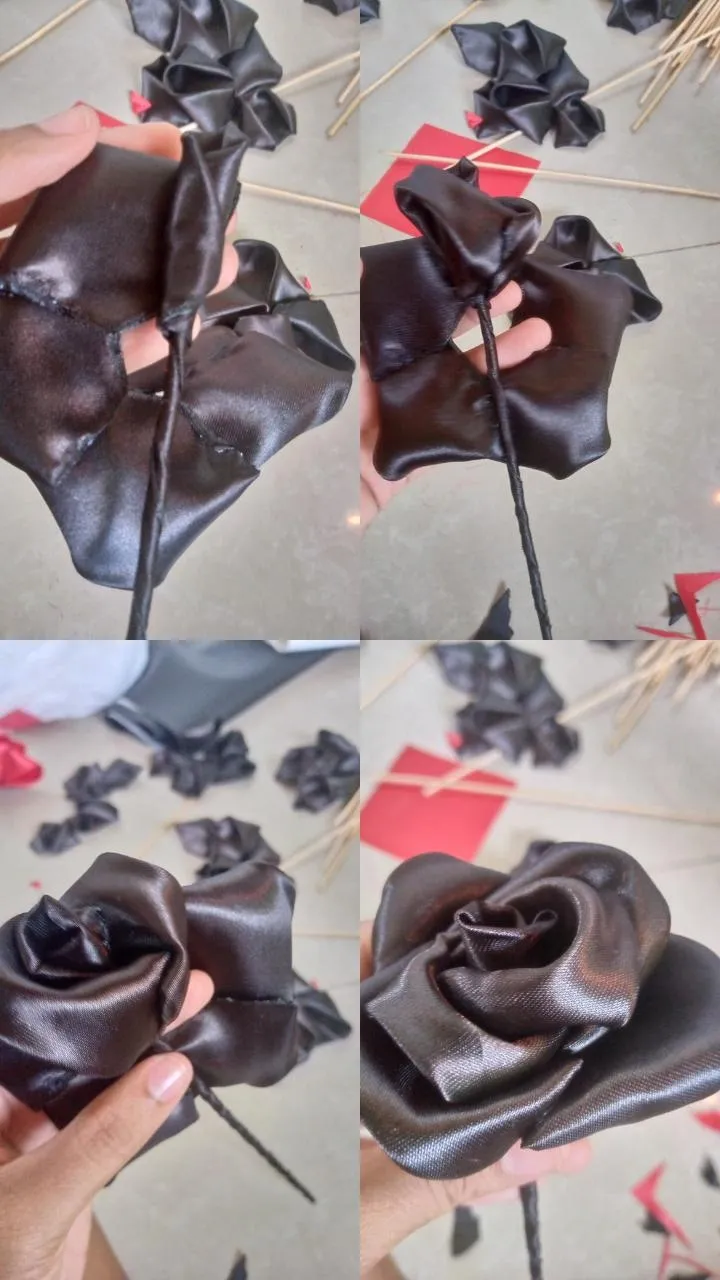
•Al finalizar quedará de esta forma, yo agregué un cristal para decorar.
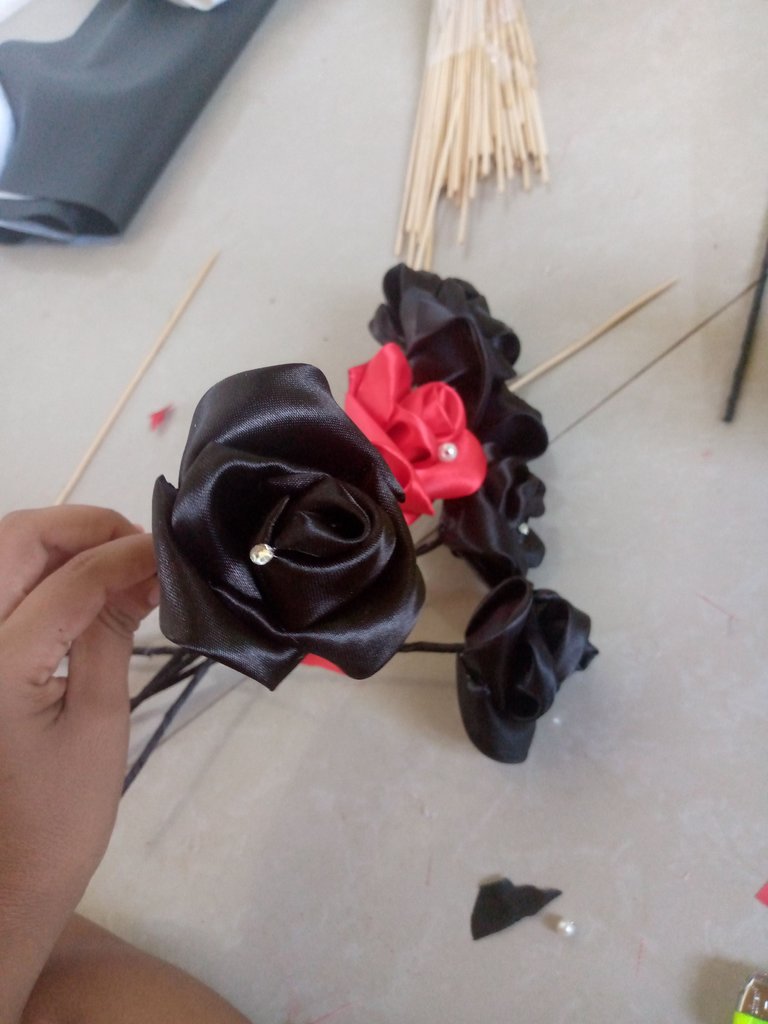
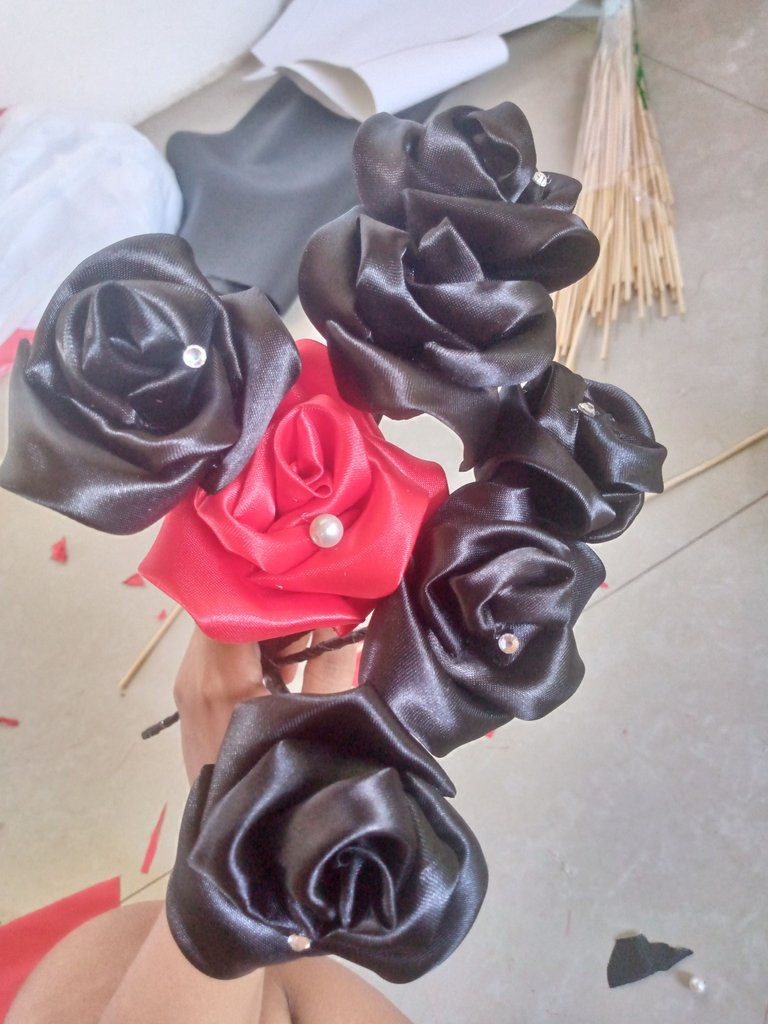
•Repetimos el procedimiento todas las veces necesarias hasta llegar el número de nuestro ramo.
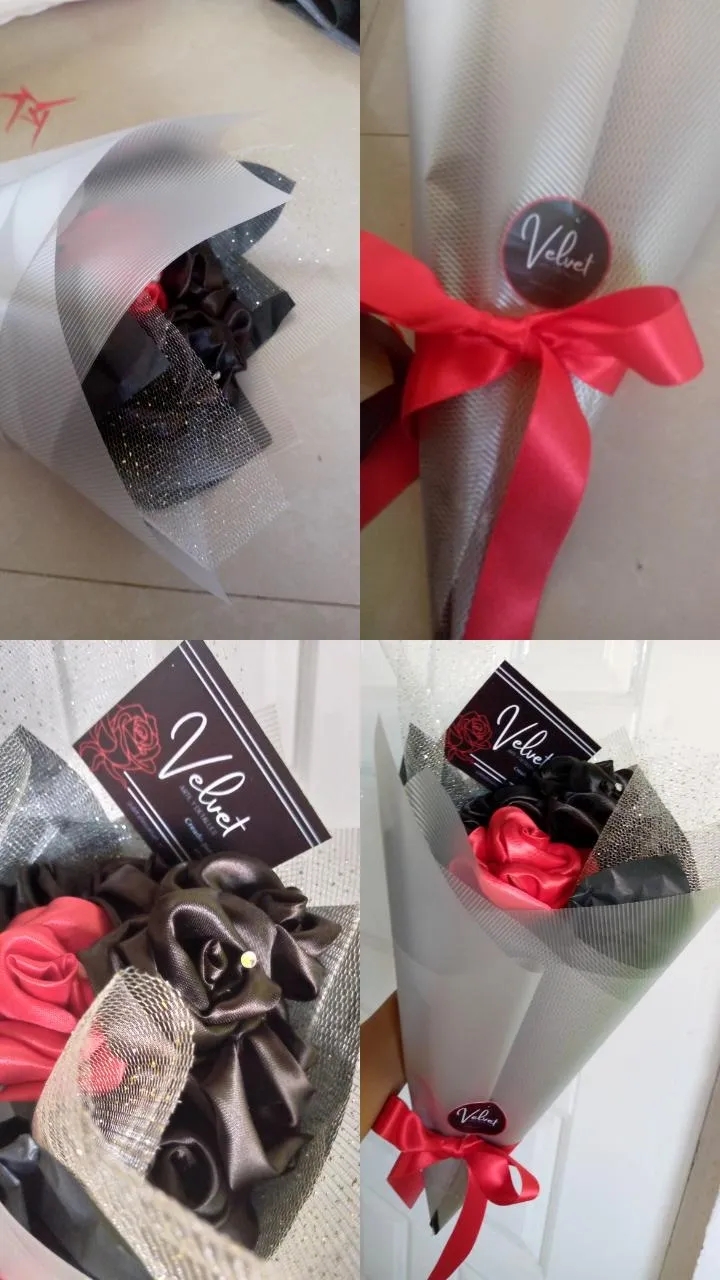
•Una vez listas las rosas, toca envolverlas, para esto necesitamos papel coreano, papel de seda y yo agregué un toque de tul fiesta.
Agregue un lazo en cinta, el stiker y tarjeta de mi marca para finalizar, espero les haya gustado este hermoso resultado:
Pueden seguirme en Instagram como @detallesvelvet.art estoy ubicada en la isla de Margarita. Hay muchos ramos y bouquet Disponibles para el día de las madres, también tengo delivery 🌹🌹🌹
English
We need:
Razo cloth or Razo tape.
Silicone
Chopsticks height
Korean paper
Silk paper
Procedure:
•The main thing is to cut the Razo fabric into squares of the size you like best, I used a measurement of 8x8cm.
•Then we make the petals one by one as shown in the image👇👇, we are going to burn the sides with the tinderbox or candle to join them. In this case I used black and red fabric, and 6 petals for the black roses and 8 for the red one.
•Now we cover with toothpicks with fabric or tape
•It was time to assemble the roses, we started by rolling the first petal with the fold facing inward on the toothpick like this.
•We glue the petals one by one, like this, and begin to roll them into the ready cocoon.
•When finished it will look like this, I added a crystal to decorate.
•We repeat the procedure as many times as necessary until we reach the number of our branch.
•Once the roses are ready, it's time to wrap them, for this we need Korean paper, tissue paper and I added a touch of party tulle.
Add a ribbon bow, my brand sticker and card to finish, I hope you liked this beautiful result:
You can follow me on Instagram as @detallesvelvet.art, I am located on the island of Margarita. There are many bouquets and bouquets available for Mother's Day, I also have delivery 🌹🌹🌹
Si llegaste hasta aquí, muchas gracias por leerme, nos vemos en un próximo post💞
If you made it this far, thank you very much for reading, see you in the next post💞

Un trabajo excelente! Nada que envidiar a las que pueden verse en algunas tiendas
Gracias, que lindo! Saludos🌷💞
quedo genial! gran trabajo!
it looked great! great job!
Gracias! Me legra mucho que sea de tu agrado 🌷💛
!DIY.!
!discovery 30
This post was shared and voted inside the discord by the curators team of discovery-it
Join our Community and follow our Curation Trail
Discovery-it is also a Witness, vote for us here
Delegate to us for passive income. Check our 80% fee-back Program
You can query your personal balance by
!DIYSTATSa beautiful bouquet to commemorate the beautiful celebration of mother's day. Buen Trabajo
Gracias un placer que lo hayan leído 💞✨
Que proceso, pero vale la pena con el resultados, te felicito por como te quedó el ramo.
Si, es bastante satisfactorio el resultado. Gracias amigo, saludos!