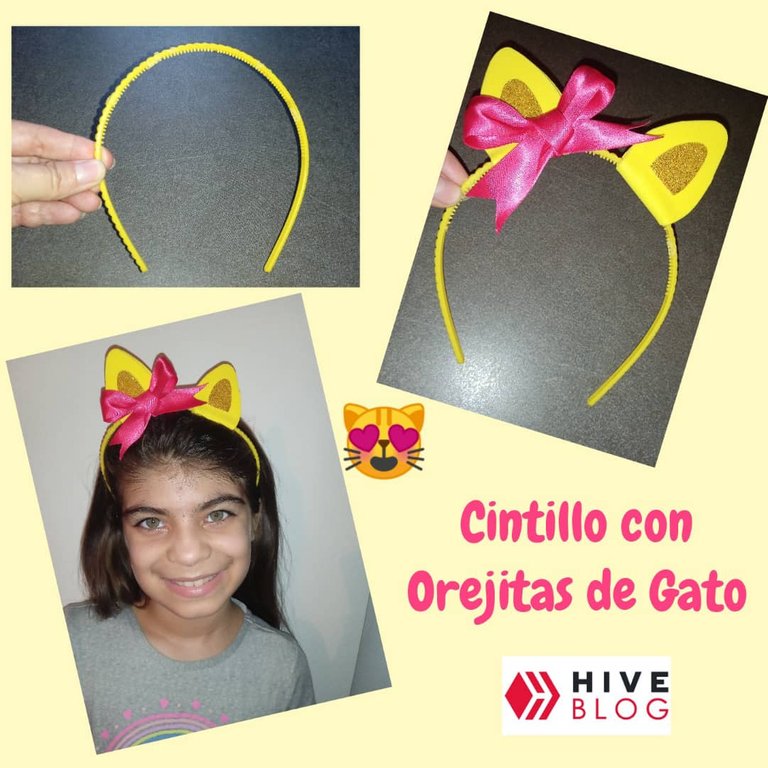
[ESP-ENG] 😻 Así Transforme un Simple Cintillo en uno Hermoso y Llamativo con Orejitas de Gato 😻/This is how I transformed a Simple Headband into a Beautiful and Eye-catching one with Cat Ears 😻
Hola, buenas noches 😘, espero estén muy bien por esta comunidad de Hive Diy, en esta oportunidad les mostraré como transforme un simple cintillo, en uno Hermoso, llamativo y divertido con Orejitas de Gato 😻, se realiza de forma fácil y rápido, necesitamos pocos materiales y así nuestras pequeñas se verán mucho más lindas, lo mejor de este proyecto es que podemos realizar la combinación de colores que deseamos, en esta ocasión yo lo hice amarillo y fucsia, todo depende de la combinación que necesite.
Hello, good evening 😘, I hope you are very well for this Hive Diy community, this time I will show you how to transform a simple headband into a beautiful, striking and fun one with Cat Ears 😻, it is done easily and quickly, we need few materials and so our little ones will look much prettier, the best thing about this project is that we can make the color combination we want, this time I did yellow and fuchsia, it all depends on the combination you need.
😻 Así Transforme un Simple Cintillo en uno Hermoso y Llamativo con Orejitas de Gato 😻
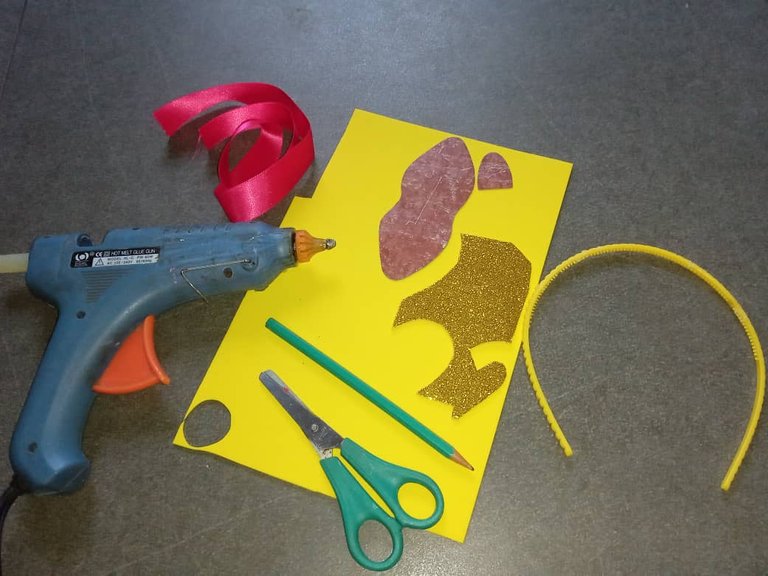
Materiales
1 cintillo plástico
Foami amarillo y dorado escarchado
Tijera
Lápiz
Silicón caliente
Cinta de tela fucsia
Molde en cartulina para orejitas de gato
😻 So Transform a Simple Headband into a Beautiful and Eye-Catching One with Cat Ears 😻 # Materials
1 plastic headband
Frosted yellow and gold foami
Scissors
Pencil
hot silicone
fuchsia fabric ribbon
Cardboard mold for cat ears
Procedimiento/Process
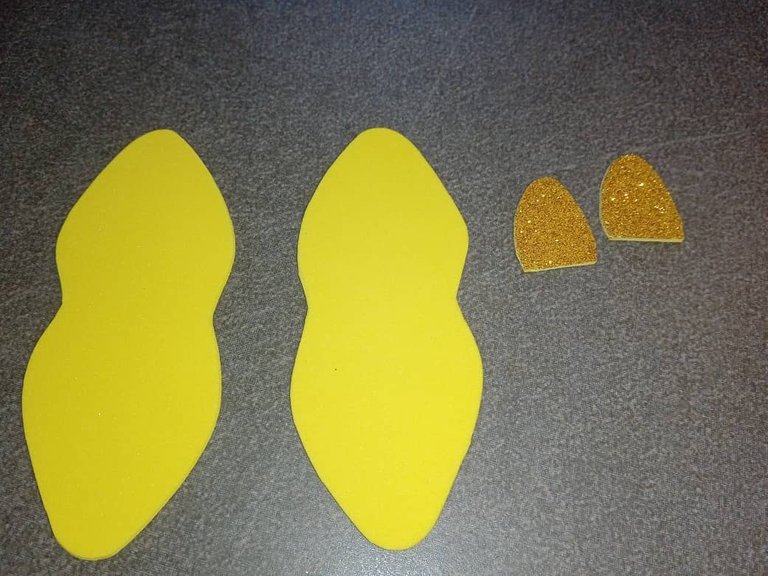
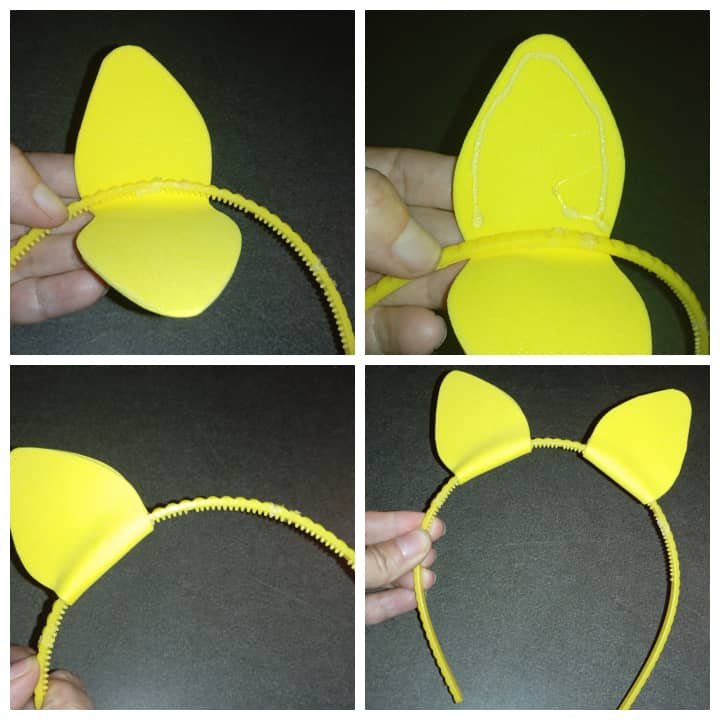
1.En este primer paso vamos a transferir en el foami amarillo el molde de la orejita de gato ( de aproximadamente 12 cm de largo), por 2 veces, la cual debe quedar de la siguiente forma:
1.In this first step we are going to transfer the cat ear mold (approximately 12 cm long) into the yellow foami, 2 times, which should be as follows:

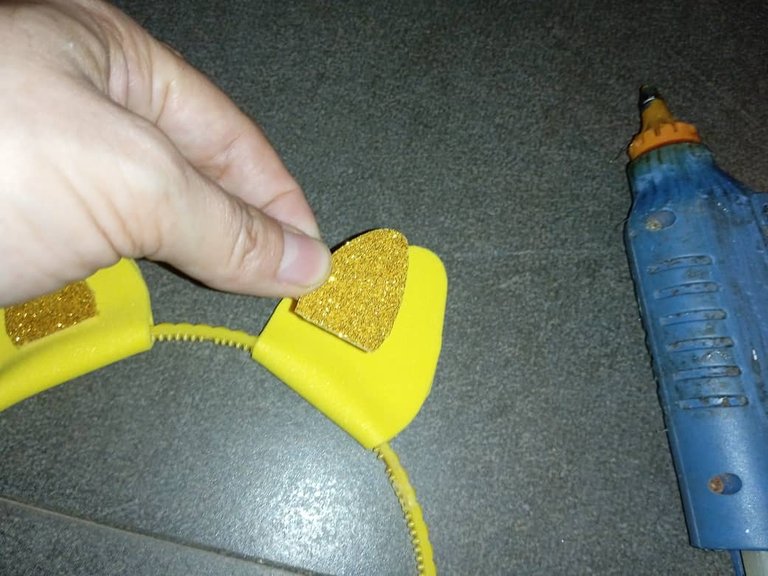
2.Tambien vamos a marcar lo que simulará el interior de las orejitas, por 2 veces, este será en el foami escarchado y tendrá la siguiente forma:
2.We are also going to mark what will simulate the inside of the ears, for 2 times, this will be in the frosted foami and will have the following shape:
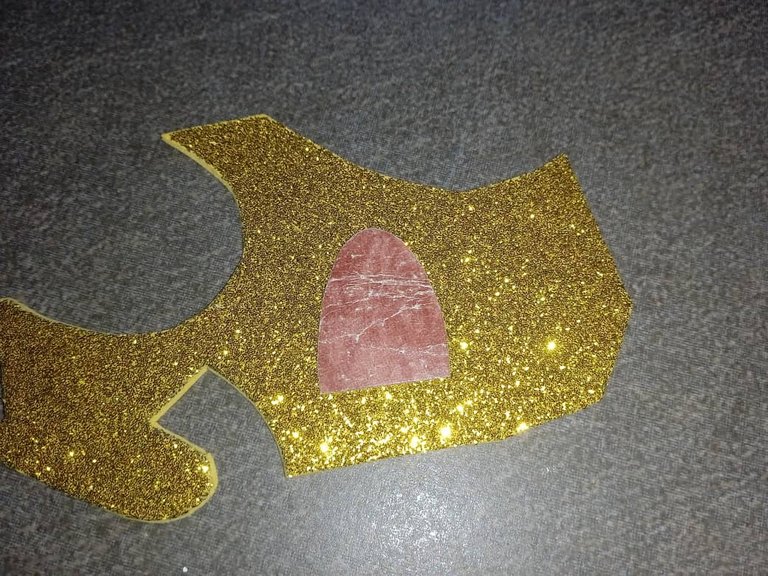
Y recortamos.
And we cut
3.Seguidamente vamos a pegar las orejitas a los lados del cintillo, colocando silicón en uno de los extremos y cerramos haciendo presión.
3.Next we are going to glue the ears to the sides of the headband, placing silicone at one of the ends and close by pressing.
4.Luego pegamos en el centro de las orejitas el foami escarchado.
4.Then we glue the frosted foami in the center of the ears.
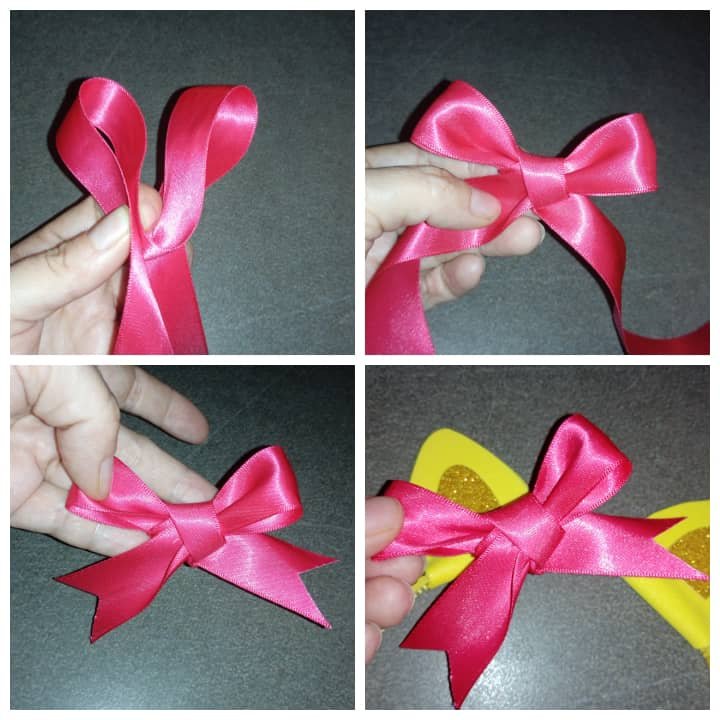
5.Despues vamos a realizar el lazo con cinta de tela, necesitaremos solo 16 cm, hacemos 2 dobles en la mitad y hacemos un nudo, estiramos y listo el lazo, la cual vamos a pegar con silicón en una de las orejitas y listo el cintillo decorado.
5.Then we are going to make the bow with fabric tape, we will need only 16 cm, we make 2 doubles in the middle and tie a knot, we stretch and the bow is ready, which we are going to glue with silicone on one of the ears and that's it decorated headband.

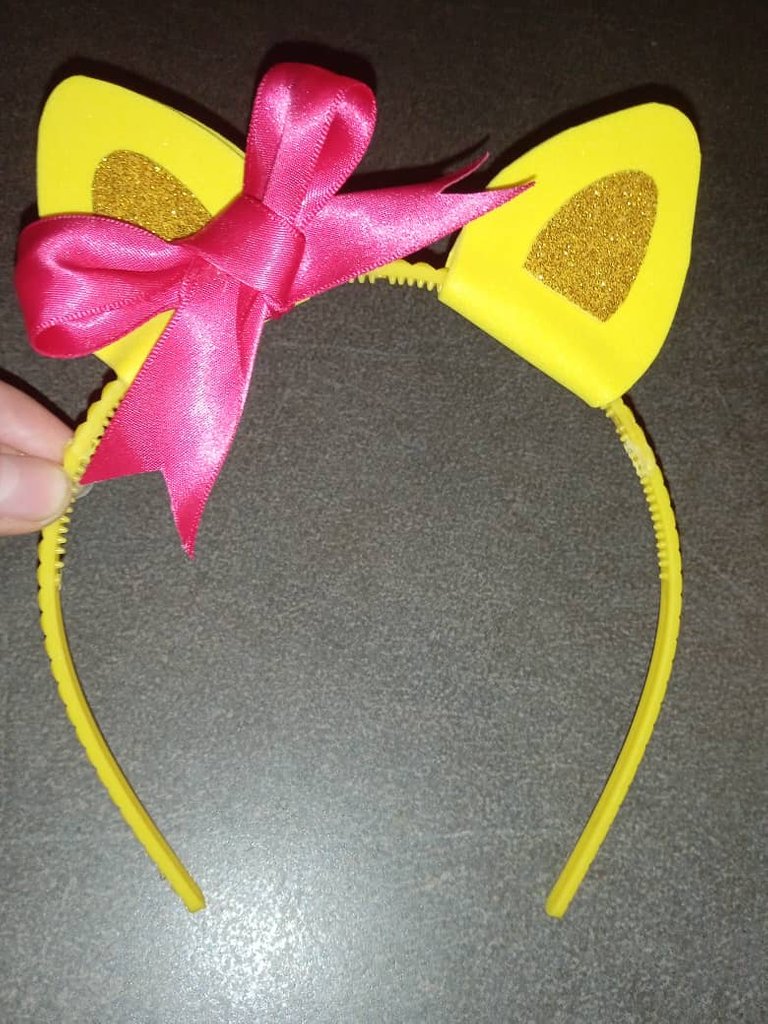
Y así, lo luce mi niña!
And that's what my girl looks like!
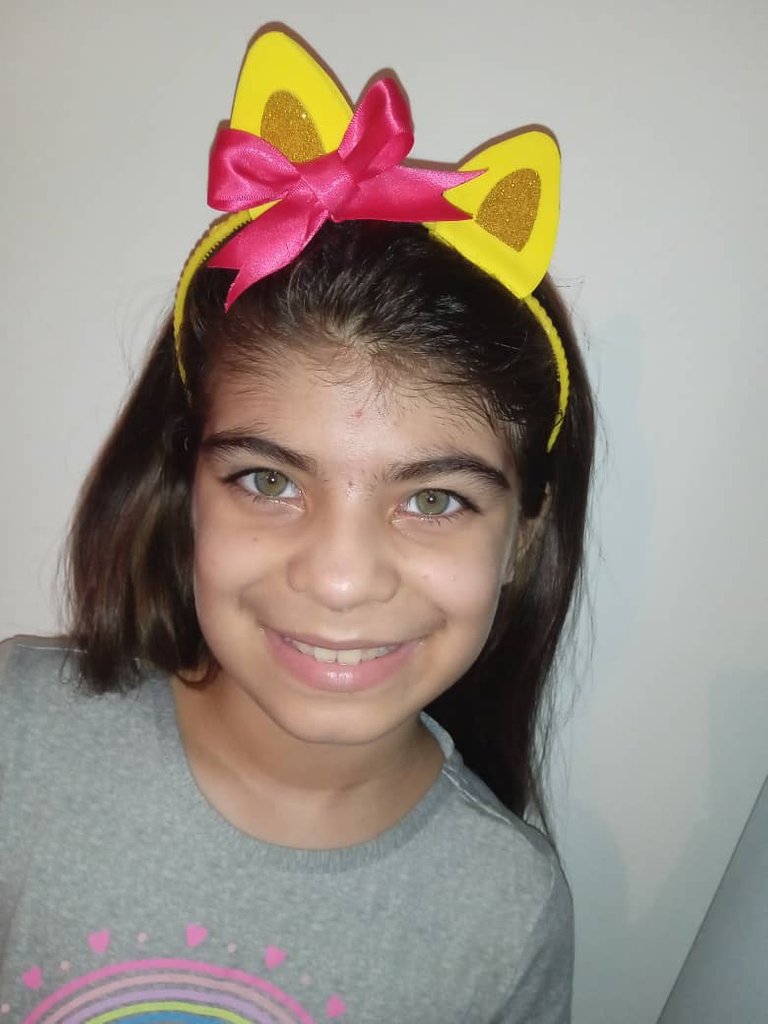
Quedó encantada con el resultado del proyecto, porque paso de ser uno simple en uno decorado con orejitas de gato. 😻
She was delighted with the result of the project, because it went from being a simple one to one decorated with cat ears. 😻
Hasta aquí mi Proyecto de este día, espero les haya gustado, muchas gracias por el apoyo. Saludos 😻
So Project for this day, I hope you liked it, thank you very much for the support. Greetings 😻
Todas las imágenes son de mi autoria por @mariarodriguez, tomadas especialmente para esta publicación.
All images are my own by @mariarodriguez, taken especially for this publication.

Yay! 🤗
Your content has been boosted with Ecency Points, by @mariarodriguez.
Use Ecency daily to boost your growth on platform!
Support Ecency
Vote for new Proposal
Delegate HP and earn more
Muy lindo quedó tu cintillo, muy buena idea la del gato.
!discovery 30
Me alegra mucho que le haya gustado.. gracias por su apoyo.