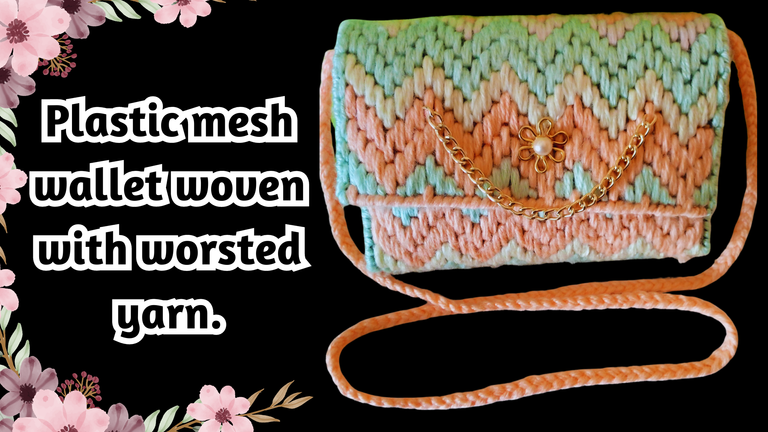
Plastic mesh wallet woven with worsted yarn / Cartera de malla de plástico tejida con hilo de estambre (ESP/ENG)

Reciban todos un caluroso saludo, queridos amigos artesanos, de esta linda comunidad, feliz inicio de semana productiva. El año pasado me propuse comenzar un proyecto sobre hacer mis propias carteras, con los materiales que tuviera a mano, este año quiero continuar con mi proyecto favorito para manejar diferentes técnicas.
En esta oportunidad vengo a compartir mi primer proyecto de cartera de este año, y es que en una de esas cosas que uno tiene guardadas me conseguí un trozo de una malla de plástico muy bonito, y en vista que he estado viendo algunos tutoriales de carteras, vi muchas con este material, enseguida se me ocurrió hacer una cartera con este preciado material de plástico, tejida con hilos de estambre de unos colores bastante frescos y suaves.
Las fotografías que verán a continuación, fueron tomadas con mi teléfono modelo TECNO SPARK GO 2023.

Receive all a warm greeting, dear artisan friends, from this beautiful community, happy start of a productive week. Last year I proposed to start a project about making my own wallets, with the materials I had at hand, this year I want to continue with my favorite project to handle different techniques.
In this opportunity I come to share my first wallet project of this year, and is that in one of those things that one has saved I got me a piece of a very nice plastic mesh, and in view that I have been watching some tutorials of wallets, I saw many with this material, immediately it occurred to me to make a wallet with this precious plastic material, woven with worsted yarns of some pretty fresh and soft colors.
The pictures you will see below were taken with my phone model TECNO SPARK GO 2023.

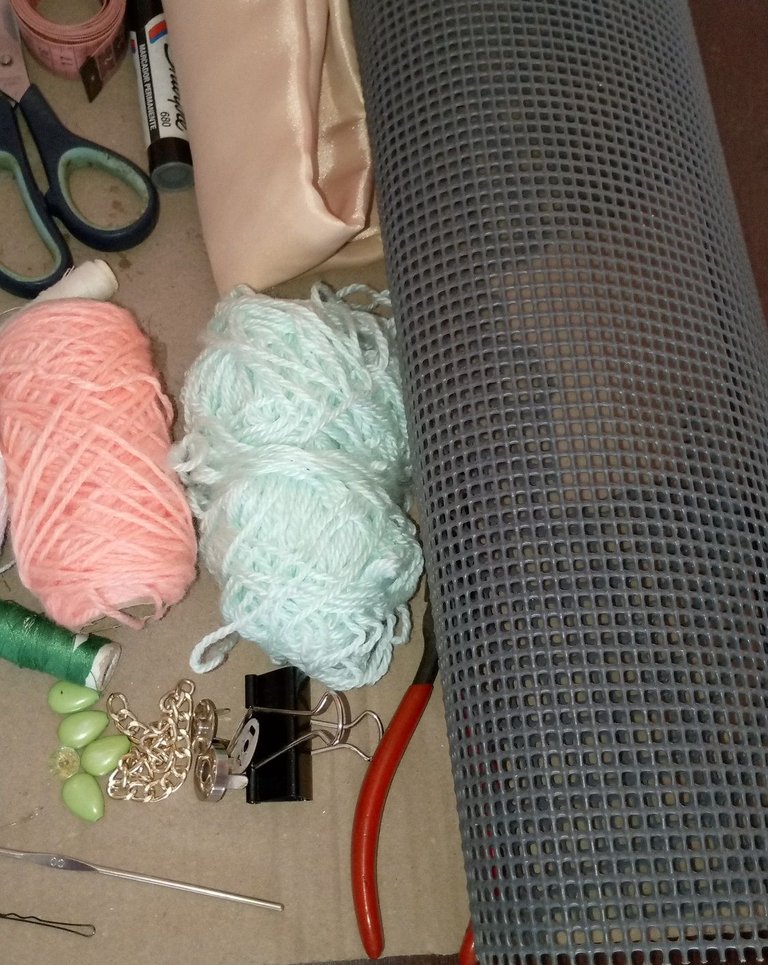
Materiales.
Tijeras
Estambre de 3 colores diferentes
Tela desaten
Hilo y aguja
Cadena y dije decorativo
Pinza para sostener
Tiza para marcar
Cinta métrica
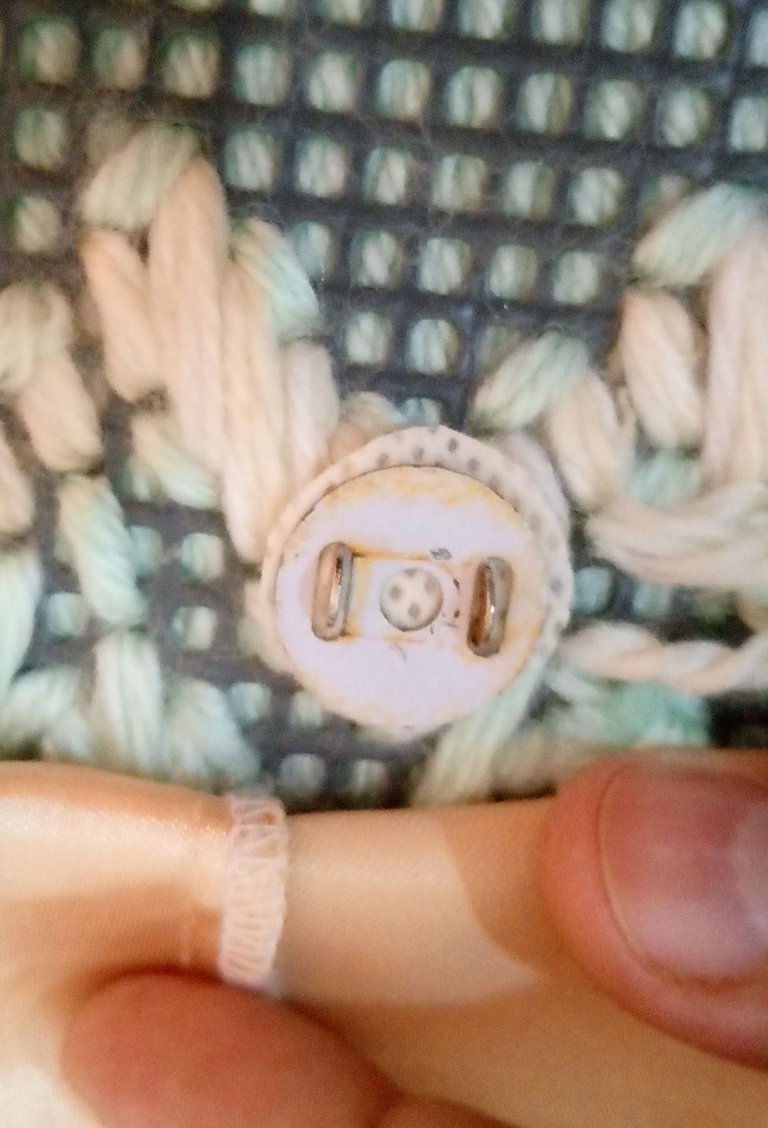
1 Broche
1 Gancho de alambre
1 Alicate
Tabla de soporte
Materials.
Scissors
3 different colors of yarn
Untied fabric
Thread and needle
Chain and decorative charm
Tweezers for holding
Chalk for marking
Tape measure
1 brooch
1 Wire hook
1 Pliers
Support board
 |  |
|---|
 |  |
|---|
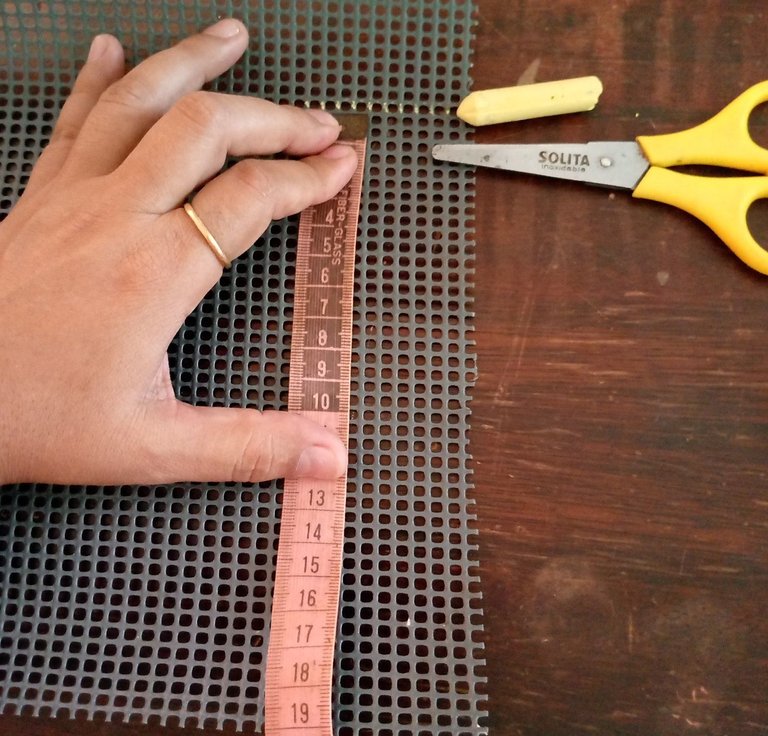
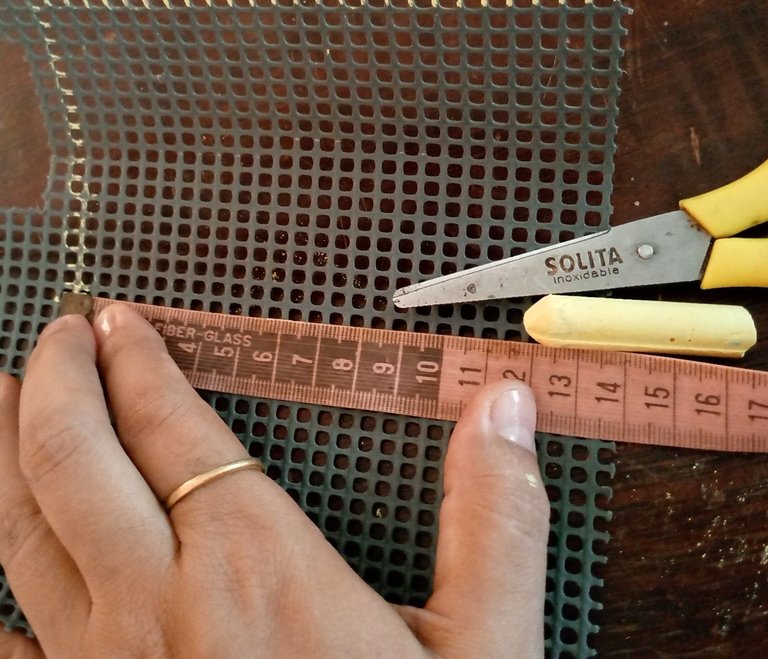
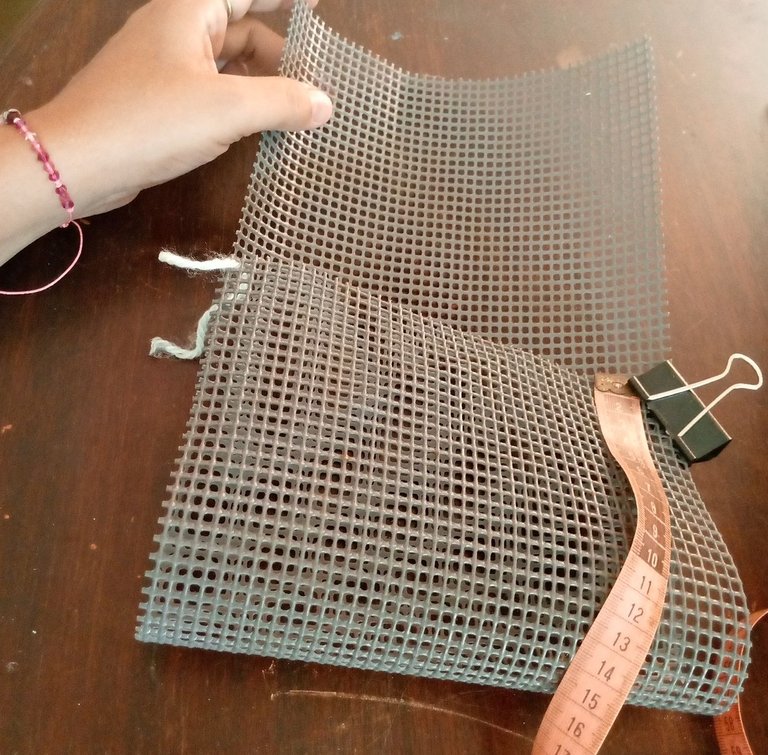
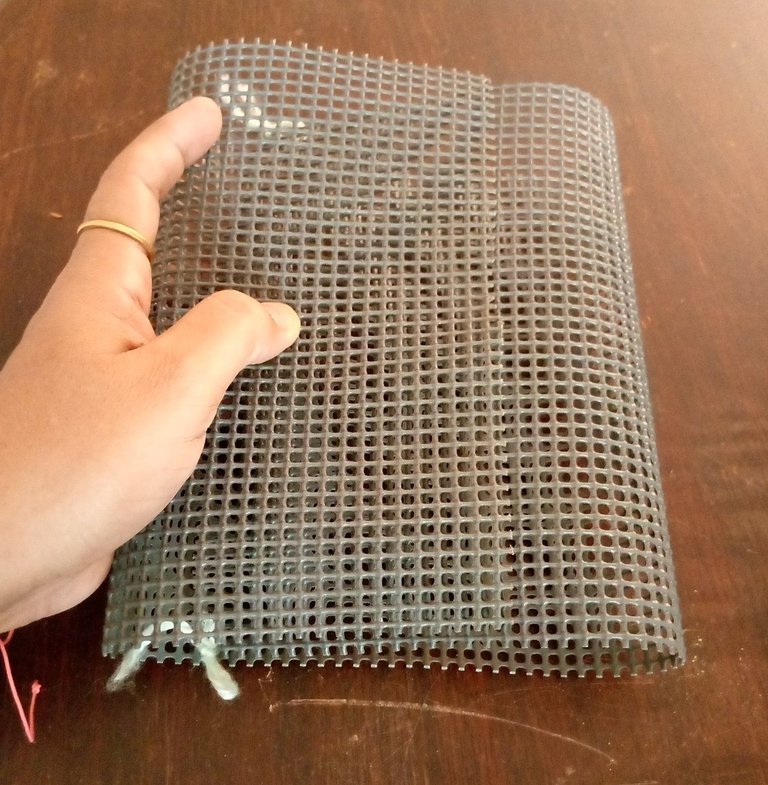
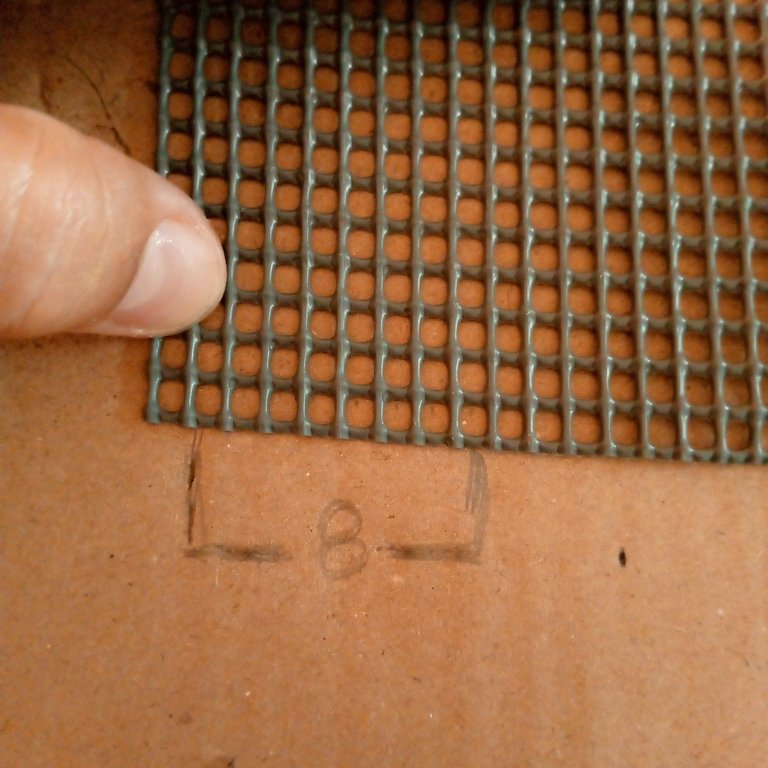
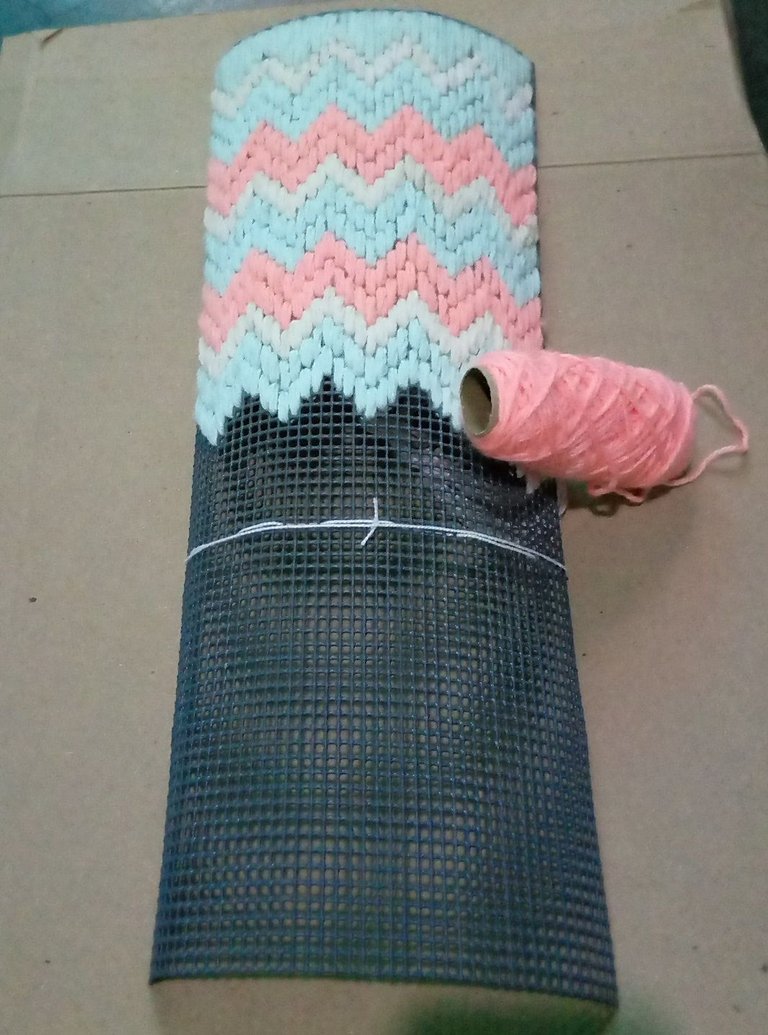
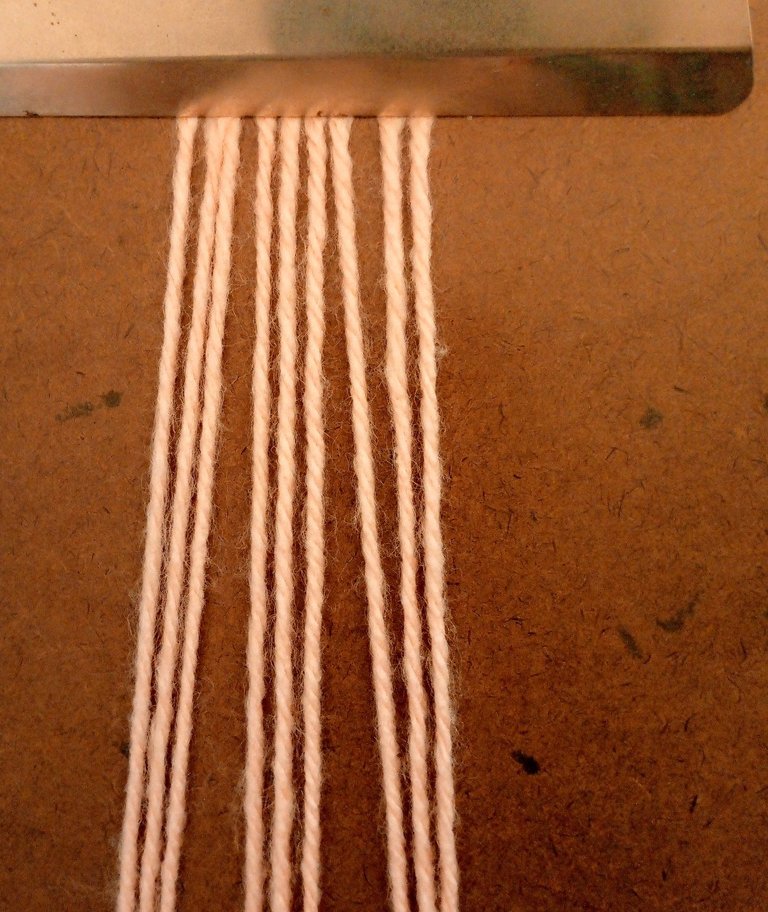
Comencé haciendo las respetivas medidas para hacer las piezas de la cartera, con el uso de una cinta métrica medí el ancho y largo que utilizaría para dar tamaño a esta cartera, las medidas que saque fueron 19 cm de ancho por 44 cm de largo, doble a 30 para la bolsa, y para la tapa quedo 14 cm, en este punto coloque unos hilos guías para saber desde donde partiría mis primeras puntadas del diseño del tejido.
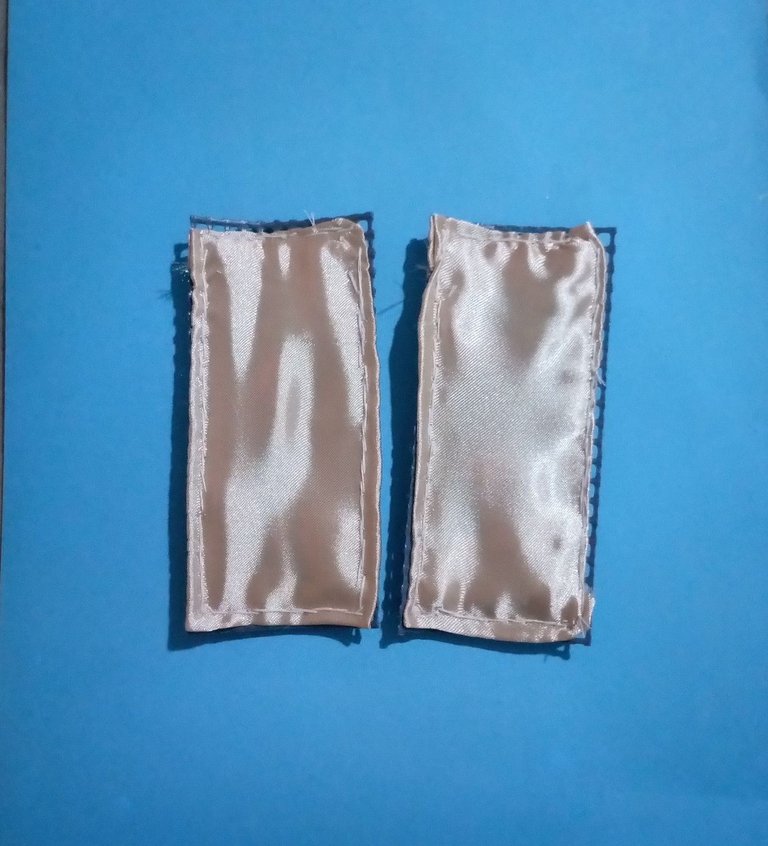
Con los retazos de malla que fueron quedando, hice las piezas para los laterales, con medidas de 11 cm de alto por 6 cm de ancho.
I started making the respective measures to make the pieces of the wallet, with the use of a tape measure I measured the width and length that I would use to size this wallet, the measures I took were 19 cm wide by 44 cm long, double to 30 for the bag, and for the cover I left 14 cm, at this point I placed some thread guides to know from where I would start my first stitches of the fabric design.
With the scraps of mesh that were left, I made the pieces for the sides, measuring 11 cm high by 6 cm wide.
 |  |
|---|---|
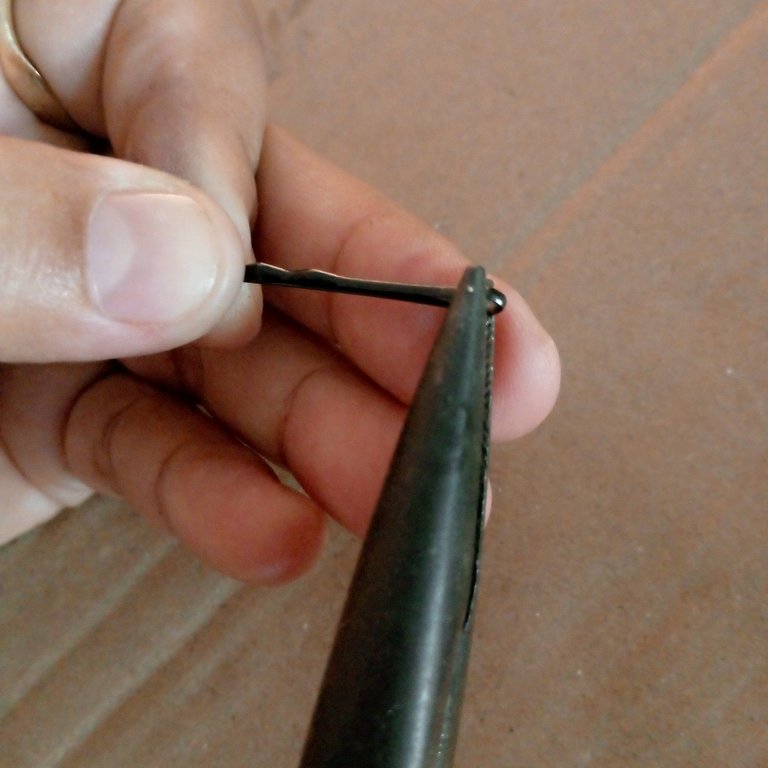 | 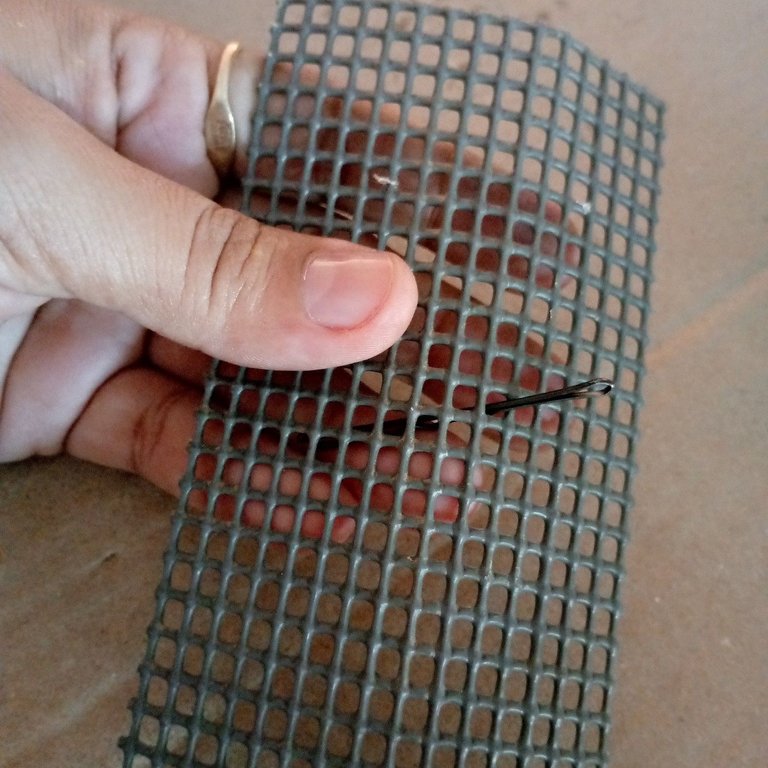 |
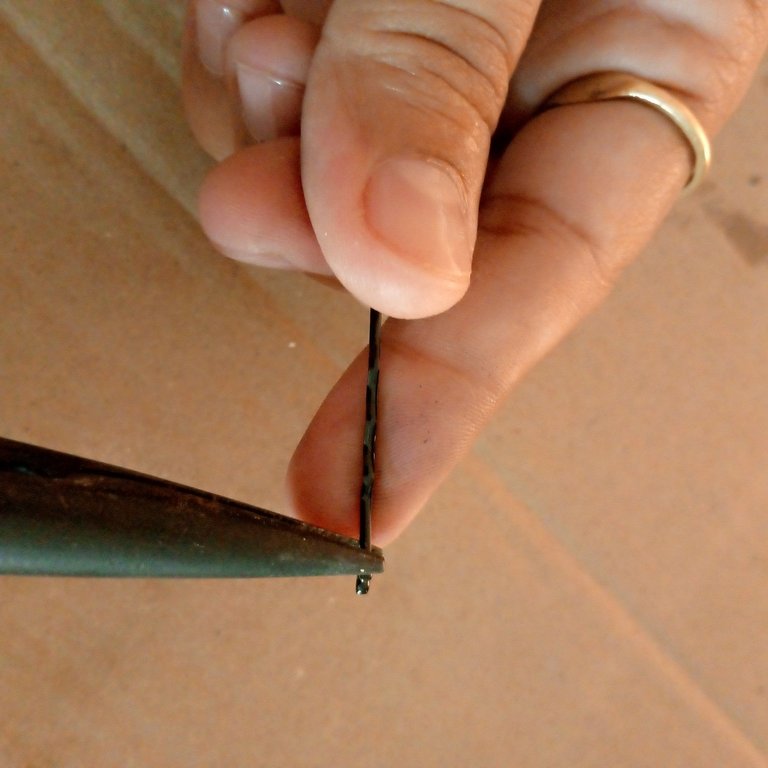
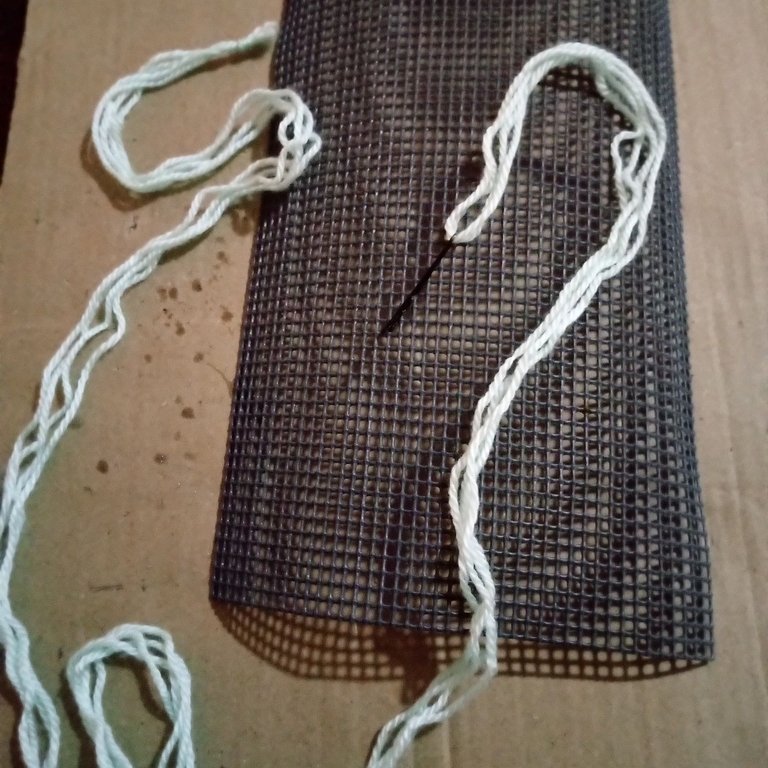
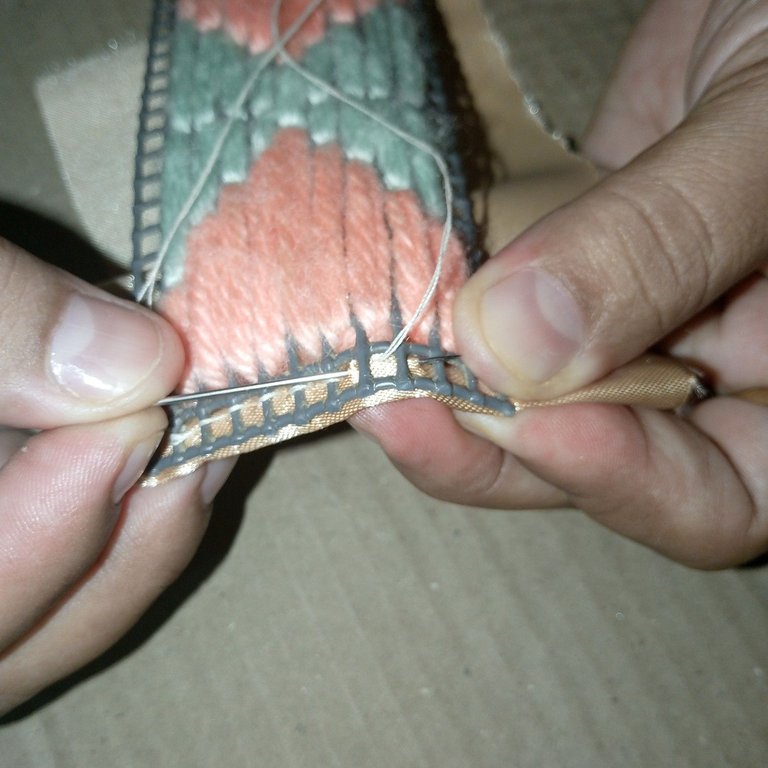
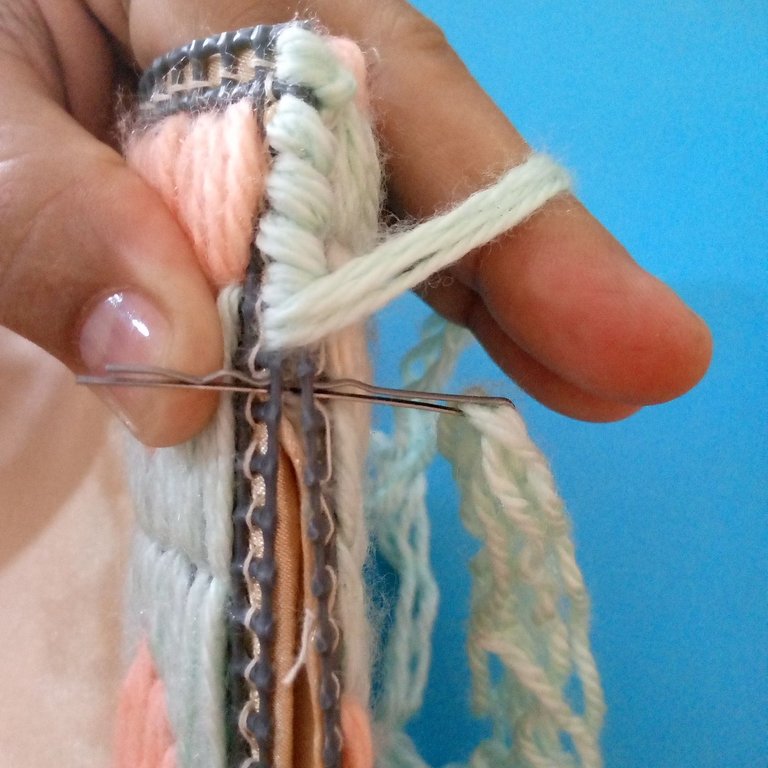
Después que complete las piezas para hacer la cartera, agarre el gancho de alambre y comencé a adaptarlo en forma de aguja, ya que no tengo una aguja para uso de estambre, tuve que improvisar y este gancho me pareció una buena herramienta para poder coser con estambre.
Con el uso de un alicate cerré un poco el gancho como haciendo un ojo angosto de una aguja para estambre, también adapte las puntas quitando el doble que lleva en las puntas y haciéndolo recto para evitar que se quede atascado en los cuadros de la malla.
Mientras adaptaba el gancho iba pasándolo por los orificios de la malla para ver si estaba en buena medida que pudiese pasar el gancho junto con el hilo de estambre.
Logrando hacer mi aguja improvisada de gancho, ya podía pensar en comenzar a hacer mis primeras puntadas para cubrir la malla.
After I completed the pieces to make the wallet, I grabbed the wire hook and started to adapt it in the shape of a needle, since I don't have a needle for worsted use, I had to improvise and this hook seemed to me a good tool to be able to sew with worsted.
With the use of a pliers I closed the hook a little bit like making a narrow eye of a worsted needle, I also adapted the ends removing the double that it has at the ends and making it straight to avoid it getting stuck in the squares of the mesh.
While I was adapting the hook I was passing it through the holes of the mesh to see if it was in good measure that I could pass the hook together with the worsted yarn.
Once I had made my improvised hook needle, I could think about starting to make my first stitches to cover the mesh.
 |  |
|---|---|
 |  |
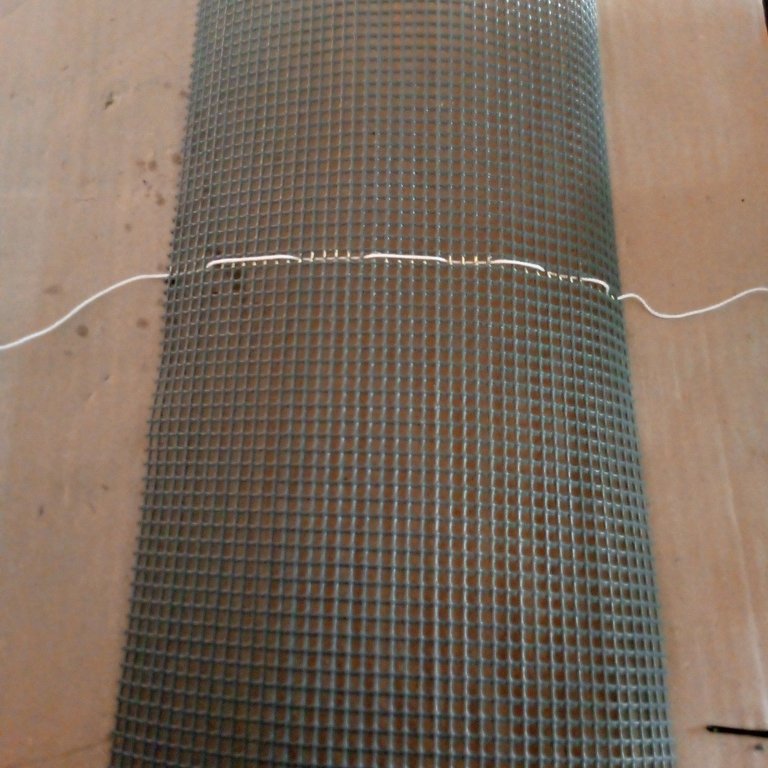
Antes de comenzar a realizar el diseño de tejido, lo primero que hice fue colocar un hilo de estambre para guiarme donde iba a hacer el doble, entre la tapa de la cartera y la bolsa, esto lo hice tomando en cuenta los centímetros que tenía antes medidos para cada pieza. También se puede hacer contando trazos, a mí me pareció más fácil tomando en cuenta las medidas, pero siempre lineales, sea horizontal o vertical.
Luego, con el uso de la tijera, retire algunas puntas sobresalientes de los lados de la malla, para evitar se vieran incómodas.
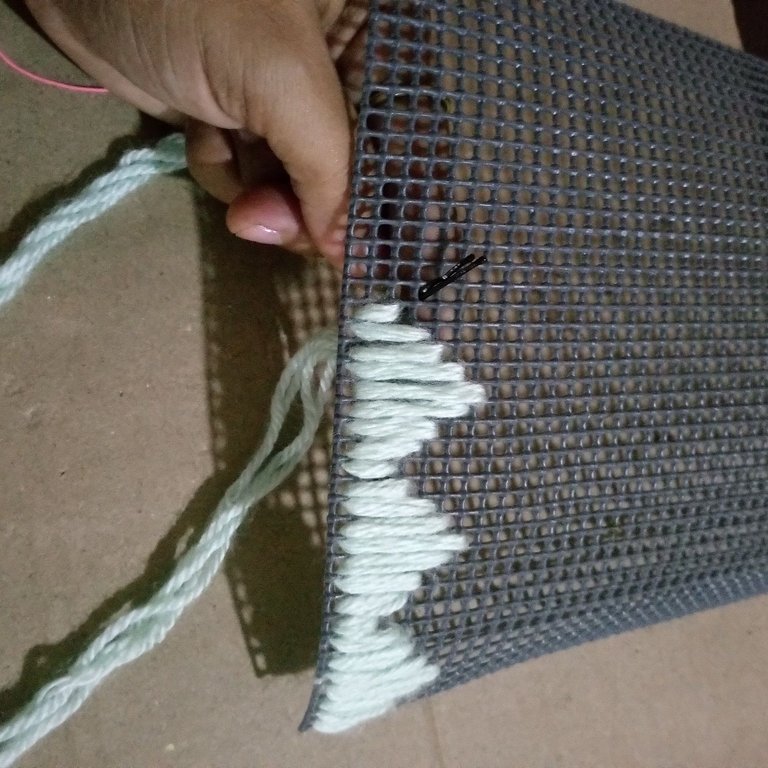
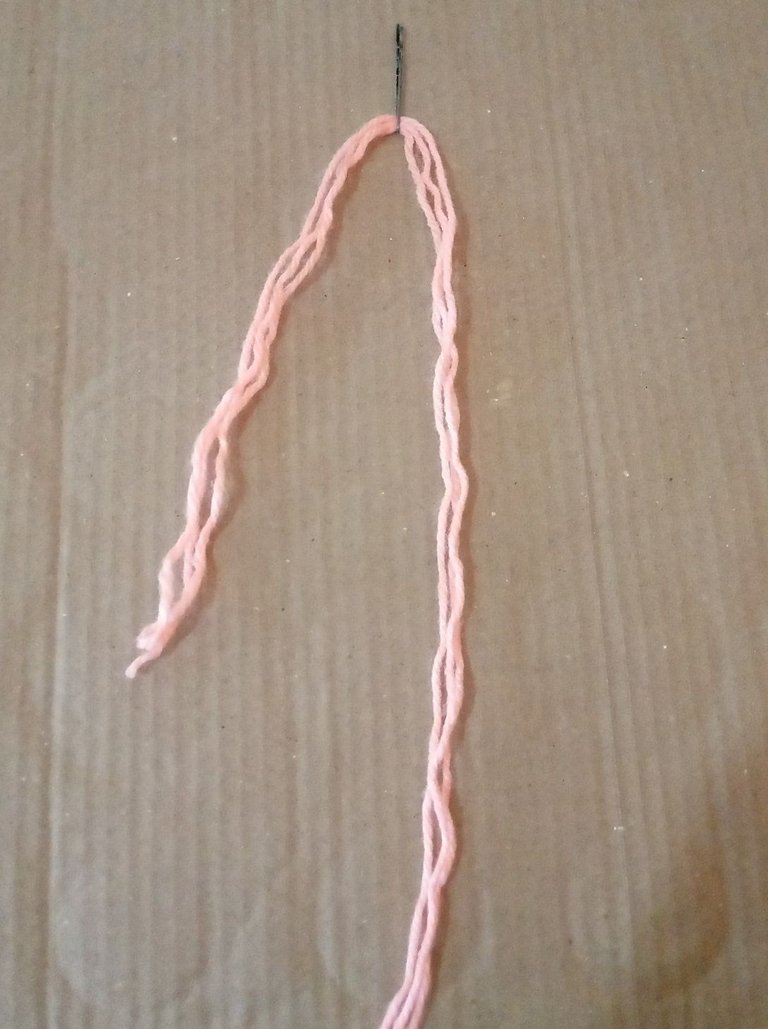
Seguido conté 8 espacios de cuadros donde comenzaría a realizar las primeras puntadas de inicio, enhebre mi aguja con hilo de estambre verde agua, este hilo lo dividí en 3 hebras y el largo que tome fue de 100 cm para evitar que se enrede.
Before starting to make the weaving design, the first thing I did was to place a thread of yarn to guide me where I was going to make the double, between the top of the purse and the bag, I did this taking into account the centimeters that I had measured before for each piece. You can also do it counting strokes, I found it easier taking into account the measurements, but always linear, either horizontally or vertically.
Then, using the scissors, I removed some protruding points from the sides of the mesh, to avoid them looking uncomfortable.
Then I counted 8 spaces of squares where I would begin to make the first starting stitches, I threaded my needle with water green worsted yarn, this yarn I divided it into 3 strands and the length I took was 100 cm to avoid tangling.
 |  |
|---|---|
 |  |
Para hacer la primera línea de tejido comencé contando 8 espacios por 5 trazos de 8 en sentido horizontal haciendo figuras triangulares, las mismas comencé haciendo con un primer punto hacia arriba de 3 espacios en aumento de 1 en la primera línea subiendo hasta la mitad que termina en 7 y luego bajando desde el punto 7, 6, 5, 4, 3 en sentido hacia abajo, completando los primeros 5 trazos de 8 puntos, dejando 2 filas de cada lado para cerrar.
Terminada la primera línea de 5 trazos triangulares, comencé la segunda línea, con hilo de estambre de color blanco ostra, de 8 puntos, pero esta vez de menor tamaño aquí los puntos son más cortos, pero siempre subiendo un punto o bajando aquí el mismo tejido de inicio, nos guiará si estamos pendientes de contar. Repetí el mismo proceso, primero la primera escalera de 4 puntos y subiendo 1 por cada punto y luego bajando los 4 puntos bajando 1, en este sentido iremos cubriendo por completo toda la pieza.
To make the first line of knitting I started counting 8 spaces by 5 strokes of 8 in horizontal direction making triangular figures, I started making them with a first stitch upwards of 3 spaces in increase of 1 in the first line going up to the middle that ends in 7 and then going down from point 7, 6, 5, 4, 3 in downward direction, completing the first 5 strokes of 8 stitches, leaving 2 rows on each side to close.
Finished the first row of 5 triangular strokes, I started the second row, with oyster white worsted yarn, of 8 stitches, but this time of smaller size here the stitches are shorter, but always going up one stitch or down here the same starting knitting, it will guide us if we are pending to count. I repeated the same process, first the first ladder of 4 stitches and raising 1 for each stitch and then lowering the 4 stitches lowering 1, in this way we will be completely covering the entire piece.
 |  |  |  |
|---|---|---|---|
 |  |  |  |
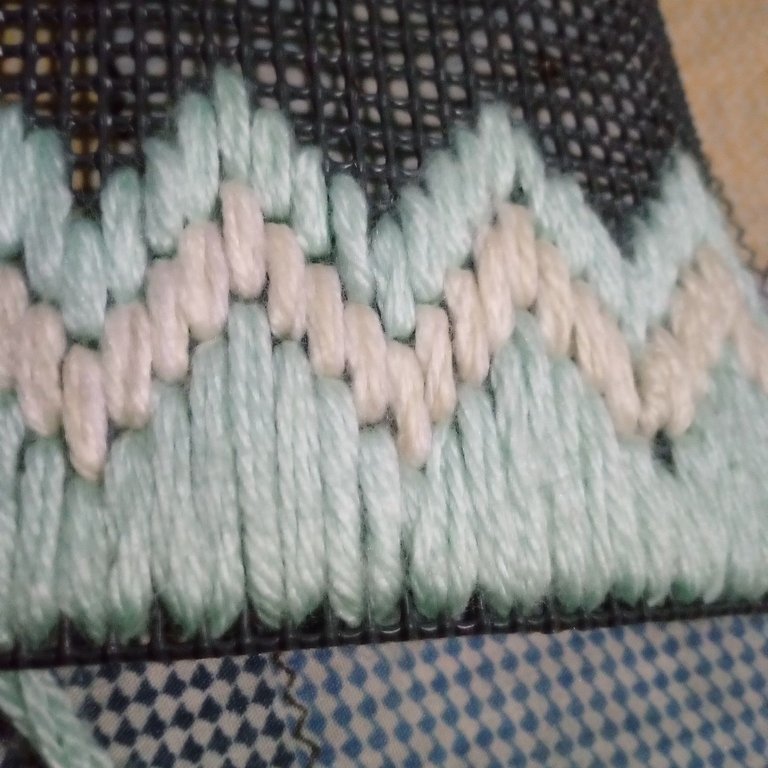
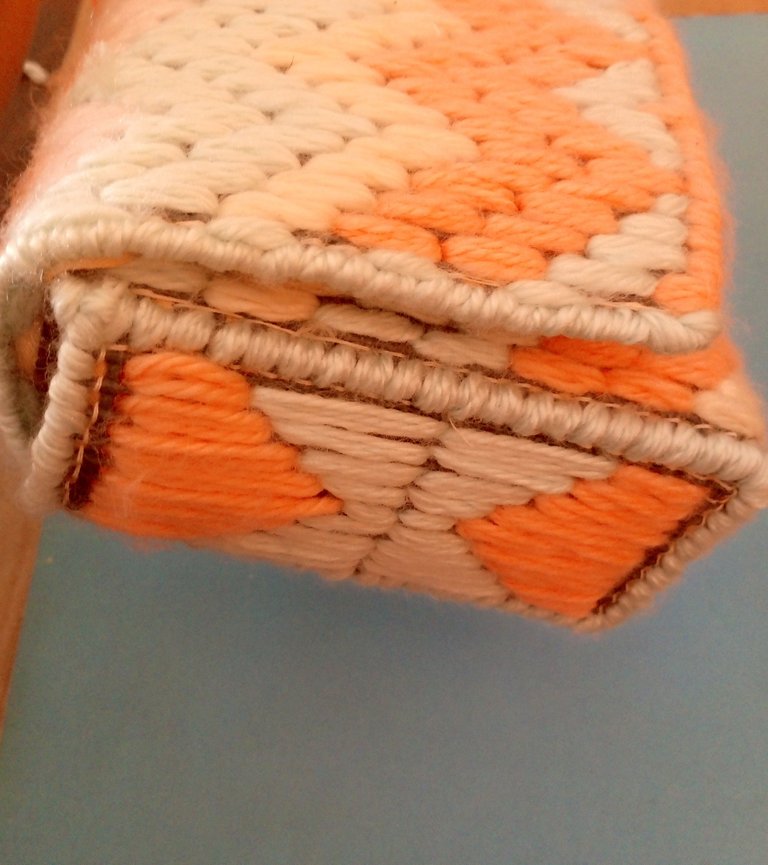
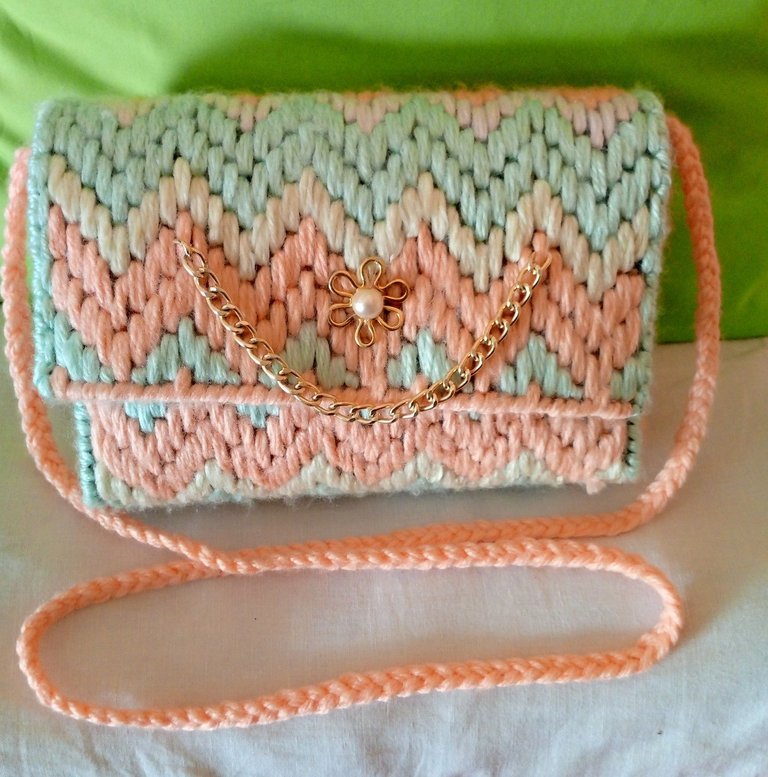
El diseño que elegí para esta cartera es de 5 tramos de 8 puntos,1 primera línea en forma de triángulo altos,1 línea más delgada de color blanco, 2 líneas seguidas de color verde, luego una de color blanco, seguida 2 líneas de color rosado, más 1 línea de color blanco más 2 líneas de color verde hasta completar en este sentido todos los puntos de líneas.
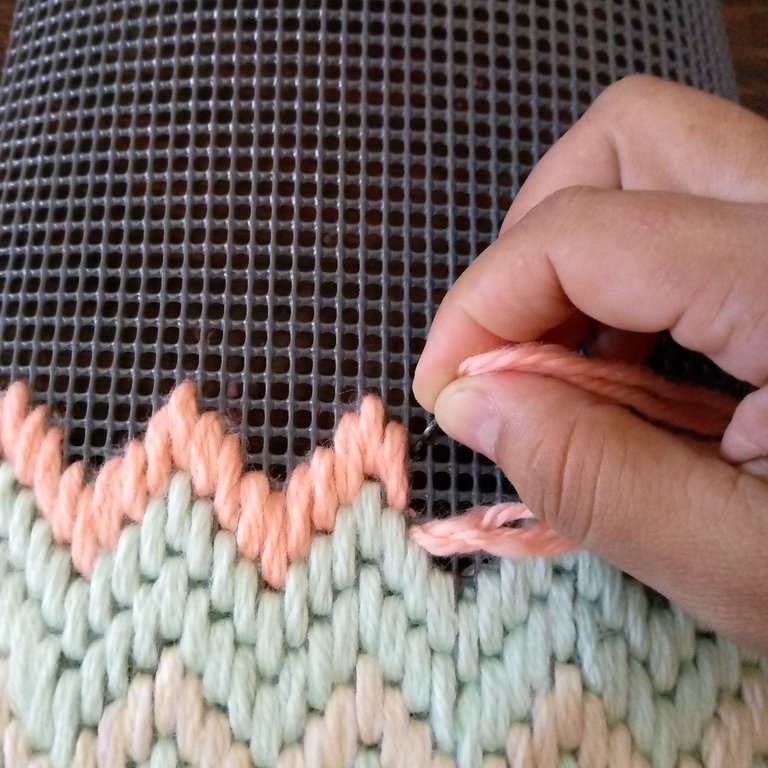
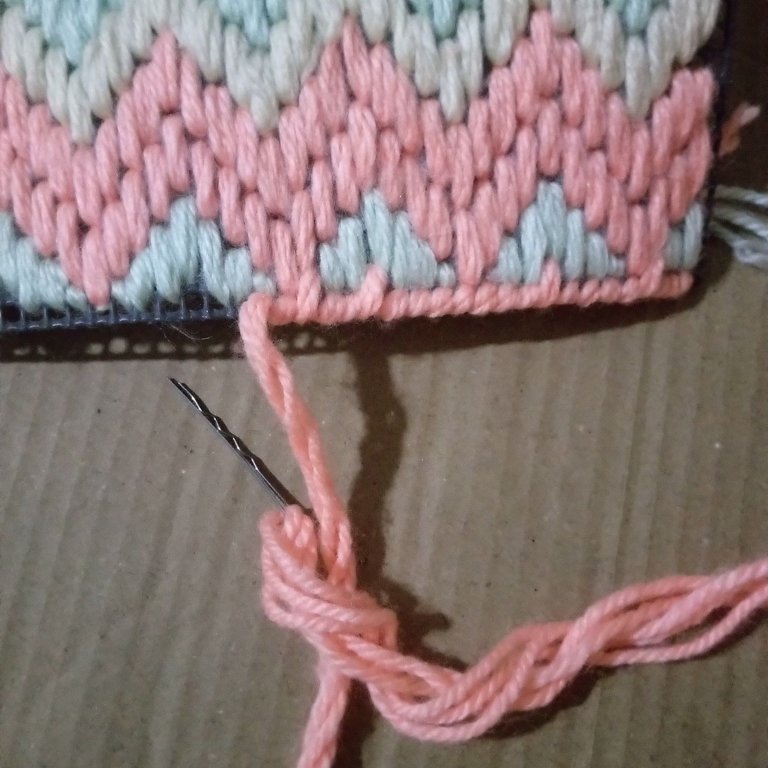
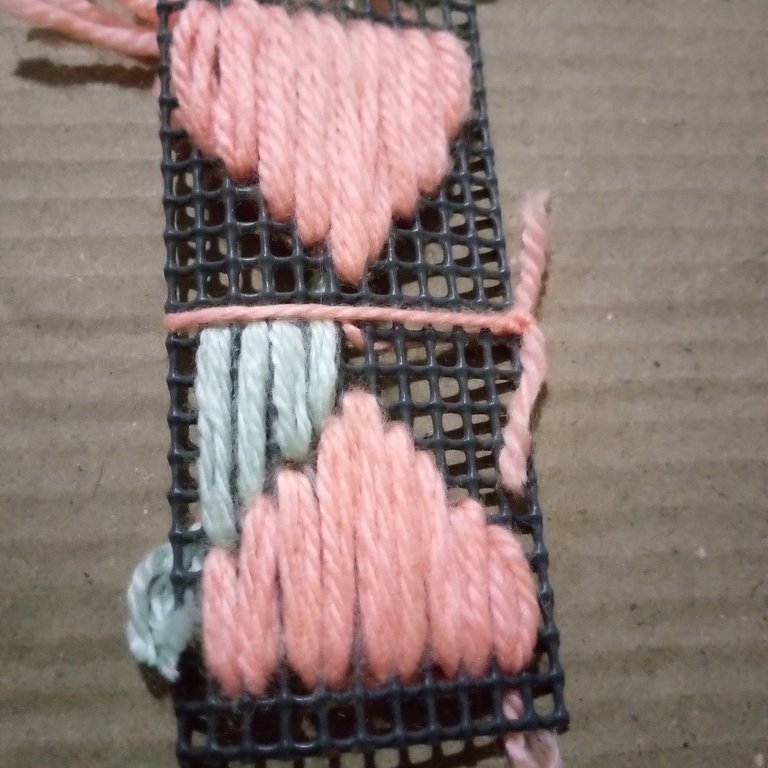
Después de terminar, tejí los bordes con estambre rosado, y comencé a tejer las piezas de los laterales de la cartera, haciendo un triángulo de 9 puntos, 4 de cada lado más un centrado más alto. Partiendo con el punto número 4 subiendo 1 punto hasta el número 8 luego bajando 7, 6, 5, 4.
Partiendo del punto 4 de la primera línea subí 7 puntos y me guie hasta el centro, luego baje los puntos dejando 2 filas laterales para cerrar los lados.
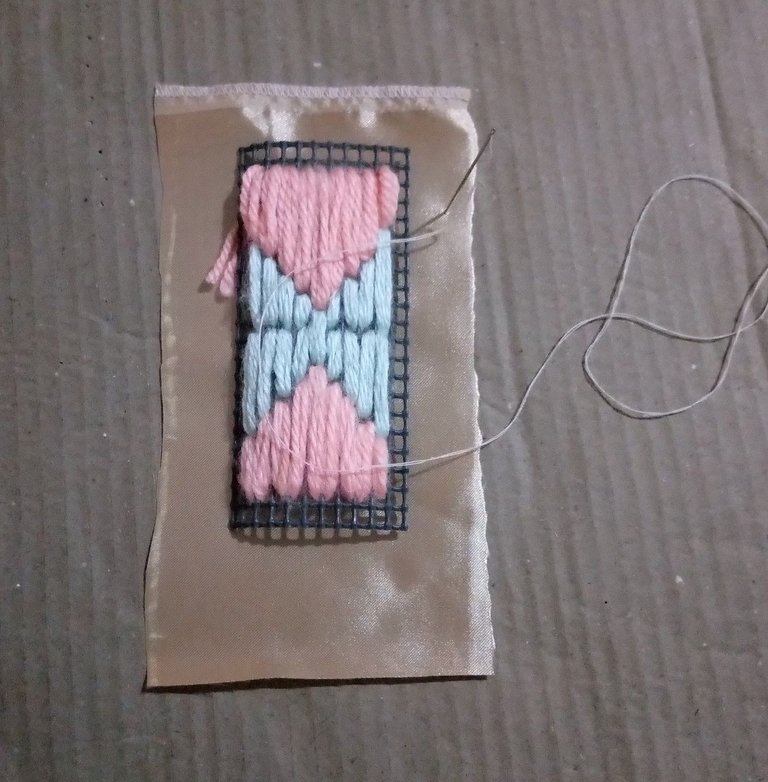
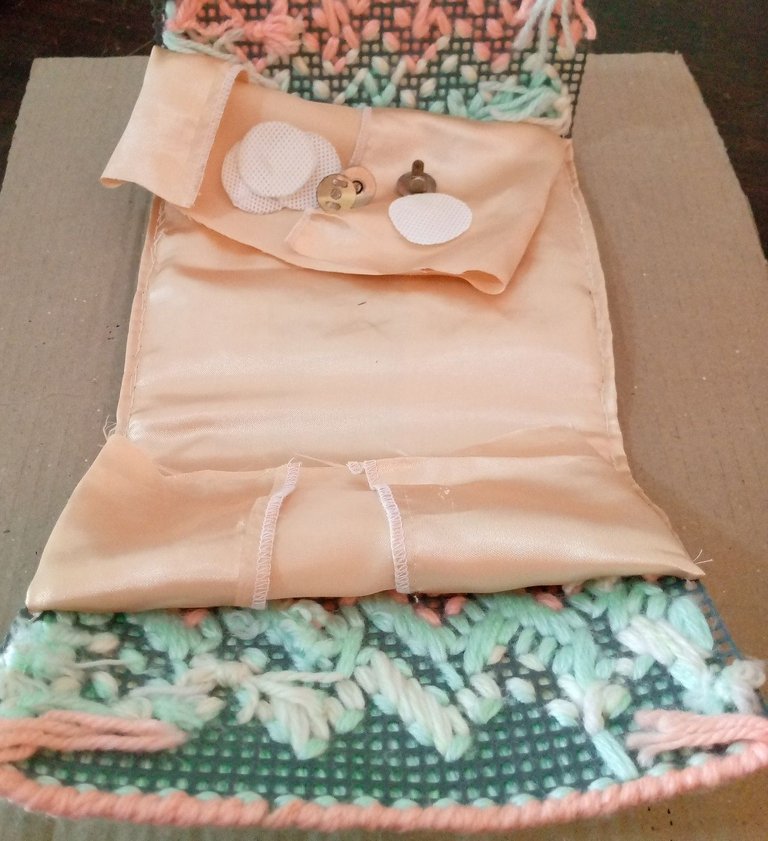
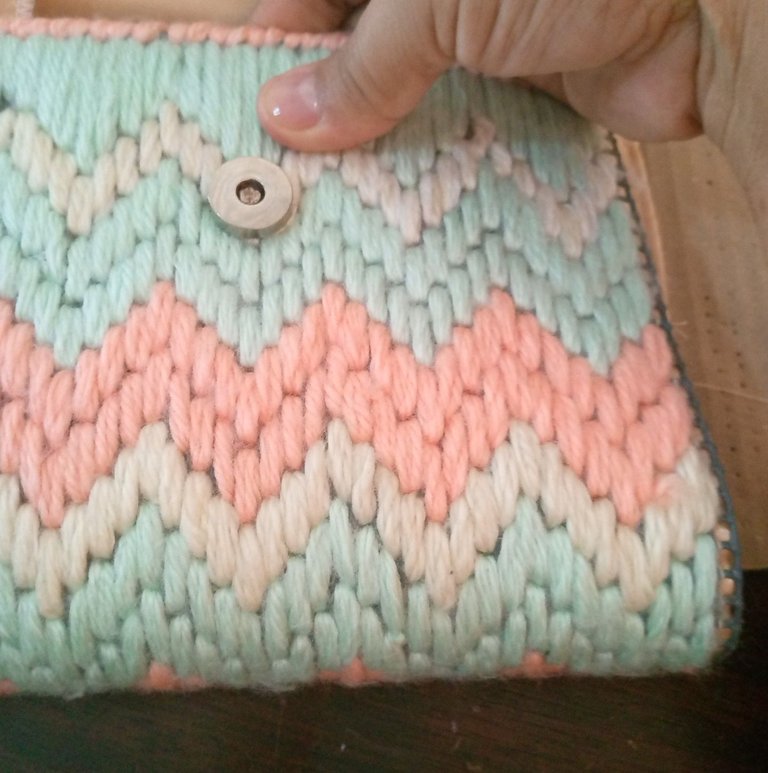
Con todas las piezas tejidas, comencé a colocar el forro interno doblando hacia dentro la tela para darle mejor vista, ya con los broches pegados cosí todos los bordes laterales y cerré.
The design I chose for this wallet is 5 sections of 8 stitches, 1 first row in the shape of a high triangle, 1 thinner white row, 2 green rows, then one white row, followed by 2 pink rows, plus 1 white row plus 2 green rows until completing all the stitches in this direction.
After finishing, I knitted the edges with pink yarn, and began to knit the pieces of the sides of the purse, making a triangle of 9 stitches, 4 on each side plus a higher centered one. Starting with stitch number 4 going up 1 stitch to number 8 then down 7, 6, 5, 4.
Starting with stitch number 4 of the first row I went up 7 stitches and guided myself to the center, then went down the stitches leaving 2 side rows to close the sides.
With all the pieces knitted, I began to place the inner lining folding the fabric inwards to give it a better view, and with the snaps attached I sewed all the side edges and closed.
 |  |  |  |
|---|---|---|---|
 |  | 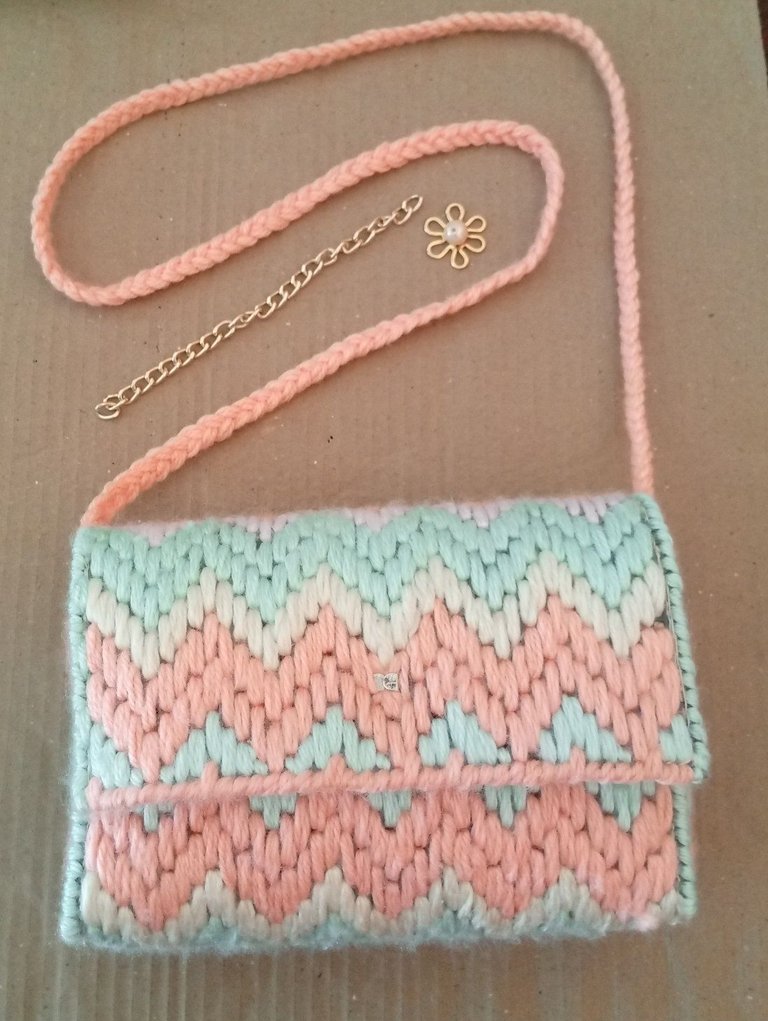 |  |
Completamente cerrada mi cartera, tome la tabla de soporte y coloque 9 hilos de 150 cm de largo, los mismos tejí una trenza para colgar la cartera, esta trenza para colgar la lleve a 120 cm, la fije de ambos lados con hilo de estambre, luego le coloque la cadena decorativa y una flor con una perla centrada.
Algunos accesorios e hilos los obvie porque note que no hacían la mejor combinación, así que decidí cambiarlos por unos más acordes.
Gracias amigos por estar en mi proceso de elaboración de este hermoso proyecto, espero que les guste se les quiere en grande.
Completely closed my purse, I took the support board and placed 9 threads of 150 cm long, I wove a braid to hang the purse, this braid to hang it to 120 cm, I fixed it on both sides with worsted yarn, then I placed the decorative chain and a flower with a pearl centered.
Some accessories and threads I left out because I noticed that they did not make the best combination, so I decided to change them for more appropriate ones.
Thank you friends for being in my process of elaboration of this beautiful project I hope you like it I love you very much.
social networks / redes sociales
![]()
![]()
Traductor Deepl
Translated Deepl
Ediciones Canva
Editions Canva

Saludos @lauracraft, me alegra mucho de proponerte hacer tus propias carteras, esta técnica es muy trabajosa, hace tiempo hice algo en esta técnica de malla, el resultado es genial de tu cartera quedo muy linda en esos los colores, espero disfrutes mucho, feliz día.
Hola @lismar21 gracias por visitar mi post, cuando vi los tutoriales me pareció fácil jajajaja, pero cuando me propuse hacer mi cartera en esta técnica, confirmo que es bastante trabajoso, estuve a punto de desistir pero la curiosidad por ver el resultado me empujó a seguir hasta el final y el resultado fue fantástico, ya la estoy luciendo por ahí. Es interesante se pueden sacar muchas ideas con esta técnica 😃
Hola. Oye se ve hermosa! Me encanto. y me gusta mucho el paso a paso. Es muy claro y detallado. Muchas gracias por comprtir. Voy a pensar en ideas para realizar una. Saludos
Hola, querida @derzweile gracias por tu alentador comentario, espero que cuando tengas las ideas disfrutes mucho haciendo tu cartera.
Wow dear !!!!! It's so cool!!!1 I want one. It's seriously too cool to undertake! You have a wonderful gift with knitting. Awww! reminds me of my saintly mother. It's a great job
@sagarkothari88 vote
Wow dear !!!!! It's so cool!!!1 I want one. It's seriously too cool to undertake! You have a wonderful gift with knitting. Awww! reminds me of my saintly mother. It's a great job
Guao querida!!!!! Esta demasiado buena!!1 Yo quiero una. En serio es demasiado genial para emprender! Tienes un don maravilloso con el tejido. Awww! Me recuerda a mi madre santa. Es un estupendo trabajo
@sagarkothari88 vote
Wow, so cute 💯💯💯 I really love it, what a beautiful skill, I love the beauty that comes out from it, well done dear
Thank you very much for your appreciated comment, I am very happy to know that you liked it. 😁
Que belleza de cartera 👛, ideal para el emprendimiento. Deseo que te vaya bien en las ventas. Saludos.
Gracias amiga 🫂🌹❤️
Realmente me encantó esta técnica, también la he visto en algunos tutoriales y me parece bastante interesante. Me alegra que hayas podido hacer esta linda cartera y cumplir una de tus metas. Gracias por compartir este proyecto tan bonito. Saludos.
Saludos amiga gracias por tu apreciado comentario, es una técnica que no requiere de muchos materiales y tejer en malla plástica también es relajante, los resultados son sorprendentes.
Es un trabajo bastante bonito, le felicito por eso.
Muchas gracias querido @soltecno espero que estés bien 🤗.
Esto quedo bello me encanta porque son materiales que no son costosos
Así es amiga, es un bonito trabajo que puede ser un excelente emprendimiento. Gracias por comentar 😃
So so cool
I wasn’t understanding what was going on until it started coming out well
Wow this is really pretty and good use of materials
I love the embellishment on the bag too
Thanks cutie, I am happy with your comments, they are really encouraging 🙂😀.
Que bello trabajo has realizado, amiga. Cuando empecé a leer tu post me preguntaba cómo hiciste está preciosidad a partir de una malla. La tejiste con mucha paciencia y dedicación. Te quedó de lo más linda. Me gusta también los colores que usaste. Combinan muy bien entre sí 😍 Te deseo un bonito día 💟
Saludos mi bella y querida amiga, cuando empecé a hacer este tejido pensé que no lo iba a lograr, porque fueron muchas las veces que tuve que descoser, porque se me pasó una puntada, además la aguja improvisada no es la más adecuada, fue un trabajo arduo, me vi lejos, pero no me rendí hasta que lo logré, somos artesanas invencibles. Los colores son bonitos muy frescos, me alegro que te haya gustado.
Te deseo una buena noche de descanso y relax. Un fuerte abrazo 🤗
Me fascinó el resultado de verdad! 😍
Felicitaciones por tan hermoso trabajo 😍
Amiga como se llama la malla plástica,y dónde se puede comprar?
Thank you, friend, I did not have how to answer you at that time, but here I am very grateful for your encouraging words, I answer you where you can compare that mesh, that was given to me, they were a few scraps, I was informed that I can get it for free market and in some craft stores. I hope you can get it, it makes beautiful work.
I send you a big hug with love.
Many friends, I also send you a strong and very affectionate hug! I hope to get it and make a beautiful wallet too!