Colored paper fruits with the 3D technique (ENG/ESP)
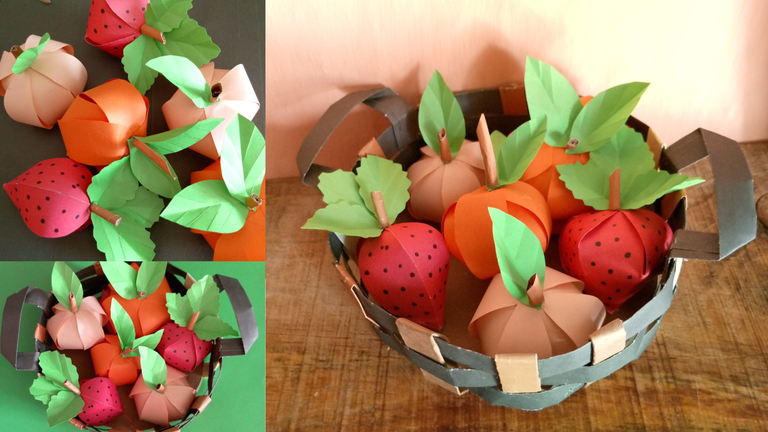
Greetings dear friends hive crafters, I hope you are very well and enjoy the weekend, today fills me with satisfaction and joy to return to share my crafts with this great community DIYHub this time I come to show you how to make a colorful paper fruits with 3D technique, with a very simple basket also made with dark colored paper, to highlight the fruits to decorate.
Next I will show you the materials and the steps to make these beautiful paper fruits.
The pictures you will see below were taken with my phone model TECNO SPARK GO 2024.
Saludos queridos amigos artesanos de hive, espero que estén muy bien y disfruten del fin de semana, hoy me llena de satisfacción y alegría volver a compartir mis manualidades con esta gran comunidad DIYHub esta vez vengo a mostrarles como hacer unas coloridas frutas de papel con técnica 3D, con una canasta muy sencilla hecha también con papel de color oscuro, para resaltar las frutas a decorar.
A continuación les mostrare los materiales y los pasos para hacer estas hermosas frutas de papel.
Las fotos que verán a continuación fueron tomadas con mi teléfono modelo TECNO SPARK GO 2024.

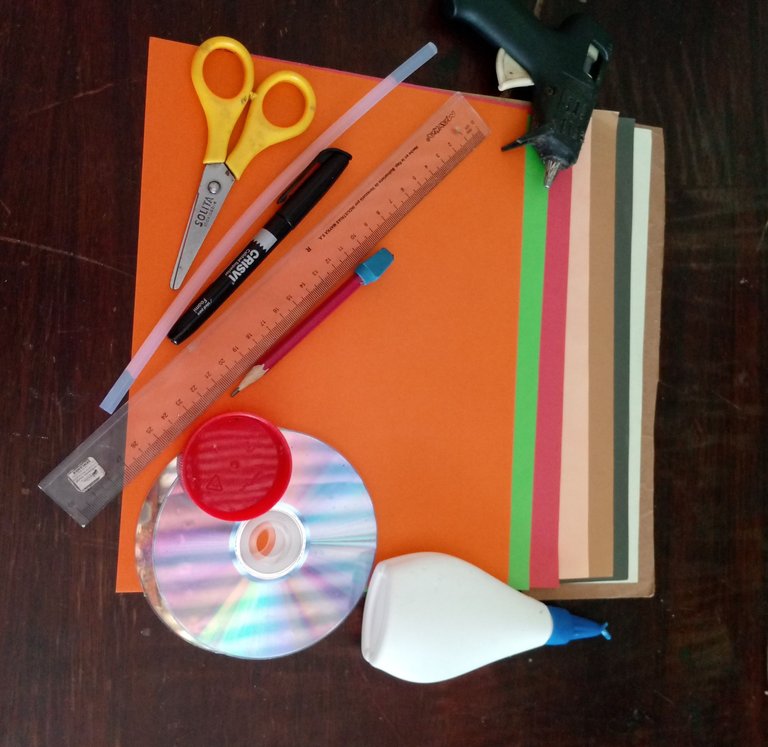
Materials:
Colored paper
2 CDS
1 Silicone stick and gun for silicone
Scissors
Black fine point marker
Pencil
Ruler
White school glue
Plastic lid
Materiales:
Papel de colores
2 CD
1 Barra de silicona y pistola para silicona
Tijera
Marcador negro puna fina
Lápiz
Regla
Pega blanca escolar
Tapa de plástico
 |  |  |
|---|
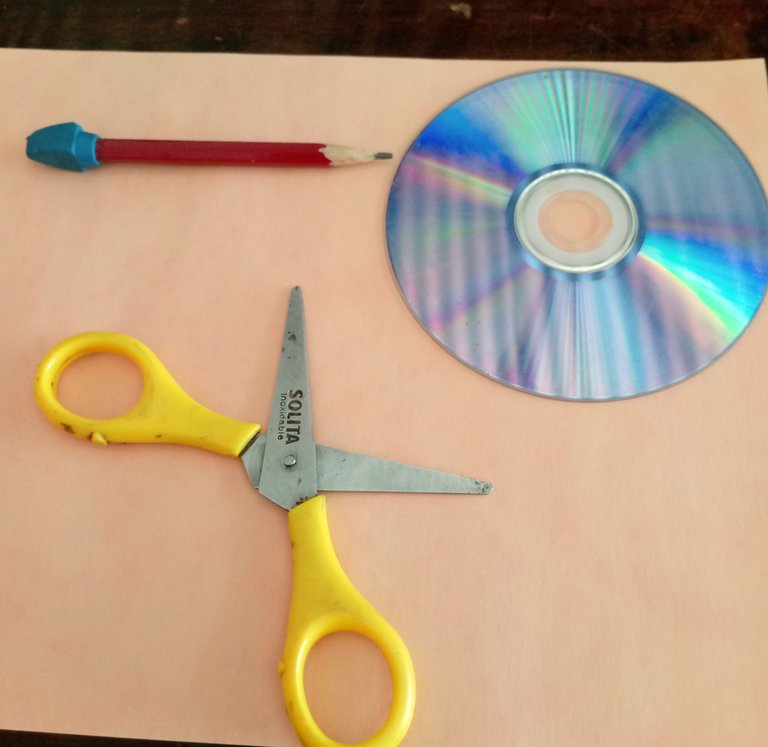
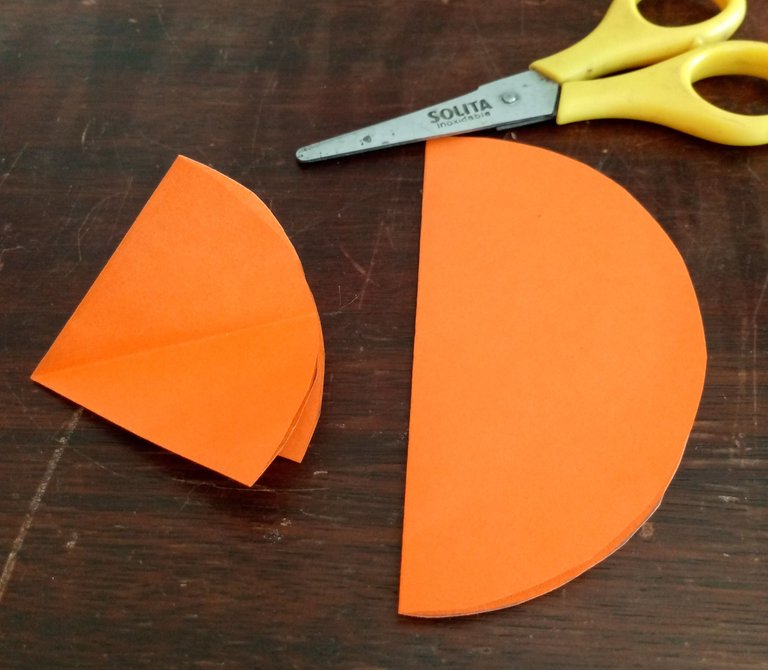
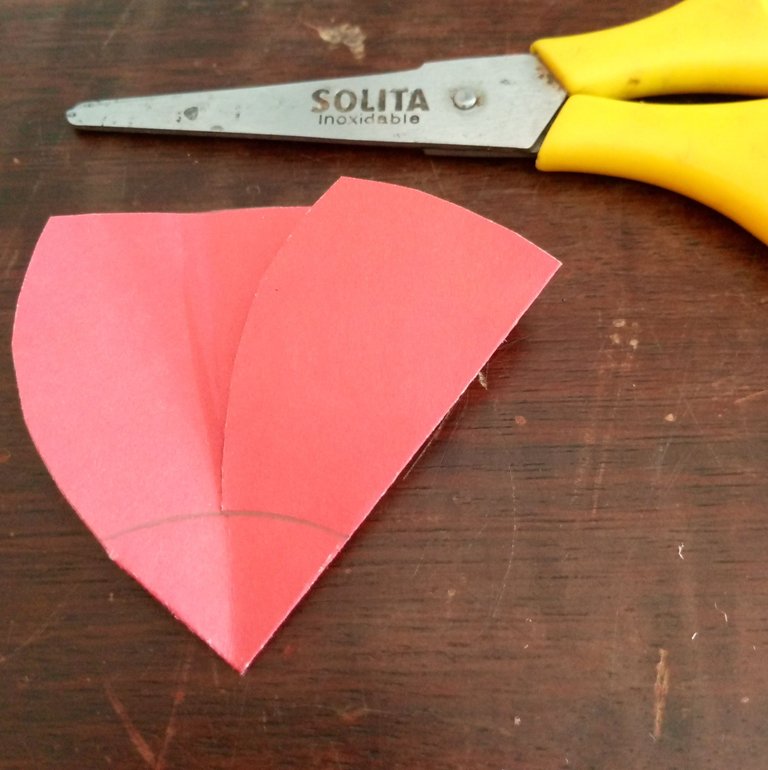
To make these fruits we will start by making some circles of colored paper, we will take the colored paper, a CD, a pencil and the scissors.
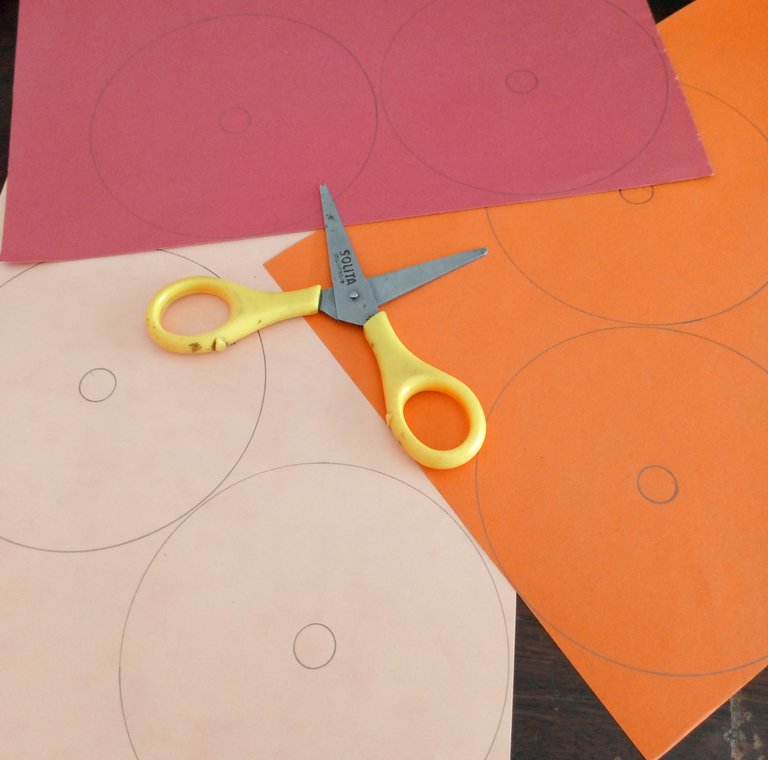
On the paper we will place the CD, we will draw the circumference of the CD, then we will cut it with the scissors.
Then we will fold it in half 3 times to make a triangle folded in half.
Para hacer estas frutas empezaremos haciendo unos círculos de papel de colores, tomaremos el papel de colores, un CD, un lápiz y la tijera.
Sobre el papel colocaremos el CD, dibujaremos la circunferencia del CD, luego lo cortaremos con la tijera.
Después lo doblaremos por la mitad 3 veces para formar un triángulo doblado por la mitad.
 |  |  |
|---|
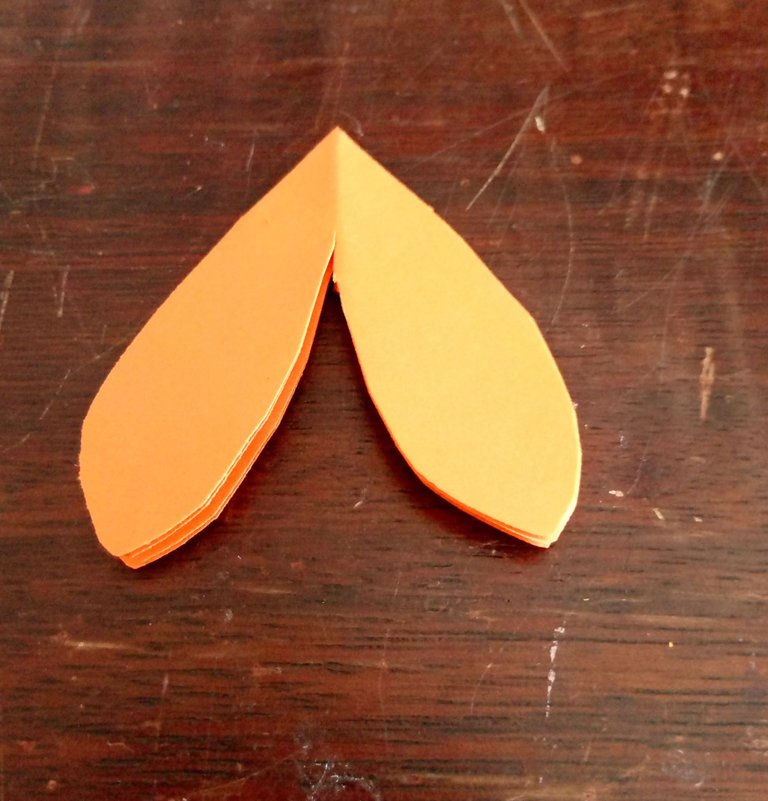
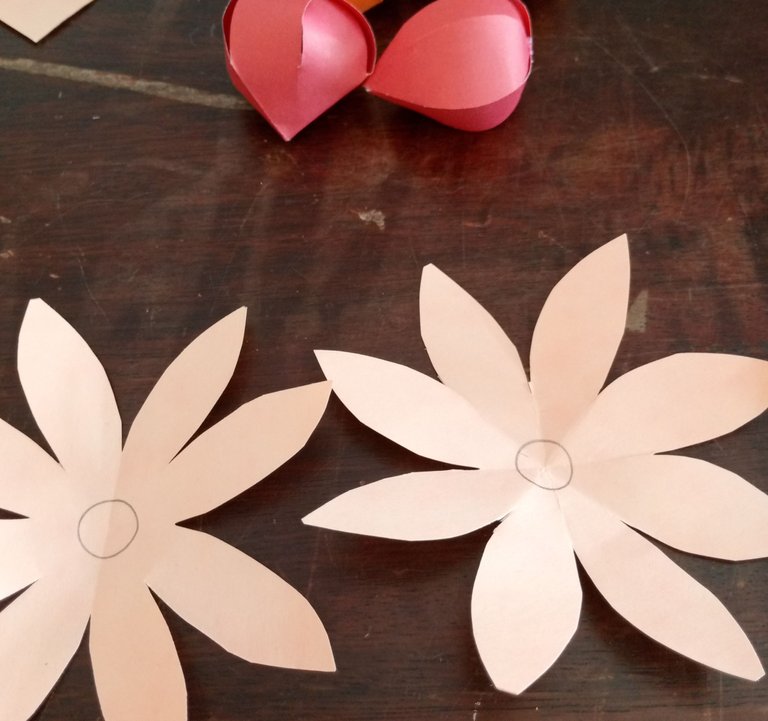
We are going to cut out the triangle in the shape of a heart, taking into account the centered line.
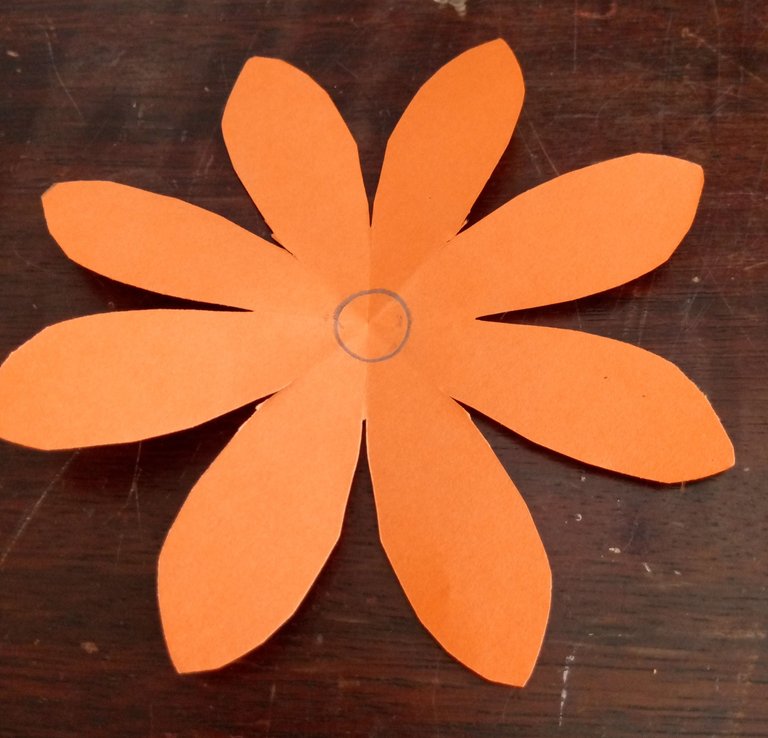
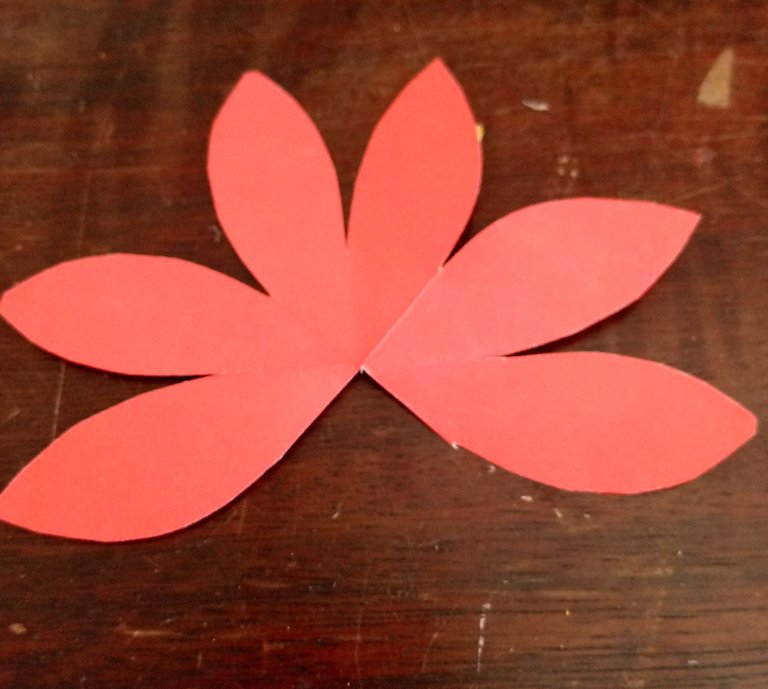
After cutting out, we open this heart, and we will have as a result a flower with 8 petals.
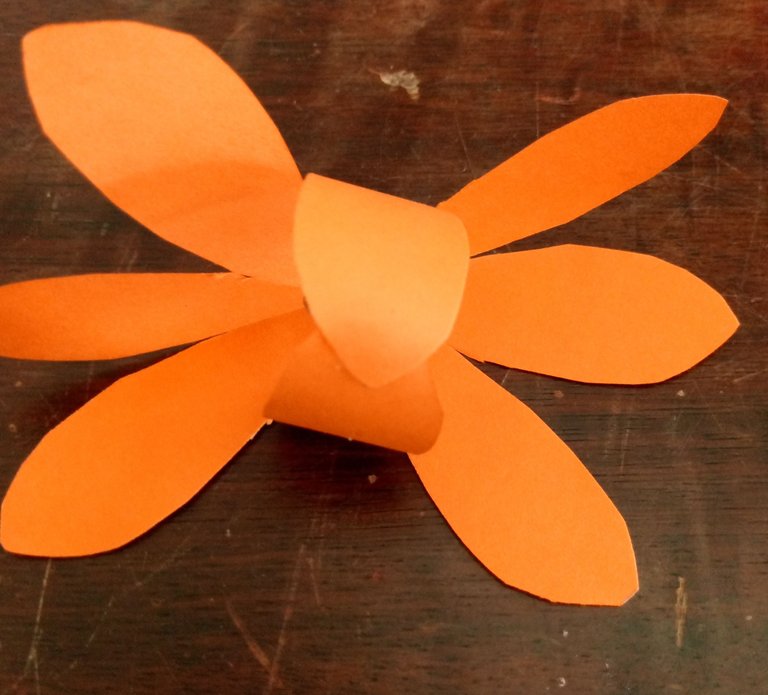
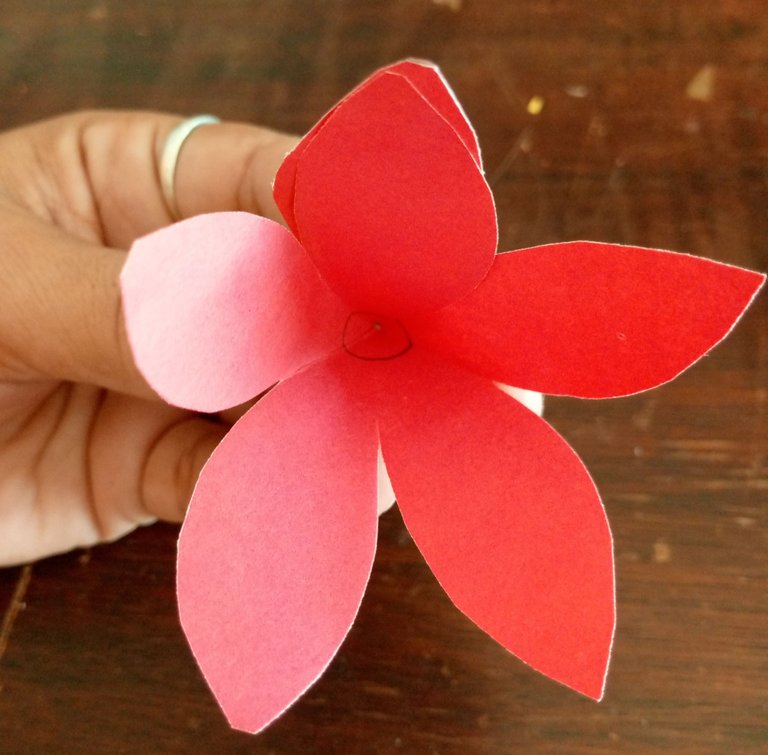
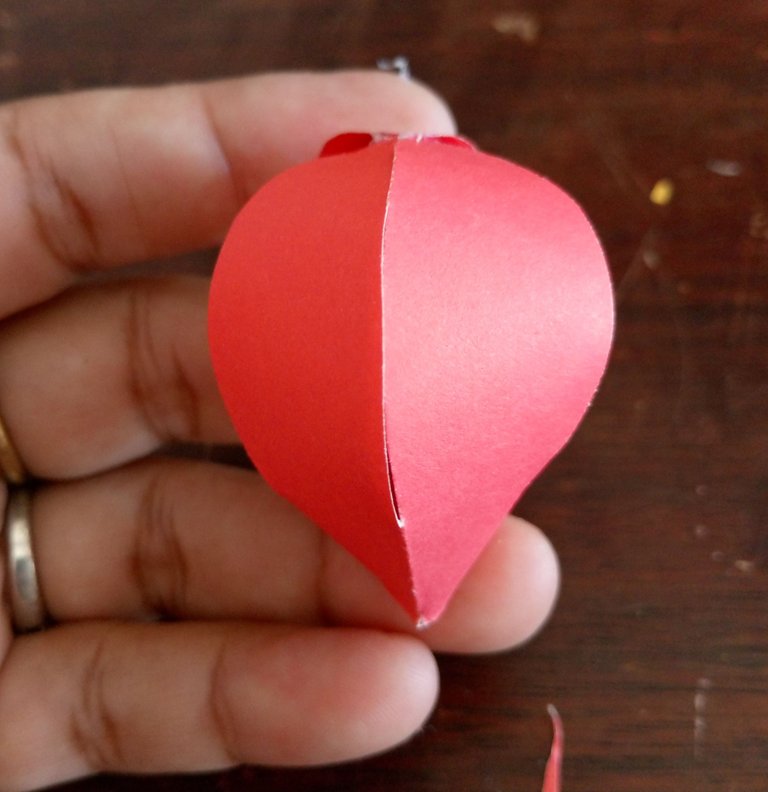
Then we will begin to glue the petals with white glue or silicone, in an orderly fashion, closing as if making a ball, always gluing at the top.
With these steps we will create a tangerine or orange.
Vamos a recortar el triángulo en forma de corazón, teniendo en cuenta la línea centrada.
Una vez recortado, abrimos este corazón, y tendremos como resultado una flor con 8 pétalos.
A continuación comenzaremos a pegar los pétalos con cola blanca o silicona, de forma ordenada, cerrando como si hiciéramos una pelota, pegando siempre por la parte superior.
Con estos pasos crearemos una mandarina o naranja.
 |  |  |
|---|
We will continue to make a milling cutter, the step is very similar, but here we have 2 differences.
We are going to fold the circumference 3 times the same and cut, but before cutting we are going to make an angle of 2 cm, we can use a smaller plastic lid or some other instrument that will serve as a guide.
We will cut to the circumference and open a new flower, but of a different color, then we will cut 2 petals and extract them.
Seguiremos haciendo una fresa, el paso es muy similar al anterior, pero aquí tenemos 2 diferencias.
Vamos a doblar la circunferencia 3 veces igual y recortamos, pero antes de recortar vamos a hacer un ángulo de 2 cm, podemos usar una tapa de plástico más pequeña o algún otro instrumento que nos sirva de guía.
Recortaremos la circunferencia y abriremos una nueva flor, pero de diferente color, luego cortaremos 2 pétalos y los extraeremos.
 |  |  |
|---|
We are going to place a little glue forming a flower with 5 petals, and close the top to see the result of the strawberry, if we want a strawberry with more volume, we will glue the petals more open, we will place two on top, 2 below and one on top.
Vamos a colocar un poco de pegamento formando una flor con 5 pétalos, y cerramos la parte superior para ver el resultado de la fresa, si queremos una fresa con más volumen, pegaremos los pétalos más abiertos, colocaremos dos arriba, 2 abajo y uno arriba.
 |  |  |
|---|
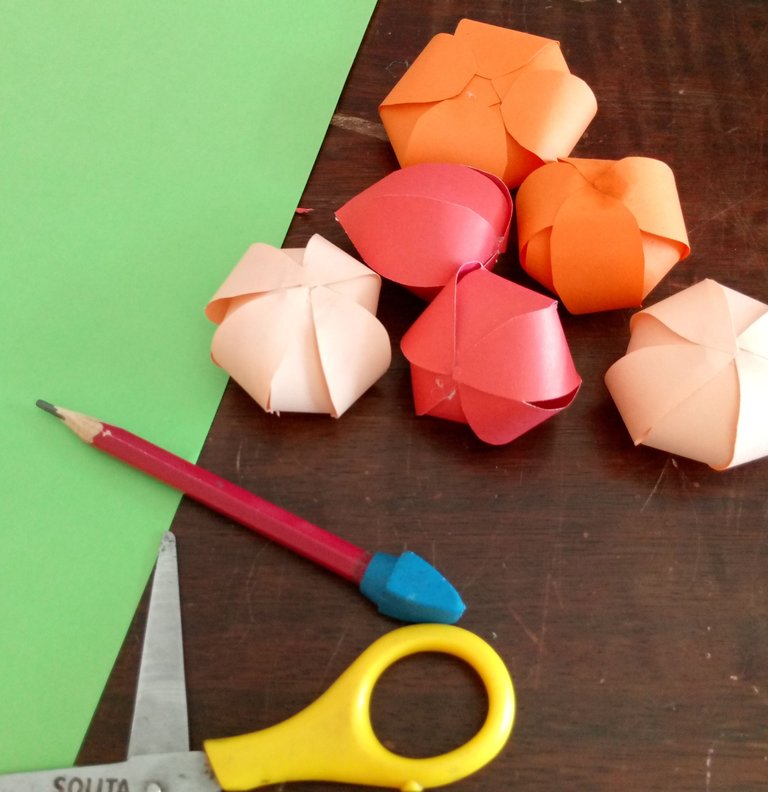
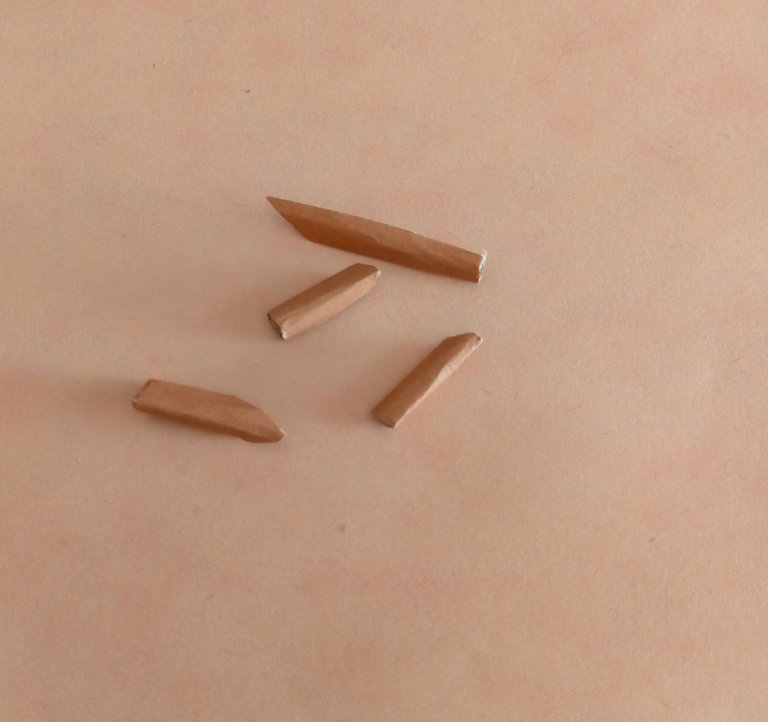
The third fruit is a peach, this one we are going to make with the 8 petals technique that consists only of gluing them at the top with a point of glue.
Possibly, it may be difficult to glue them all, for this we can use a skewer pole that we will introduce inside making pressure to hold the petals while they stick.
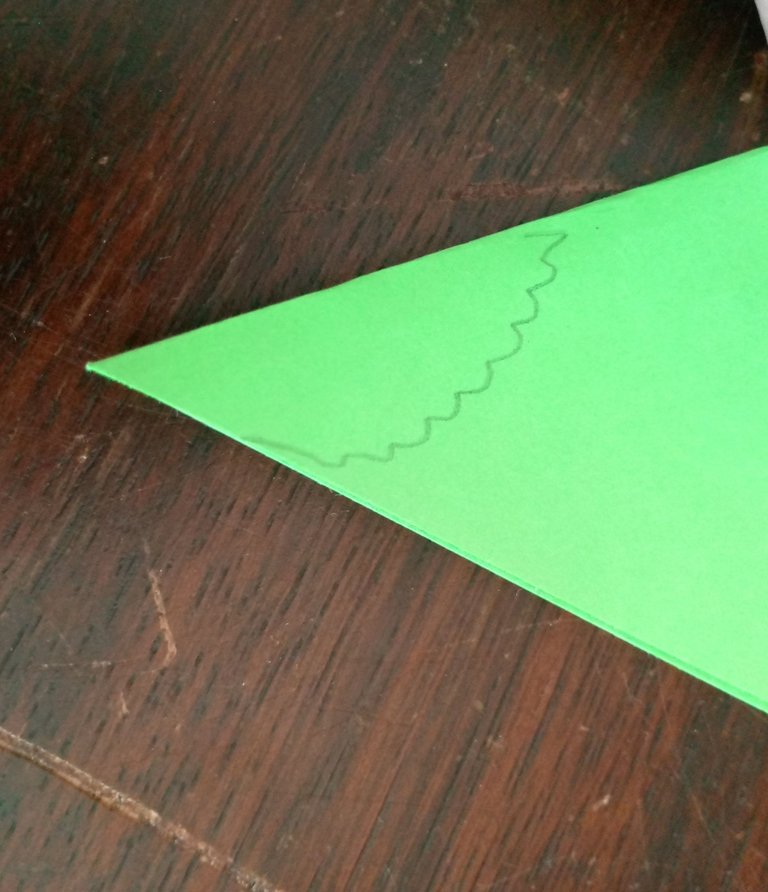
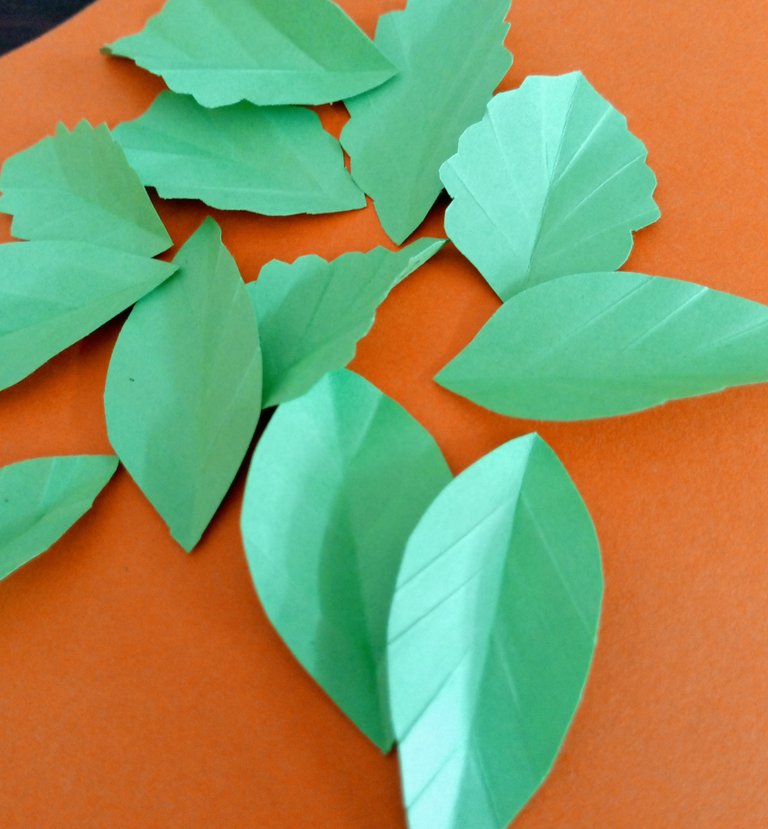
At this point we have the fruits ready, we will start making the leaves, we will only fold one end of the leaf, we will draw the shape of the leaf we want and cut it out, then we will fold with semi inclined lines to make the ribs, we will fold first on one side then on the other and we will open the leaf, leaving it with a nice look.
La tercera fruta es un durazno, este lo vamos a hacer con la técnica de los 8 pétalos que consiste únicamente en pegarlos en la parte superior con una punta de pegamento.
Posiblemente nos cueste pegarlos todos, para ello podemos utilizar un palo de brocheta que introduciremos dentro, haciendo presión para sujetar los pétalos mientras se pegan.
Llegando a este punto ya tenemos los frutos listos, empezaremos a hacer las hojas, solo doblaremos un extremo de la hoja, dibujaremos la forma de la hoja que queremos y la recortaremos, luego doblaremos con líneas semi inclinadas para hacer las nervaduras, doblaremos primero por un lado luego por el otro y abriremos la hoja, quedando con un bonito aspecto.
 |  |  |
|---|
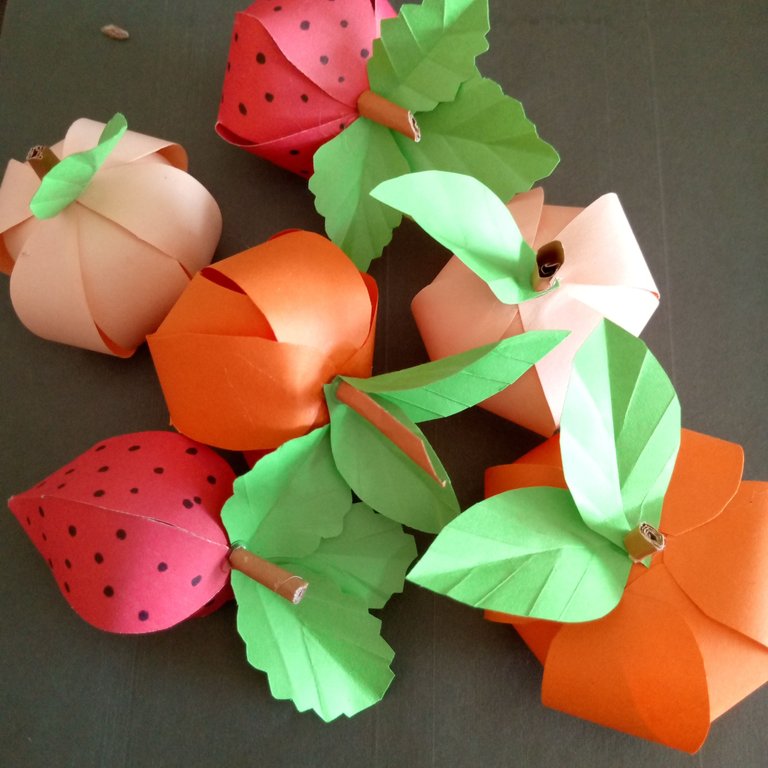
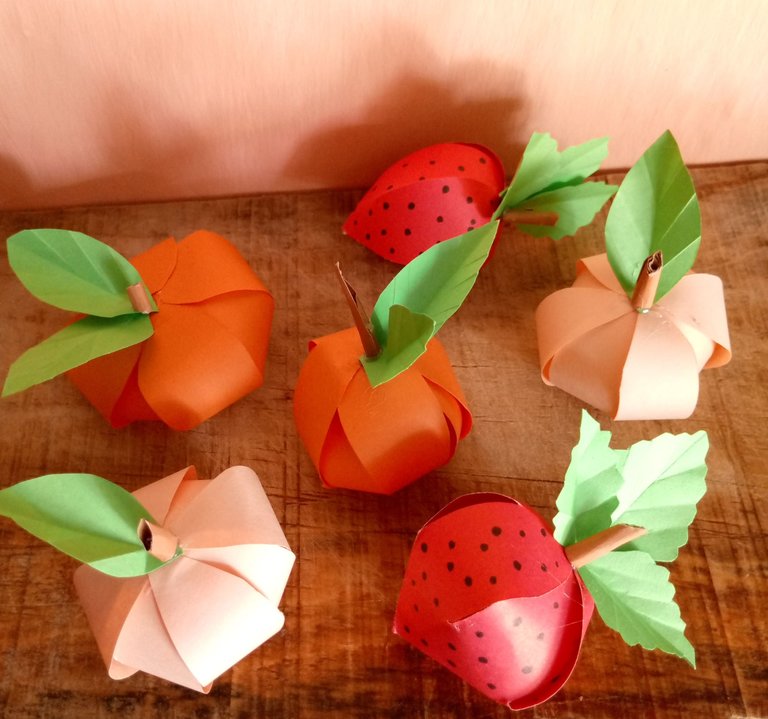
In this step we glue the leaves and stems, now we are going to enjoy some beautiful and colorful fruits, we will start making a basket to place these fruits.
En este paso pegamos las hojas y los tallos, ahora vamos a disfrutar de unas bonitas y coloridas frutas, vamos a empezar a hacer una cesta para colocar estas frutas.
 |  |  |
|---|
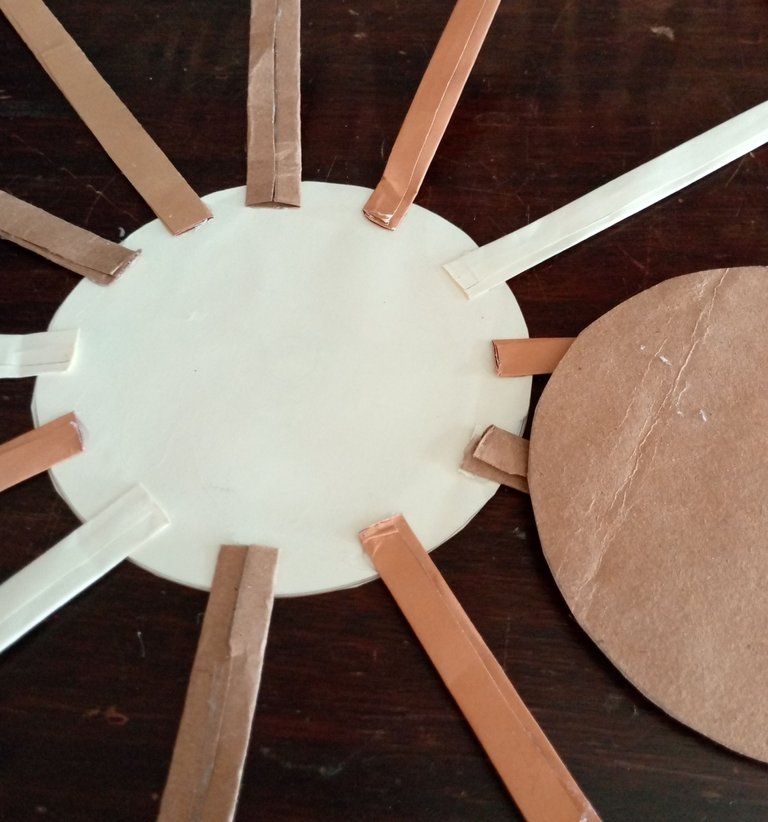
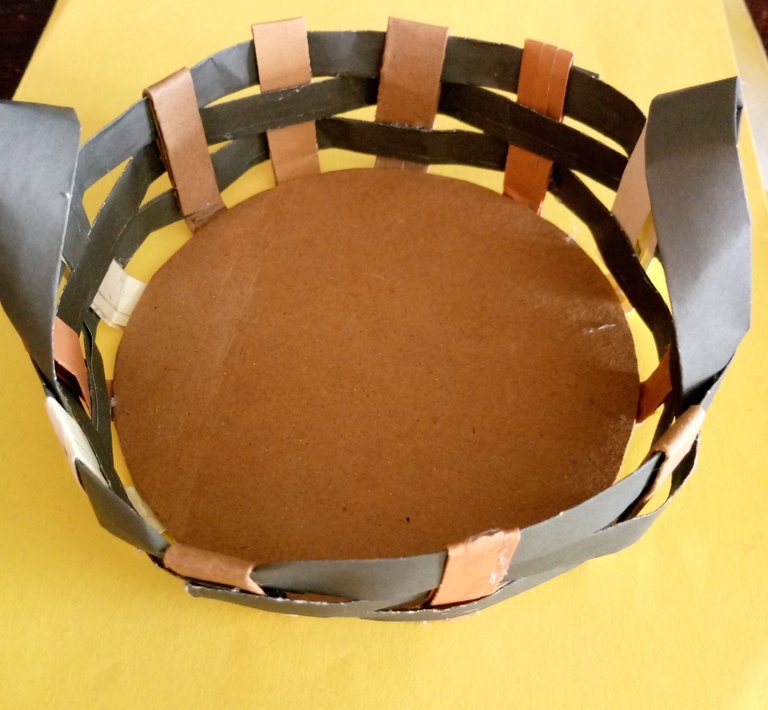
Using the CDs that we have used to make the circumference to make the fruits, we are going to make a simple basket.
The first thing we are going to do is to line the CDs with paper, then we are going to cut some paper ribbons 3 cm wide, we are going to fold 1 cm on each side inwards and we are going to stick them with silicone.
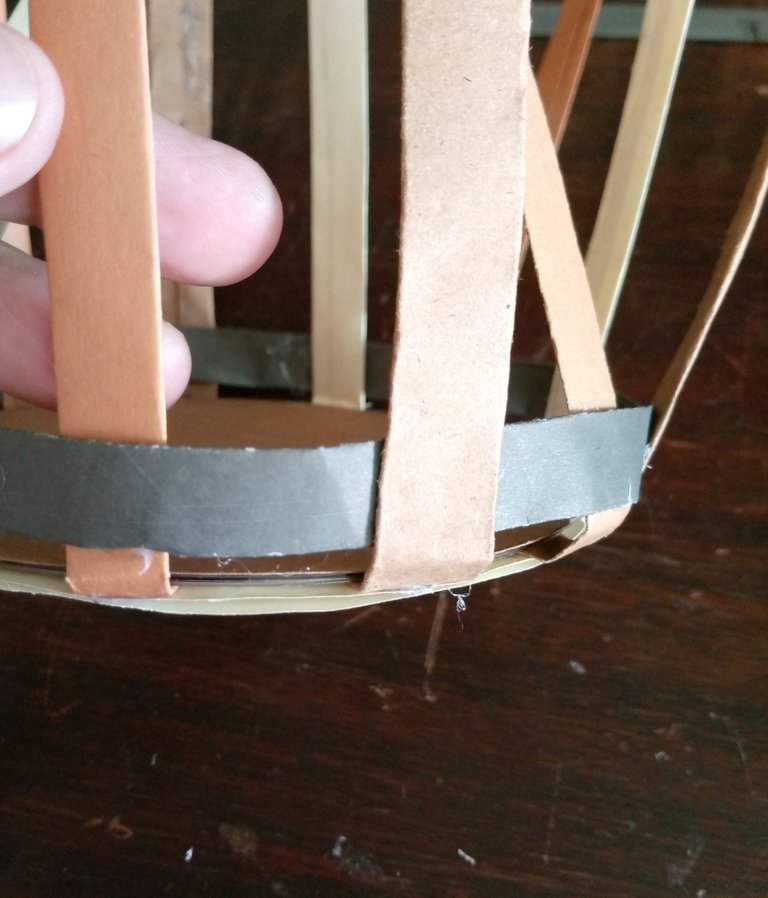
Then we are going to cut these ribbons and glue them around the circumference of the CD we lined, place another CD on top of them and start weaving with a ribbon passing between ribbons, one on the top and one on the inside, making 3 turns of ribbons.
We close the edge of the basket by folding the ribbons, gluing and trimming the excess, then we glue some handles and the basket is ready to place the beautiful fruits.
Utilizando los CDs que hemos utilizado para hacer la circunferencia para hacer las frutas, vamos a hacer una sencilla cesta.
Lo primero que vamos a hacer es forrar los CD con papel, después vamos a cortar unas cintas de papel de 3 cm de ancho, vamos a doblar 1 cm por cada lado hacia dentro y las vamos a pegar con silicona.
Luego vamos a cortar estas cintas y las vamos a pegar alrededor de la circunferencia del CD que forramos, colocamos otro CD encima y empezamos a tejer con una cinta pasando entre cintas, una por arriba y otra por dentro, haciendo 3 vueltas de cintas.
Cerramos el borde de la cesta doblando las cintas, pegando y recortando el sobrante, luego pegamos unas asas y la cesta está lista para colocar las hermosas frutas.
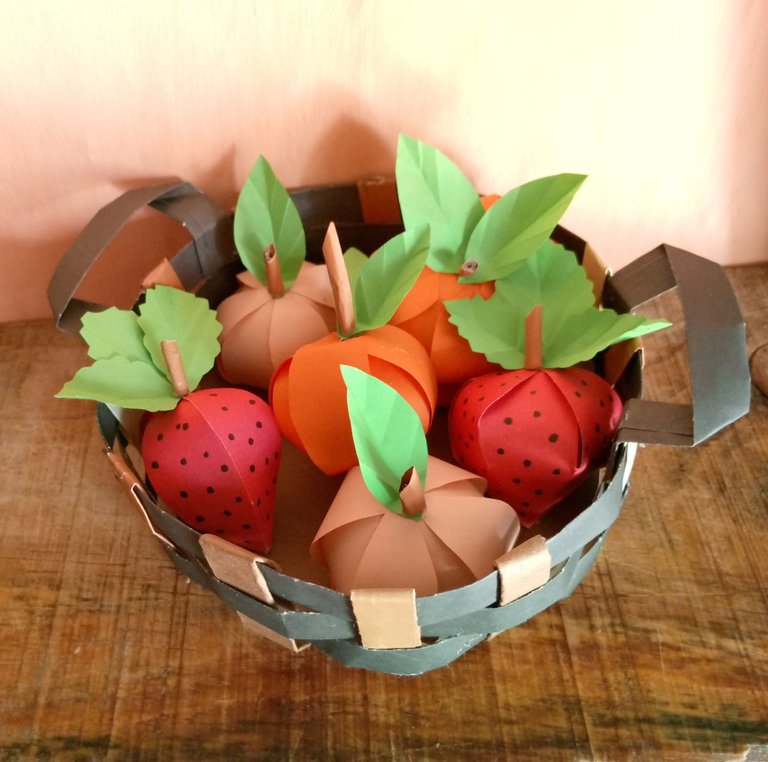
At this point we have concluded with this beautiful fruit ornament, I hope you liked sharing this experience with me, for me it has been a pleasure to share my art of the day with everyone.
I love you all and send you a big hug from a distance.
En este punto hemos concluido con este hermoso adorno frutal, espero que les haya gustado haber compartido esta experiencia conmigo, para mi ha sido un placer compartir mi arte del dia con todos.
Se les quiere, y les envio un enorme abrazo desde la distancia.😘 🤗
social networks / redes sociales
![]()
![]()
Traductor Deepl
Translated Deepl
Ediciones Canva
Editions Canva


Qué bellas!! Me provocaron comérmelas jajajaja!
Jjajaja gracias querida, me alegra que te provoquen 😁
wow that looks so beautiful, thanks for sharing. keep up the good work.
Nice craft
Thank you, sweetie 😃
You're welcome 😊
Ainssss pero que lindo trabajo, te quedaron preciosas y muy bien elaboradas. Un trabajo muy prolijo, me encantaaaa...
!DIY
Muchas gracias querida @dayadam me alegra que te hayan gustado.😃
a community encouraging first-hand content, and each individual living their best life.
You can query your personal balance by
!DIYSTATSFrom Venezuela, our witness drives decentralization and the adoption of Web3 technology, creating opportunities for the local community and contributing to the global ecosystem. // Desde Venezuela, nuestro testigo impulsa la descentralización y la adopción de la tecnología Web3, generando oportunidades para la comunidad local y contribuyendo al ecosistema global.
Sigue, contacta y se parte del testigo en: // Follow, contact and be part of the witness in:
¡Felicidades! Esta publicación obtuvo upvote y fue compartido por @la-colmena, un proyecto de Curación Manual para la comunidad hispana de Hive que cuenta con el respaldo de @curie.
Si te gusta el trabajo que hacemos, te invitamos a darle tu voto a este comentario y a votar como testigo por La Colmena.
Si quieres saber más sobre nuestro proyecto, te invitamos a acompañarnos en nuestro servidor de Discord.
So simple and so well done, I loved your work, you made it look very cute.
Thank you for your encouraging words, I'm glad you liked it.🙂😀
Se ven hermosas, yo las pondría en el centro del comedor jaja 😍
Gracias amiga, sí, se ven tan lindas en la mesa, las visitas se maravillan, gracias por leer y comentar 😘.
Es un trabajo delicado, que requiere cierta habilidad. Me recuerda que en ciertas creencias, se hacen cestas con frutas en papel, herramientas y multitud de objetos. Para luego agregarlos a la pira funeraria y así sus seres queridos pudiesen tener todos los objetos en el más allá.
¡Amigo mío espero estés bien! Wow interesante creencia no sabía este detalle, gracias compartirme esa información.
Como bien dices es un trabajo delicado, sin embargo, es fácil de hacer, puedes notar que de unas flores podemos crear frutas, es interesante porque pasa como en la naturaleza, es una casualidad muy bonita.😃
Te quedaron lindas las frutas garotiñaa, son tentadoras porque tengo hambre en este preciso momento, menos mal que son creaciones artesanales de la garotiña y no son comestibles jajaja. Diría que están geniales para colocar en la mesa del comedor como adorno, así se le daría un aspecto más colorido. Tienes mucha creatividad, además bastante paciencia para realizar tantos detalles jeje. Un abrazo garotiña artesana.
¡Hola mi querido garotooo espero estés muy bien me alegra que hayas pasado como siempre!!! ¡Gracias!!!, las frutas se ven lindas, pero lamentablemente no te las puedes comer jajajaja,😁 son adornos que como bien dices se verían lindas en la mesa del comedor, te las regalo y espero que tus insectos no las destruyan porque los voy a mandar a bañar contigo jajajaja.🤝 😆 un abrazote para ti también.
Hermosa cesta de frutas, todas las frutas quedaron bellas, todo muy delicado, me encantó, feliz noche.
The fruits are beautiful and colorful. I love it.
quedo hermoso! genial trabajo.
It was beautiful! great job.
Gracias amiga, me alegra saber que te han gustado, son un bonito detalle para decorar, es divertido hacerlos.
A combination of paper with different color papers makes a wonderful fruit basket. Where various fruits can be kept on the dining table or in different places. Thank you so much for presenting this wonderful art to us.
Thanks for stopping by, I really appreciate your comment.😃
you are Wellcome
Thank you !!!🤗
Hola @lauracraft me ha gustado ver tu post, me ha gustado todo el proceso que has explicado con mucho detalle, bonito resultado. Saludos
Hola @miguel gracias por pasar, me alegra que te haya gustado.😃