Paso a paso de una cartelera en 3D sobre el satélite artificial
Hey queridos amigos de Hive
Espero que se encuentren súper bien el día de hoy, quiero compartir con ustedes una manualidad que realicé ayer ayudando a una vecinita quien debía entregar una pancarta en 3D sobre el satélite artificial, aquí teníamos que hacer todo en relieve y usar solo los poquitos materiales que ella pudo facilitarme por lo que fue todo un reto pero el resultado final me dejo muy satisfecha y orgullosa por lo que había logrado, aquí te comparto todo el proceso espero les guste
Hey dear friends of Hive
I hope you are feeling great today, I want to share with you a craft I made yesterday helping a neighbor who had to deliver a 3D banner on the artificial satellite, here we had to do everything in relief and use only the few materials that she could provide me so it was a challenge but the end result left me very satisfied and proud of what I had achieved, here I share the whole process I hope you like it

Materiales
Cartón
Cartulina de color negro
Silicón
Tijeras
Envase de refresco
Papel aluminio
Pega en barra
Pega blanca
Un globo
Marcadores
Pinturas
Foami azul
Materials
Cardboard
Black cardboard
Silicone
Scissors
Soda can
Aluminum foil
Glue stick
White glue
Balloon
Markers
Paints
Blue Foami
Pasó a paso
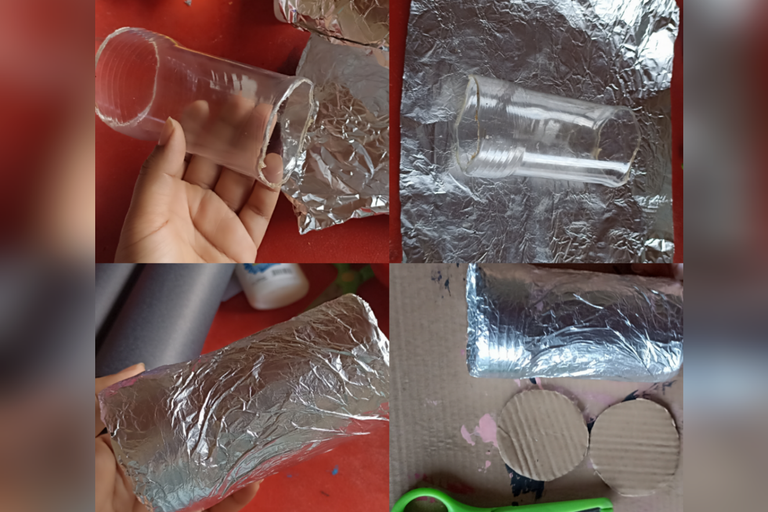
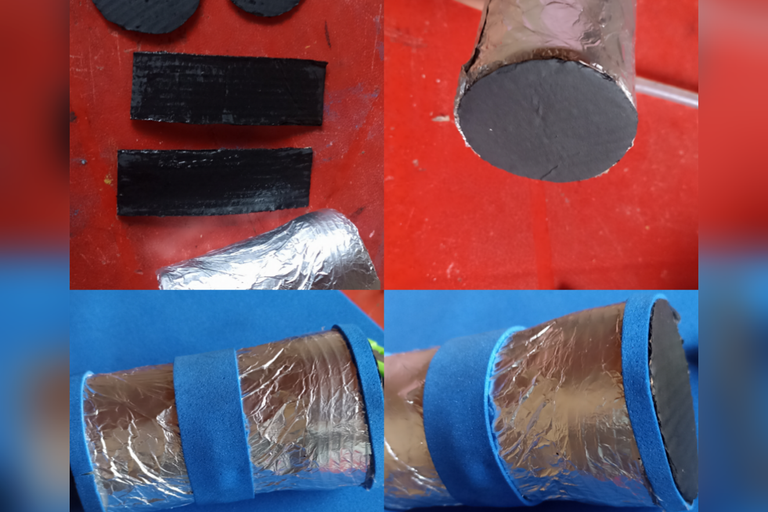
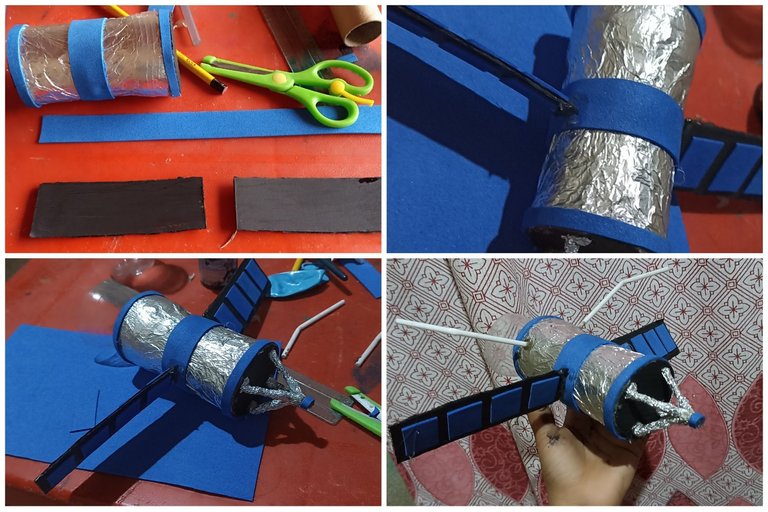
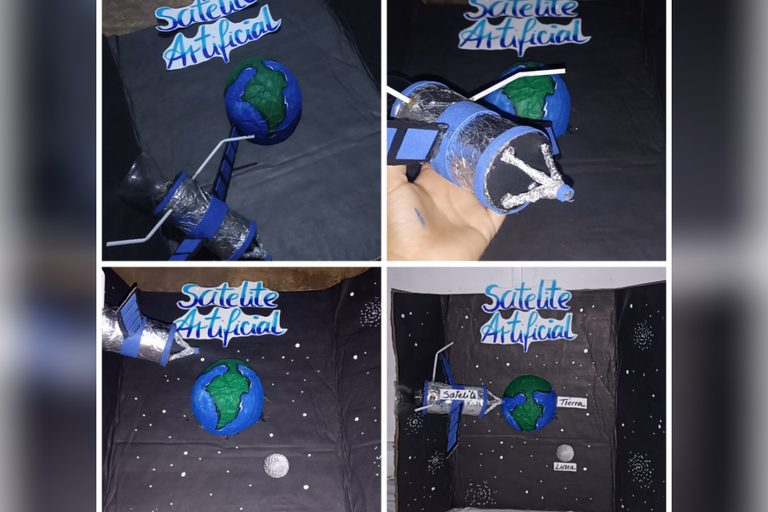
Primero comencé a hacer el satélite y este lo hice con un envase de refresco le pique la punta y la parte de atrás para solo dejar la parte más recta y este lo forre con papel aluminio mientras que para tapar sus orificios recorte dos círculos que pinté de negro para luego pegarlo, para darle algunos detalles use foami azul, seguidamente recorte dos pedazos rectos de cartón y también pinte de negro y con foami azul le hice los detalles al satélite, arme y pegue todo con Silicón, pegue la punta del refresco en la parte de atrás y con más aluminio realice la punta por último pegue dos palitos de chupetas como grandes antenas y listo
Step by step
First I started to make the satellite and I made it with a soda can, I cut the tip and the back to leave only the straightest part and I lined it with aluminum foil while to cover the holes I cut out two circles that I painted black and then glued it, to give it some details I used blue foami, Then I cut two straight pieces of cardboard and also painted them black and with blue foami I made the details to the satellite, I assembled and glued everything with Silicone, I glued the tip of the soda in the back and with more aluminum I made the tip and finally I glued two lollipop sticks as big antennas and that was it.
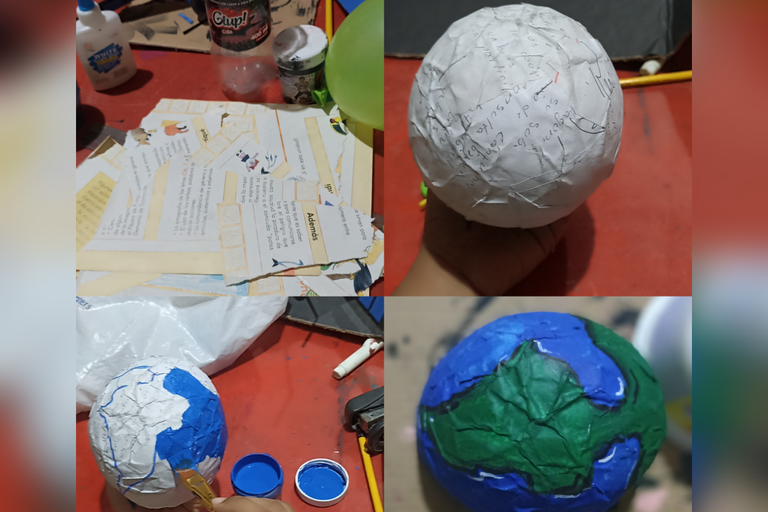
Al tener el satélite listo tenía que seguir con la parte de la cartelera aquí debía colocar el planeta en relieve y tuve la idea de tomar un globo inflado tan solo un poco y cubrir la mitad de papel y pega, al secar se endureció y pude pintar el planeta usando el color verde y azul para luego pegarlo justo en el medio de la cartulina que había doblado estilo libro
When I had the satellite ready I had to continue with the part of the billboard here I had to place the planet in relief and I had the idea of taking a balloon inflated just a little and cover half of the paper and glue, when it dried it hardened and I could paint the planet using the green and blue color and then paste it right in the middle of the cardboard that I had folded book style.
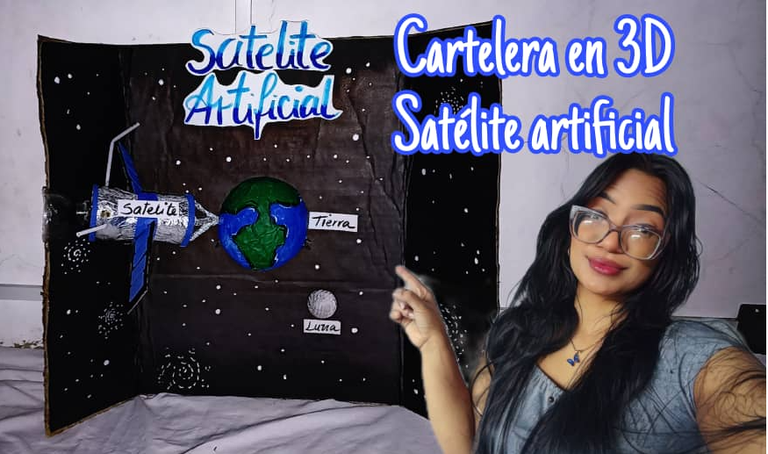
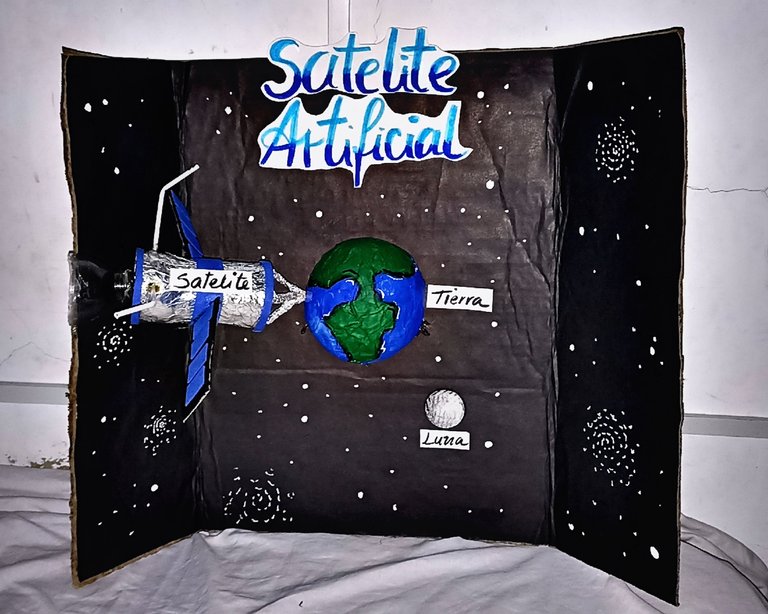
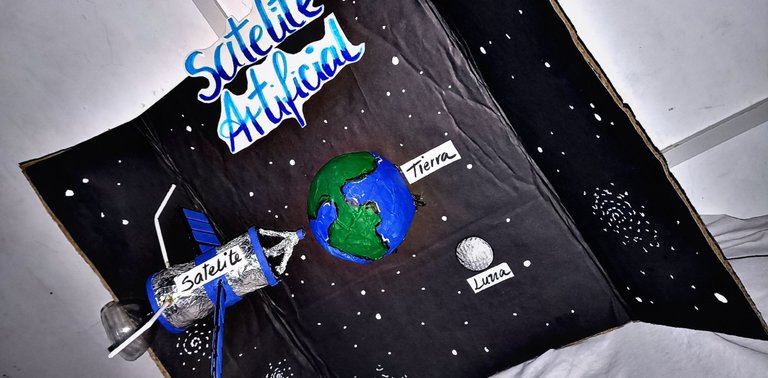
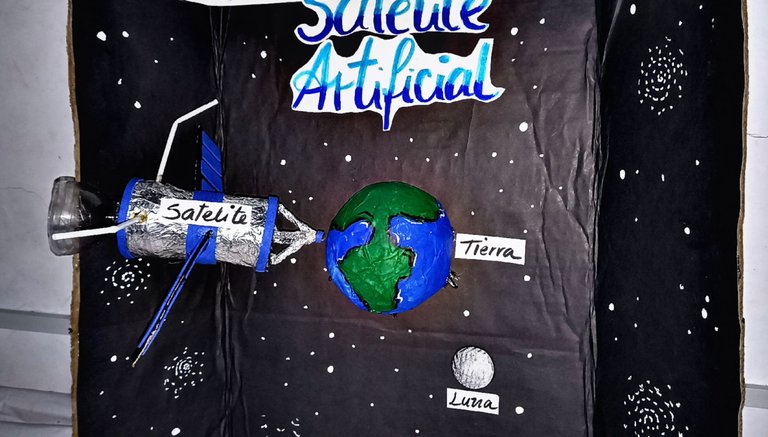
Para finalizar armamos todo realice el título de la cartelera usando dos tonos de azul y pegue en la superficie de la lámina justo en el centro por encima del planeta, con una grapadora coloque el satélite aún costado del planeta que pareciera que flotará y, pegue una luna que había dibujado realice con blanco muchísimas estrellas de diferencia tamaños y coloque el nombre todo para dar por culminado está cartelera en 3D sobre el satélite artificial
To finish we put everything together make the title of the billboard using two shades of blue and paste on the surface of the sheet right in the center above the planet, with a stapler place the satellite even side of the planet that seems to float and paste a moon that had drawn with white made a lot of stars of different sizes and place the name all to give culminated this billboard in 3D on the artificial satellite.
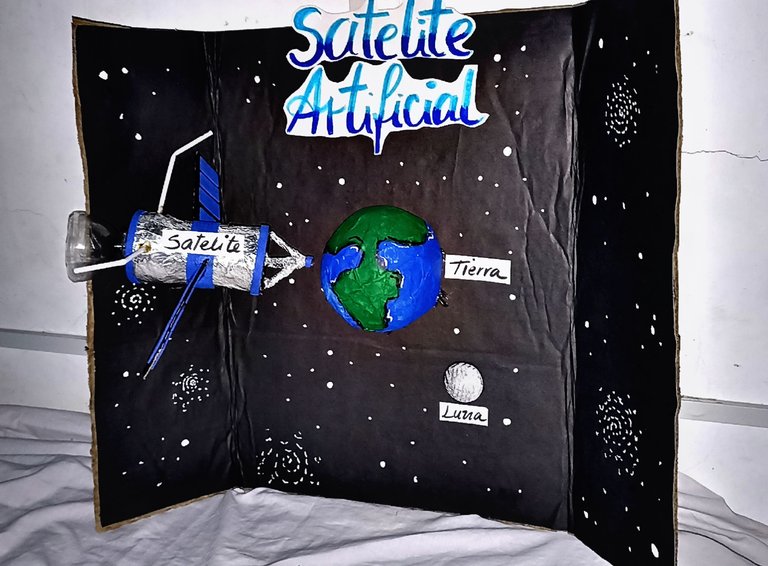
Aquí les comparto el resultado final espero les haya gustado no pude tomarme fotos porque lo terminé en la madrugada jajajaja quiero darles las gracias por regalarme un ratico de su tiempo nos vemos en una próxima publicación un abrazo gigante
Here I share the final result I hope you liked it I could not take pictures because I finished it in the early morning hahahaha I want to thank you for giving me a little of your time see you in a next publication a giant hug

!giphy great job
@sagarkothari88 vote 15%
| Hive Curators Community | Join Discord | Support Witness | Follow Curation Trail |
Keep Up the good work on Hive ♦️
Se ve hermosa, buen trabajo ✌🏽
The whole process looks complicated but the result really is awesome.
Great work
Whaoo this is creative and beautiful
Hola Keilis, interesante post, la dedicación en tu trabajo rindió frutos muy positivos, que las ganas de ayudar al prójimo nunca no disminuya. Saludos.