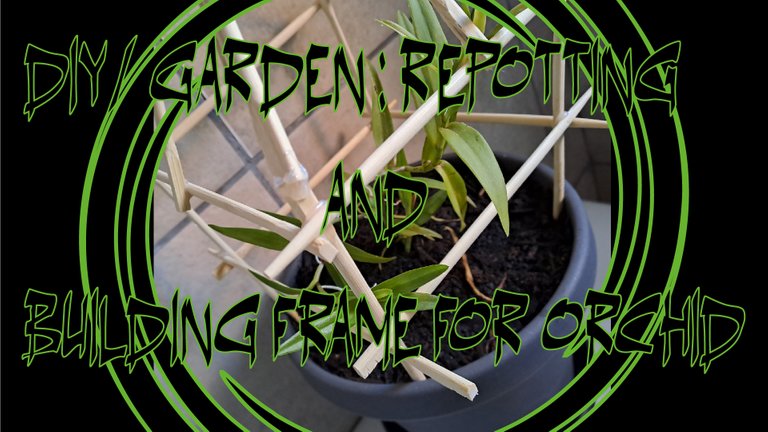
DIY/ Garden: Repotting & Building Decorative Frame for Orchid

Source: Created on Adobe Illustrator
Greetings from a very cold South Africa!
This was just a quick weekend project that I've been wanting to get to for ages. It was easy, fun and I'm pretty impressed with the results!
I'll admit, I'm not exactly sure what kind of orchid this is, it was a housewarming gift. For the longest time, it didn't do much, didn't even show a lot of growth, after moving it around and experimenting a lot, I finally managed to get it to start growing again, and wow, did it grow! And grow.... right out of it's original container. Clearly it was time to repot.
It does best when it has some sort of support, but the plain stick we were using wasn't very pretty, and I wanted something that would also look pretty, so I built a little frame thing around it. Pretty and functional, my favourite combination of things 😀
Here's how I did it:
Prepping for Repotting

Source: Created on Adobe Illustrator
Equipment Used:
- Plant
- Container for plant 20cm
- Potting Soil (I use Culterra Professional Potting Mix)
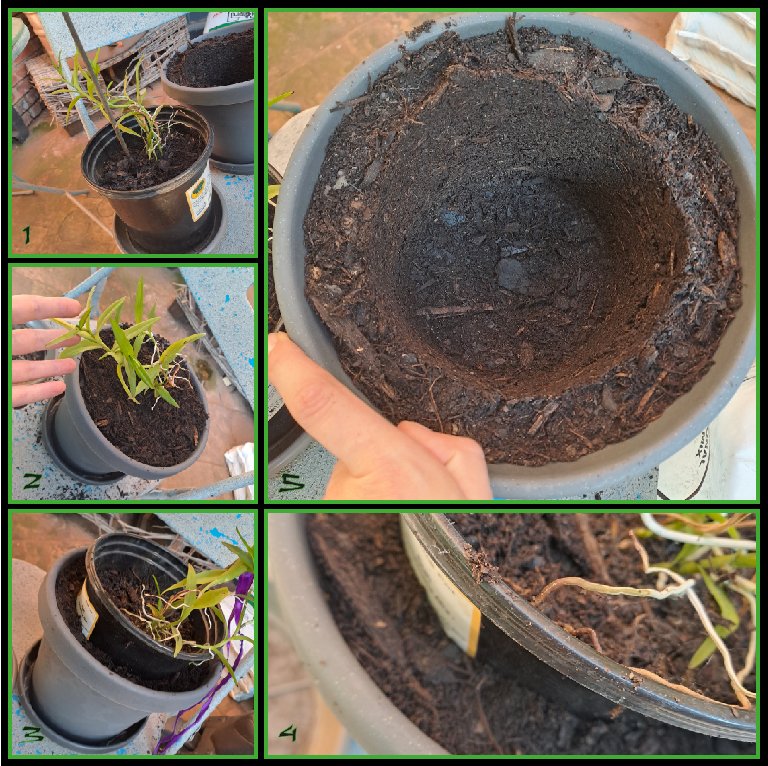
So far this seems to be the easiest way too prepare the new pot and soil, first I like to fill the new container with some potting soil, about 1/4 of the size of the container is usually pretty decent. After that, I just pop the old container (plant and all, as is) into the new container, then I very carefully fill the space around that container with potting soil, packing in a little bit, bit not too tightly. It should leave a nice pot shaped space, as shown above.
Transferring to New Container

Source: Created on Adobe Illustrator
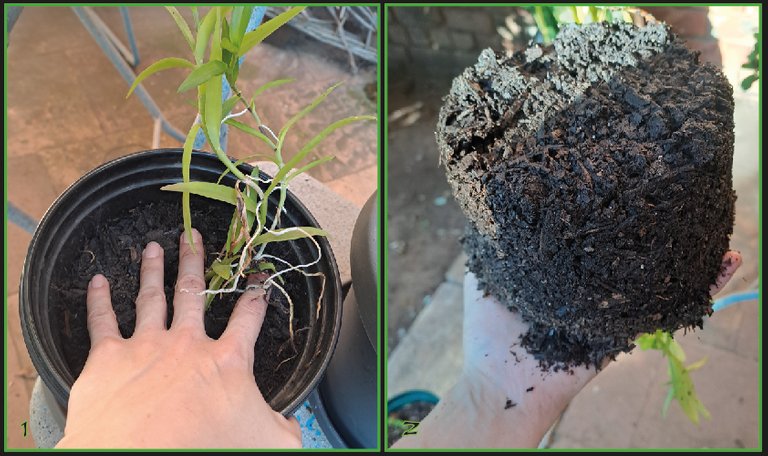
Next, I gently place my hand around the base of the plant, as show, and quickly flip the container over, it usually slides out pretty easily. Working quickly (which is why there aren't more photos of this step), carefully flip the plant, with soil still attached, over and place into the space created in the new container. This way I can repot it without disturbing the roots too much.
Building the Decorative Support Frame

Source: Created on Adobe Illustrator
For this step I used:
-Chopsticks from a local restaurant (I hate wasting and always try to donate/DIY/recycle before throwing anything away)
-Glue gun and glue sticks
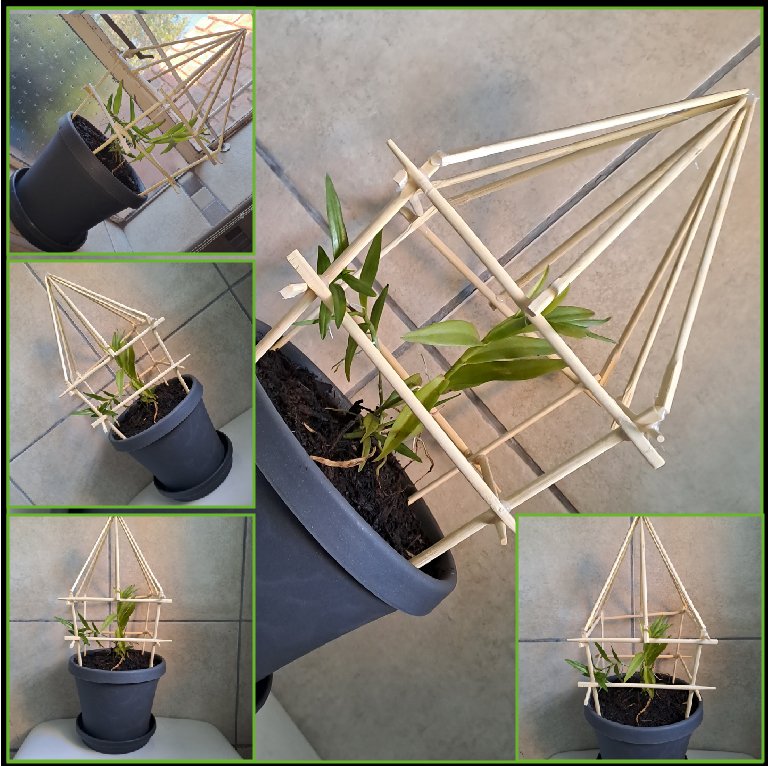
This part was pretty easy, I simply started by sticking four chopsticks into the soil, after that I glued four more to the tops of those, creating a roughly square shaped 'cage' around my plant (had to be very careful while doing this, hot glue and cute little plants.... scary combination)
Once the main shape was there, I started to add more sticks, for the top half, making a diamond like shape. I stuck a few more on there just to make it look right. And then I was done and ready to clean it all up a bit before moving it to its permanent home!

Source: Created on Adobe Illustrator
The orchid seems to be doing much better in it's new container, and I also think it looks pretty good. Will definitely do this for more of my plants in the future.
Thank you for reading! Till next time!
Credits: All photos by: S. R. Webber
Photo collages created using Adobe Illustrator - by S.R Webber
Congratulations @hellsveiah! You have completed the following achievement on the Hive blockchain And have been rewarded with New badge(s)
Your next target is to reach 20 posts.
You can view your badges on your board and compare yourself to others in the Ranking
If you no longer want to receive notifications, reply to this comment with the word
STOPTo support your work, I also upvoted your post!
Check out our last posts:
Thank you for using the #diy tag, the go-to-tag to earn and grow your BUIDL power.
You will be upvoted as long as you post plagiarism-free content/images and continue growing your BUIDL Power.
Whenever you are posting anything related to a DIY creation, you can use #diy tag, which will give your posts extra eyeballs and you will be entitled to earn BUIDL tokens as well.
Check out this post for more information about BUIDL tokens.
Likewise, whenever you are posting anything related to hivelist related tags use the #contests, #forsale, #services, #gigs, #events or #fundraising tags and your posts will be featured in https://hivelist.org, which will give your posts extra eyeballs and you will be entitled to earn LIST tokens as well.
I like this technique helps the plant to remain stable...good job.
https://twitter.com/Chacald1/status/1666522623977705495?s=20
!DIY
!discovery 35
This post was shared and voted inside the discord by the curators team of discovery-it
Join our Community and follow our Curation Trail
Discovery-it is also a Witness, vote for us here
Delegate to us for passive income. Check our 80% fee-back Program