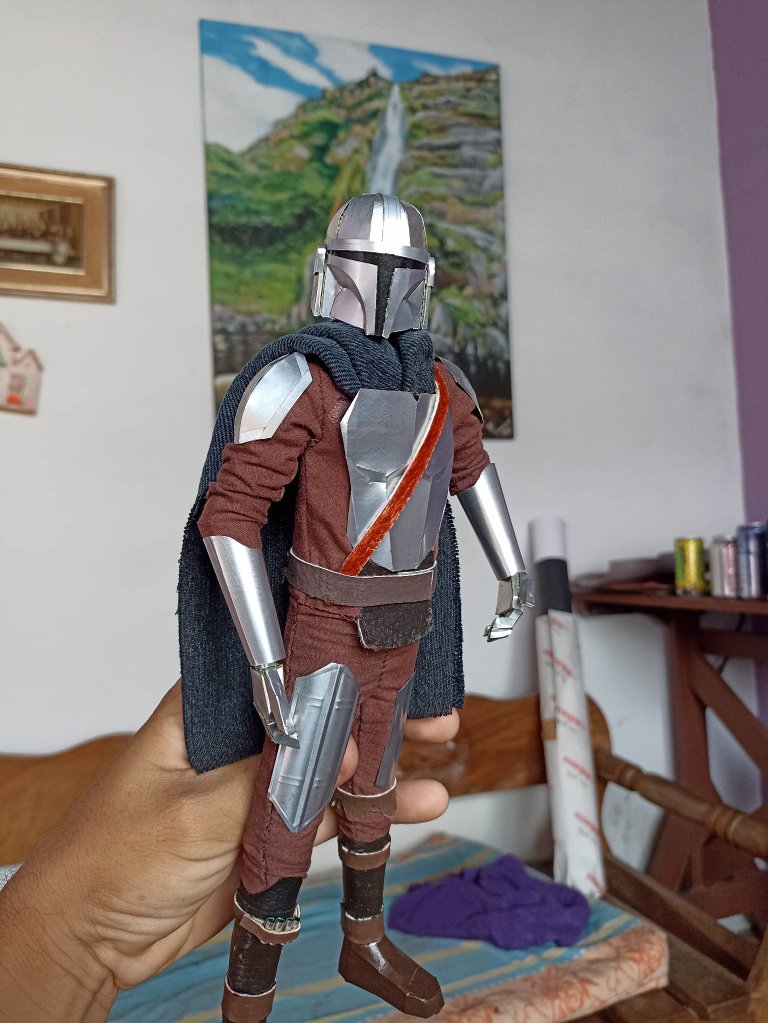
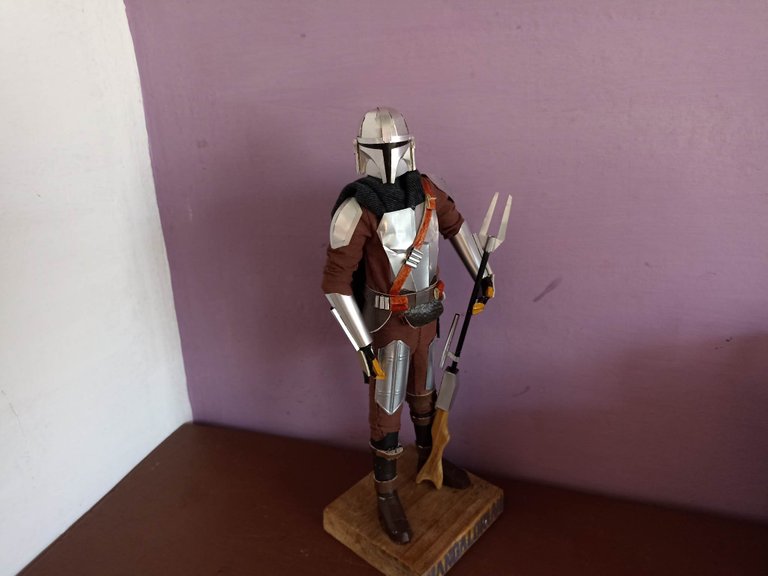
THE MANDALORIAN, A SCULPTURE MADE WITH SODA CANS - [ENG-ESP]
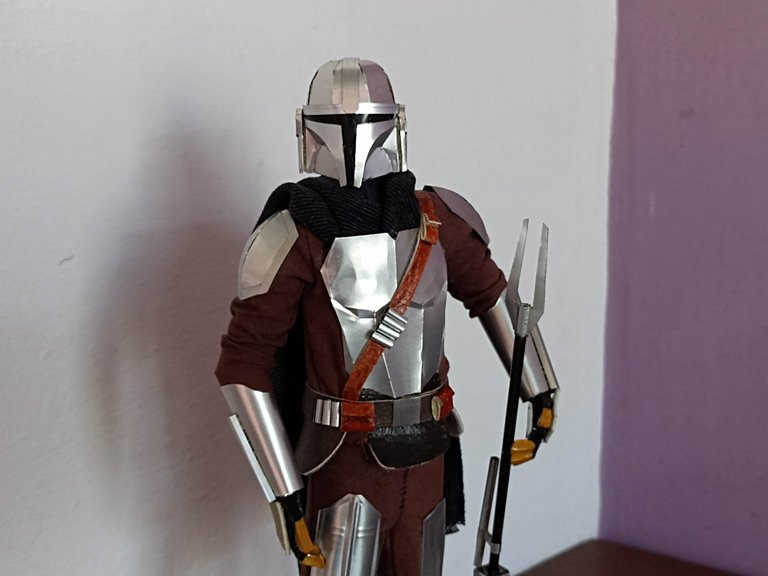
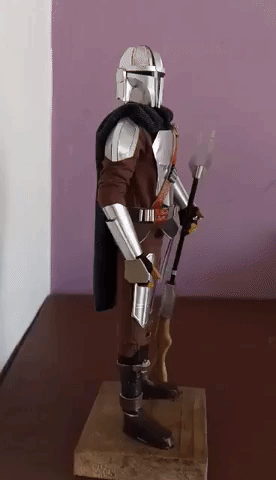
Hello friends, recently I was super busy while working on this sculpture, so it took me quite a while to make it, but more than that I wanted to add as many details as possible to it. This figure is from The Mandalorian, my favorite character in the new Star Wars installments, the figure is made of various materials, the main one being aluminum cans, also cardboard, synthetic leather and wood. The sculpture is 30 centimeters high, it doesn't weigh much and I made it guided by the images available on the internet, so I also found some templates that were useful for the part of the body and then I made some changes and I also added more things to it. get the end result. I will try to be brief in the explanation so that you can enjoy them, I hope you like it.
Hola amigos, recientemente estuve super ocupado mientras trabajaba en esta escultura, por lo que tardé bastante tiempo en hacerla, pero más de eso quise añadirle todos los detalles posibles. Esta figura es de El Mandaloriano, mi personaje favorito en las nuevas entregas de Star Wars, la figura está realizada con varios materiales, siendo el principal latas de aluminio, también cartón, cuero sintético y madera. LA escultura tiene una altura de 30 centímetros, no pesa mucho y la hice guiándome por las imágenes disponibles en internet, así también encontré unas plantillas que me sirvieron para la parte del cuerpo y luego yo le hice algunos cambios y también le agregué más cosas para conseguir el resultado final. Trataré de ser breve en la explicación para que puedan disfrutarlas, espero les guste.

 |  | |
|---|---|---|
 |  |
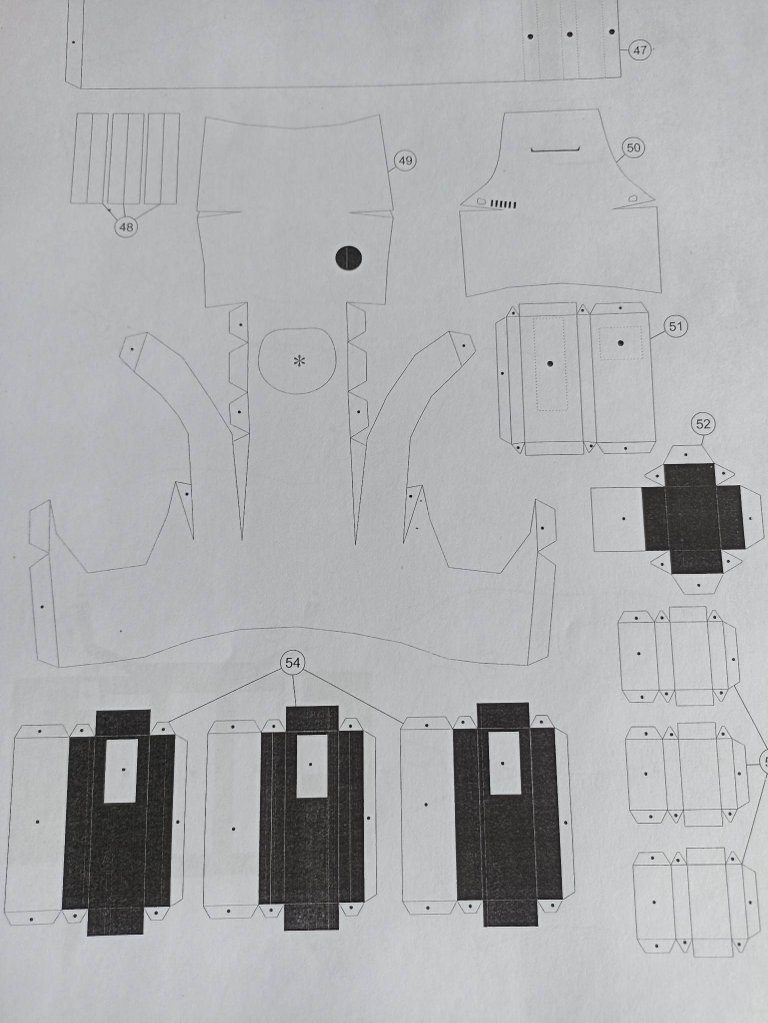
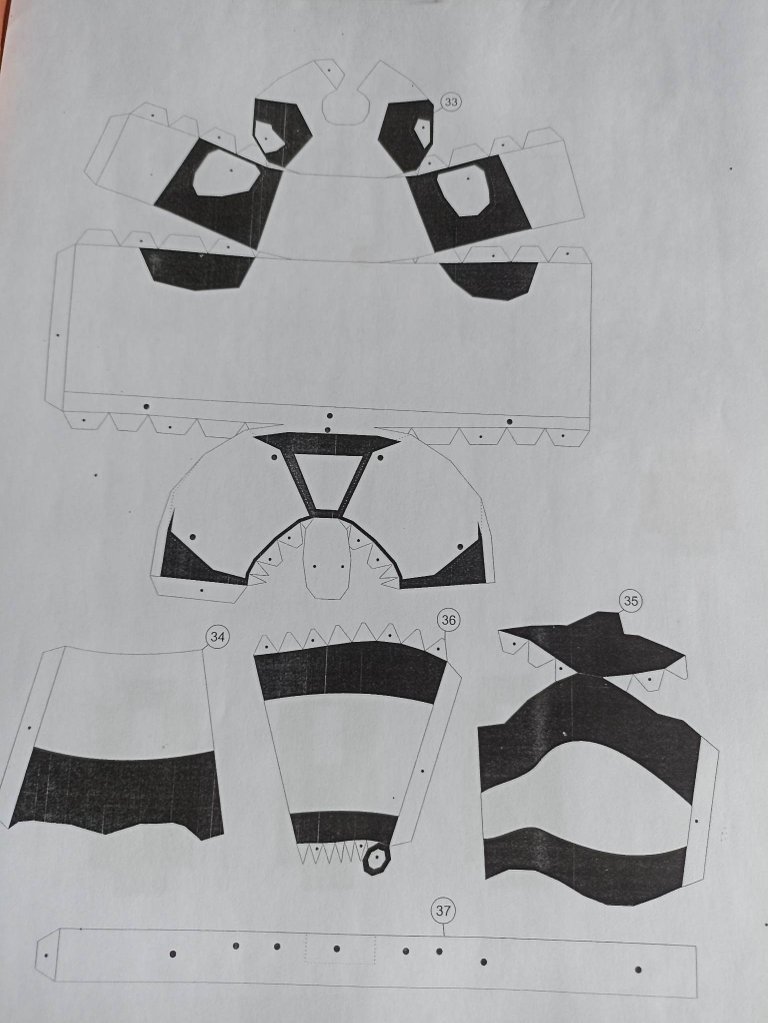
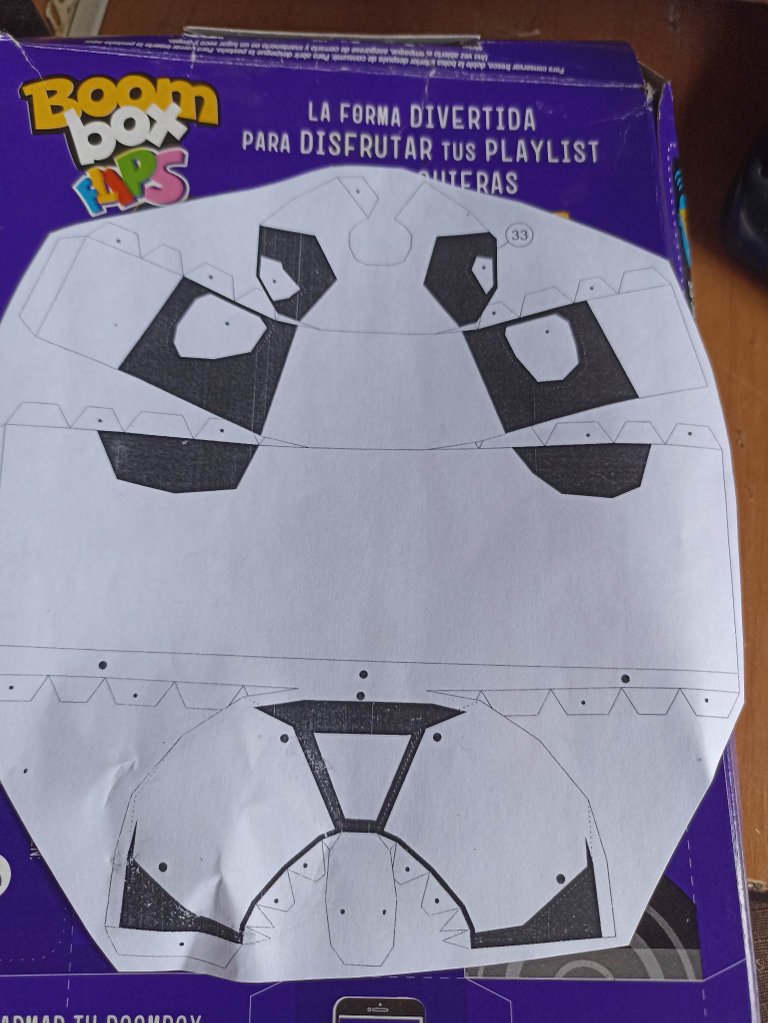
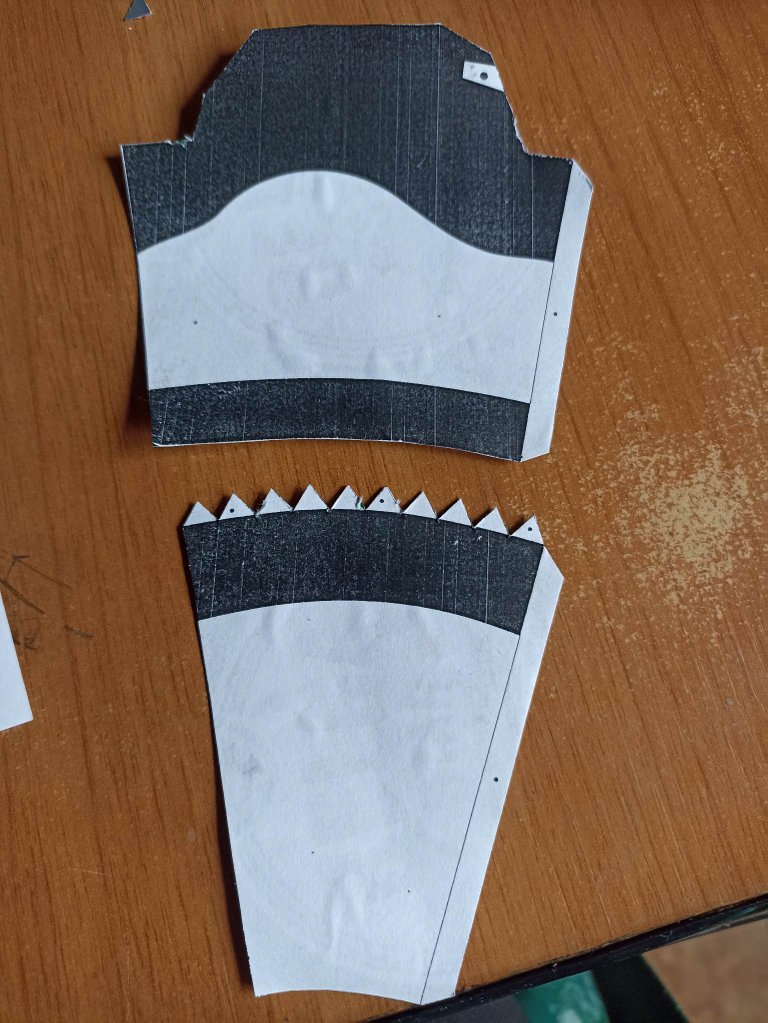
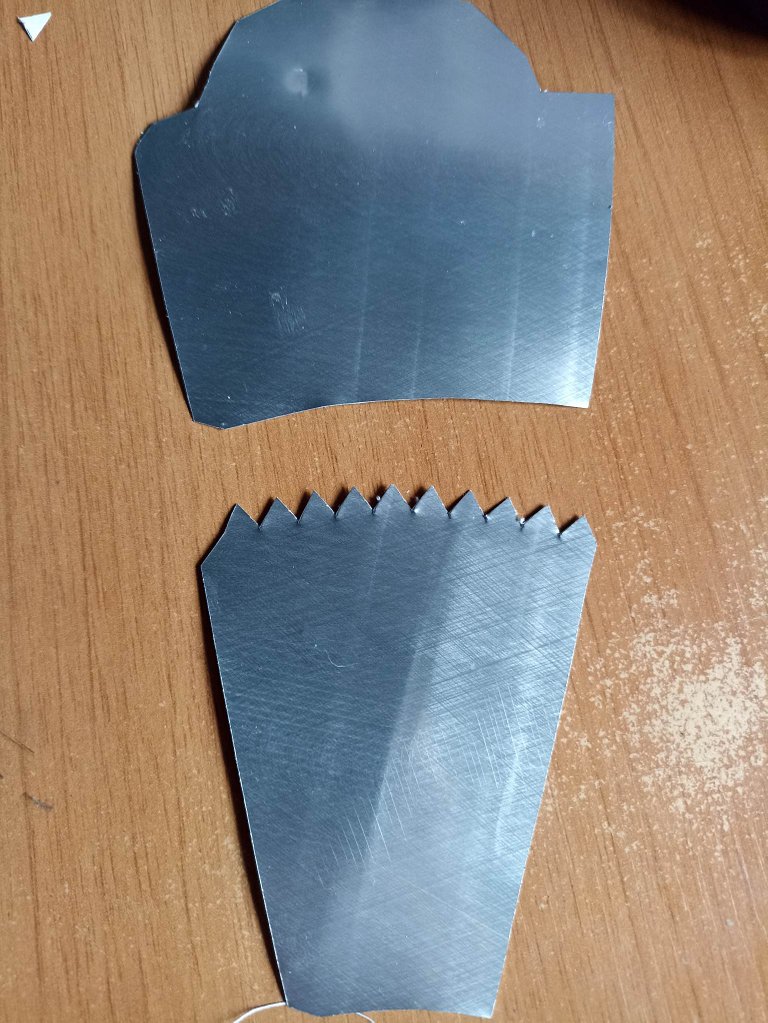
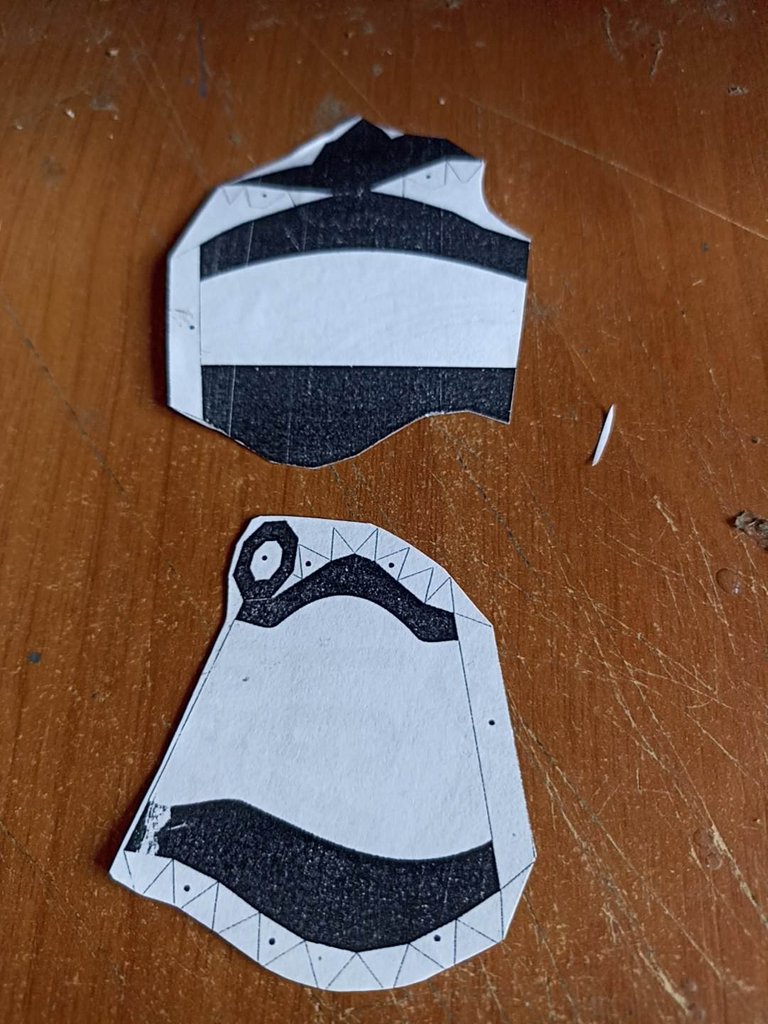
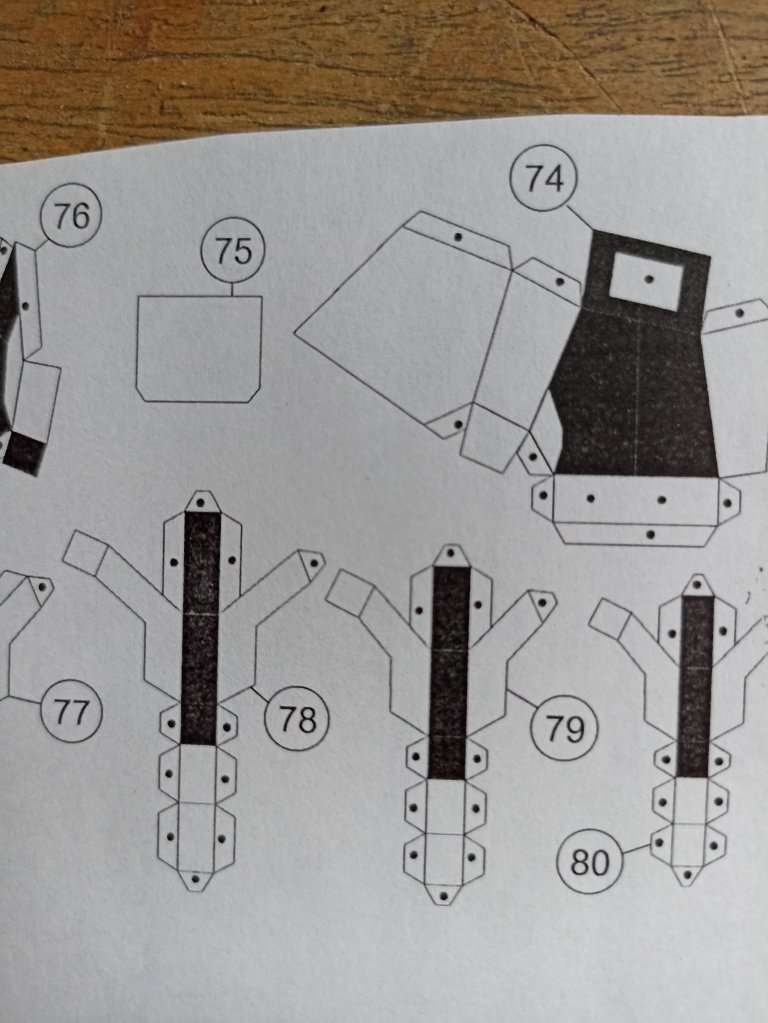
To start the action figure I used 15 soda cans, which I cut and then turned into sheets to work better, I downloaded the templates from the website Paper-replika there are thousands of templates of various models that users create and share, from pokemon, lego figures and very complicated templates that require many hours of concentration. I downloaded some templates that are to make a stormtropper, but I only used the base of the body, such as arms, chest and legs and I added the rest.
Para comenzar la figura de acción utilicé 15 latas de soda, las cuales corte y luego convertí en láminas para trabajar mejor, las plantillas las descargue del sitio web Paper-replika ahí se encuentran miles de plantillas de diversos modelos que los usuarios crean y comparten, desde pokemon, figuras de lego y plantillas muy complicadas que ameritan muchas horas de concentración. Yo descargué unas plantillas que son para realizar un stormtropper, pero yo solo utilicé la base del cuerpo, como brazos, torax y piernas y el resto yo lo agregué.
 |  |  |
|---|---|---|
 | 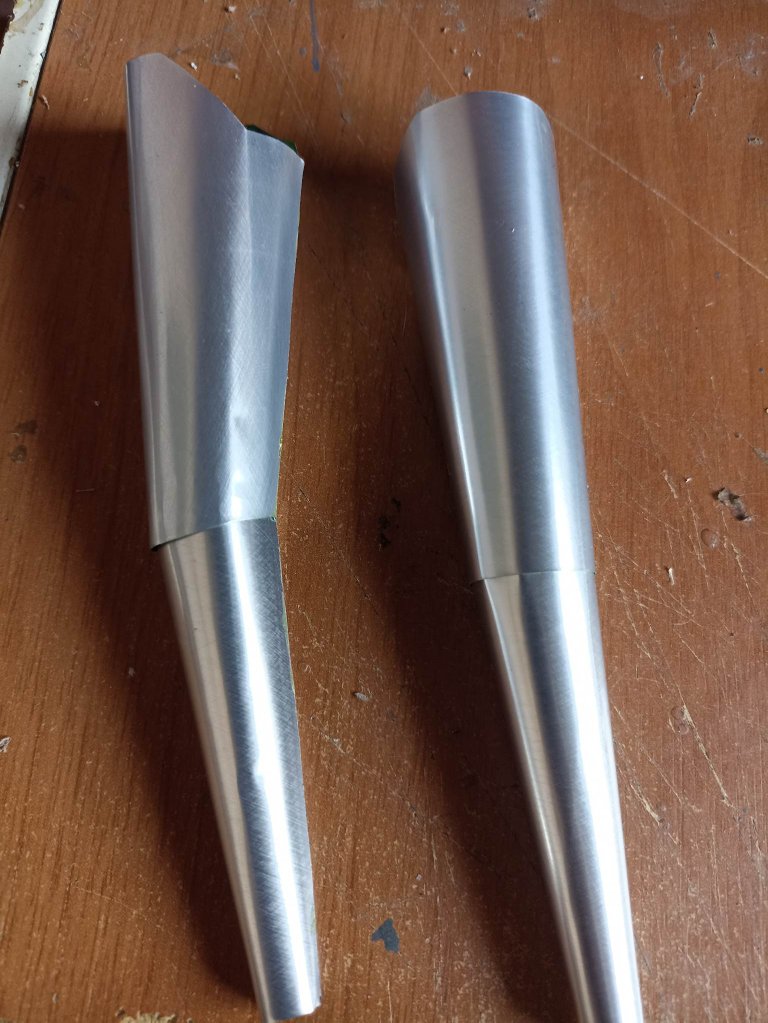 |  |
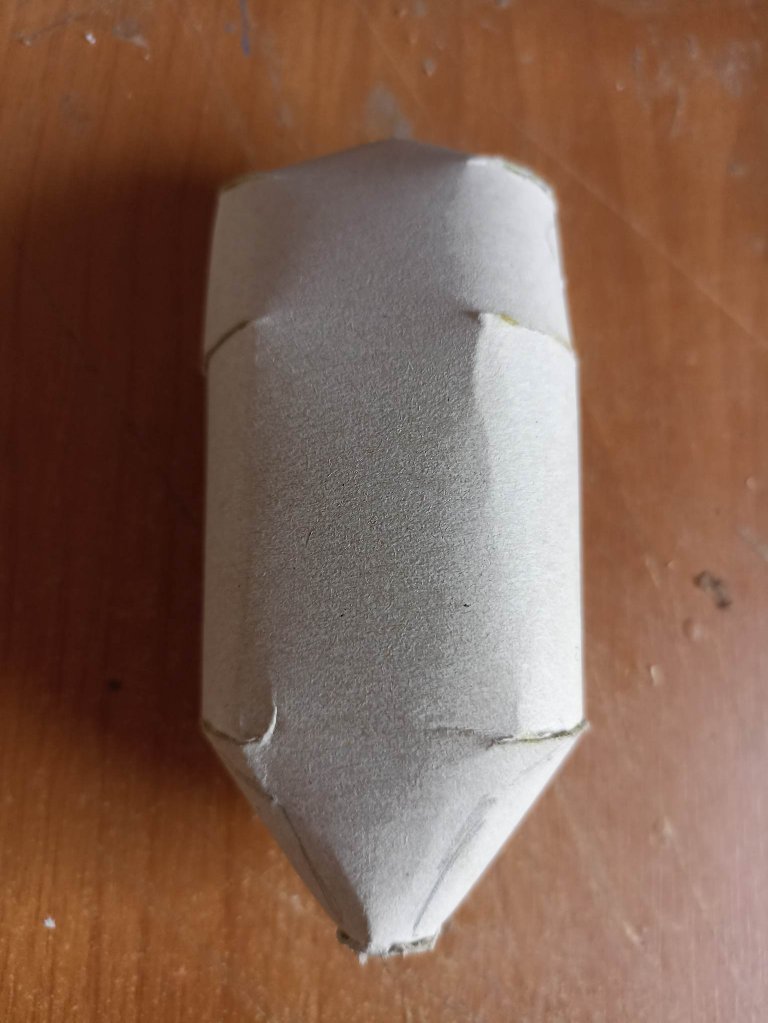
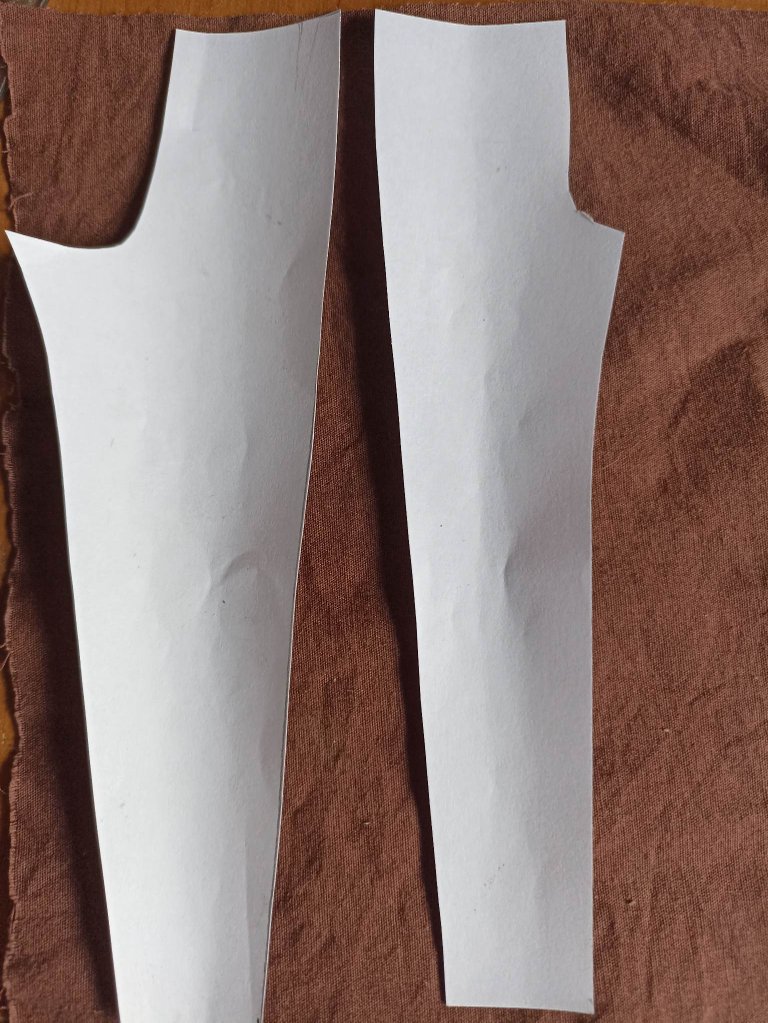
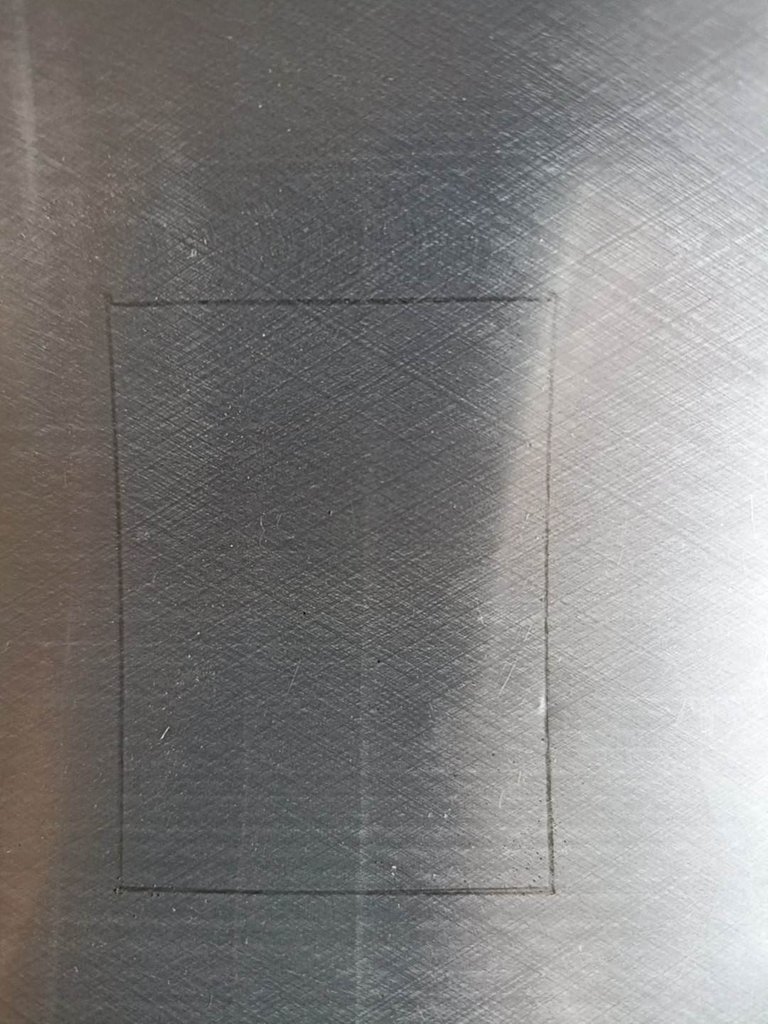
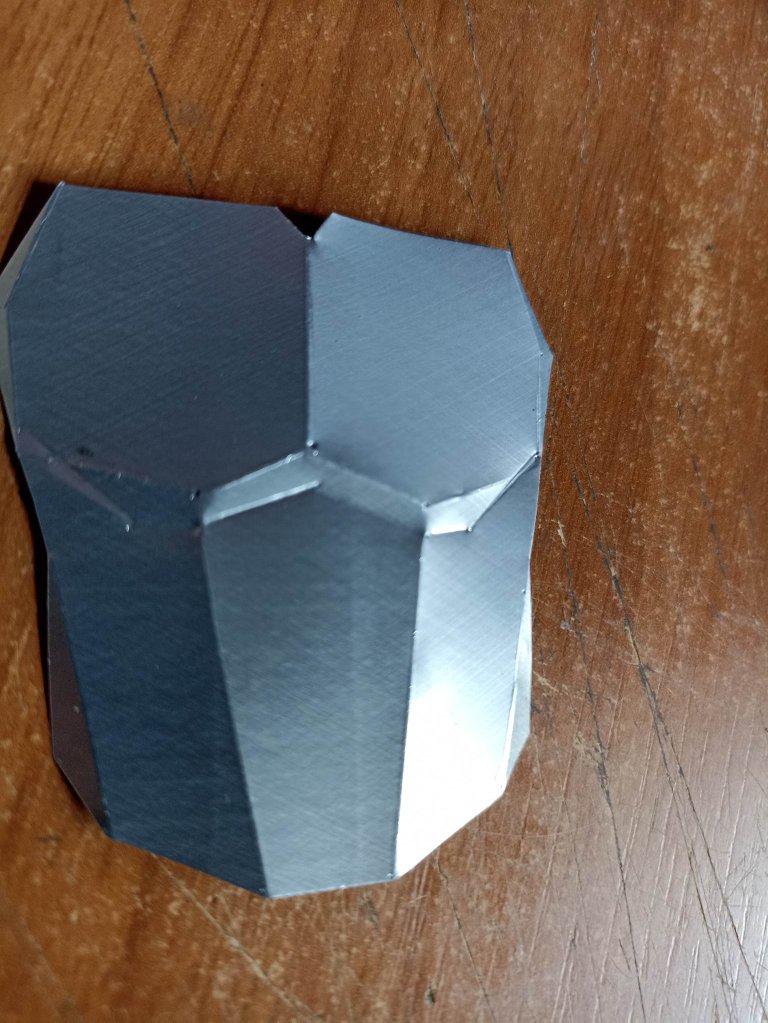
First of all, I make the trunk of the body using cardboard since this piece is very large that no can is enough to do it. I use the cardboard from a cereal box and on top of it I place the template and then cut it out. She indicates where to fold and paste to get the figure. Then I do the same with the legs.
En primer lugar realizo el tronco del cuerpo utilizando cartón ya que esta pieza es muy grande que no alcanza ninguna lata para hacerlo. Utilizo el cartón de una caja de cereales y encima de ello coloco la plantilla y luego la corto. Ella va indicando donde doblar y pegar para sacar la figura. Seguidamente hago lo mismo con las piernas.
 |  | |
|---|---|---|
 |  |
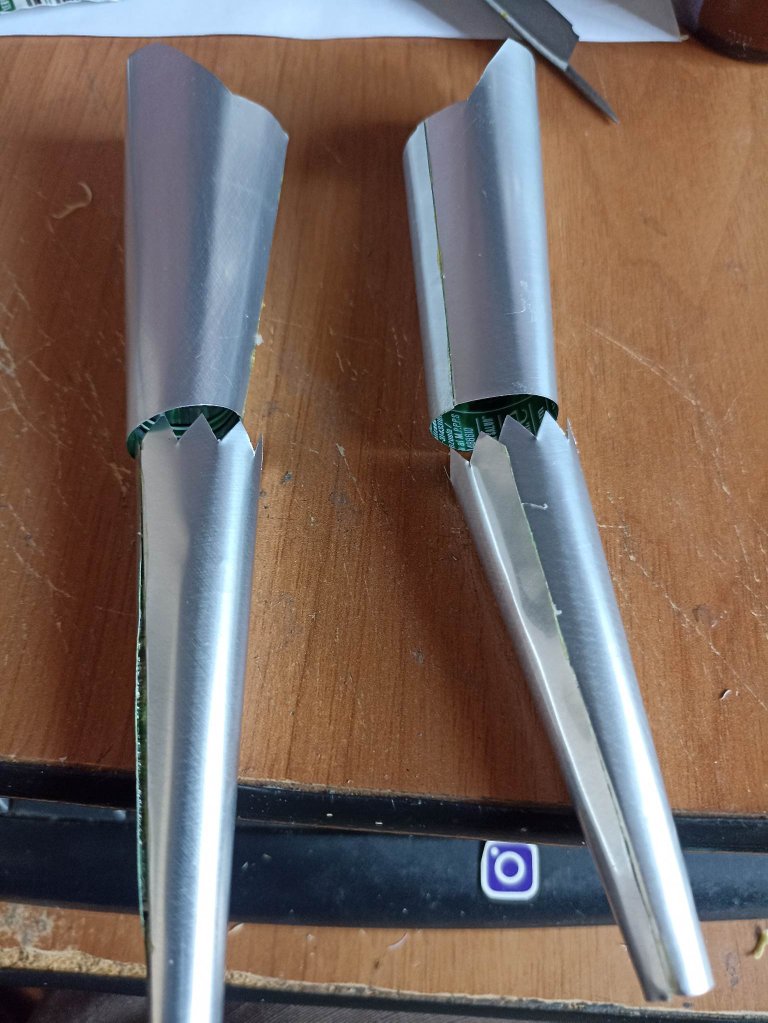
Next I continue with the arms, here I had to be a little careful since both arms are not the same but have a different position, so I almost confused the pieces thinking they were the same and the result was different, so I started again to that they come out as is. When I finished, what I did was glue the legs and arms to the back of the body.
Seguidamente continúo con los brazos, aquí debí tener un poco de cuidado ya que ambos brazos no son iguales sino que tienen una posición diferentes, entonces casí confundo las piezas pensando que eran iguales y el resultado fue otro, así que volví a comenzar de nuevo para que salieran tal cual. Al terminar lo que hice fue pegar las piernas y los brazos al retso del cuerpo.
 |  |  |
|---|---|---|
 |  | 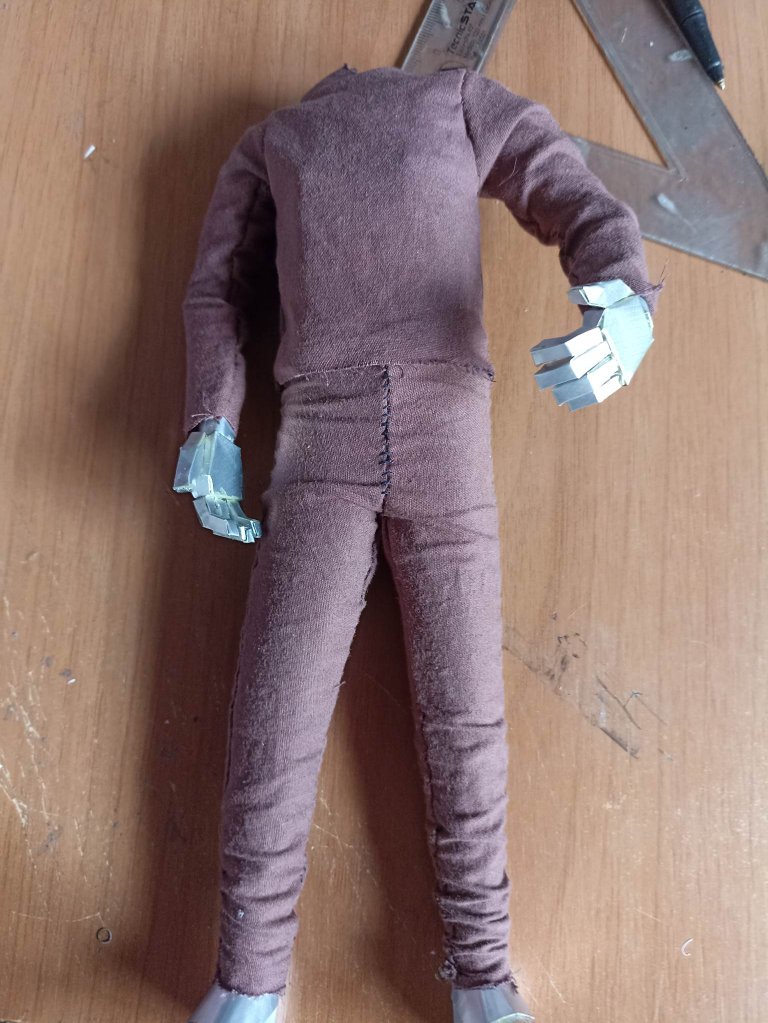 |
You won't believe me but in this job I graduated as a seamstress hahaha, since I had to make the mmandalorian's clothes, so with brown fabric I made the pants like the shirt, and lastly I added the hands and the shoes, after dressing the body. From here on it is only adding the details that make the figure stand out.
No me lo van a creer pero en este trabajo me gradué de costurero jajaja, ya que me tocó hacer la ropa del mmandaloriano, así que con tela de color café hice los pantalones como la camisa, y de último agregué las manos y los zapatos, luego de vestir el cuerpo. De aquí en adelante solo es agregar los detalles que hacen resaltar la figura.
 |  | |
|---|---|---|
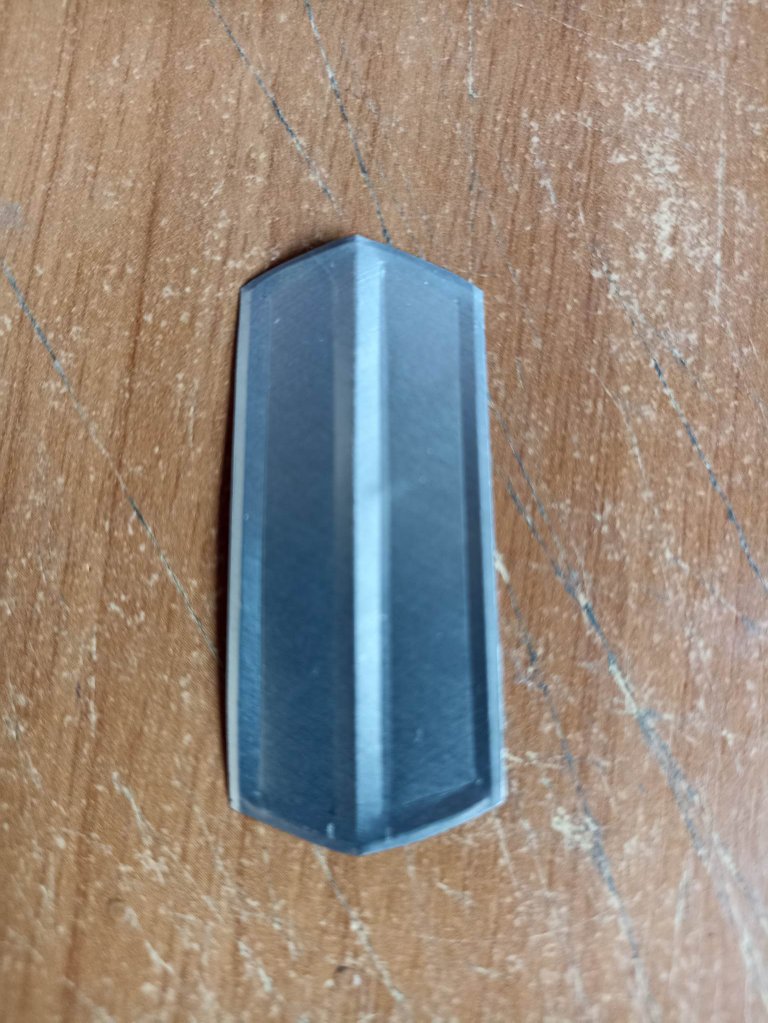 | 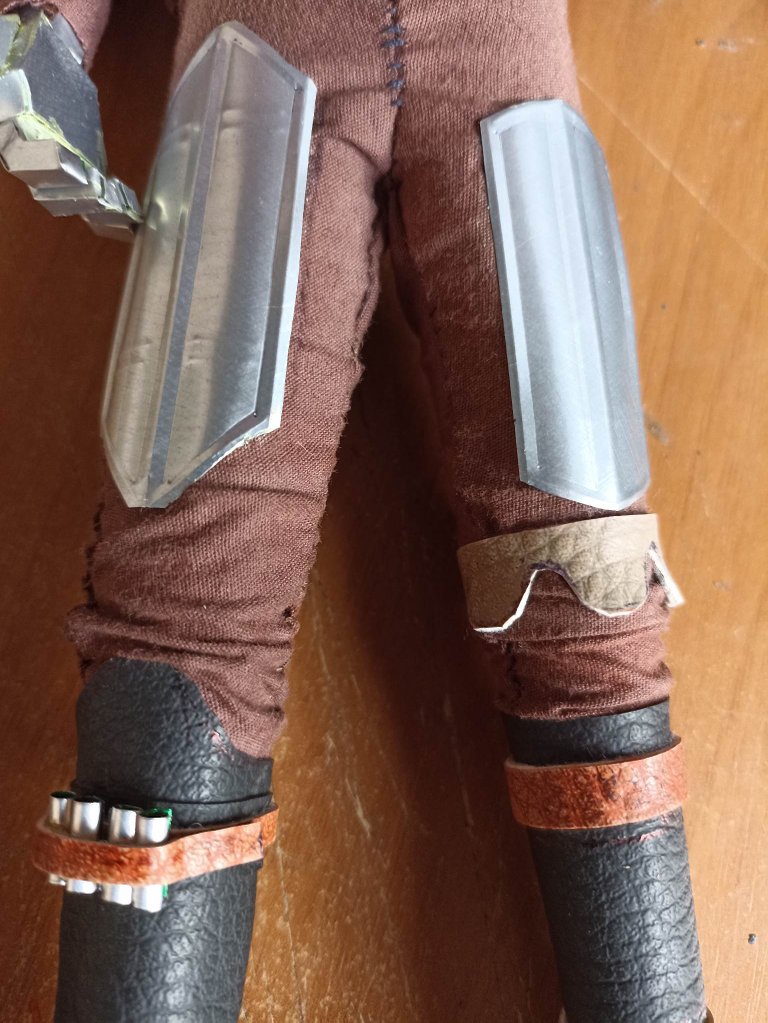 |
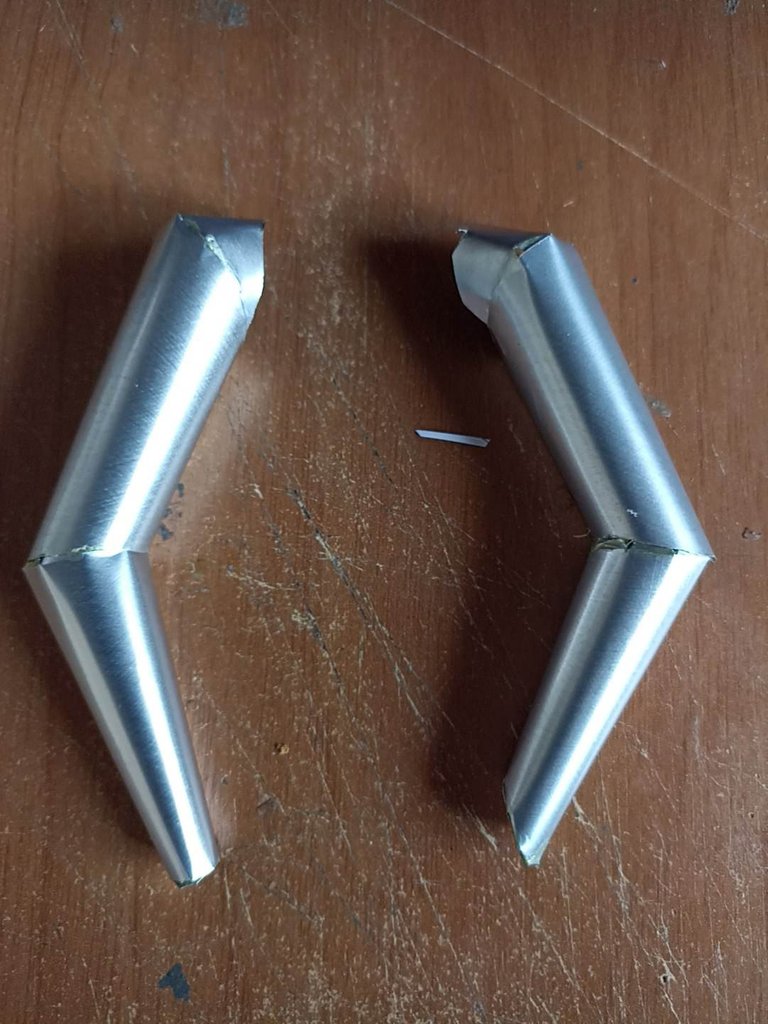
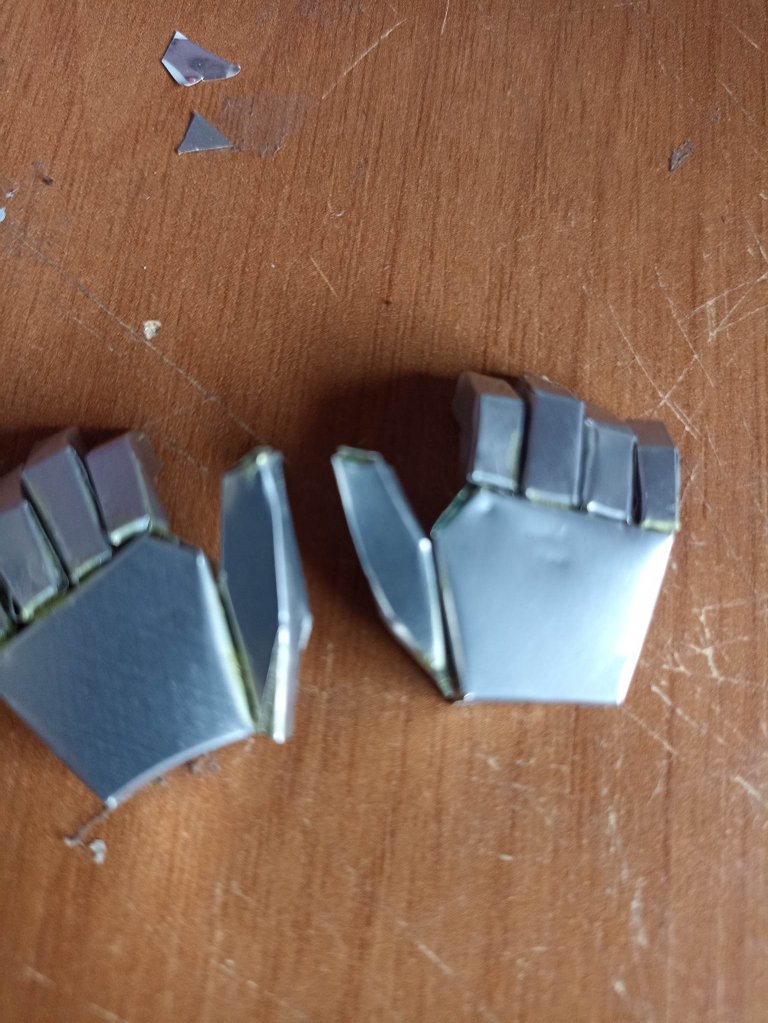
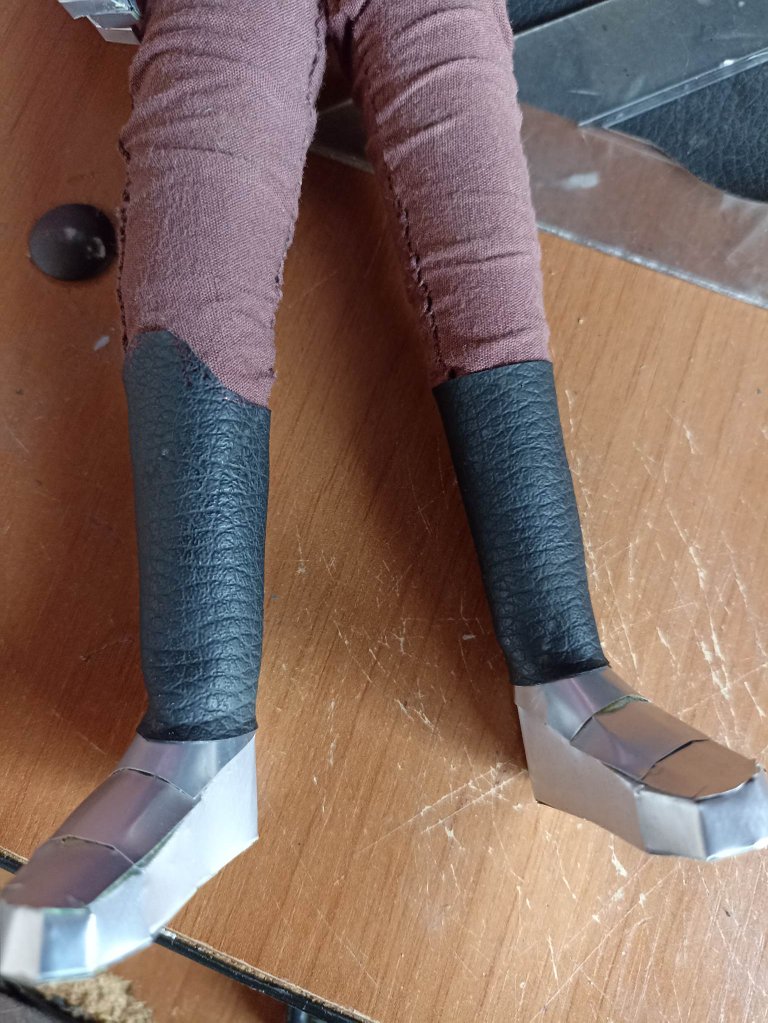
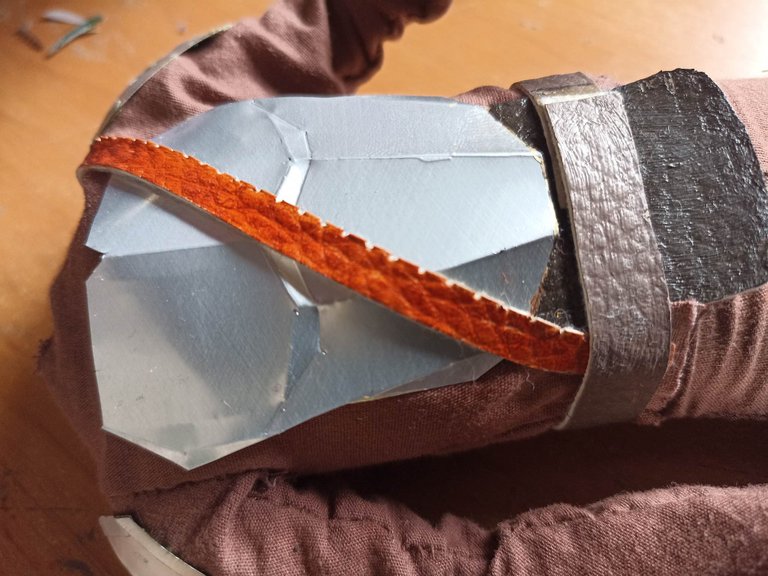
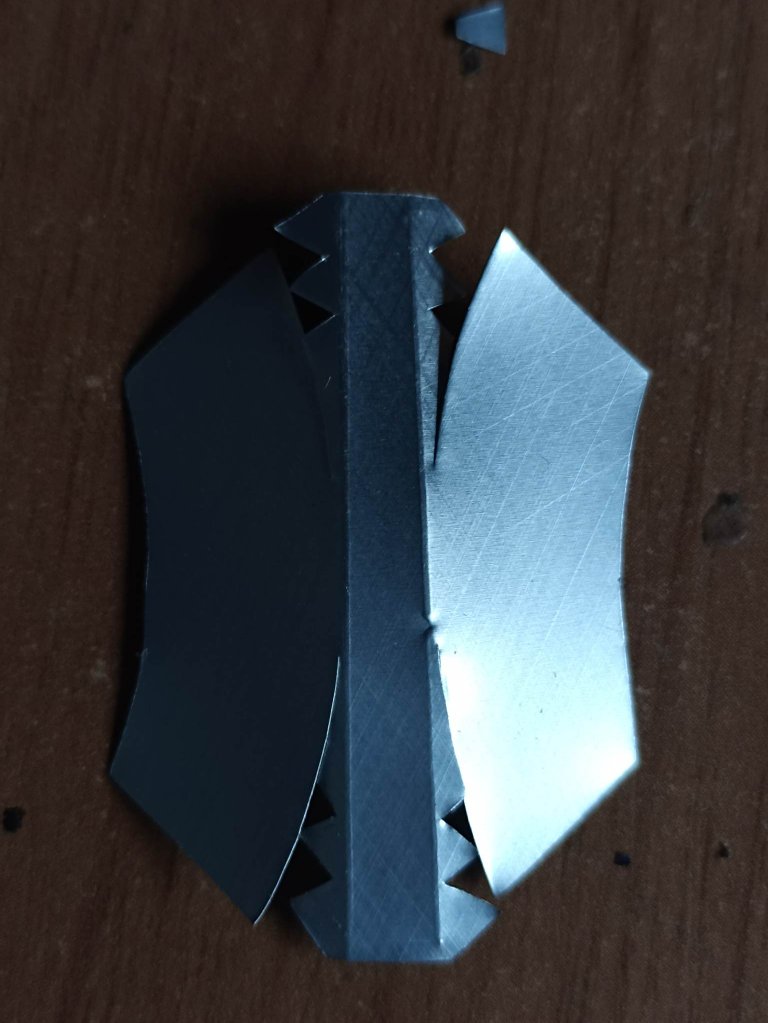
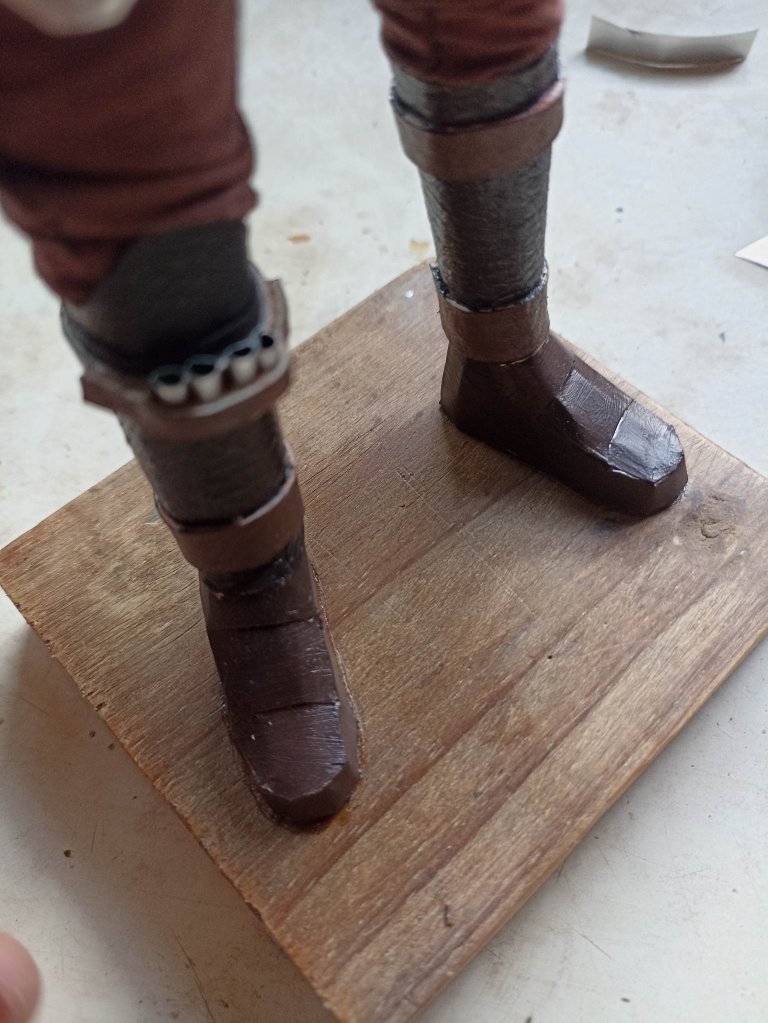
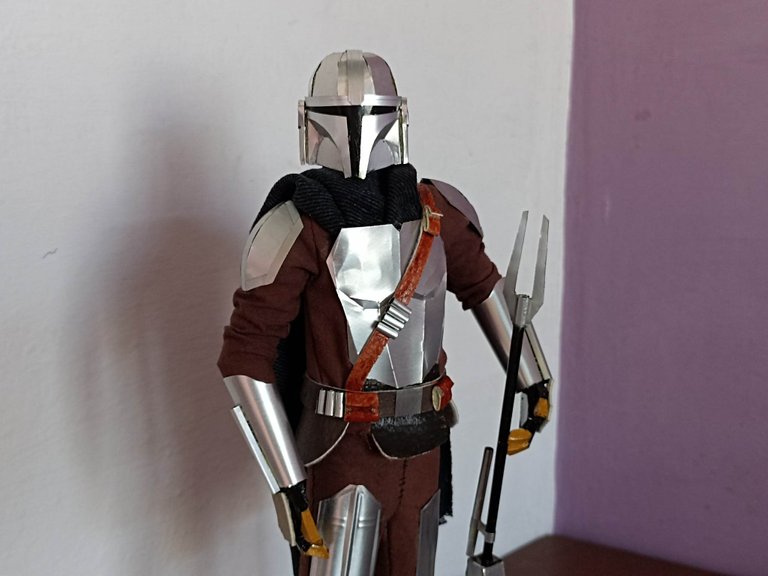
After making the figure's clothes, I start with the accessories. I found it more convenient to start with the feet, so I painted the shoes that were previously chrome to brown with acrylic paint. I added the protectors using synthetic leather and cutting it as it appears in the real images, I also started with part of the metal armor known as Beskar in the world of Star Wars and that gives that chrome tone to the armor, so I made the protectors for the legs. I added these figures just by looking at the images, then I drew on the can with a prudent size and then proceeded to cut and mold them, aluminum is very moldable if we use a sharp tip to do it.
Luego de hacer los ropajes de la digura entonces comienzo con los accesorios, ví más conveniente comenzar por los pies, así que pinté los zapatos que antes estaban de color cromado a color café con pintura acrílica. Agregué los protectores utilizando cuero sintético y cortándolo tal cual aparece en las imágenes reales, también comencé con parte de la armadura del metal conocido como Beskar en el mundo de Star Wars y que le da ese tono cromo a la armadura, así que hice los protectores para las piernas. Estas figuras las agregué solo mirando las imágenes, luego dibujaba sobre la lata con un tamaño prudente y después procedía a cortarlas y a moldearlas, el aluminio es muy moldeable si usamos una punta afilada para hacerlo.
 |  | |
|---|---|---|
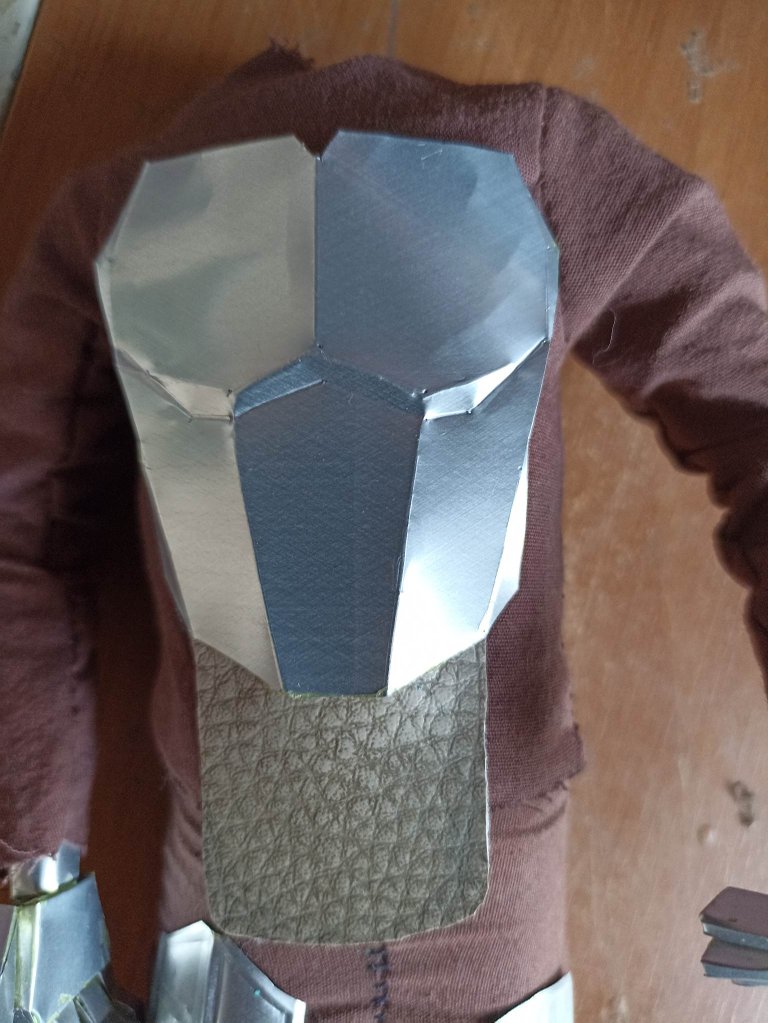 |  |
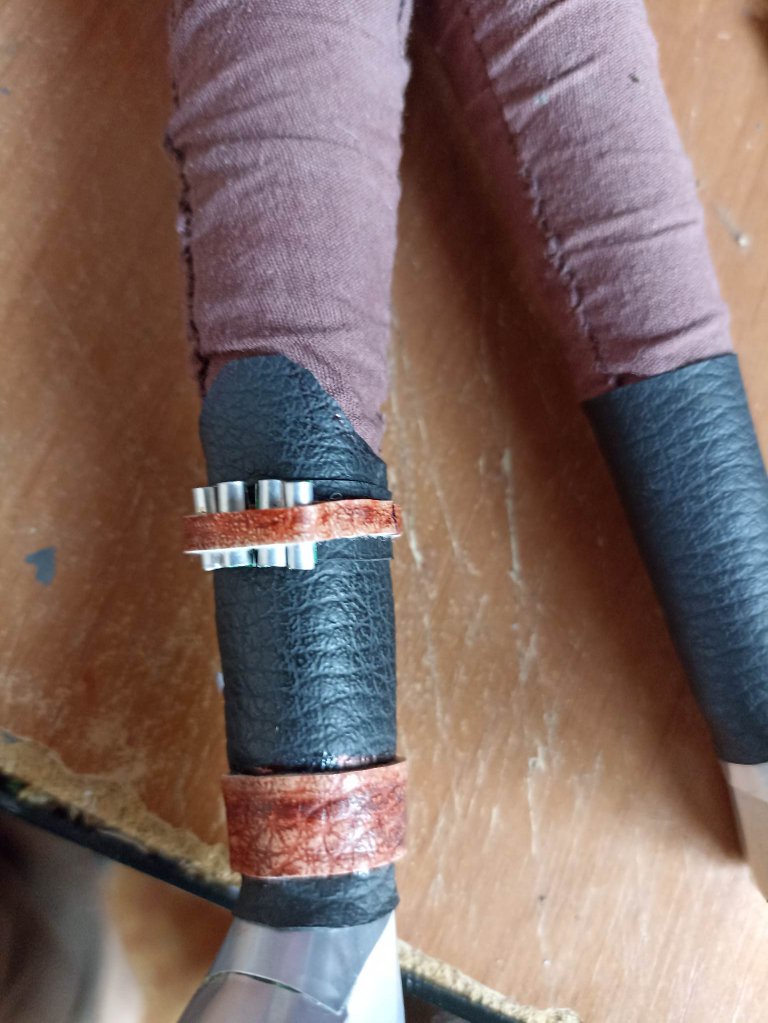
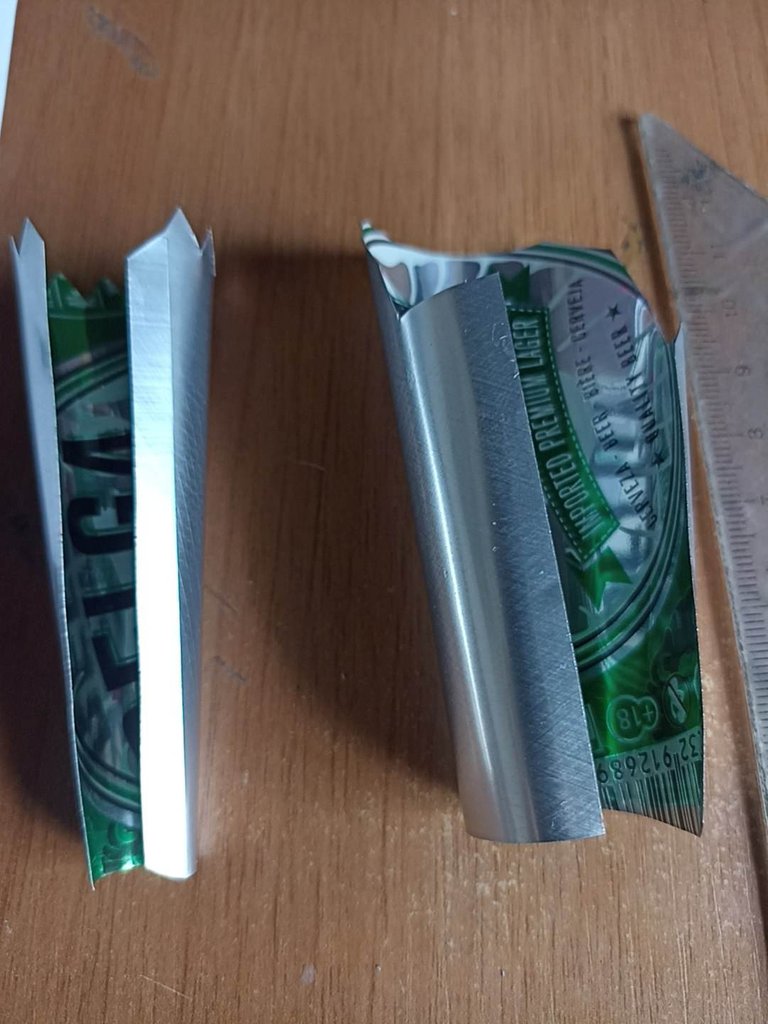
The next step was to make the front part of the armor that protects the chest, as you can see I also worked on top of the can since for this there was no template other than to look at the original model and then do it on top of the can, cutting it too I made several molds to make it very realistic. Then I added other details such as the leather belt where the other artifacts and the machine gun cartridges are.
El siguiente paso fue hacer la parte frontal de la armadura que protege el pecho, como pueden observar también trabajé encima de la lata ya que para esto no había plantilla más que fijarme en el modelo original y luego hacerlo encima de la lata, al recortarlo también le hice varios moldes para dejarla muy realista. Luego agregué otros detalles como la el cinturon de cuero donde estan los demás artefactos y los cartuchos de la ametralladora.
 |  |  |
|---|---|---|
 |  |  |
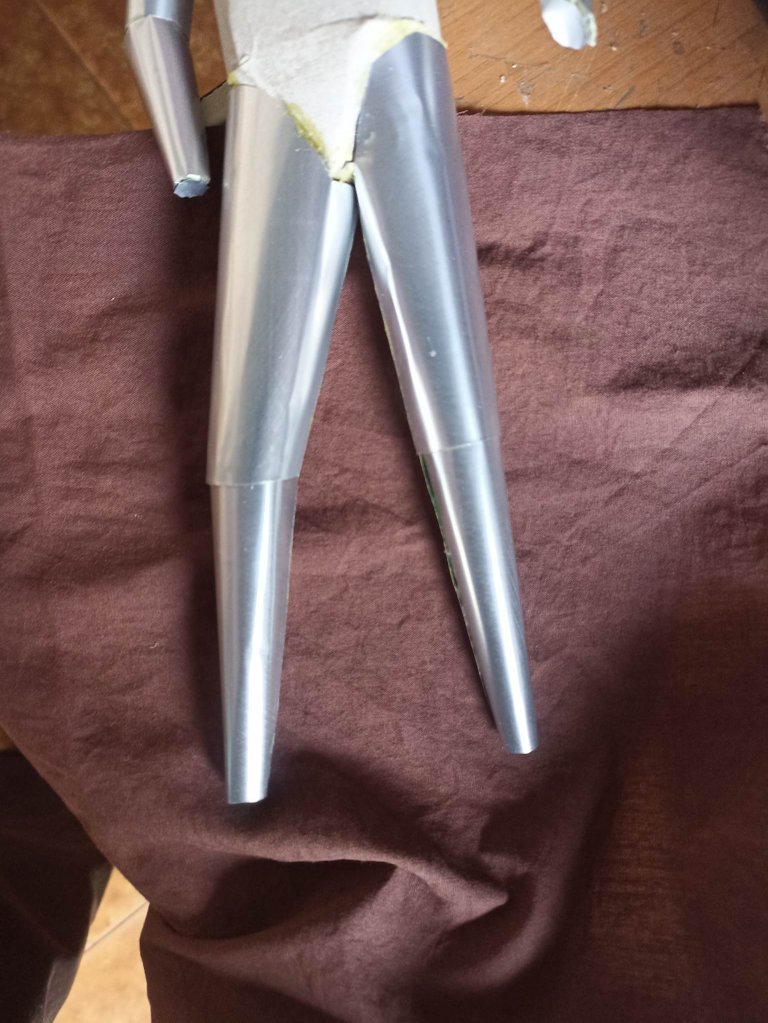
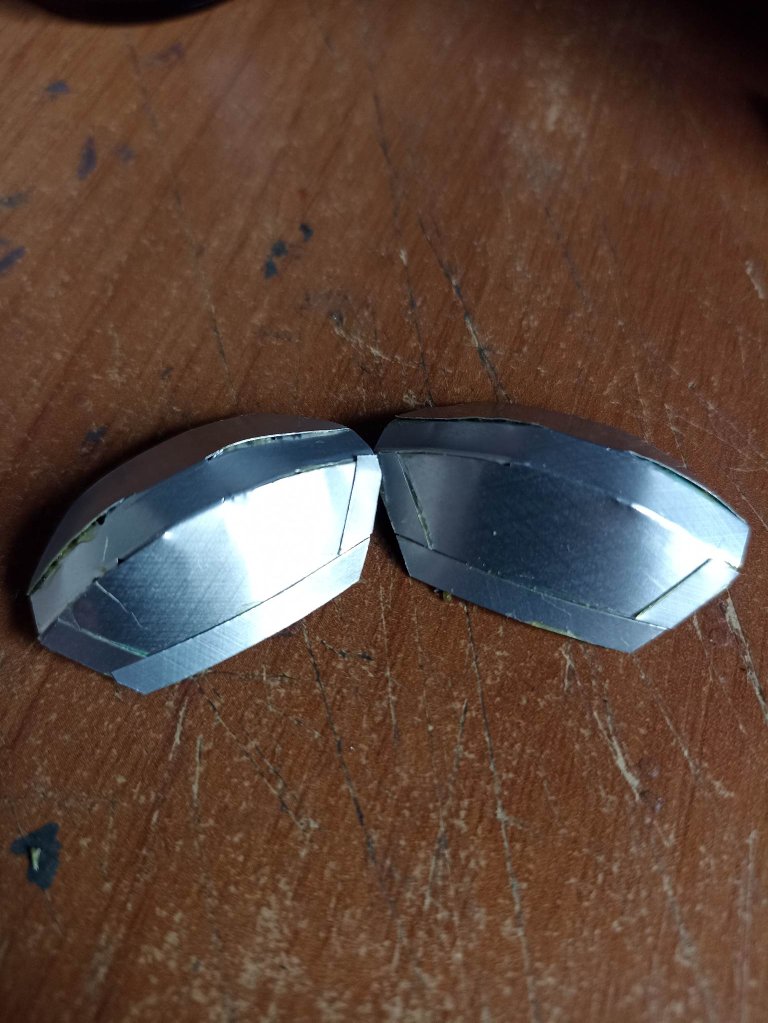
I also made the shoulder protectors, this part I paid attention to how to do it since it has a circular shape and it is difficult to mold so with a lot of patience I also made the drawing of the piece but this time on paper since I was not sure as it would be, being convinced that it was the correct one, then I did it on the can. Then I made the protectors for the arms where they also have bracelets that are used to activate other weapons and the jetpack to fly, I made the cape with a piece of old jean and I left a circle to introduce what would be the neck, the last detail was the Mandalorian helmet, I did this using old templates and that you can also see in one of my posts from a few months ago on how to make a Mandalorian keychain that you can see here: link
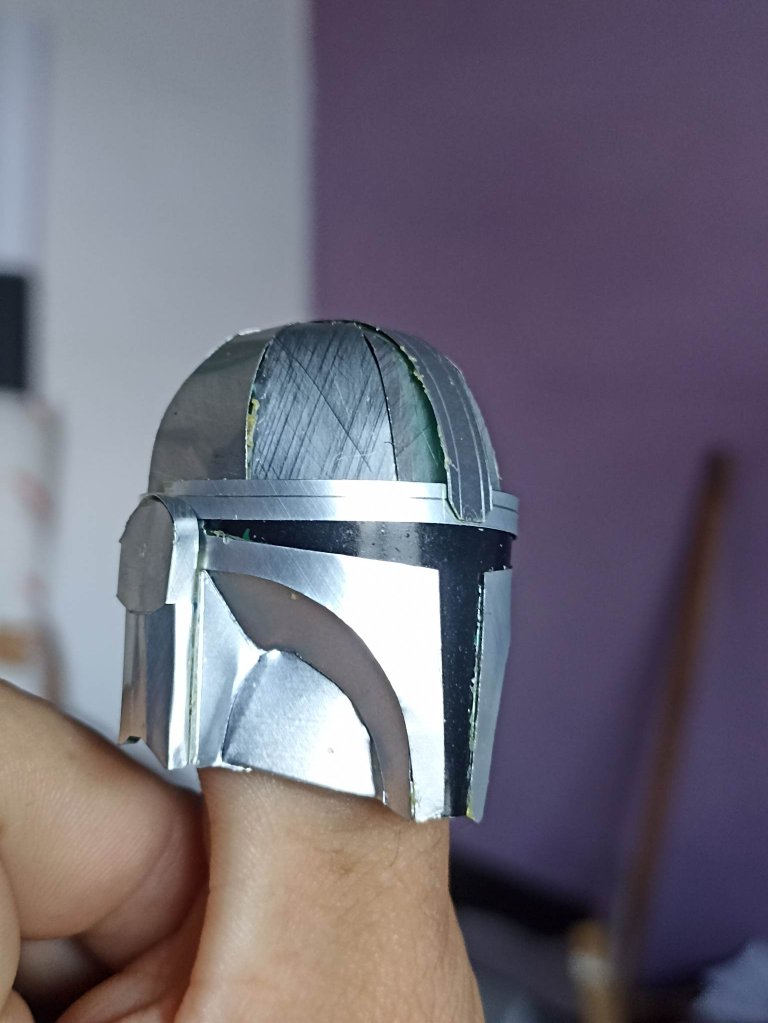
También hice los protectores de los hombros, esta parte me fijé muy bien como hacerla ya que tiene forma circular y es dificil poder moldear así que con mucha paciencia tambien hice el dibujo de la pieza pero esta vez en un papel ya que no estaba seguro de como quedaría, al estar convencido de que era la correcta entonces ahí lo hice sobre la lata. Después hice los protectores para los brazos donde también tiene brazaletes que sirven para activar otras armas y el jetpack para volar, la capa la hice con un trozo de jean viejo y dejé un círculo para introducir lo que sería el cuello, el último detalle fue el casco mandaloriano, este lo hice usando plantillas viejas y que también pueden ver en unas de mis publicaciones de algunos meses atrás de como hacer un llavero mandaloriano que pueden ver aquí: link
 |  |  |
|---|---|---|
 |  |  |
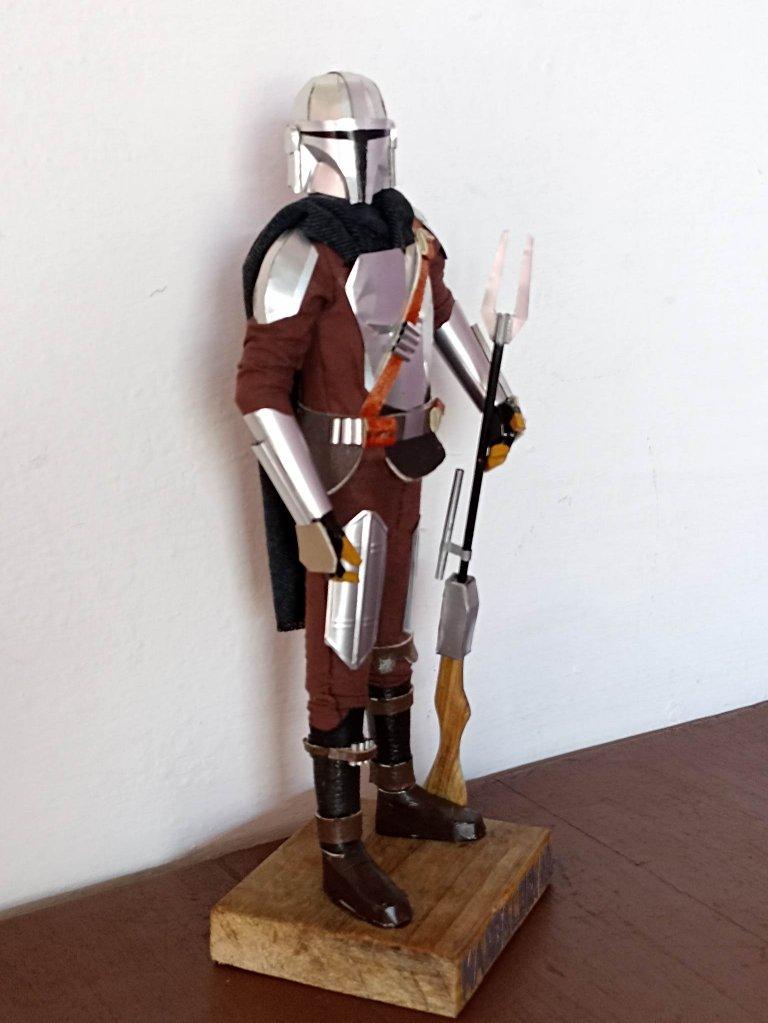
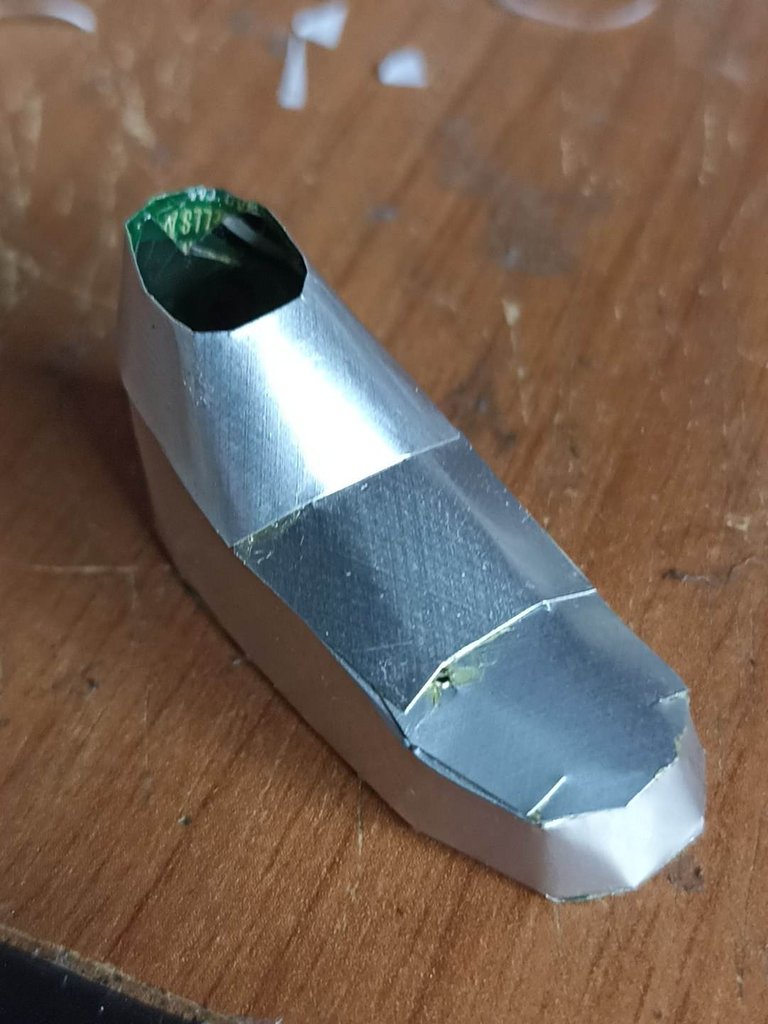
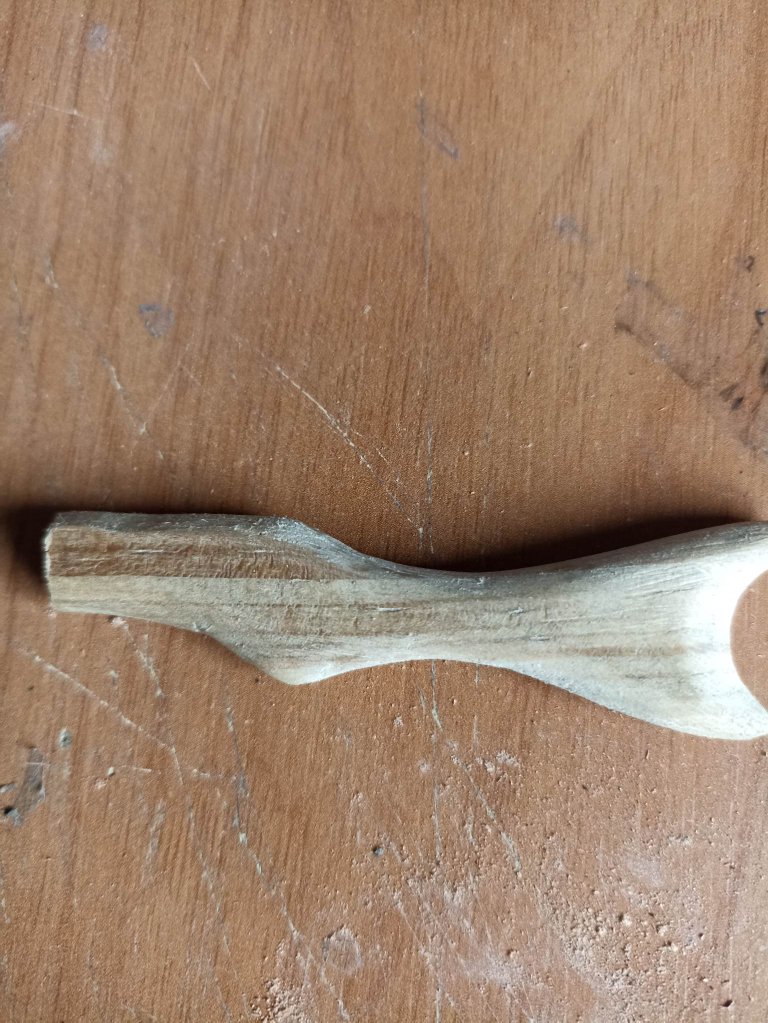
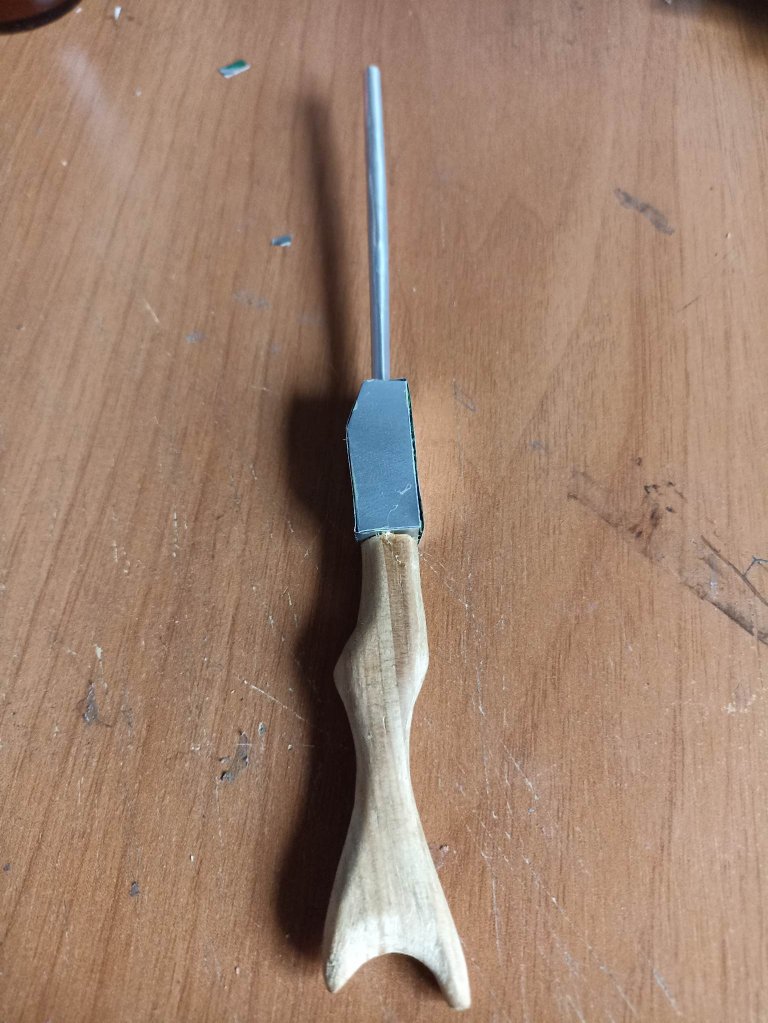
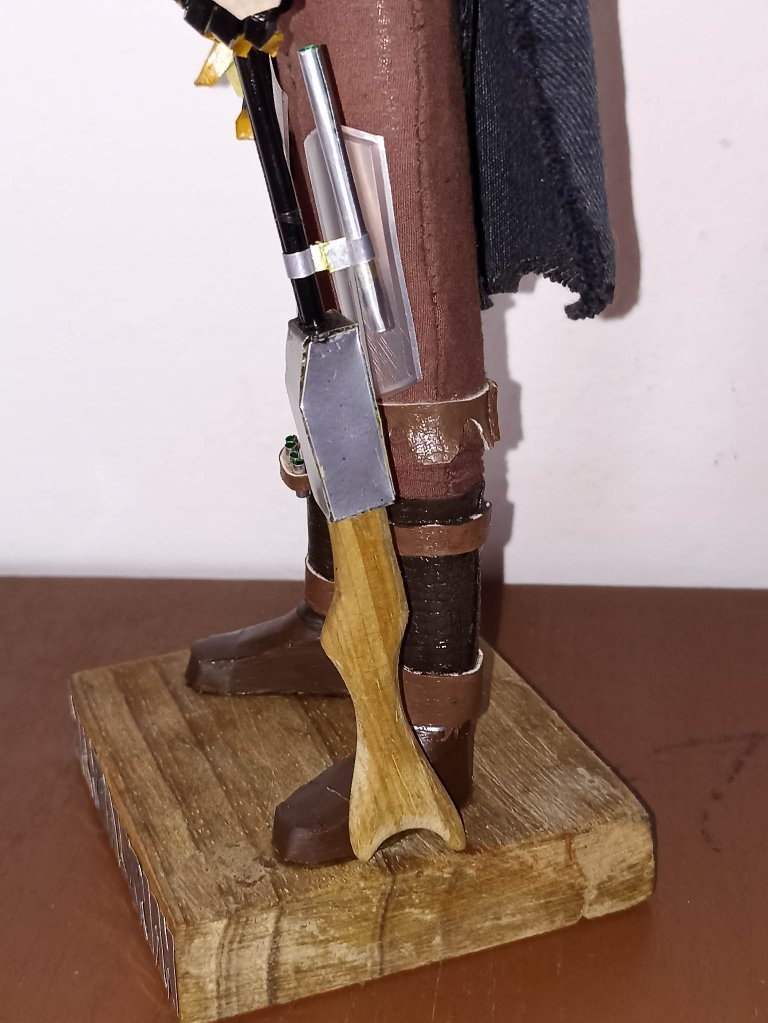
Finally, I made the gadgets that he wears on his belt as well as the blaster rifle that I made using a piece of wood for the stock and the rest I did with aluminum. I also added a wooden base and on the front I made the letters of the Mandalorian using the aluminum cans, in this way the sculpture was finished.
Para finalizar hice los gadgets que lleva puesto en el cinturón como tambien el rifle blaster que lo hice utilizando un trozo de madera para la culata y el resto lo hice con aluminio. Agregué también una base de madera y en la parte frontal hice las letras de el Mandaloriano utilizando las latas de aluminio, de esta manera quedó finalizada la escultura.
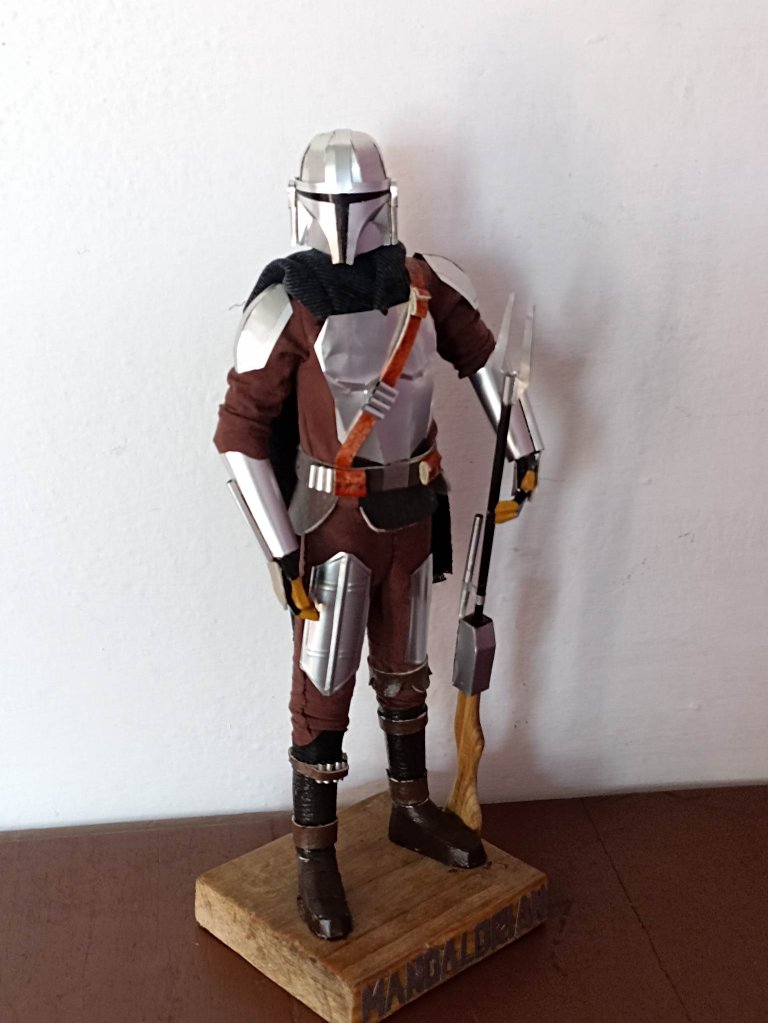
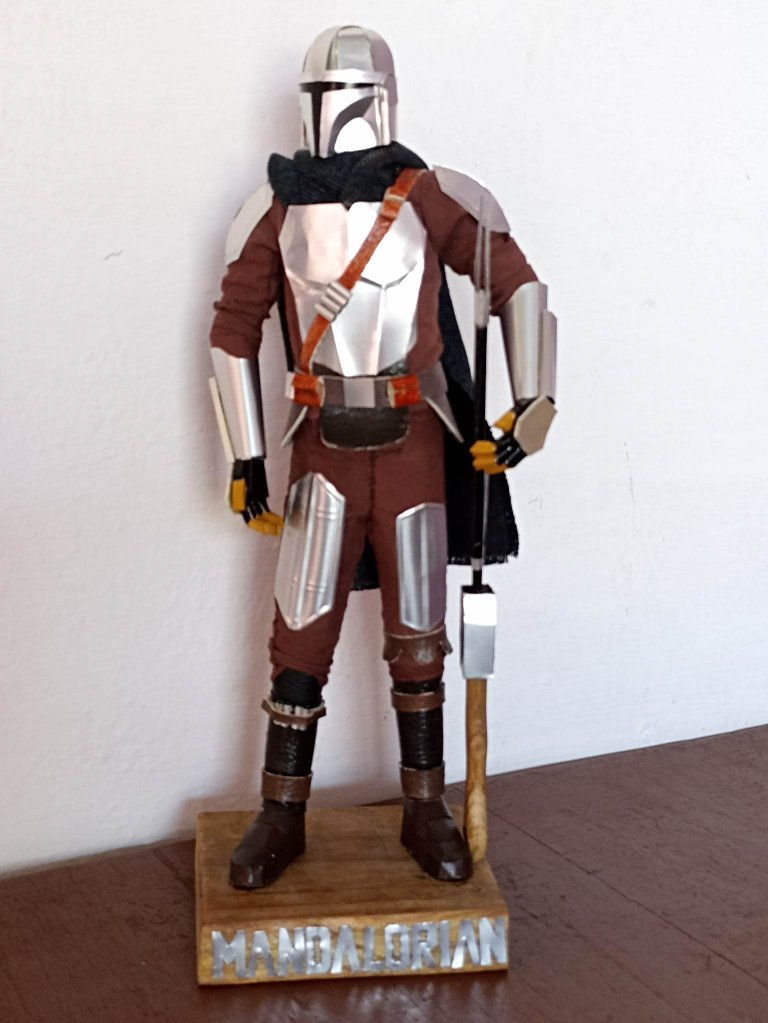
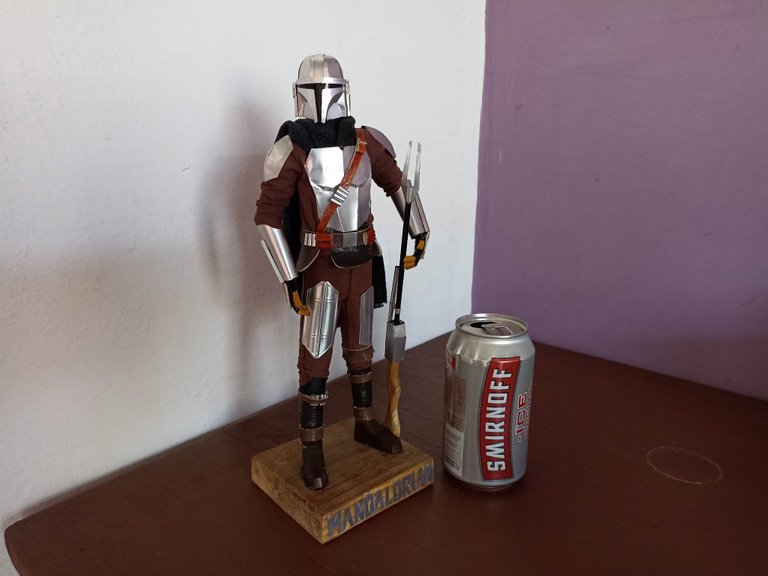
This is how the figure of Din Djarin, which is his real name, is finished, now that the third season of the series has come out because I have not missed a single chapter, if I knew how to make wooden sculptures I would have made Grogu, maybe I will learn that art and do it in the future hehehe. It took me exactly 3 weeks to do it, while I was looking through the templates and also the soda cans, which are difficult to find, when I had everything ready I got to work. This is my third figure in this style, the others were Boba Fett and Darth Vader, I say goodbye until a new opportunity, I appreciate the opportunity to share here with you one of my great hobbies. See you later!
Así quedo finalizada la figura de Din Djarin, el cual es su verdadero nombre, ahora que ha salido la tercera temporada de la serie pues no me he perdido ni un solo capítulo, si supiera hacer esculturas de madera hubiera hecho a Grogu, tal vez aprenda ese arte y lo haga en el futuro jejeje. Tarde exactamente 3 semanas en realizarlo, mientras ruenia las plantillas y tambien las latas de soda, que son difíciles de encontrar, al tener todo listo puse manos a la obra. Esta es mi tercera figura en este estilo, las otras fueron de Boba Fett y Darth Vader, yo me despido hasta una nueva oportunidad, agradezco la oportunidad de poder compartir aquí con ustedes una de mis grandes aficiones. Hasta luego!

Your sculpture turned out amazing! Seeing the process of all the little details coming together was intriguing. You should definitely work on more sculptures and show us your creative process.
Thank you very much, for example a template is taken as a base which can later be used to make other sculptures just by adding more details. When I can I'll share another one, I'm glad you liked it.
No dejo de sorprenderme con estas bellas esculturas... Cada detalle es tan perfecto que no sé cuál admirar...te felicito. Eres asombroso
!PIZZA
🎆🎇🎉🎊🌧️💐✨🌾🌱🌹🌙🌿🍃🥀⚡🌺☘️🍀🌈🌷⭐🪴🌵🌸🌟💮🌴🌳💫☀️💮☔🌲🌳🌍🌌🌠☄️🏵️🐝🌻🌼🍄🐞🦋💙☕💜🍍🎆🎇🎉🎊
Hola señorita buenas tardes. Me alegra mucho leerla por aquí y que le haya gustado como quedó la escultura..ha sido un gusto total poder comoartirla
PIZZA Holders sent $PIZZA tips in this post's comments:
@chacald.dcymt(1/5) tipped @fixie (x1)
Please vote for pizza.witness!
https://twitter.com/280767197/status/1636086814724218884
https://twitter.com/838720363/status/1636093252070789129
The rewards earned on this comment will go directly to the people( @fixie, @shinfxx ) sharing the post on Twitter as long as they are registered with @poshtoken. Sign up at https://hiveposh.com.
Holy Christoooooooooooooo.... This is a great work of art 😍. You went over the top. Every detail is unsurpassed, it has shoes, it has clothes, it has everything!
My admiration for you great master @fixie. Success, and a thousand blessings, great artist... 💓
Santísimo Cristooooooooooo.... Esto es una grandiosa obra de arte 😍. Te pasaste. Cada detalle esta insuperable, es que tiene zapatos, tiene ropa, tiene de todooooo.
Mi admiración para ti gran maestro @fixie. Éxitos, y mil bendiciones, gran artista... 💓
This is the way jajaja.. así es el camino, después de varios días pues, llegó el merecido final 😁
what an amazingly encouraging comment!
It's a pleasure @diyhub . You have to give value to those who deserve it... ✨
Yes and you deserve it well.
Keep engaging with other authors within our community for a chance of getting rewarded in your comment. It's our latest addition to support quality/meanings engagement like yours.
Thanks for being awesome.
Quéeeeeee, naguará parece un fotograma sacado directamente de la serie. Tremendo trabajo, como siempre. 🌱
Y eso que me faltaron cositas pero hay detalles que son demasiado pequeños y me rompería la cabeza tratando de hacerlos 🫠
Que hermosura.... Sinceramente es fantástica.....
Awwww graaaacias 💪💪 que la fuerza te acompañe
https://leofinance.io/threads/@dayadam/re-leothreads-7zaqba79
https://leofinance.io/threads/@flquin/re-leothreads-dabpq5s
The rewards earned on this comment will go directly to the people ( dayadam, flquin ) sharing the post on LeoThreads,LikeTu,dBuzz.
Hey, este trabajo está genial!
Todo te quedó perfecto, pareciera todo hecho de Beskar!
¡Este es el camino!
Con el aluminio por el lado reverso pude conseguir ese efecto, es lo que más me gustó. This is the way
Te quedó muy bien y me lo estoy pensando en tratar de hacerlo. Me lo pienso más por buscar las latas por ahí jajaj
Ese es el detalle más difícil jajaja pero si se consiguen. Sino toca sacrificarse, comprarse unas y tomarse las 🤣 si te animas me avisas y te envío las plantillas
A chévere. Muchas gracias. Hoy al menos ya conseguí una lata jajaj. Este es mi discord Felquin#3519.
¡This is the way!
Increíble la escultura, invaluable.
Muchas gracias. This is the way
¡ESTO ESTÁ INCREÍBLE! Como fanático de Star Wars y particularmente de la serie en cuestión, debo decirte que este trabajo está totalmente espectacular, This is the way!
Hasta Grogu estaría demasiado feliz de ver esta escultura jajaja.
¡Sigamos creciendo!
Si logro hacer esculturas de madera no dudes que lo haré jajaja. This is the way.
Es digno de admiración tu trabajo.
Te felicito y espero sigas creando y compartiendo estas bellezas!
Hola que tal? Me alegra mucho que te haya gustado. Por supuesto, estaré compartiendo más cosas con diversos materiales 🤣🤣
The best use of old things is undoubtedly, Just Amazing Work-Amazing Creativity.
Thank you very much, you always have to give things a second chance and let your imagination fly
Agreed. Keep up the great work.
Esto ha quedado genial
Muchas gracias, un gusto poder compartirlo saludos
Magnífica escultura, te quedo increíble!
Gracias hermano!