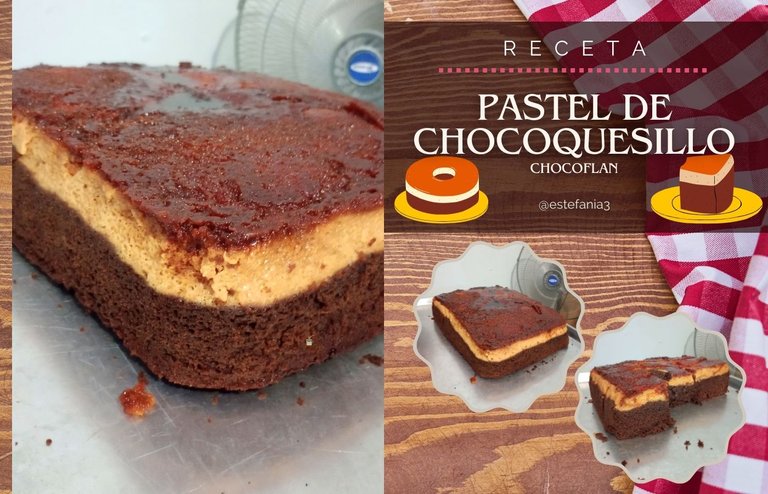
Receta: Pastel de Chocoquesillo (chocoflan) || Recipe: Chocoquesillo cake (chocoflan) ♥

¡Hola Chicos!
Como les comenté en un post anterior, en nuestras clases de panadería también aprendemos cosas de pastelería, y una de las últimas recetas que hemos aprendido es a hacer un pastel de chocoflan, chocoquesillo o la torta "imposible".
Le dicen así porque se cocinan en un mismo molde y al mismo tiempo, una mezcla de quesillo (flan) y un pastel de chocolate.
No importa en el orden que lo viertas al moldes, el pastel de chocolate siempre saldrá a flote y el quesillo quedará hasta el fondo. Ambas mezclas se separan perfectamente y quedan en su punto exacto. ♥
Tuve la oportunidad de hacer dos veces esta receta en los últimos días, ya que en la clase de repostería también la vimos, aunque debo confesar que mi favorita fue la que les voy a presentar a continuación.
Su textura quedó perfecta, el pastel suave y el quesillo con muchos agujeritos en su interior y suavecito. ♥ Así que voy a comenzar con los ingredientes y luego les enseño el paso a paso para que puedan hacerlo en sus casitas.
Hello Guys!
As I told you in a previous post, in our baking classes we also learn things about pastry, and one of the last recipes we have learned is to make a chocoflan cake, chocoquesillo or the "impossible" cake.
They call it that because a mixture of quesillo (flan) and a chocolate cake are baked in the same mold and at the same time.
No matter in which order you pour it into the molds, the chocolate cake will always rise and the quesillo will remain at the bottom. Both mixtures separate perfectly and are just right. ♥
I had the opportunity to make this recipe twice in the last few days, since we also saw it in the baking class, although I must confess that my favorite was the one I am going to present below.
Its texture was perfect, the cake soft and the quesillo with lots of holes inside and soft. ♥ So I'm going to start with the ingredients and then I'll show you the step by step so you can make it at home.
INGREDIENTES || INGREDIENTS
Para el quesillo:
- 1 lata de leche condensada
- La misma cantidad de leche líquida
- 6 huevos
- 3 cucharadas grandes de leche en polvo
- Ron
- Esencia de vainilla
Para el pastel de chocolate:
- 3 tazas y 1/2 de harina de trigo leudante
- 2 tazas y 1/2 de azúcar
- 250 gr de margarina
- 5 huevos
- 1/2 taza de cacao
- 2 tazas d leche
- 1 cucharada de bicarbonato
- 1 cucharadita de caramelina
Caramelo:
- 2 tazas de azúcar
For the quesillo:
- 1 can of condensed milk
- The same amount of liquid milk
- 6 eggs
- 3 large spoonfuls of powdered milk
- Rum
- Vanilla essence
For the chocolate cake:
- 3 cups and 1/2 cups of leavened wheat flour
- 2 1/2 cups of sugar
- 250 gr margarine
- 5 eggs
- 1/2 cup cocoa
- 2 cups of milk
- 1 tablespoon of baking soda
- 1 teaspoon of caramel
Caramel:
- 2 cups of sugar

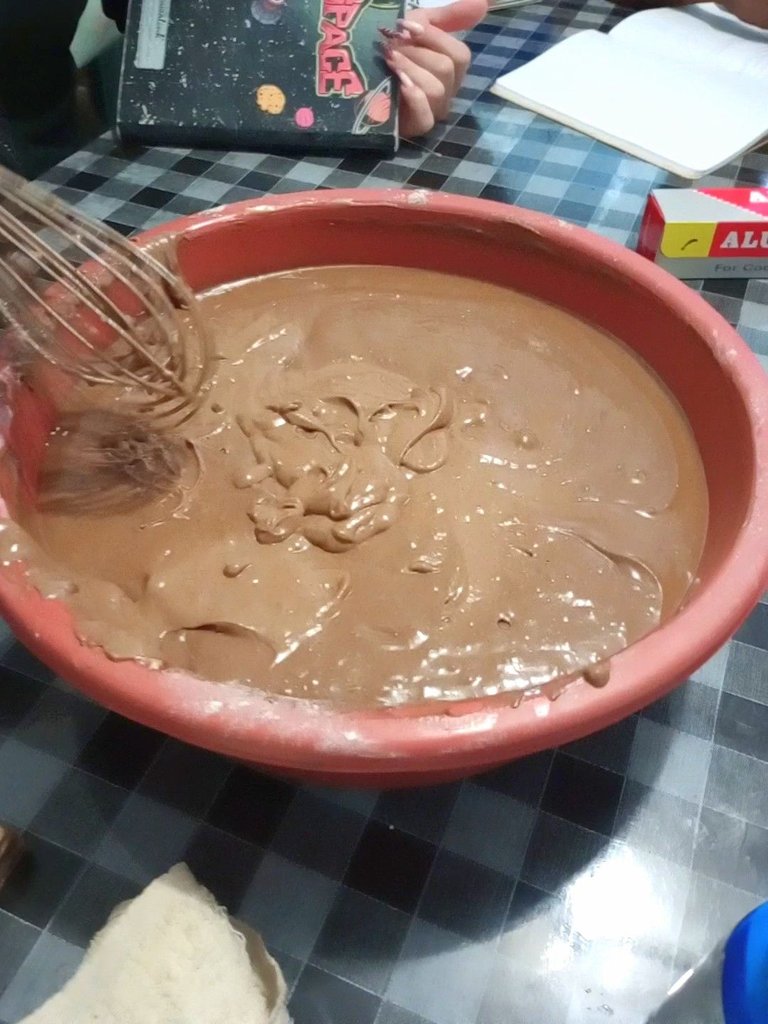
Iniciamos haciendo la mezcla del pastel de chocolate, para ello vamos a batir muy bien la margarina junto al azúcar.
Una vez logrado una consistencia cremosa, integramos uno a uno los huevos y continuamos mezclando sin parar.
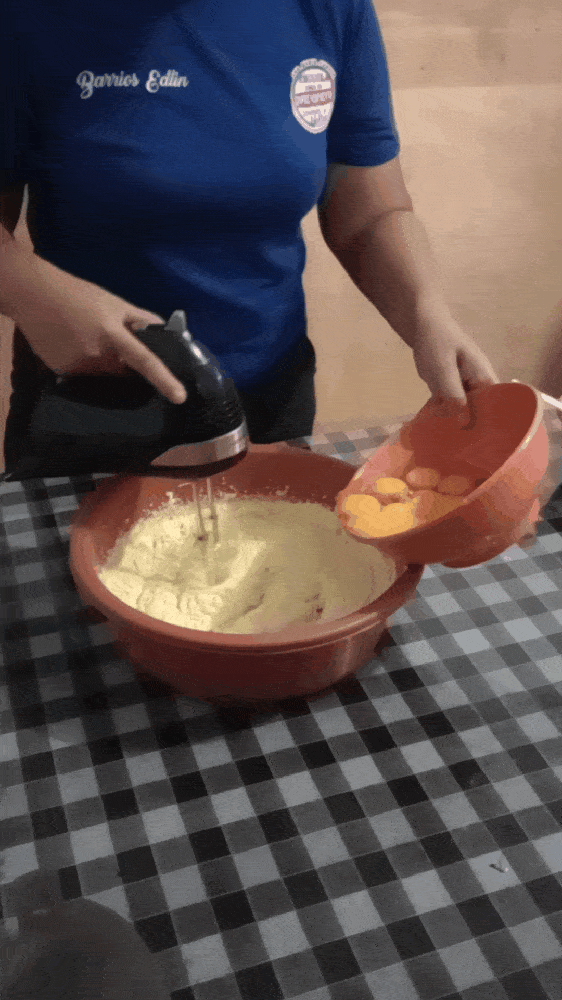
We start by making the chocolate cake mixture, for this we are going to beat the margarine with the sugar very well.
Once a creamy consistency is achieved, we integrate one by one the eggs and continue mixing without stopping.
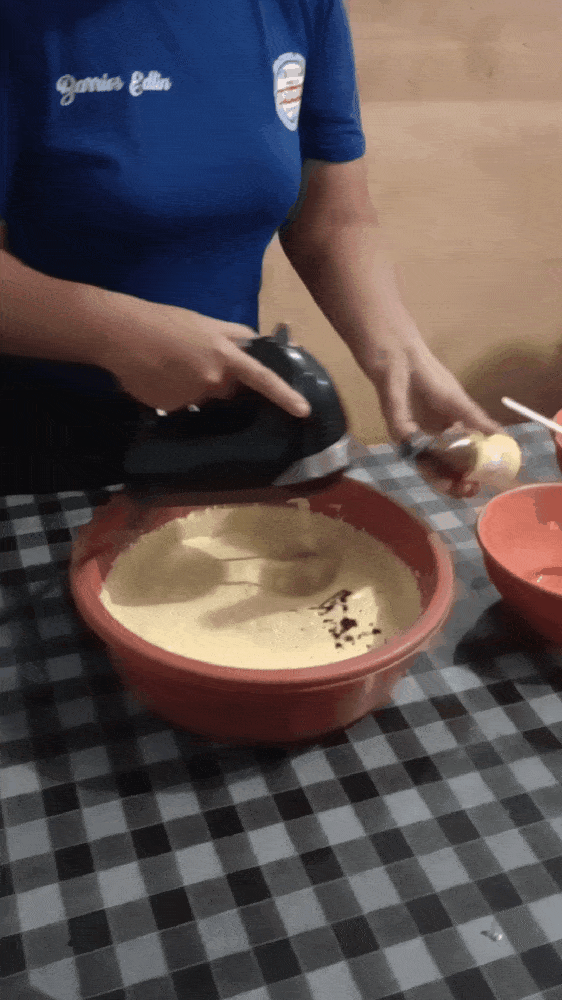
Agregamos la esencia de vainilla y la caramelina, que no es más que una esencia de caramelo tostado, que más que agregarnos sabor nos aporta un color marrón oscuro a la receta.
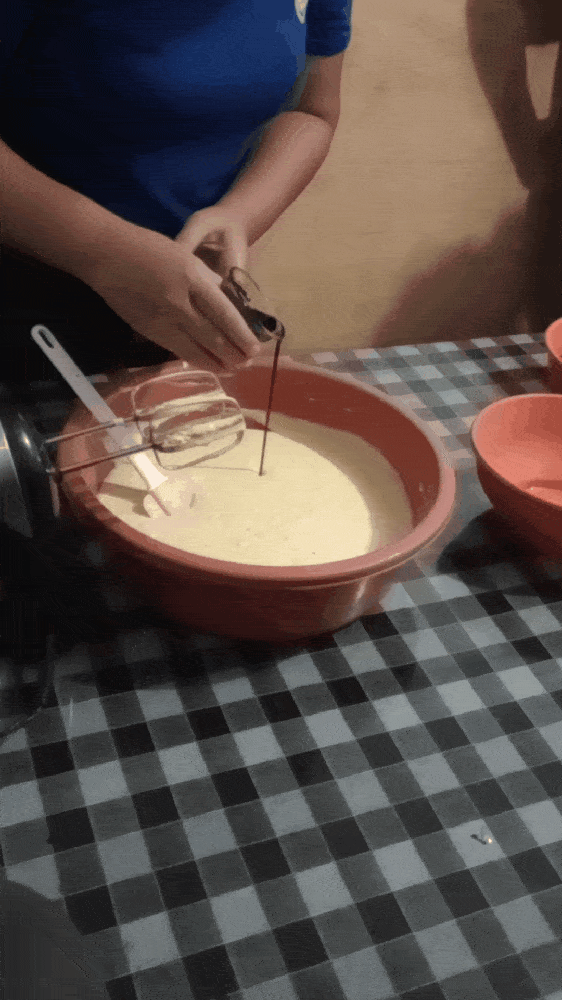
Add the vanilla essence and the caramel, which is nothing more than a toasted caramel essence, which rather than adding flavor gives the recipe a dark brown color.
En un bowl aparte vamos mezclar los ingredientes secos: cacao, harina y bicarbonato. Luego los integramos en dos partes a nuestra mezcla sin sobre batirla.
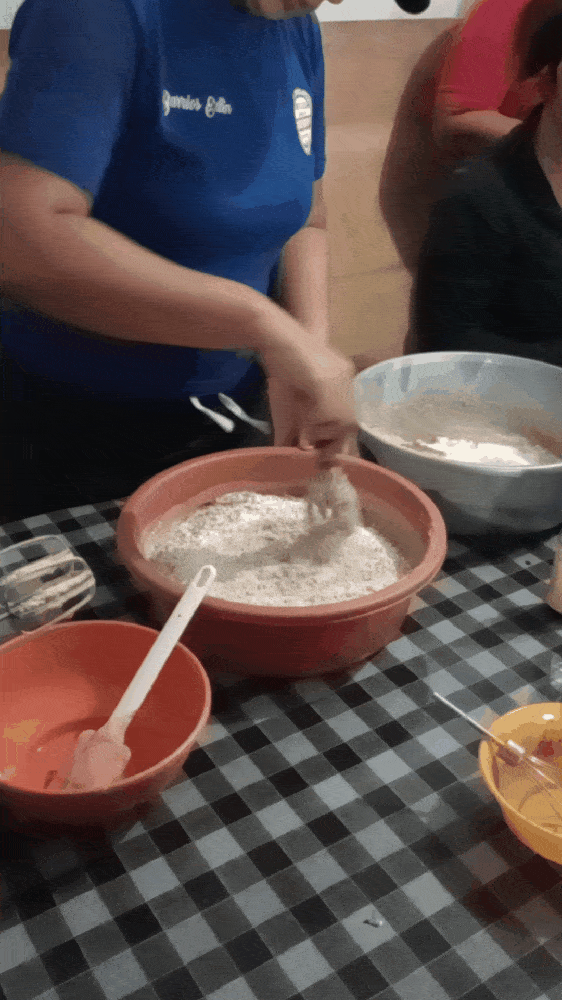
In a separate bowl we are going to mix the dry ingredients: cocoa, flour and baking soda. Then we integrate them in two parts to our mixture without over beating it.
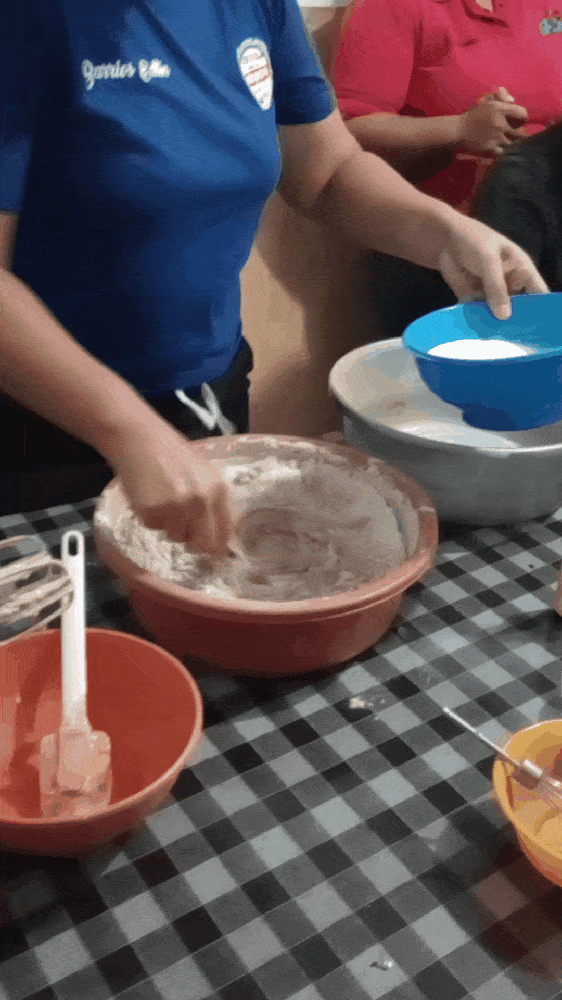
Agregamos también la leche líquida y una vez lograda la mezcla estamos listos para pasar al quesillo.
Vamos a reservar por un momento nuestra mezcla de chocolate.
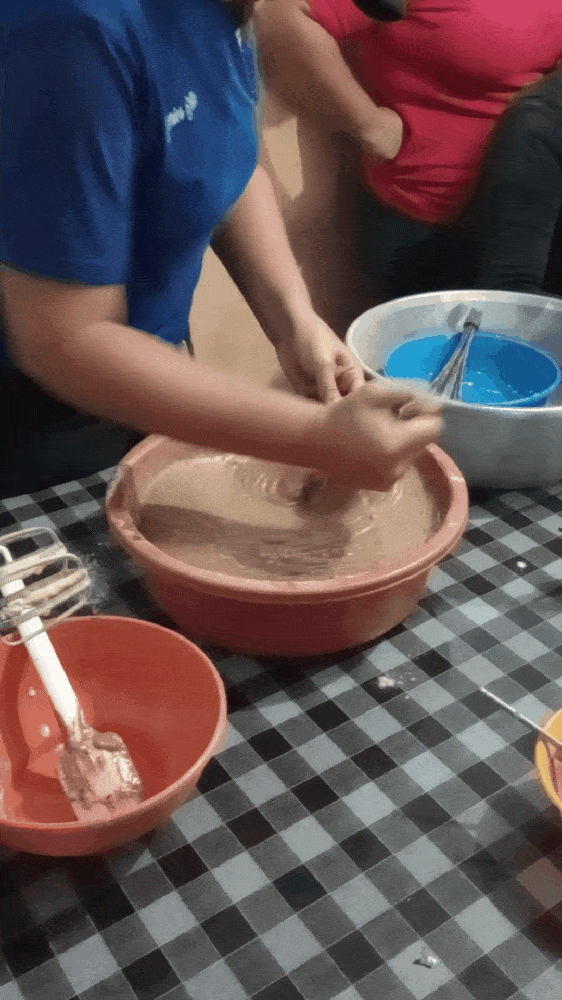
We also add the liquid milk and once the mixture is ready we are ready to move on to the cheesecake.
We are going to reserve our chocolate mixture for a moment.
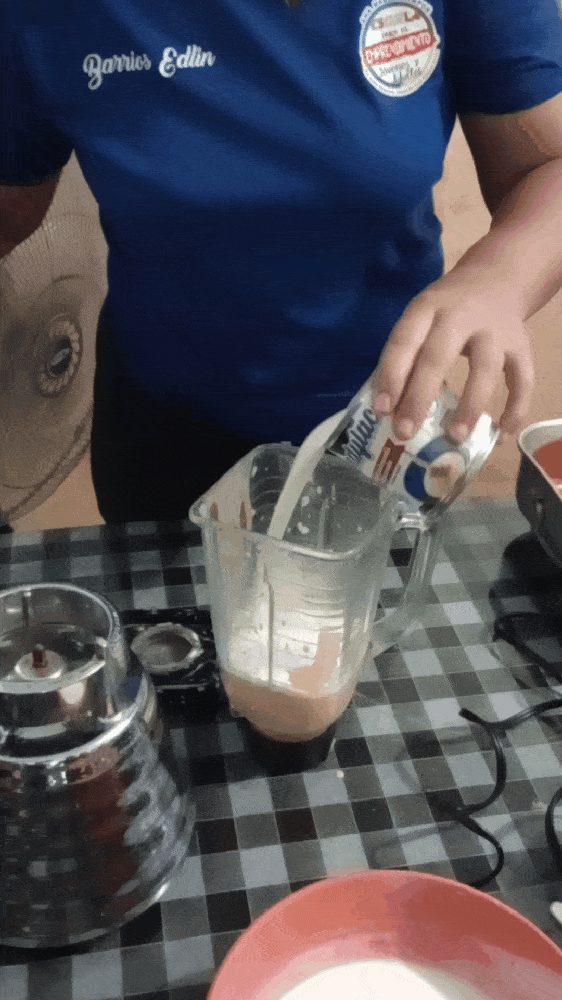
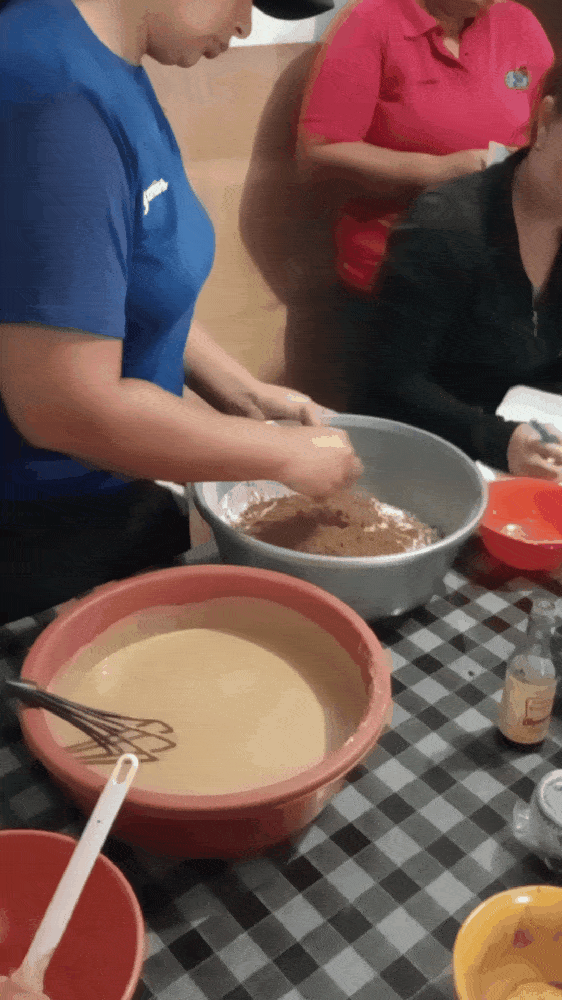
Para el quesillo (flan) vamos a colocar en una licuadora la leche condensada, utilizamos la misma lata para medir la leche líquida. Luego agregamos los huevos.
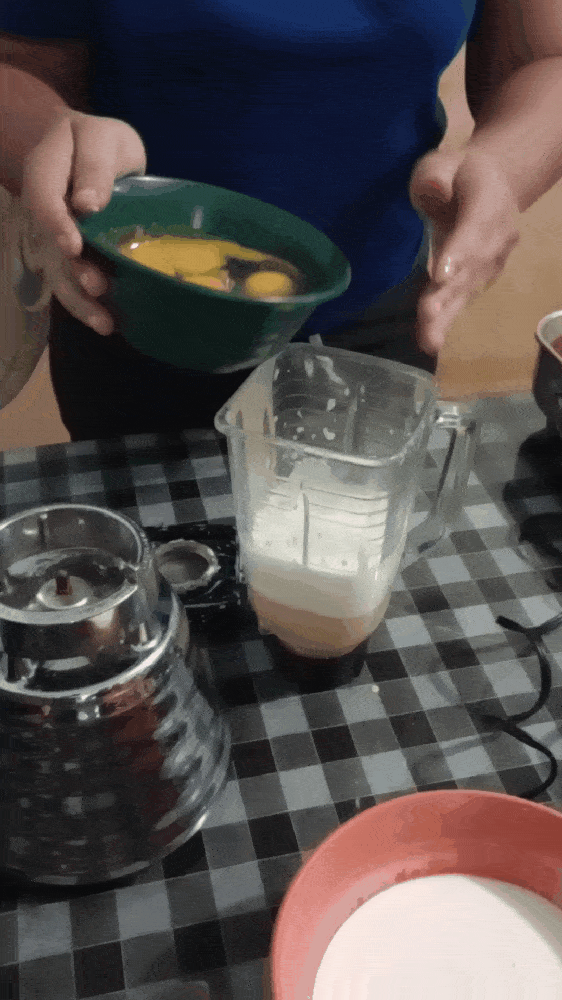
For the quesillo (flan) we are going to put the condensed milk in a blender, we use the same can to measure the liquid milk. Then add the eggs.
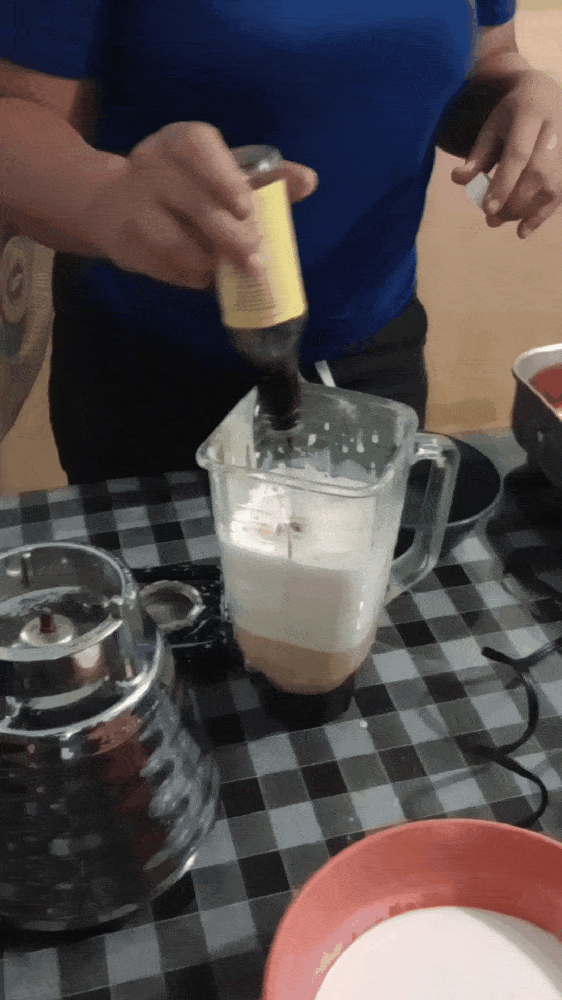
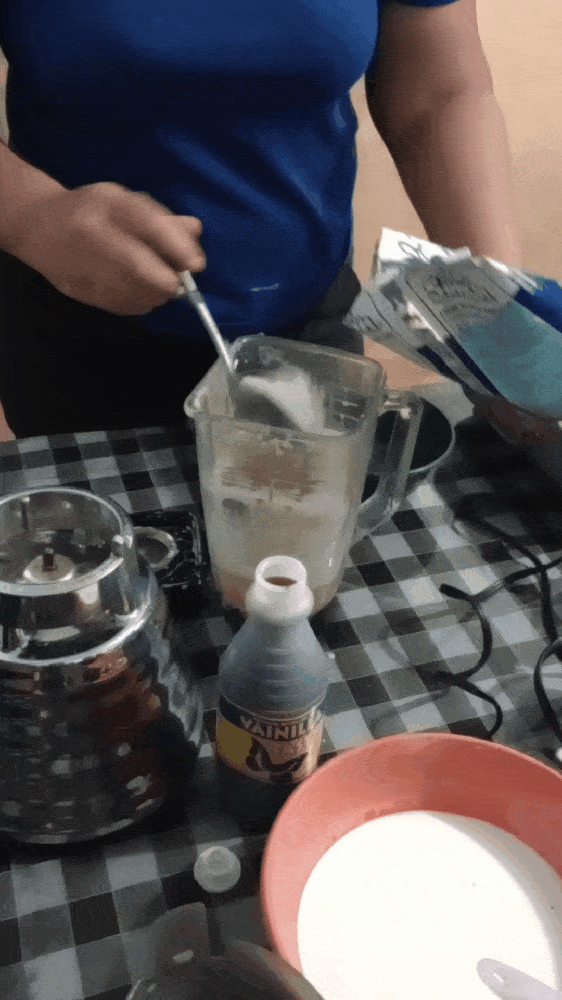
Colocamos vainilla, ron al gusto y finalmente la leche en polvo.
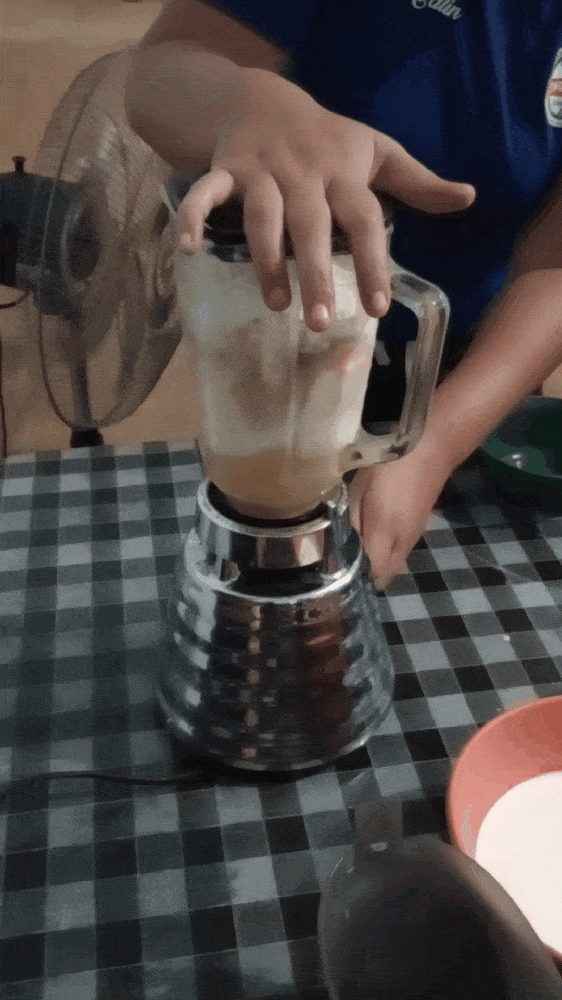
Batimos hasta integrar muy bien todo.
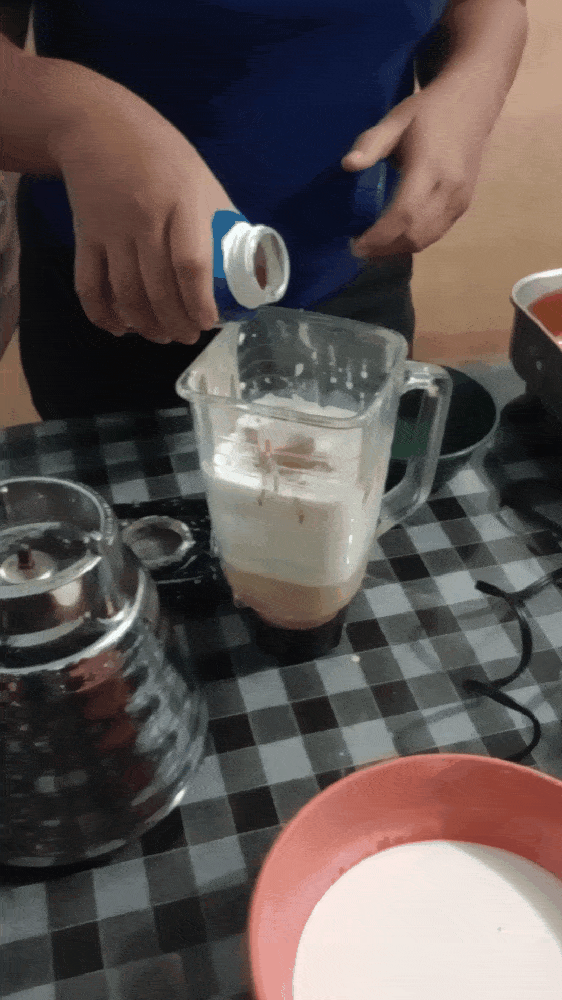
Add vanilla, rum to taste and finally the powdered milk.
Beat until everything is well integrated.
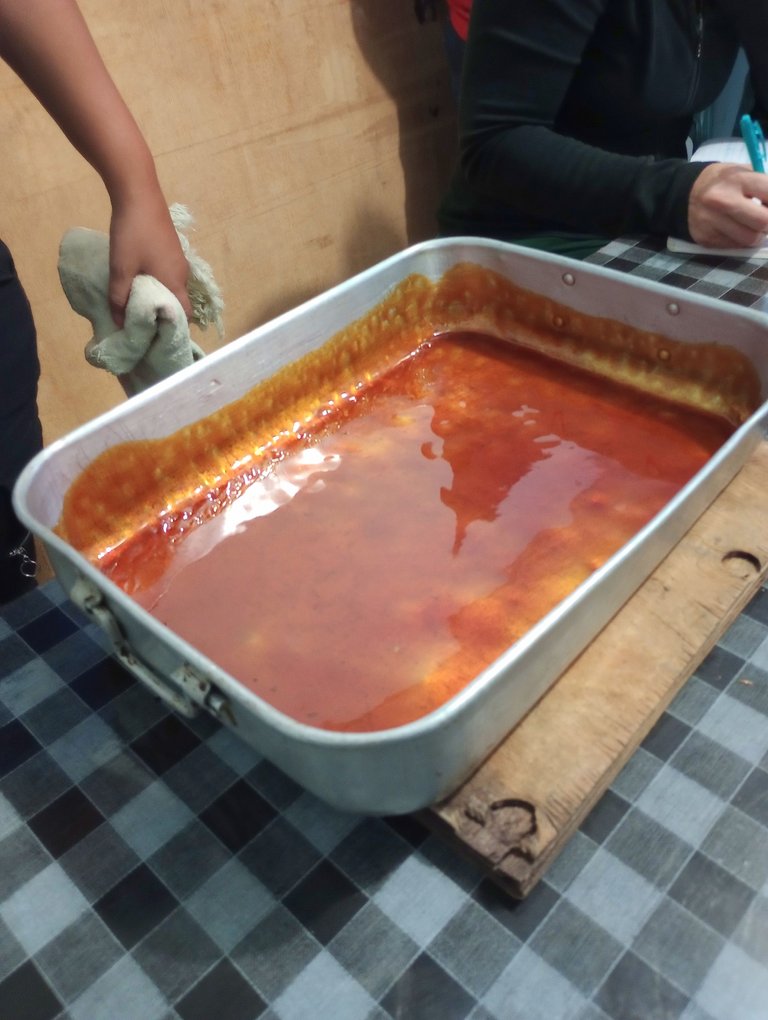
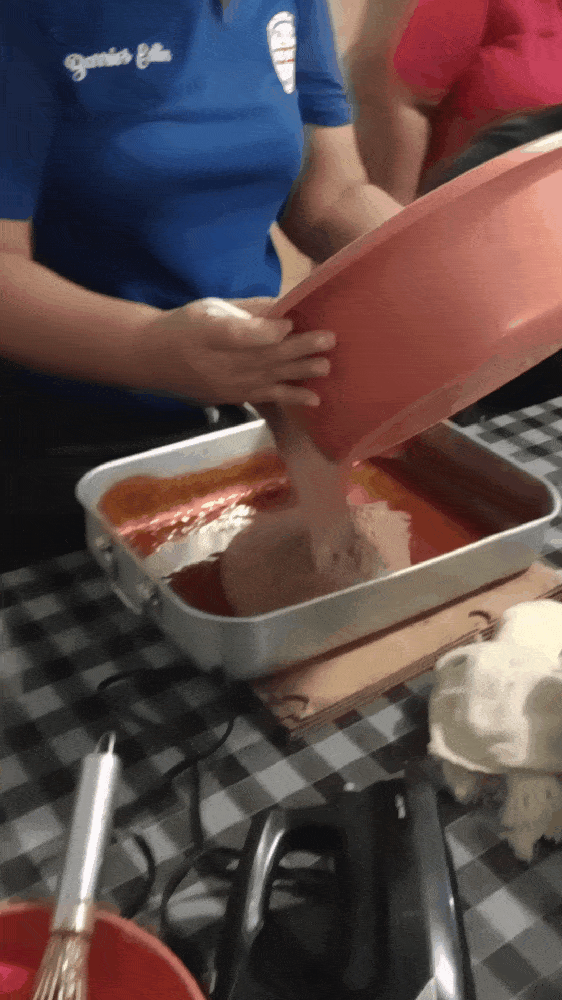
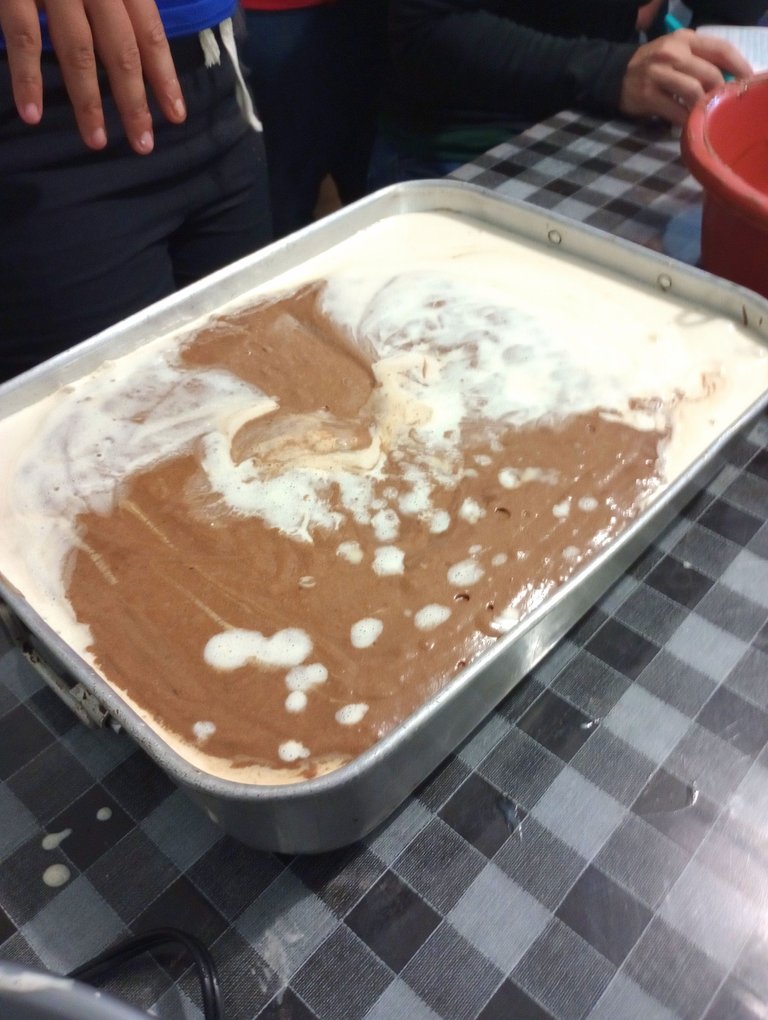
En un molde hacemos el caramelo y bañamos todas las paredes con él. Vertemos la mezcla de pastel de chocolate seguido de la mezcla del quesillo.
Como les comenté al inicio, no importa en el orden que las coloquemos. Al principio se verá todo desordenado, pero confíen que en el horno, todo se colocará en su sitio.
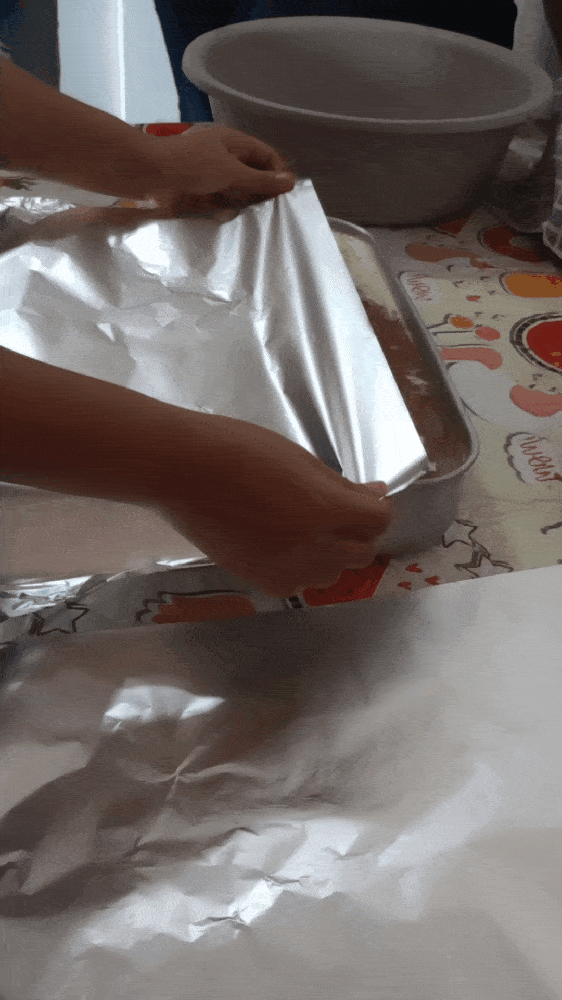
Cubrimos la bandeja con papel aluminio y cocinamos a baño de maría en el horno. Debemos siempre cerciorarnos de que la bandeja tenga agua para que se cocine correctamente.
El tiempo varía según la altura del molde, sabremos que está listo cuando al introducirle un palillo salga limpio.
Se demora aproximadamente 1 hora y media.

In a mold we make the caramel and bathe all the walls with it. Pour the chocolate cake mixture followed by the quesillo mixture.
As I mentioned at the beginning, it doesn't matter in which order we place them. At first it will look messy, but trust that in the oven, everything will fall into place.
Cover the tray with aluminum foil and bake in a bain-marie in the oven. We must always make sure that the tray has water in it so that it cooks properly.
The time varies according to the height of the mold, we will know it is ready when a toothpick comes out clean.
It takes approximately 1 hour and a half.
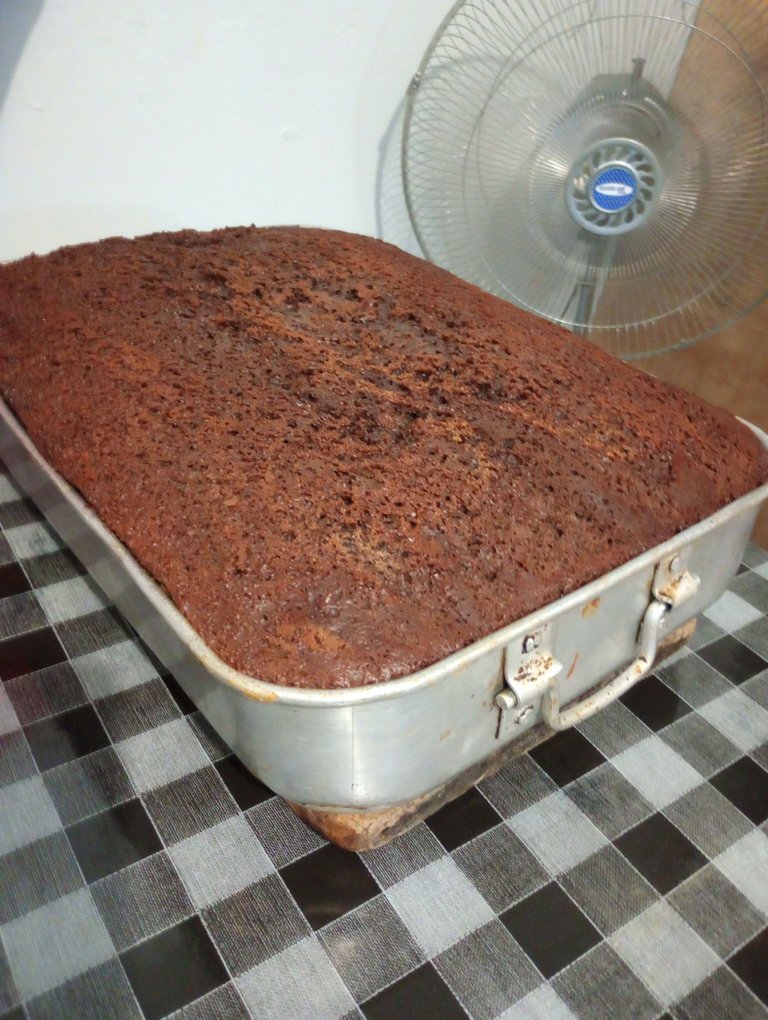
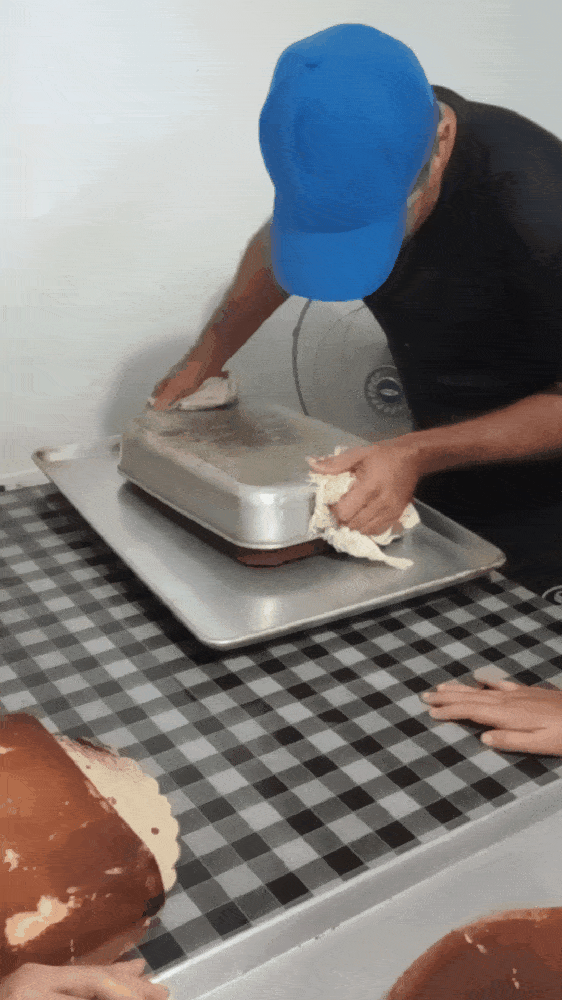
Salido del horno lo dejaremos reposar muy bien antes de desmoldar. Preferiblemente debemos refrigerar por un día antes de hacerlo.
Nosotros por cuestión de tiempo no podíamos esperar, así que lo desmoldamos estando aún caliente.
Por fortuna todo salió bien. ♥
Once out of the oven, let it rest very well before unmolding. Preferably it should be refrigerated for a day before serving.
We couldn't wait because of time constraints, so we unmolded it while it was still warm.
Fortunately everything went well. ♥
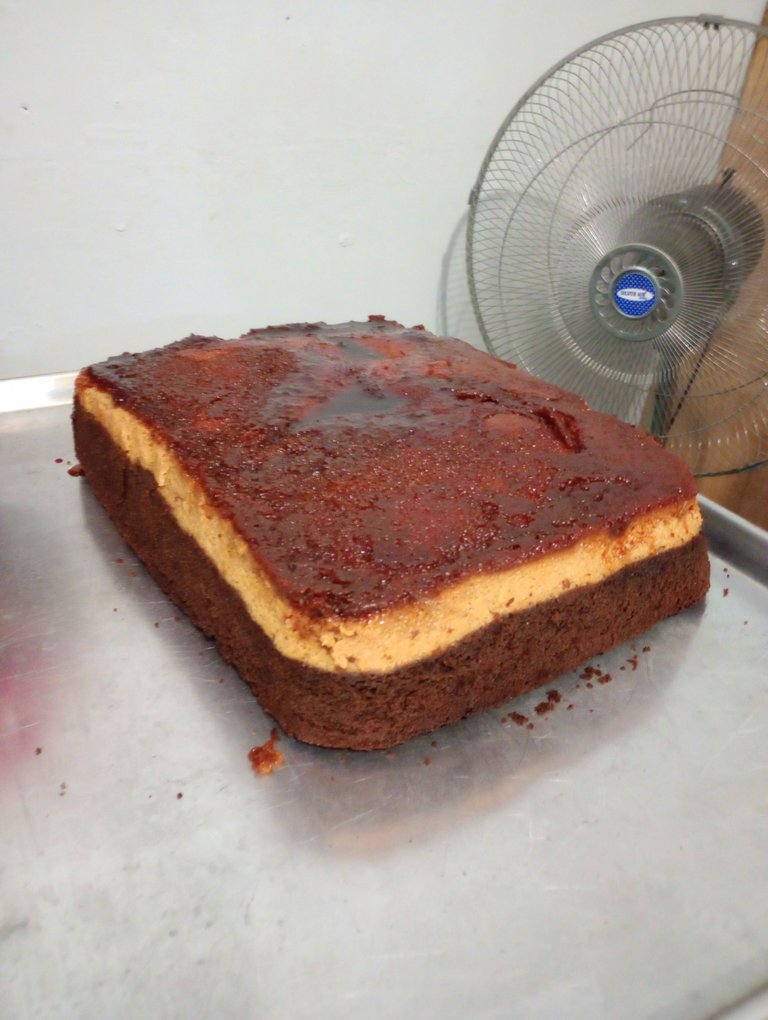
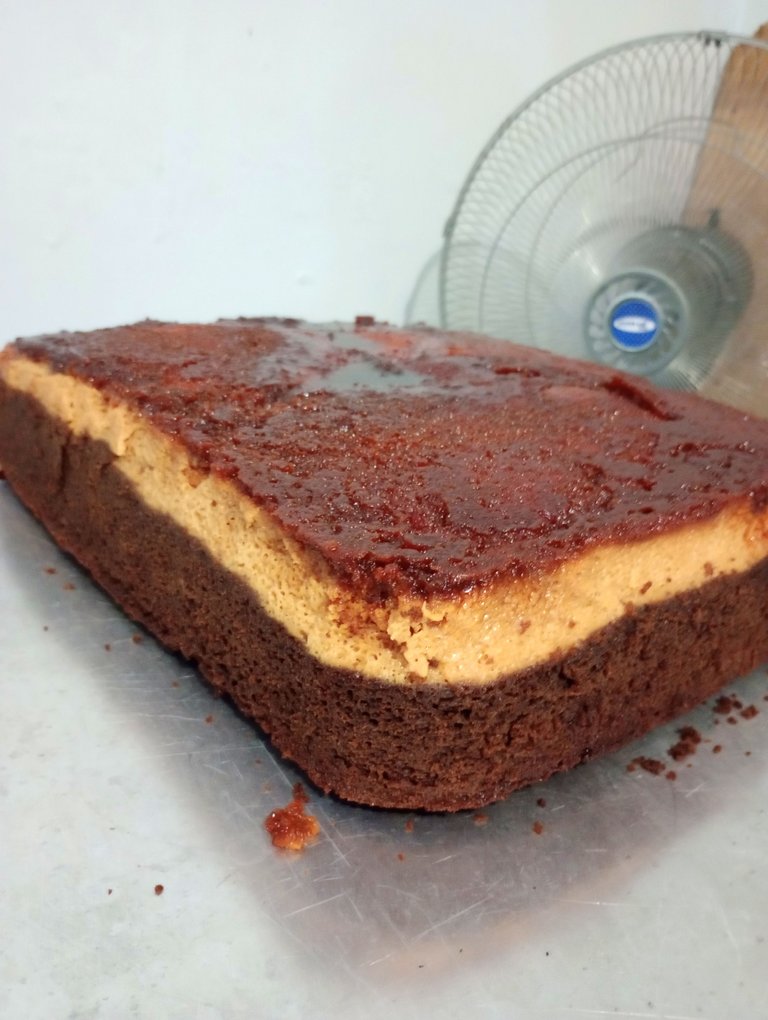
Así quedó de espectacular nuestro pastel de chocoquesillo, una delicia para el paladar.
Es un pastel húmedo, perfecto para disfrutar en cualquier ocasión. Espero les haya gustado la receta y la practiquen en sus casitas.
Si tienen alguna duda me la dejan en los comentarios. ♥
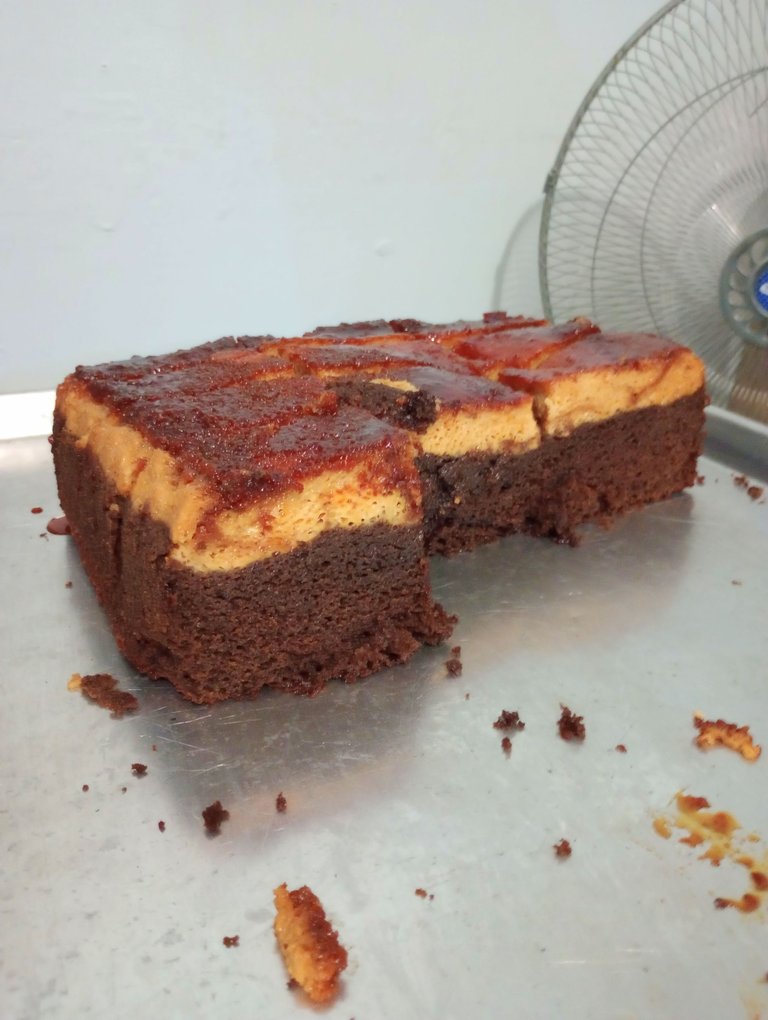
This is how spectacular our chocoquesillo cake turned out, a delight for the palate.
It is a moist cake, perfect to enjoy on any occasion. I hope you liked the recipe and practice it at home.
If you have any questions leave them in the comments. ♥

Espero haya sido de tu agrado y provecho.
Un gran abrazo a todos, y nos leemos en un próximo post
• Lakrearte en Hive •
Att: Estefania Garcia ♥

Imágenes y separadores de mi autoría
Portada editada en Canva
Fotografías tomadas con un Moto G31
Texto traducido en Google ImTranslate v.14.27
Esa torta es la gloria, me encanta!!✨
Wow! exquisito 😋, me encanta esta torta!
Qué sabroso se ve ese pastel! Amo el flan y por supuesto el chocolate! No puede fallar nunca!
La receta se ve deliciosa y perfecta para endulzar cualquier ocasión. Me encanta cómo combina el chocolate y el flan en un solo postre