Good vibes bracelet "red thread + turkish eye" ❤️🧿 - macrame weaving with the lark's knot technique - Step by step [ESP/ENG]
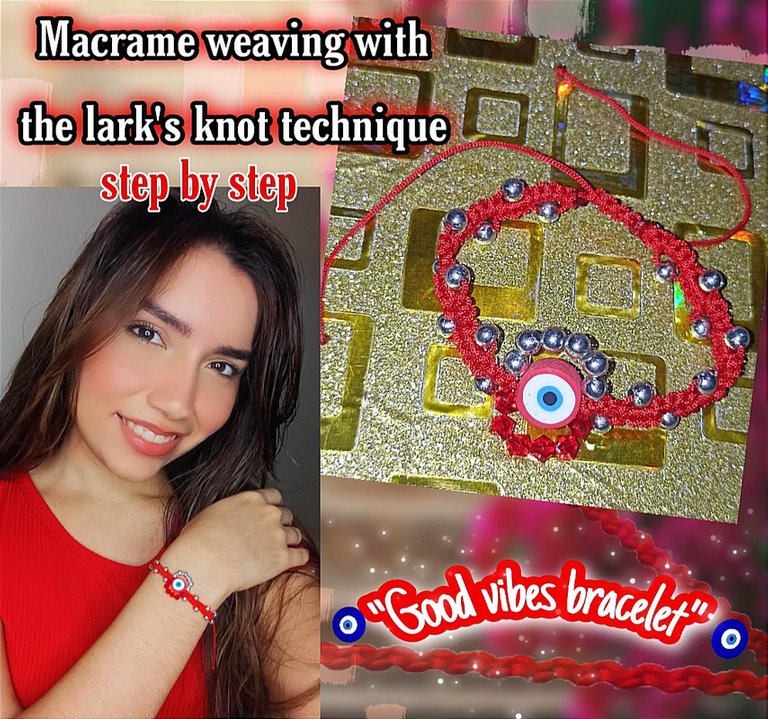
Hola amigos de Hive ❤️ un saludo para todos los que me visitan el día de hoy, en esta oportunidad me encuentro en esta comunidad para compartirles una nueva técnica de nudo macramé que aprendí para realizar una hermosa pulsera con un lindo diseño hecha con hilo rojo y ojo turco, mejor conocida también como pulseras de la buena vibra. Estoy segura que alguna vez escucharon hablar sobre este tipo de pulseras y del poder que tienen para reprimir aquellas malas vibras o mal de ojo para el que la lleva, pues hoy te enseño cómo hacerla en muy sencillos pasos.
El nudo que estaré realizando se llama nudo alondra, en forma de zig zag, con brillantes cuentas plateadas y un dije central que también les estaré explicando su elaboración con hilo nylon, cristales y el famoso ojo turco, todo en combinación en tono rojos para combinarlo con nuestro hilo chino. Así que como siempre digo "no le temas a los nudos " 😁. Te invito a que aprendas junto a mi a realizarlo, y ahora sí, sin más que agregar... Comencémos!!
Hello friends of Hive ❤️ greetings to all who visit me today, this time I am in this community to share with you a new macrame knot technique that I learned to make a beautiful bracelet with a nice design made with red thread and Turkish eye, also known as good vibes bracelets. I'm sure you've heard about this kind of bracelets and the power they have to repress those bad vibes or evil eye for the one who wears it, well today I show you how to make it in very simple steps.
The knot that I will be making is called lark knot, in a zig zag shape, with shiny silver beads and a central pendant that I will also be explaining its elaboration with nylon thread, crystals and the famous Turkish eye, all in combination in red tones to combine it with our Chinese thread. So as I always say "don't be afraid of knots" 😁. I invite you to learn with me how to make it, and now yes, without further ado.... Let's start!

Texto sin editar
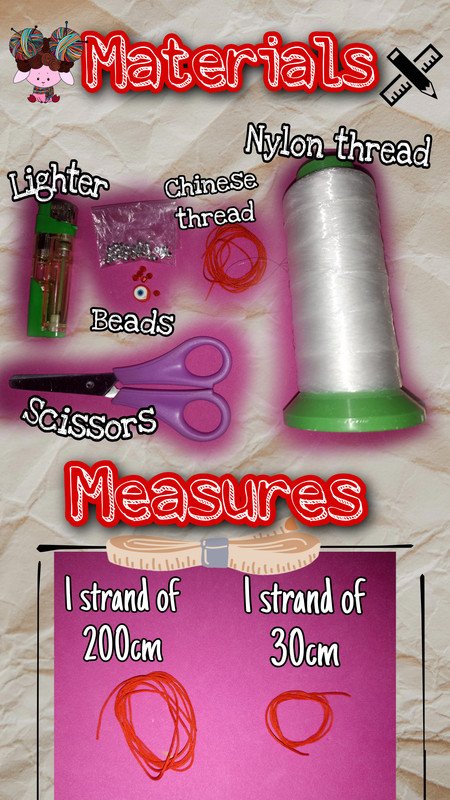
Materiales:
- Hilo chino (rojo)
- Tijeras
- Encendedor
- Cuentas + ojo turco
- Hilo nylon
Medidas:
- 1 hebra de 200cm
- 1 hebra de 30cm
Unedited text
Materials:
- Chinese thread (red)
- Scissors
- Lighter
- Beads + Turkish eye
- Nylon thread
Measures:
- 1 strand of 200cm
- 1 strand of 30cm
Para el Dije:
For the pendant:
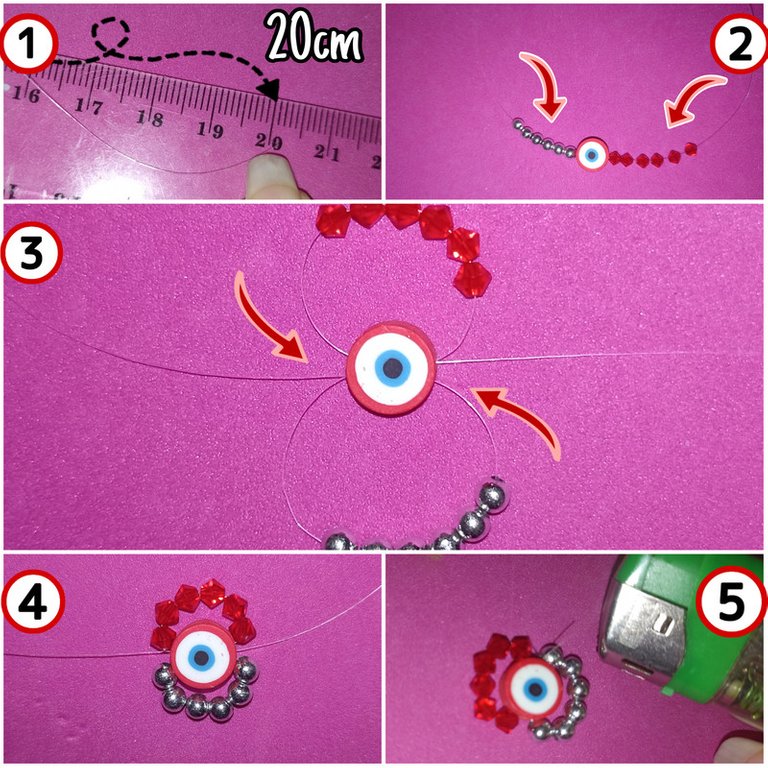
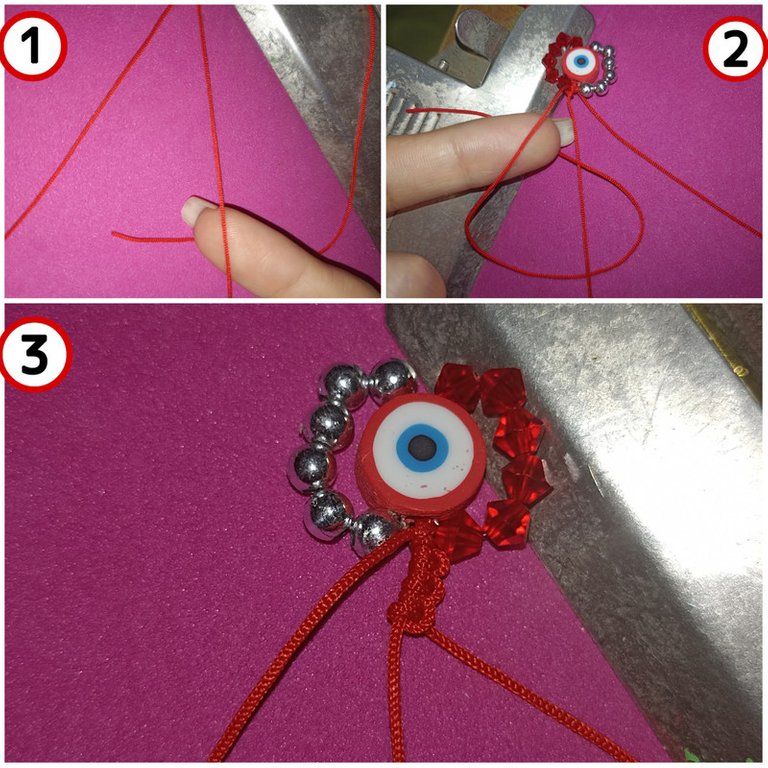
Paso 1: para comenzar, vamos a medir y cortar nuestro hilo nylon aprox 20cm.
Paso 2: ahora vamos a introducir las 6 cuentas plateadas, el ojo turco y luego los 6 cristales rojos.
Paso 3: El hilo izquierdo lo vamos a introducir por el orificio derecho del ojo turco, el cual será nuestra piedra central, luego el hilo derecho lo introduciremos por el orificio izquierdo para cruzar ambos hilos en el centro y nos quede formado un círculo.
Paso 4: estiramos y ajustamos bien ambos hilos para apretar todas las piedras y cuentas.
Paso 5: y finalmente haremos un nudo y quemamos las puntas con nuestro encendedor.
- Step 1: to start, we are going to measure and cut our nylon thread approx 20cm.
- Step 2: now we are going to introduce the 6 silver beads, the Turkish eye and then the 6 red crystals.
- Step 3: we are going to introduce the left thread through the right hole of the Turkish eye, which will be our central stone, then we will introduce the right thread through the left hole to cross both threads in the center and form a circle.
- Step 4: we stretch and tighten both threads to tighten all the stones and beads.
- Step 5: and finally we make a knot and burn the ends with our lighter.
Para la pulsera:
For the bracelet:
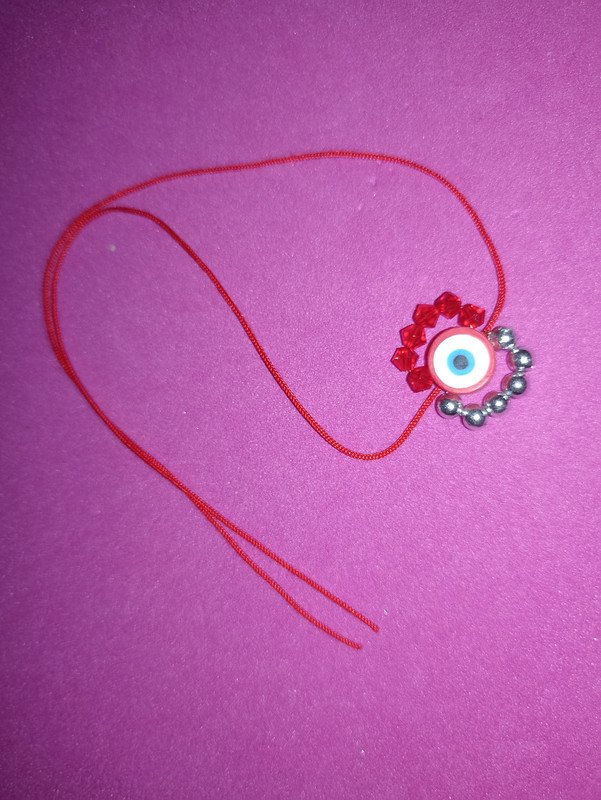
Por el dije que acabamos de hacer, vamos a introducir muestro hilo de 30 cm por el centro, y que este nos quede en medio.
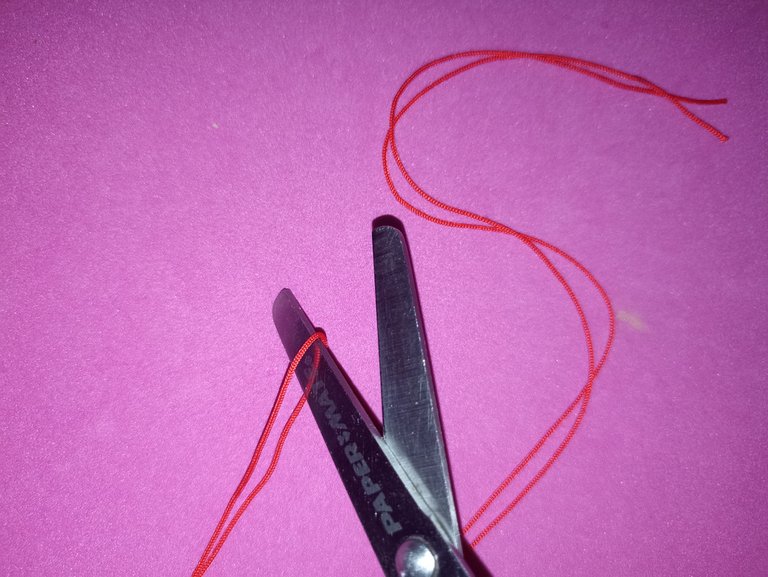
Luego vamos a cortar a la mitad la otra hebra de hilo de 200cm, teniendo como resultado, dos hebras de 100cm.
For the pendant that we have just made, we are going to introduce our 30cm thread through the center, so that it remains in the middle.
Then we are going to cut in half the other strand of thread of 200cm, having as a result, two strands of 100cm.
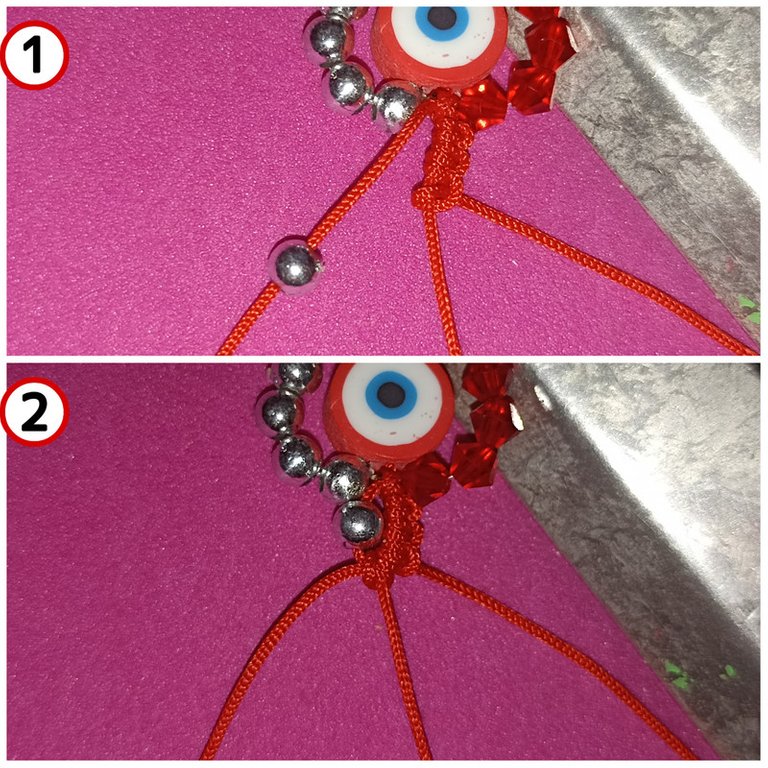
Para realizar este diseño del nudo alondra vamos a tomar uno de las puntas, en esta caso el derecho, y formaremos un semi arco pasando sobre el hilo central, luego por debajo, y lo sacamos nuevamente por el semi círculo que iniciamos inicialmente.
To make this lark knot design we are going to take one of the ends, in this case the right one, and form a half bow passing over the central thread, then underneath, and we take it out again through the half circle we started with initially.
Vamos a repetir el mismo procedimiento pero cambiando la dirección del hilo, para ello tomaremos ahora la misma hebra formando nuevamente el semi círculo, pero la pasaremos ahora por debajo del hilo central, luego por encima y lo sacamos por el semi círculo del inicio. Esto lo vamos a repetir 3 veces.
We are going to repeat the same procedure but changing the direction of the thread, for this we will now take the same thread forming again the half circle, but we will pass it now under the central thread, then over it and we will take it out through the half circle of the beginning. We will repeat this 3 times.
Hecho el nudo tres veces tomaremos la otra hebra e introduciremos una cuenta, y cerramos realizando nuevamente el nudo anterior.
Once the knot has been tied three times, we will take the other strand and introduce a bead, and close it by tying the previous knot again.
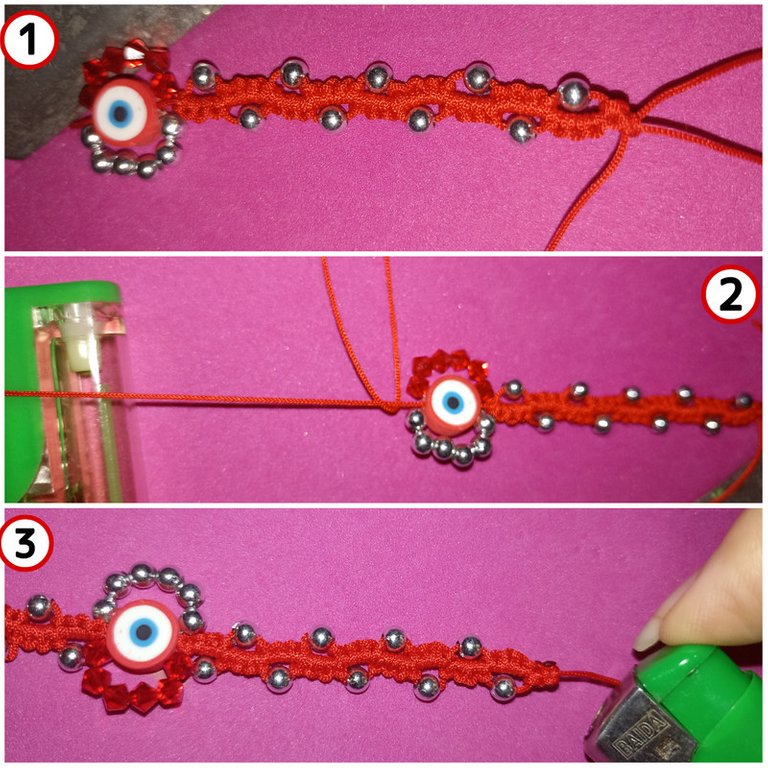
Para que nuestro diseño sea un zig zag, debemos intercalar el nudo, primero derecha luego izquierda, realizando el nudo con una hebra y luego con la otra.
Cada lado debe medir aproximadamente 6 a 7 cm, pero eso depende de la medida que deseas tener. Una vez hayas terminado un lado comienzas por el otro comenzando en el dije central. Ajustamos bien el último nudo, cortamos el sobrante y quemamos las puntas.
For our design to be a zig zag, we must intersperse the knot, first right then left, tying the knot with one strand and then with the other.
Each side should measure approximately 6 to 7 cm, but it depends on the size you want to have. Once you have finished one side you start on the other side starting at the central bead. Tighten the last knot, cut off the excess and burn the ends.
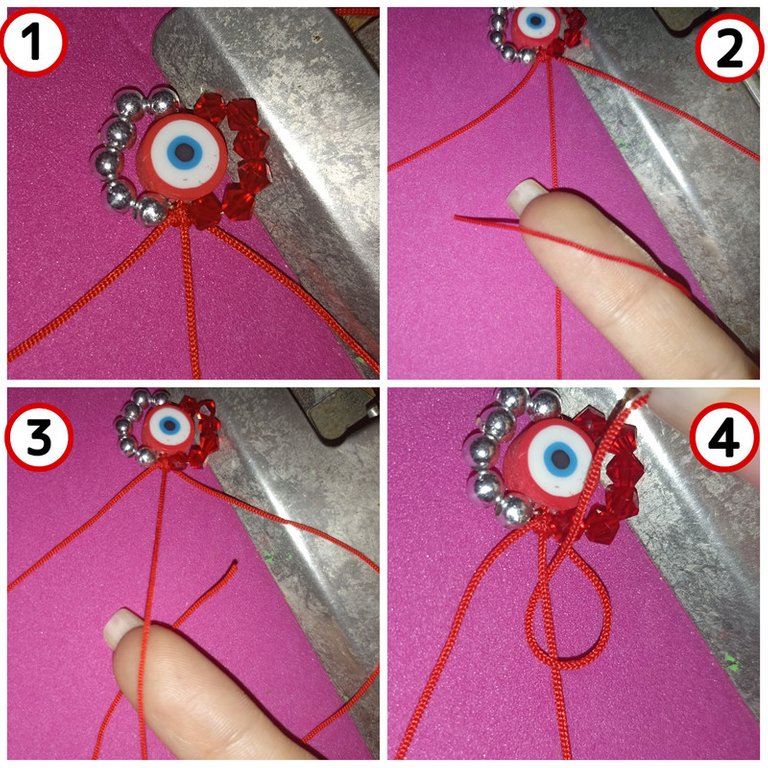
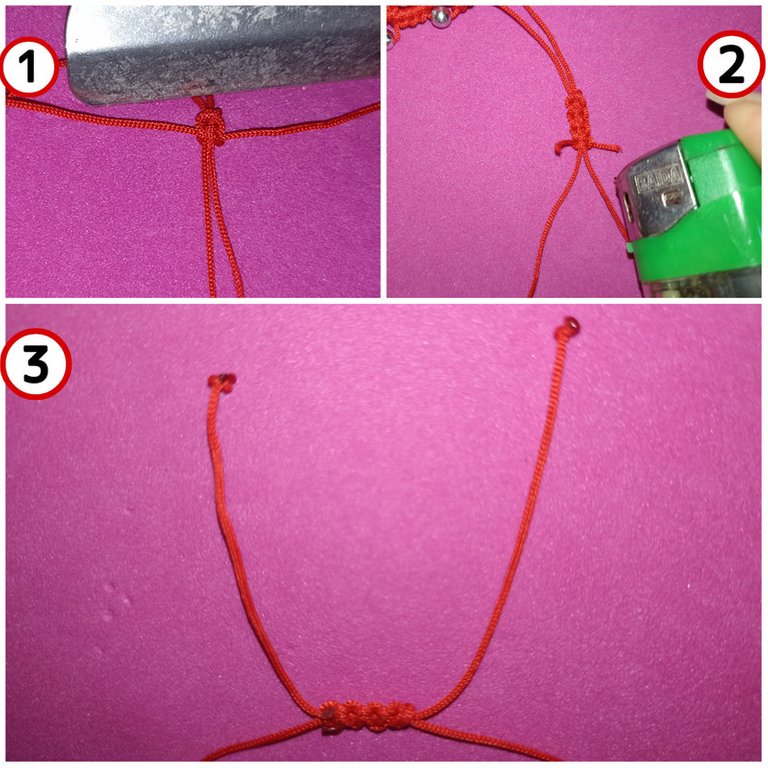
Ahora para cerrar la pulsera vamos a realizar un nudo ajustable sencillo realizando un nudo plano. Con tres a cuatro nudos estaría perfecto, cortamos un poco el hilo sobrante y quemamos las puntas.
Si deseas puedes agregar una cuenta para decorar las hebras colgantes o simplemente hacerle un pequeño nudo.
Now to close the bracelet we are going to make a simple adjustable knot by making a flat knot. Three to four knots would be perfect, cut a little bit of the excess thread and burn the ends.
If you wish you can add a bead to decorate the hanging strands or simply tie a small knot.
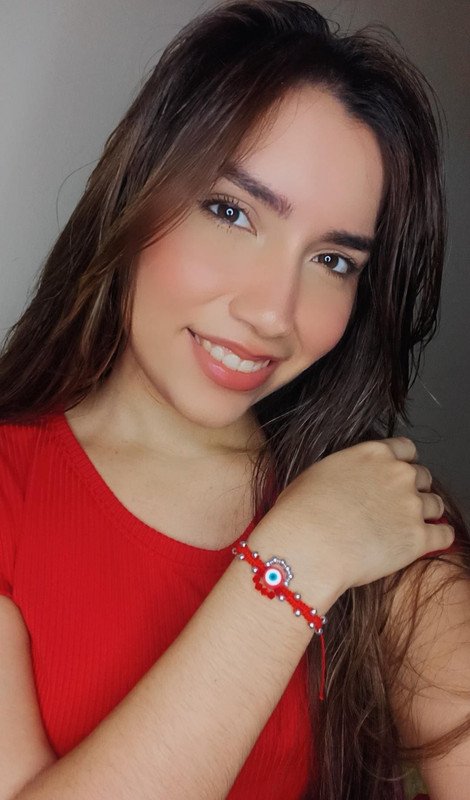
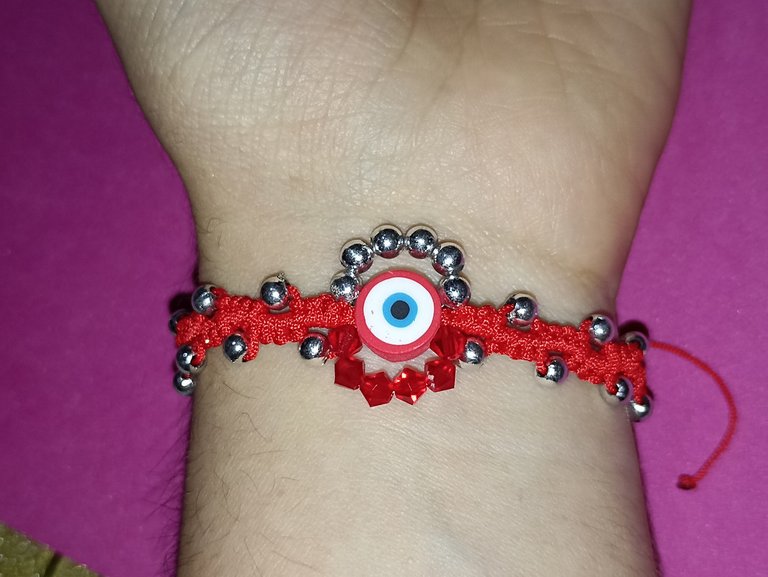
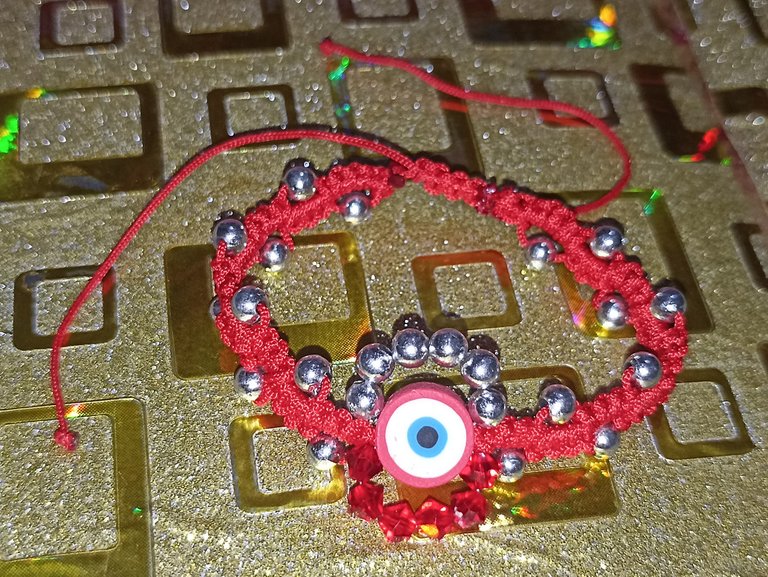
Y aquí les muestro la pulsera terminada, como ven aunque parecia complicada, realmente no lo es una vez le agarras el truco y la práctica, la verdad que este nudo lo había visto y combinado con este diseño junto al dije central realizado por nosotros mismos me pareció que quedaba perfecto. No le temas a los nudos ! Es súper sencilla de hacer y si te gusto te animo a que lo intentes y así tengas también una pulsera de la buena vibra que actualmente están muy de moda, solo es cuestión de práctica, mucha creatividad y por supuesto un toque secreto de amor para que el trabajo quede con el mejor acabado 🥰. Espero les haya gustado, me encantó mostrarles este pequeño tutorial con la técnica del Macramé de nudo de alondra, espero compartirles muy pronto nuevos trabajos, con mucho cariño me despido y será hasta la próxima 💕.
And here I show you the finished bracelet, as you can see although it seemed complicated, it really is not once you get the trick and practice, the truth is that I had seen this knot and combined with this design along with the central pendant made by ourselves I thought it looked perfect. Don't be afraid of knots ! It is super simple to do and if you like I encourage you to try it and so you also have a bracelet of good vibes that are currently very fashionable, it's just a matter of practice, lots of creativity and of course a secret touch of love so that the work is with the best finish 🥰. I hope you liked it, I loved to show you this little tutorial with the Macramé lark's knot technique, I hope to share new works very soon, with much love I say goodbye and will be until next time 💕.
Todo el contenido es de mi autoría y las imágenes son de mi propiedad
Cámara: Redmi note 10s
Uso un aro de luz LED como base para mi teléfono y tomarme las fotos
All content is my own and images are my property
Camera: Redmi note 10s
I use an LED light ring as a base for my phone to take pictures of myself

Edición y Separador|Editing and Separator
App Picmonkey - App Picsart
Traductor|Translator
DeepL

@edwarlyn11 te quedó muy linda tú pulsera y me gusta que has detallado muy bien las cosas paso a paso para que se pueda seguir todo sin problemas.
Las estructura del post está impecable, y bueno no puedo decir mucho más porque esto no es mi área, lo que si es que me encanta apoyar post de personas que se nota que han dedicado tiempo para poder hacer un contenido verdaderamente único y de calidad.
Me encanta ver post como el tuyo que se que serán de gran utilidad para quienes adoran las manualidades.
Saludos un abrazo 🤗 y mi voto en apoyo 👍
Aww☺️muchas gracias por tan lindas palabras @enfocate, de verdad que comentarios como el tuyo me llenan de mucho ánimo para continuar compartiendo contenido de la mejor calidad posible, porque pienso que los lectores, la comunidad y la plataforma en general lo merecen. Fue un gusto para mí hacerlo porque me encanta lo que hago y me da mucho más gusto ver que te haya gustado igual...un saludo y otro gran abrazo virtual para tí amigo!!!💕
Si justamente por eso lo hago porque se que hay quienes se dedican más que todo a crear contenido pero olvidan comentar fuera de sus propias publicaciones, así que bueno intento hacer el equilibrio jejej
Ahora mismo mi poder de voto no es muy alto, pero estoy seguro que pronto lo será 😃
Un abrazo 🤗
Que belleza, me gusto mucho tu diseño, el tejido que llevaste a cabo y los detalles. Gracias por compartir. Saludos @edwarlyn11 ✨
Muchas gracias amiga🤗 me alegra mucho que te gustara!! Fue un placer compartirlo, un saludito para ti @dayadam 💕
Linda pulsera, felicidades y éxito.
Muchas gracias a ti por visitarme 🤗 me alegra mucho saber que te gusto, fue un placer compartir la elaboración de esta pulsera, muchas gracias por tus bonitos deseos amiga @yanethstars ...un saludito para ti💕
Tr ha quedado muy bonita la pulsera con el nudo alondra, es increíble lo bonita que quedó con todos los balines y la estructura que le diste, es un nudo precioso, muy bien detallado tu post, gran trabajo.
Muchas gracias comunidad 🤗 me alegra que les gustara, este nudo ya lo había visto y la verdad es que se pueden crear diversos modelos además de este, combinando varias ideas para elaborar este tipo de pulsera de la buena vibra que hoy en día están súper de moda. Me encanta que poco a poco estoy aprendiendo varias técnicas de nudos que espero compartirles pronto...un saludito y muchas gracias una vez más por visitarme, su comentario y apoyo me animan mucho 💕☺️
Hola, feliz noche, que linda pulsera hermosa diría yo, muchas gracias por el tutorial, mucha suerte.👍👍👍👍👍👍👍👍👍👍👍👑
Hola amigo feliz noche para ti también 🤗 de verdad que muchas gracias por tan bonito comentario, me alegro leerte y me anima mucho saber que te gusto, fue un placer compartir...!!💕💕💕🤗🤗🤗
https://twitter.com/1048398048240566273/status/1581335102268678144
The rewards earned on this comment will go directly to the people sharing the post on Twitter as long as they are registered with @poshtoken. Sign up at https://hiveposh.com.