HOW DO I MAKE MY POSTS? | Guide and tips to make a post without complications 💻 [ENG/ESP].
Good Day, Hive friends! Greetings DigitalDicast in a new post for Hive!
If you've been on hive, you've written sometime on this platform, either in the form of a comment or a post. However, not all of us can make a good outline/structure when it comes to making a post or maybe you don't know how to do such a thing for the better..
But don't worry! In this post I will show you the process I go through to make a post, one which has changed over time and for now is the one that is currently working for me, being the most effective to date (for me).
I will show from the process of how I create the ideas to how I do the layout of my post, this will certainly serve to more than one (especially to new people who enter hive) to have an idea of how is the process of creating a post, so without more to say, Let's start with the post!

PART 1: IDEAS, DRAFT AND OUTLINE CREATION.
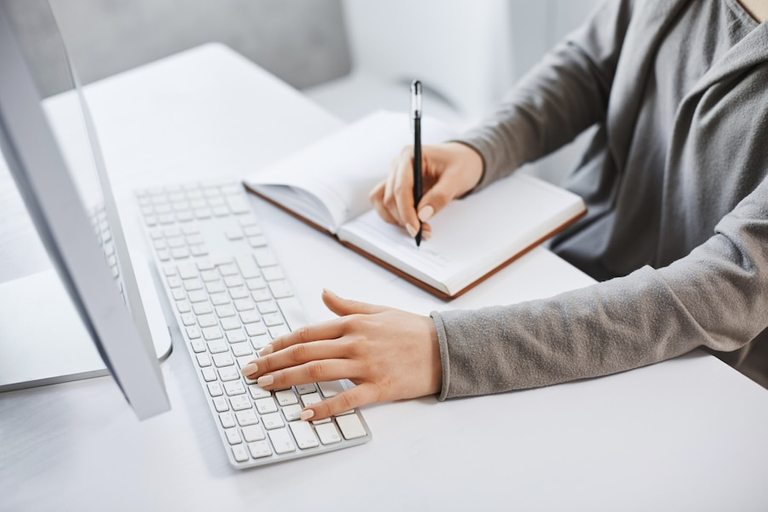
First things first, the ideas: these are generated from events and moments of daily life, as well as suggestions and questions that my mind asks to translate them into a draft.
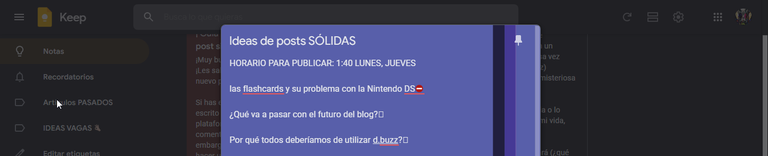
What I do is take my personal notepad (which is google keep) to write my ideas and save them for when I feel motivated to write them (such as this post, which I was thinking of doing since August 2021)
ideas come and go, so don't get frustrated if you don't have anything to write, that great idea you were looking for will soon arrive, the best thing is to get out of the routine a bit and watch a series, a book or do something you like to that your mind does not feel so heavy.
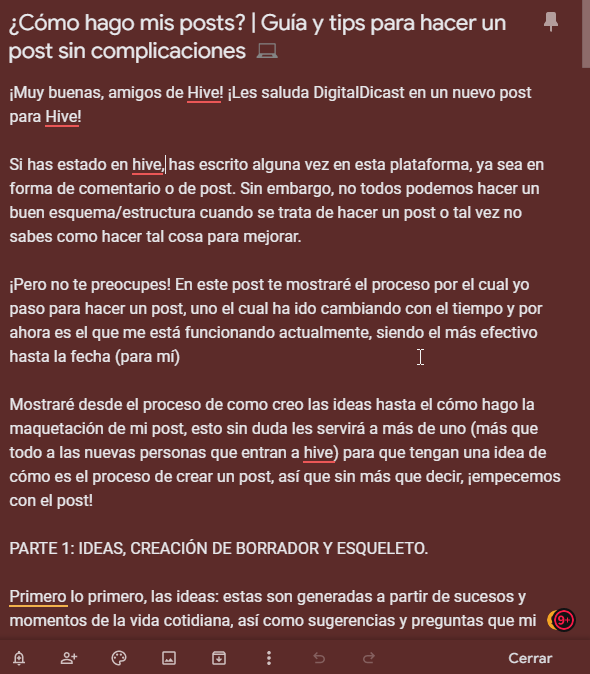
Then we go with the draft, the most important and at the same time fun to do:
To do so, I follow these steps that I will show you below:
Title (can be a provisional one in the meantime)
Entrance or introduction to the subject in an engaging way - Clear - Concrete - Attractive to continue reading (you can also leave it for later, just like the conclusion, only it is advisable to do this first)
Development of the post: Easy to read blog body/outline - Use subtitles - Short paragraphs of no more than 6 lines - Provisional images.
Conclusion
Title it "Conclusion"
Summarizes
If the conclusion has your personal opinion, clarify that it is your opinionCall to action
Keep reading - Share the article - Give me your opinion - Follow me
This is a basic scheme, but effective to know more or less how to make a good post, you can change it as you want, after all it is just an indication.
TIP: Try to make the draft once you finish all the important things you had to do for the day, so your mind doesn't think about other things and you can express yourself more fluently thanks to having a calm mind, you can put some music if you want and take breaks (with the pomodoro method)
PART 2: CREATING THUMBNAILS/COVERS FOR THE POST
Now we are going with something that not many pay attention to, but that is important for your post to differentiate itself from the others and thus stand out, the so-called covers or thumbnails.
This is fundamental because this is how you define your personal brand within the platform so that people recognize you, in addition, you can make them however you want, that is the magnificent thing about the edition.

First I make an early sketch in my mind about how I want to do the cover (if I want to make it simple, extravagant, with x representative color, which characters, etc.) you can do the same as me or you can also do the sketch in one sheet or digitally.
Then, I go into my photo editor (which is Photopea, a free online photo editor VERY similar to Photoshop) and start making the cover of the post, usually I start with the borders because it helps me a lot with the setting of the post and to know that I am on the right path.
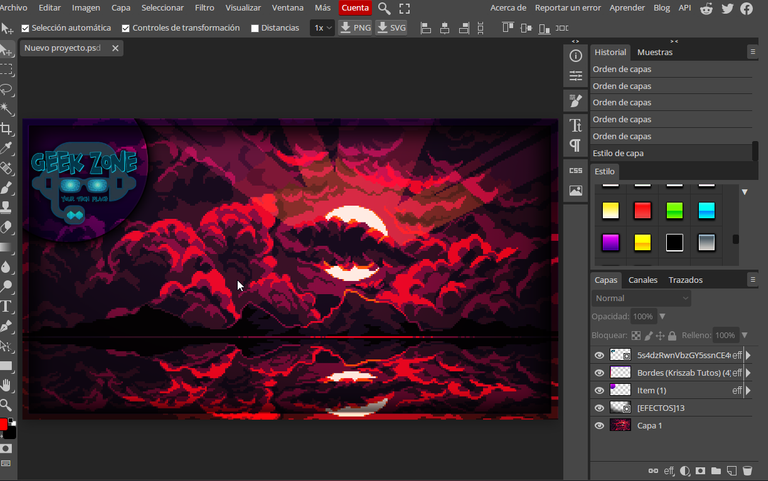
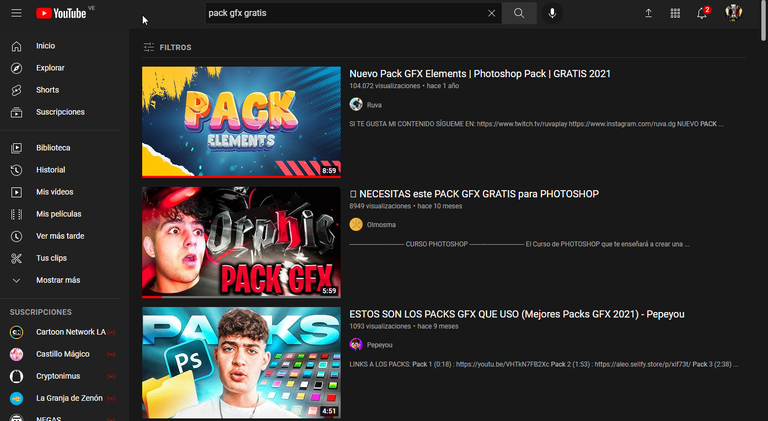
Both the effects and fonts and letter styles are downloaded from the internet for commercial use thanks to the different YouTube videos that provide them free of charge.
To make the covers, I almost always follow these principles, this is to make it stand out from the others and thus be able to attract more attention.
1st Tip: Put a different text than the article/video, do not put the same title.
2nd tip: position the text in an empty place in the image that is not above the characters/object.
3rd Tip: Put an image referring to the subject of the article (very important)
4th tip: put emojis, indications if you want more attention from the public. (this is optional)
So what are you waiting for? Start improving your covers right now! :D
PART 3: LAYOUT: HTML AND IMAGES.
Now we are going with the part that I like to do the most due to how monotonous it is, I can have a coffee with some cookies and start doing the layout of the article, since it is the most going to decorate the post (it will make it beautiful, forgive the redundancy) for when you see it.
First what I do is put the title (already definitive) in the ecency editor, then I put the corresponding labels so that the post is noticed, in addition, I also put the initial greeting (which is the one you saw when top of post)
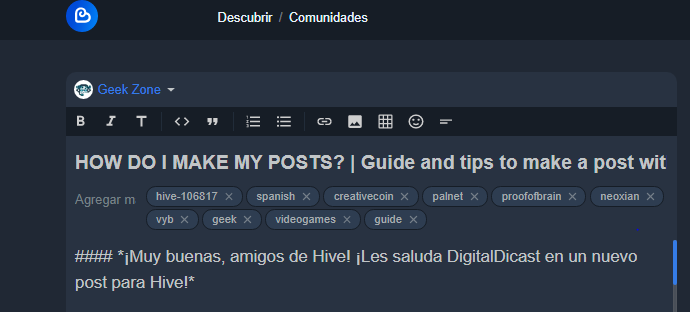
I make the introduction and conclusion in italics, this is more than aesthetic to differentiate my inner self from the whole post (do you see this?, yes, here I can speak everything I want without altering the continuity of the post, you can try it by omitting this text), so normally when I put the letters in italics I put extra data or things that are not so necessary to put, but that I, to give the article more personality, I plan to put in order to save doubts when reading the post.
After making the introduction I put the cover and therefore the first part of the post with HTML, which I will talk about right now:
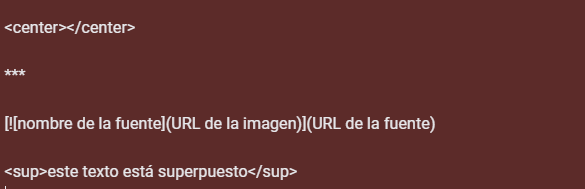
The HTML is a point that everyone should consider when making posts, since it is what is going to decorate the post the most and what organizes everything so that it does not look messy, I have all the codes in a store that creates ecency (also peakd) to use them whenever I want, here I have all kinds of codes, from putting centered characters, to putting left and right side images.
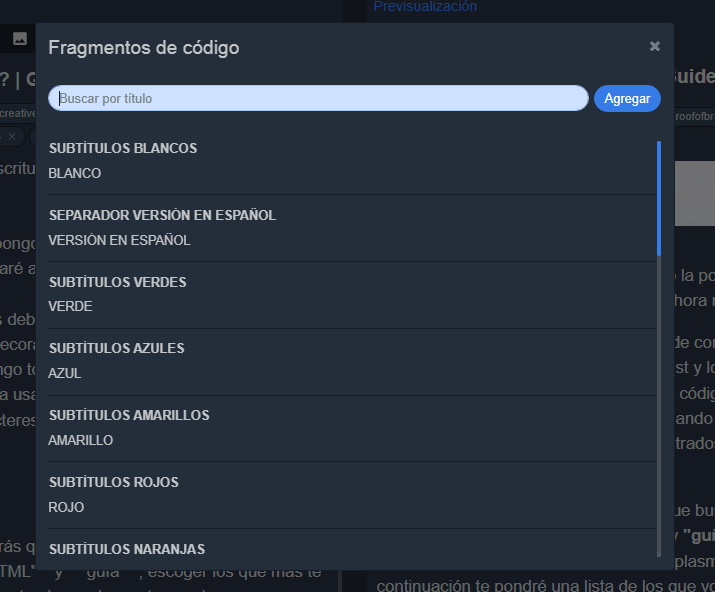
To get these codes you will have to search the search engine of the dapp of your choice for the words "HTML" and "guide", choose the ones that you like the most or are useful to translate them into your posts later. , then I will put a list of the ones that I use the most to decorate my posts:
Little by little you will learn what to put in each part of the post so that it looks good and then in a couple of months you will be able to do everything as if it were a robot thanks to how simple it is, it does not seem so, but it is very easy!
TIP: I recommend using a single separator for you to use in your posts, you can use it both to differentiate subtitles from the content and to separate very long texts, I recommend canva to make them and the 587x40 resolution (use all your creativity , there are no limits!)
Then we go with the images, whenever I can I try to use my own images or photos, which can be used for commercial use, it can be difficult to find the best image banks, so I bring you several links of the most used banks in the world.
✅ 1.- Freepik ➡️ http://www.freepik.es/
✅ 2.- Pixabay ➡️ www.pixabay.com
✅ 3.- Unsplash ➡️ www.unsplash.com
✅ 4.- Pexels ➡️ https://www.pexels.com/
✅ 5.- Fancy Crave ➡️ http://fancycrave.com/
✅ 6.- Free Nature Stock ➡️ http://freenaturestock.com/
✅ 7.- Free Images ➡️ https://es.freeimages.com/
✅ 8.- Wikimedia Commons ➡️ https://commons.wikimedia.org/wiki/Main_Page
✅ 9.-Open Photo ➡️ https://openphoto.net/
✅ 10.- Jay Mantri➡️ http://jaymantri.com/
✅ 11.- Death to the stock photo ➡️ http://join.deathtothestockphoto.com/
✅ 12.- Stok Pic ➡️ http://stokpic.com/
✅ 13.- Gratisography ➡️ https://www.gratisography.com
✅ 14.- lifeopix ➡️ https://www.lifeofpix.com/
✅ 15.- Stock Vault ➡️ https://www.stockvault.net
✅ 16.- Splitshire ➡️ https://www.splitshire.com
✅ 17.- Super Famous ➡️ https://www.superfamous.com
✅ 18.- Picography ➡️ https://www.picography.co
✅ 19.- Startup Stock Photos ➡️ https://www.startupstockphotos.com
✅ 20.- Shutteroo ➡️ http://shutteroo.com
TIP: Although the pages tell you that you do not need to give credits, give them anyway, this is so that people know where to get images of such quality and also improve your personal image.

CONCLUSION
I hope you liked this post that I made with much affection for you, the hivers and content creators, since there are people who have not defined how to make a post, these are my tips and I hope you take them to the maximum.
I wanted to make this post as short and easy as possible, so I did not put how I do each thing in detail, however, with everything I put is enough to start being a better blogger on this great platform, I hope this little push has helped you!
So comment if you liked it and if so you can follow me for more content like this on my blog, without more to say I'll see you in the next one!
- Banners, dividers and subtitles made in canva by me
- Translated from DeepL
- Original and unpublished article first published in Hive
- Avatar (DigitalDicast) created on Picrew page, page to create OC (original characters) my avatar was created in Russa's avatar creator
VERSIÓN EN ESPAÑOL
¡Muy buenas, amigos de Hive! ¡Les saluda DigitalDicast en un nuevo post para Hive!
Si has estado en hive, has escrito alguna vez en esta plataforma, ya sea en forma de comentario o de post. Sin embargo, no todos podemos hacer un buen esquema/estructura cuando se trata de hacer un post o tal vez no sabes como hacer tal cosa para mejorar.
¡Pero no te preocupes! En este post te mostraré el proceso por el cual yo paso para hacer un post, uno el cual ha ido cambiando con el tiempo y por ahora es el que me está funcionando actualmente, siendo el más efectivo hasta la fecha (para mí)
Mostraré desde el proceso de como creo las ideas hasta el cómo hago la maquetación de mi post, esto sin duda les servirá a más de uno (más que todo a las nuevas personas que entran a hive) para que tengan una idea de cómo es el proceso de crear un post, así que sin más que decir, ¡empecemos con el post!
PARTE 1: IDEAS, CREACIÓN DE BORRADOR Y ESQUELETO.
Primero lo primero, las ideas: estas son generadas a partir de sucesos y momentos de la vida cotidiana, así como sugerencias y preguntas que mi mente hace para plasmarlas en borrador.
Lo que hago es llevar mi bloc de notas personal (el cual es google keep) para escribir mis ideas y guardarlas para cuando me motive a escribirlas (como por ejemplo este post, el cual estaba pensando hacer desde agosto de 2021)
las ideas van y vienen, así que no te frustres si no tienes nada que escribir, pronto llegará esa gran idea que tanto buscabas, lo mejor es salirse un poco de la rutina y ver una serie, un libro o hacer algo que te guste para que tu mente no se sienta tan pesada.
Luego vamos con el borrador, lo más importante y a la vez divertido de hacer:
Para hacerlo, hago sigo estos pasos que te mostraré a continuación:
Título (puede ser uno provisional mientras tanto)
Entrada o introducción al tema de forma enganche - Claro - Concreto - Atractivo para seguir leyendo (también lo puedes dejar para después, al igual que la conclusión, solo que es recomendable hacer esto primero)
Desarrollo del post: Cuerpo/esquema del blog fácil de leer - Usar subtítulos - Párrafos cortos de no más de 6 líneas - Imágenes provisionales.
Conclusión
Titúlala "Conclusión"
Resume
Si la conclusión tiene tu opinión personal, aclara que es tu opiniónCall to action
Sigue leyendo - Comparte el artículo - Dame tu opinión - Sígueme
Este es un esquema básico, pero efectivo para saber más o menos como hacer un buen post, puedes cambiarlo como quieras, al fin y al cabo es solo un indicio.
TIP: Intenta hacer el borrador una vez termines todas las cosas importantes que tenías que hacer en el día, así la mente no piensa en otras cosas y puedes expresarte con más fluidez gracias a tener la mente tranquila, puedes poner una música si quieres y tomarte descansos (con el método pomodoro)
PARTE 2: CREACIÓN DE MINIATURAS/PORTADAS PARA EL POST
Ahora vamos con algo que no muchos le prestan atención, pero que es importante para que tu post se diferencie de los demás y así destacar, las llamadas portadas o miniaturas.
Esto es fundamental porque así defines tu marca personal dentro la plataforma para que te reconozca la gente, además, puedes hacerlas como quieras, eso es lo magnífico de la edición.
Primero hago un boceto temprano en mi mente sobre como quiero hacer la portada (si la quiero hacer simple, extravagante, con x color representativo, cuáles personajes, etc.) tú puedes hacer lo mismo que yo o también poder hacer el boceto en una hoja o digitalmente.
Luego, entro a mi editor de fotos (el cual es Photopea, un editor de fotos gratuito en línea MUY parecido a Photoshop) y empiezo a hacer la portada del post, generalmente empiezo con los bordes debido a que me ayuda mucho con la ambientación del post y para saber que voy en el camino correcto.
Tanto los efectos como fuentes y estilos de letra son descargados de internet para uso comercial gracias a los diferentes videos de YouTube que los proporcionan gratuitamente sin costo.
Para hacer las portadas, casi siempre sigo estos principios, esto para que destaque sobre las demás y así poder llamar más la atención.
1.º Tip: Poner un texto distinto al del artículo/vídeo, no poner el mismo título.
2.º tip: posicionar el texto en un lugar vacío de la imagen que no sea arriba de los personajes/objeto.
3.º Tip: Poner una imagen referente al tema del artículo (muy importante)
4.º tip: poner emojis, indicaciones si quieres más atención del público. (esto es opcional)
Así que, ¿qué esperas? ¡Empieza a mejorar tus portadas ahora mismo! :D
PARTE 3: MAQUETACIÓN: HTML E IMÁGENES.
Ahora vamos con la parte que más me gusta hacer debido a lo monótono que es, puedo tomarme un cafecito junto a unas galletas y empezar a hacer la maquetación del artículo, ya que es lo más va a decorar el post (lo pondrá bonito, valga la redundancia) para cuando lo veas.
Primero lo que hago es poner el título (ya definitivo) en el editor de ecency, luego, pongo las etiquetas correspondientes para que se haga notar el post, además, también pongo el saludo inicial (el cual es el que viste al principio del post)
La introducción y la conclusión las hago en cursiva, esto es más que todo estético para diferenciar mi yo interior con todo el post (¿ves esto?, sí, aquí puedo hablar todo lo que yo quiera sin alterar la continuidad del post, puedes probarlo omitiendo este texto), por lo que normalmente cuando pongo las letras en cursiva pongo datos extra o cosas que no son tan necesarias de poner, pero que yo, para darle más personalidad al artículo, pienso poner para así ahorrar dudas al leer el post.
Ya luego de hacer la introducción pongo la portada y por ende la primera parte del post con HTML, de lo cual hablaré ahora mismo:
El HTML es un punto que todos deben de considerar a la hora de hacer posts, ya que es lo que más va a decorar el post y lo que organiza todo para que no se vea desordenado, yo tengo todos los códigos en un almacén que crea ecency (también peakd) para usarlos cuando yo quiera, aquí tengo todo tipo de códigos, desde poner caracteres centrados, hasta poner imágenes de lado izquierdo y derecho.
Para conseguir estos códigos tendrás que buscar en el buscador de la dapp de tu preferencia las palabras "HTML" y "guía", escoger los que más te gusten o sean útiles para más adelante plasmarlos en tus posts, a continuación te pondré una lista de los que yo utilizo más para decorar mis posts:
Poco a poco aprenderás que poner en cada parte del post para que se vea bien y luego en un par de meses podrás hacer todo como si de un robot se tratase gracias a lo simple que es, ¡no lo parece, pero es muy fácil!
TIP: Recomiendo emplear un separador único para que los utilices en tus posts, puedes usarlo tanto para diferenciar subtítulos del contenido como para separar textos muy largos, recomiendo canva para hacerlos y la resolución de 587x40 (usa toda tu creatividad, ¡no hay límites!)
Luego vamos con las imágenes, siempre que puedo intento emplear mis propias imágenes o fotos, las cuales puedan ser usadas para uso comercial, puede ser difícil encontrar los mejores bancos de imágenes, por lo que te traigo varios links de los bancos más empleados en el mundo.
✅ 1.- Freepik ➡️ http://www.freepik.es/
✅ 2.- Pixabay ➡️ www.pixabay.com
✅ 3.- Unspash ➡️ www.unsplash.com
✅ 4.- Pexels ➡️ https://www.pexels.com/
✅ 5.- Fancy Crave ➡️ http://fancycrave.com/
✅ 6.- Free Nature Stock ➡️ http://freenaturestock.com/
✅ 7.- Free Images ➡️ https://es.freeimages.com/
✅ 8.- Wikimedia Commons ➡️ https://commons.wikimedia.org/wiki/Main_Page
✅ 9.-Open Photo ➡️ https://openphoto.net/
✅ 10.- Jay Mantri➡️ http://jaymantri.com/
✅ 11.- Death to the stock photo ➡️ http://join.deathtothestockphoto.com/
✅ 12.- Stok Pic ➡️ http://stokpic.com/
✅ 13.- Gratisography ➡️ https://www.gratisography.com
✅ 14.- lifeopix ➡️ https://www.lifeofpix.com/
✅ 15.- Stock Vault ➡️ https://www.stockvault.net
✅ 16.- Splitshire ➡️ https://www.splitshire.com
✅ 17.- Super Famous ➡️ https://www.superfamous.com
✅ 18.- Picography ➡️ https://www.picography.co
✅ 19.- Startup Stock Phots ➡️ https://www.startupstockphotos.com
✅ 20.- Shutteroo ➡️ http://shutteroo.com/
TIP: Aunque las páginas te digan que no hace falta dar créditos, dalos igualmente, esto para que las personas sepan dónde conseguir imágenes de tal calidad y también mejoras tu imagen personal.
CONCLUSIÓN
Espero te haya gustado este post que hice con mucho cariño para ustedes, los hivers y creadores de contenido, ya que hay gente que no tiene definido el cómo hacer un post, estos son mis consejos y espero los lleves al máximo.
Quise hacer este post lo más breve y llevadero posible, por lo que no puse como hago cada cosa tan detalladamente, sin embargo, con todo lo que puse es suficiente para empezar a ser un mejor blogger en esta gran plataforma, ¡Espero te haya ayudado este empujoncito!
Así que comenta si te gustó y si es así puedes seguirme para más contenido como este en mi blog, ¡sin más que decir nos vemos en el próximo!
- Banners, dividers and subtitles made in canva by me
- Translated from DeepL
- Original and unpublished article first published in Hive
- Avatar (DigitalDicast) created on Picrew page, page to create OC (original characters) my avatar was created in Russa's avatar creator
Que maravilla de post. La verdad está todo MUY bien articulado y fácil de entender. Gracias por traer una guía de buena calidad sobre creaciones de post. Que estés muy bien!
!PGM
BUY AND STAKE THE PGM TO SEND TOKENS!
Discord
Support the curation account @ pgm-curator with a delegation 10 HP - 50 HP - 100 HP - 500 HP - 1000 HP
Get potential votes from @ pgm-curator by paying in PGM, here is a guide
I'm a bot, if you want a hand ask @ zottone444
Que cosa tan hermosa has creado hermano, a mi me sirve muchísimo, llevo menos de 1 mes en la plataforma y a veces me faltan ciertas cuestiones en el post que no me doy cuenta, gracias a tu post puedo decir que crearé mejor contenido. Realmente un crack <3
¡Gracias por leer el post! Espero que realmente te ayude para progresar en esta gran plataforma 😃
maestro tremendo tutorial, tus post siempre son lo mejor manito keep on!
Gracias por esas grandes palabras bro, siempre estaré aquí trayendo contenido para ustedes 😎
One of the few subjects in school I wish I had paid more attention to was English (Grammer/language arts). I just did not like all the writing assignments.
Posted using PALnet