A Beautiful Baby Dino! 🦖💥🪴Un Hermoso Dino Bebé!!🍃🦖✨ By Danhyelita24
The crochet dinosaur is formed by making and combining different parts of a fairly simple amigurumi pattern. In other opportunities I have shared several amigurumi patterns on the construction of crochet characters whose assembly is similar to this one and which I invite you to visit if you wish.
Hola queridas abejitas,saludos y un fuerte abrazo a todos los usuarios de #hivediy. Hoy como ya es costumbre vamos a hacer juntos un amigurumi de dinosaurio muy lindo. El dinosaurio a ganchillo se forma haciendo y combinando diferentes partes de un patrón de amigurumi bastante simple. En otras oportunidades he compartido varios patrones de amigurumi sobre la construcción de personajes a crochet cuyo ensamblaje es parecido a este y los cuales te invito a visitar si así lo deseas.
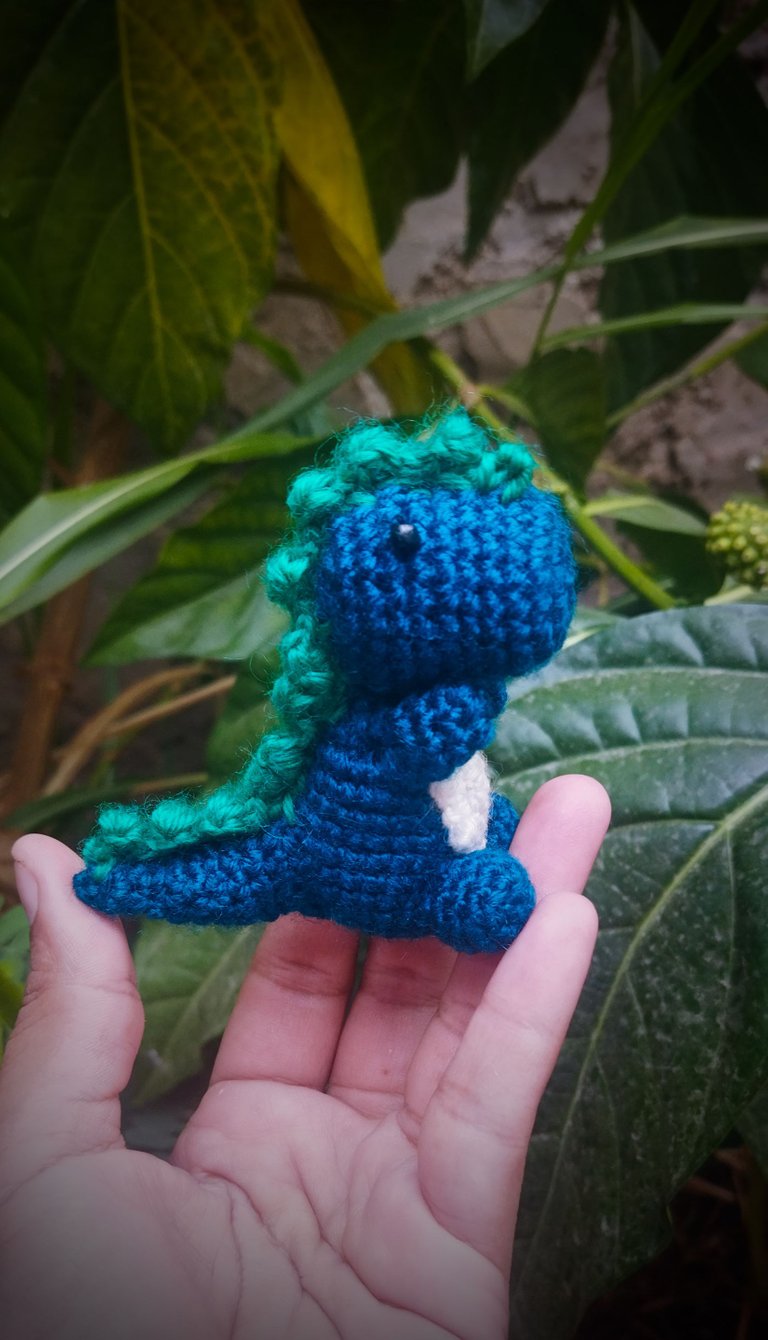
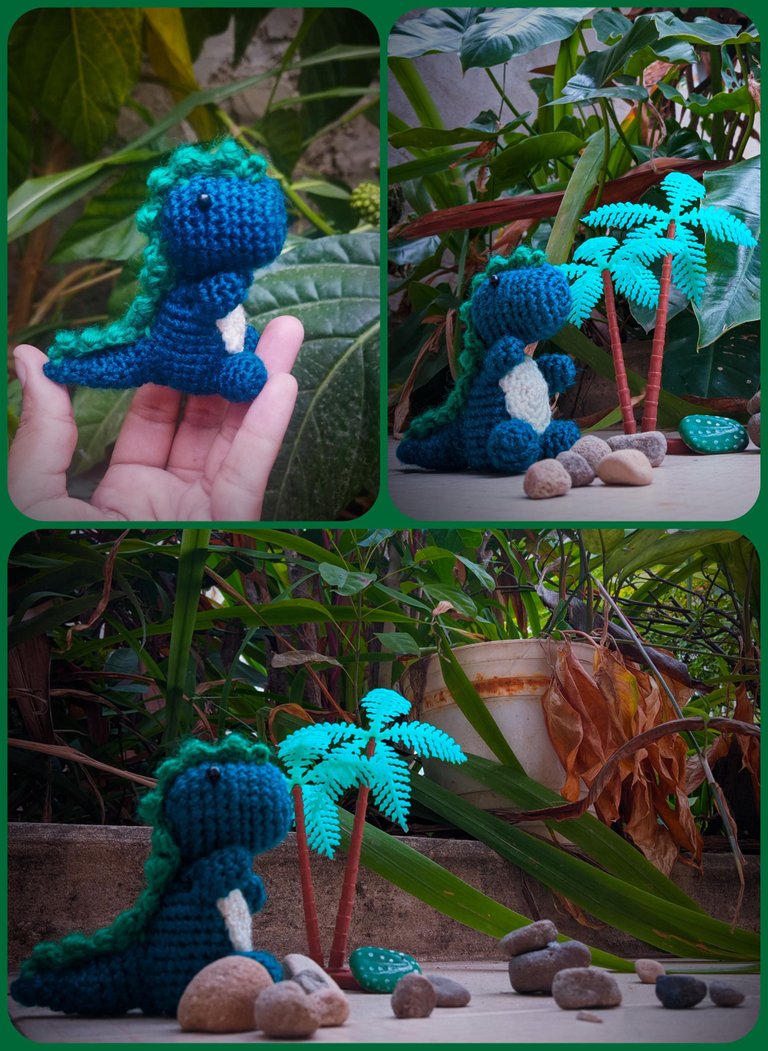
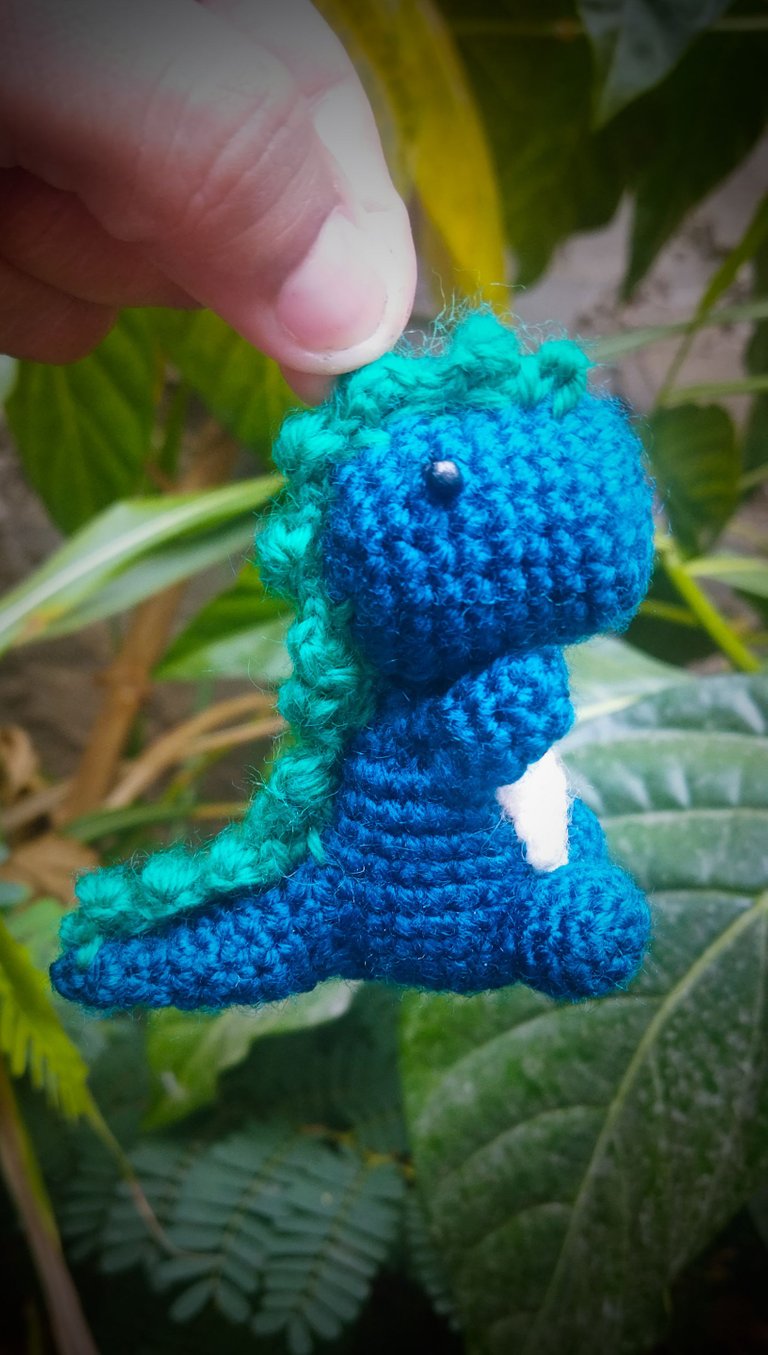
Para la realización de este mini Dino he utilizado hermosos colores, en variadas tonalidades de verde, especialmente por el brillo del color. Espero que ésta manualidad les guste y sin más comencemos a tejer este gracioso diseño amigurumi de dinosaurio Mini paso a paso.El tamaño de este personaje es de unos 7-8 cm, dependiendo del grosor del hilo.
Wool in shades of turquoise green,apple green and white. Crochet needle (I use 0 mm). Plastic eyes size 3 mm, glue, fiberfill, needle, pins and scissors.
Los materiales utilizados fueron: Lana en tonos verde turquesa,verde manzana y blanco. Aguja de ganchillo (yo uso de 0 mm). Ojos de plástico tamaño 3 mm, pegamento,relleno de fibra, aguja, alfileres y tijeras.

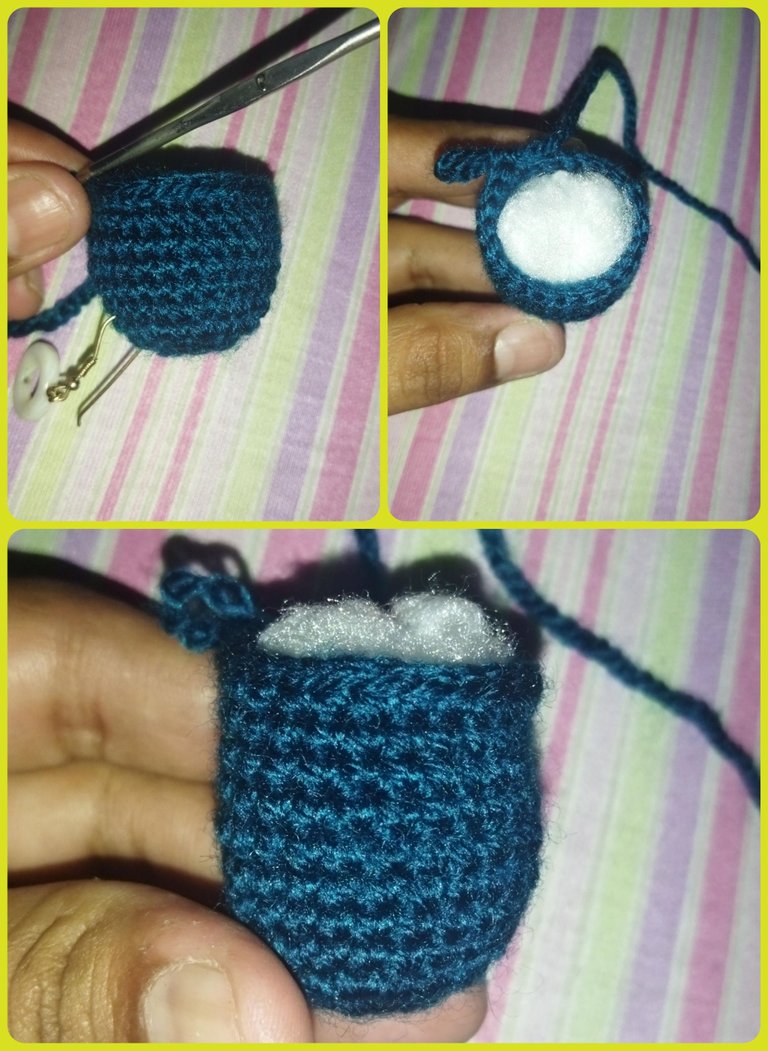
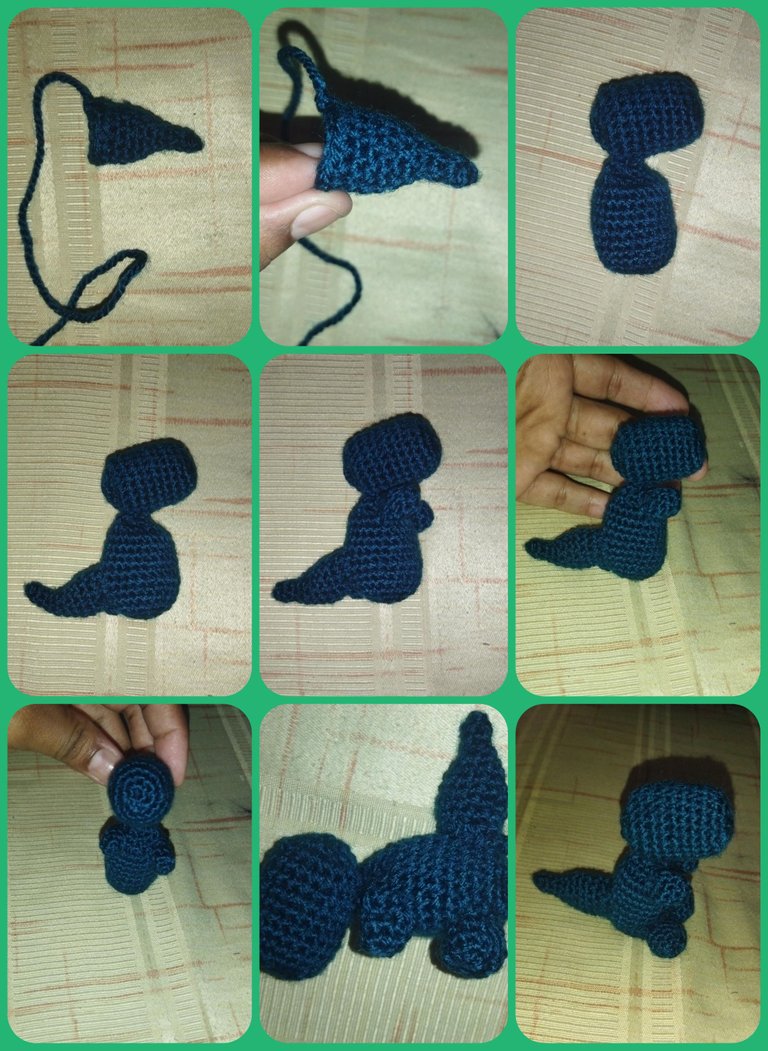
Para comenzar iniciaremos por la cabeza en tono verde turquesa, montando un anillo mágico de 7 puntos, para la primera vuelta realizamos Un aumento por cada punto de decir 14 puntos bajos, y para la segunda vuelta realizamos la secuencia de un punto bajo Un aumento hasta tener un total de 21 puntos bajos, los cuales vamos a realizar por 9 vueltas realizadas en espiral, es decir, 9 vueltas de 21 puntos. Una vez realizado esto procederemos a realizar la secuencia de un punto bajo una disminución hasta obtener un total de 14 puntos bajo, vamos a rellenar y realizamos 7 disminuciones, cortamos el hilo y cerramos la pieza.
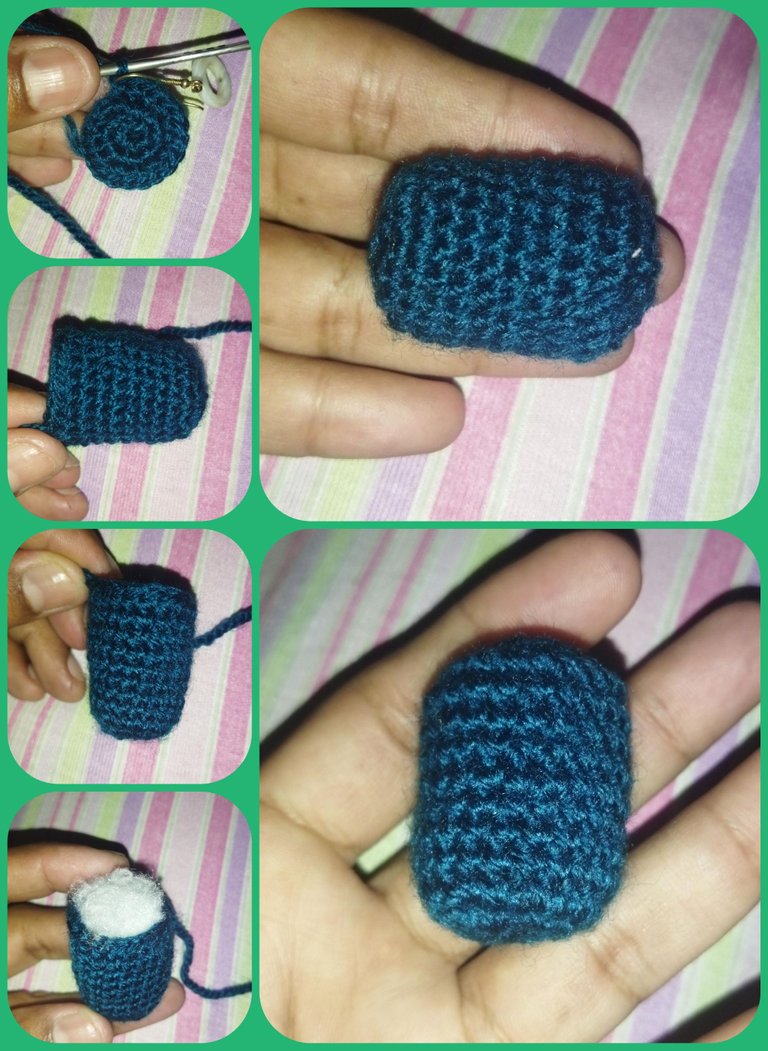
Para la parte del cuerpo utilizando el verde turquesa con un anillo mágico de 8 puntos Bajos en la primera vuelta realizamos aumenta en cada punt para tener un total de 16 pb, y luego hacemos la secuencia de un punto bajo Un aumento para obtener un total de 24 puntos, realizando 8 vueltas más de un punto en cada punto, Luego realizamos seis disminuciones y 12 puntos bajos para un total de 18 puntos, luego realizamos disminuciones 6 puntos bajos para un total de 6 puntos bajo rellenamos cortamos y cerramos.
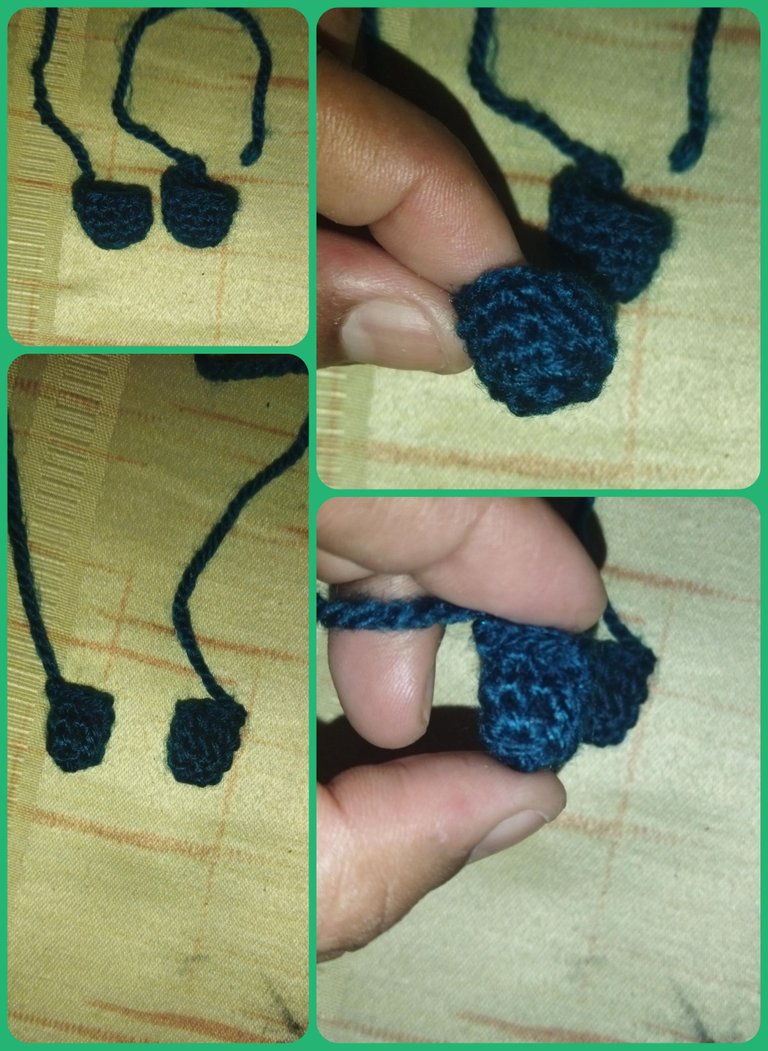
Para las patas superiores vamos a hacer un anillo mágico de 3 puntos bajos, Un aumento en cada un punto, hasta obtener un total de 6 puntos y realizamos tres vueltas iguales de 6 puntos bajo hacemos una cadena y cerramos la pieza no es necesario rellenar y cerramos con tres puntos bajos.
Para las patas inferiores realizamos un anillo mágico de 5 puntos bajos luego la secuencia de un aumento en cada punto para tener un total de 10 puntos, vamos a hacer tres vueltas de los mismos 10 puntos bajos, rellenamos y cortamos la pieza.
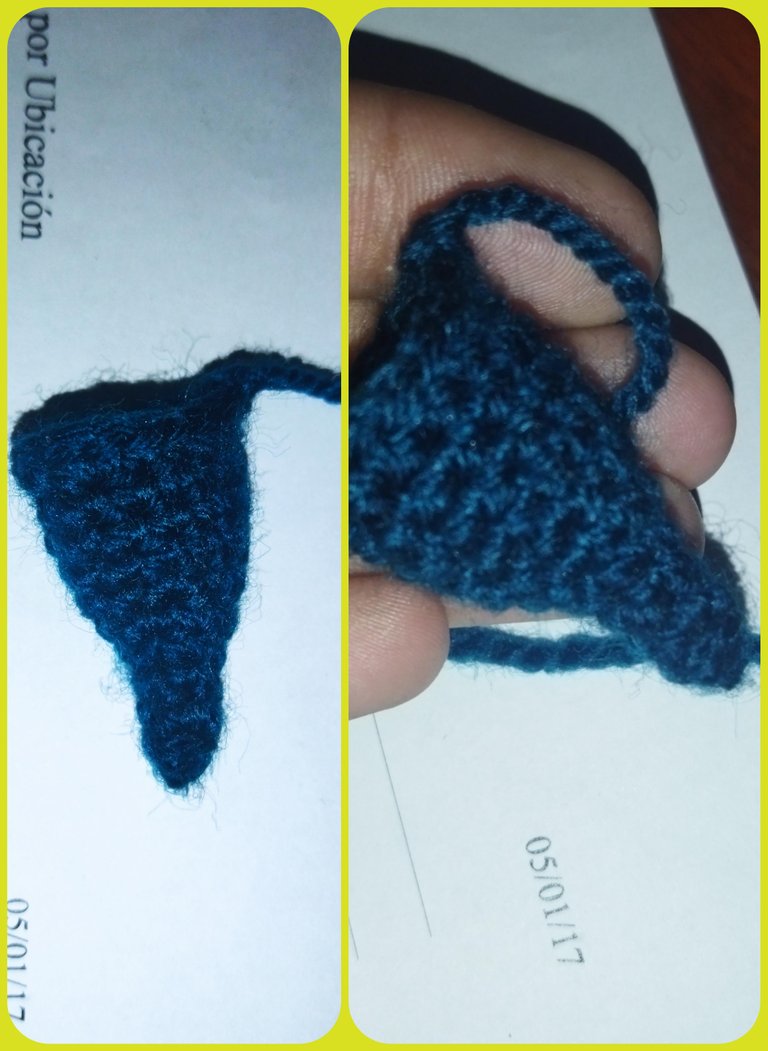
Para la cola vamos a realizar un anillo mágico de 3 puntos bajos y luego vamos a realizar la secuencia de un aumento por cada punto, es decir, 6 puntos bajos, la próxima vuelta la realizamos de los mismos 6 puntos bajos, la próxima realizamos un punto bajo un aumento hasta obtener 9 puntos bajos, luego realizamos otra vuelta de los mismos 9 puntos bajos, seguidamente hacemos la secuencia de dos puntos bajos Un aumento hasta obtener un total de 12 puntos, realizando dos vueltas adicionales y la última secuencia sería de 3 puntos bajos Un aumento hasta obtener un total de 15 puntos bajo vamos a rellenar cortamos y reservamos.
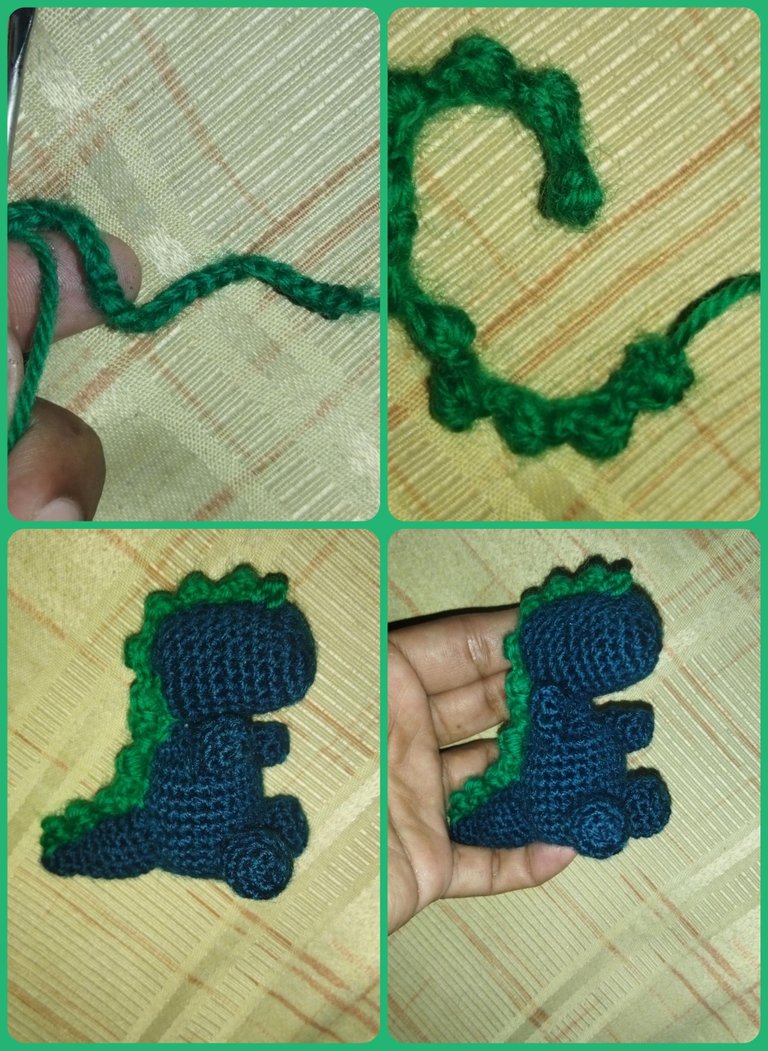
As a decorative element we still have to make the part of the crest which we will do in apple green color making 24 chains and making the Puff stitch, that is, we will take the last chain and we will make three passes of thread without removing it consecutively, the fourth time we take it out we make a slipped stitch, then we move with two slipped stitches to separate and we will do this all along the edge of the chains.
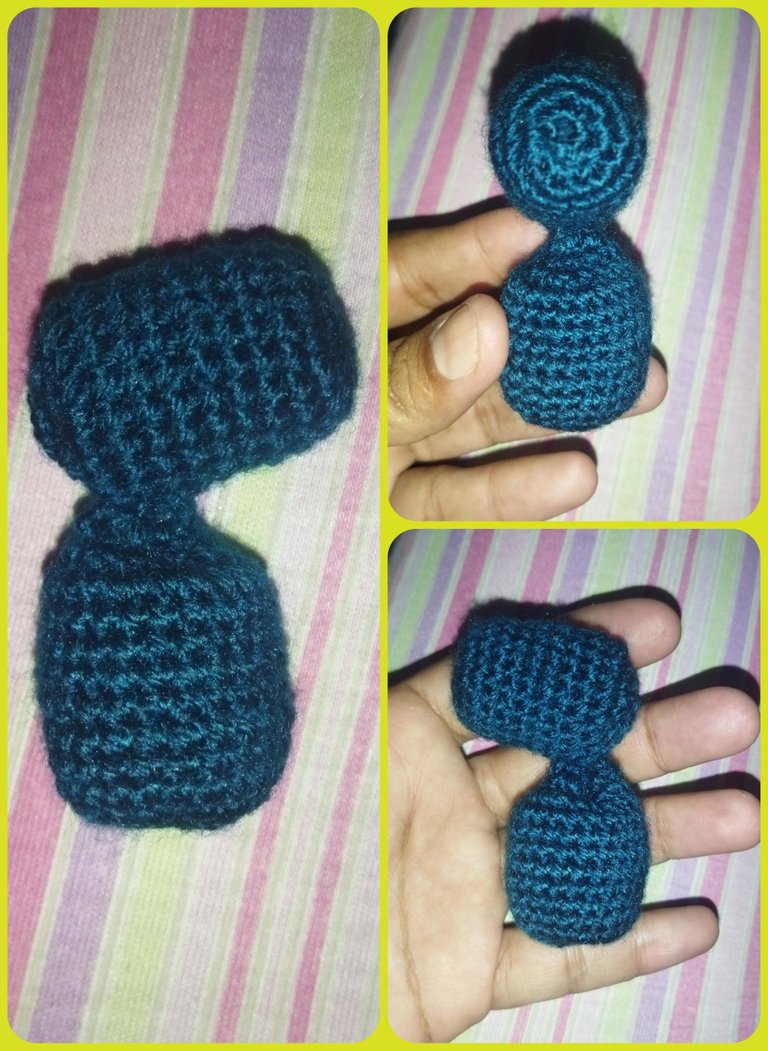
Vamos a proceder a ensamblar todas las piezas de nuestro Dino bebé con la cabeza al cuerpo y pegando las patas superiores e inferiores. Como elemento decorativo nos restaría realizar la parte de la cresta qué la vamos a hacer en color verde manzana realizando 24 cadenas y elaborando el punto Puff,es decir, vamos a tomar en la última cadena y vamos a hacer tres pasadas de hilo sin sacarlo consecutivamente, a la cuarta vez lo sacamos hacemos un punto deslizado, luego nos movemos con dos puntos deslizados para separar y esto lo vamos a hacer por todo el borde del las cadenas.
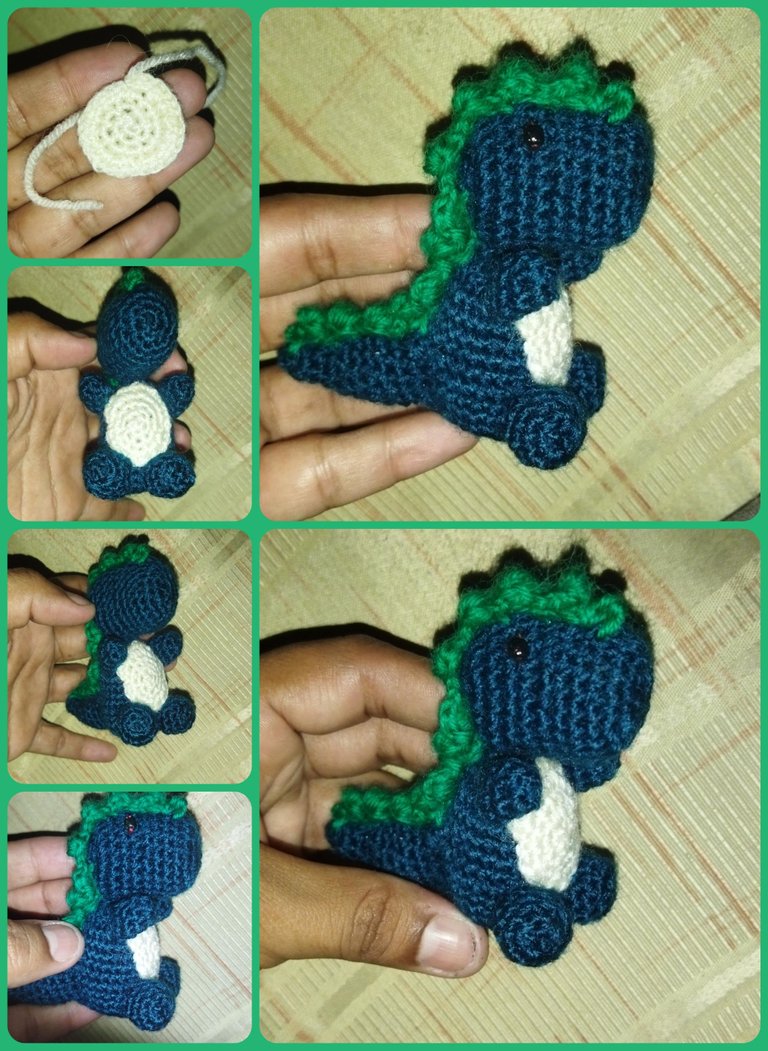
Vamos a colocarle los ojos entre las filas 5 y 6 y en hilo blanco vamos a realizar un círculo con anillo mágico de cuatro puntos bajo y realizando aumenta consecutivamente hasta llegar al ancho de la barriguita.
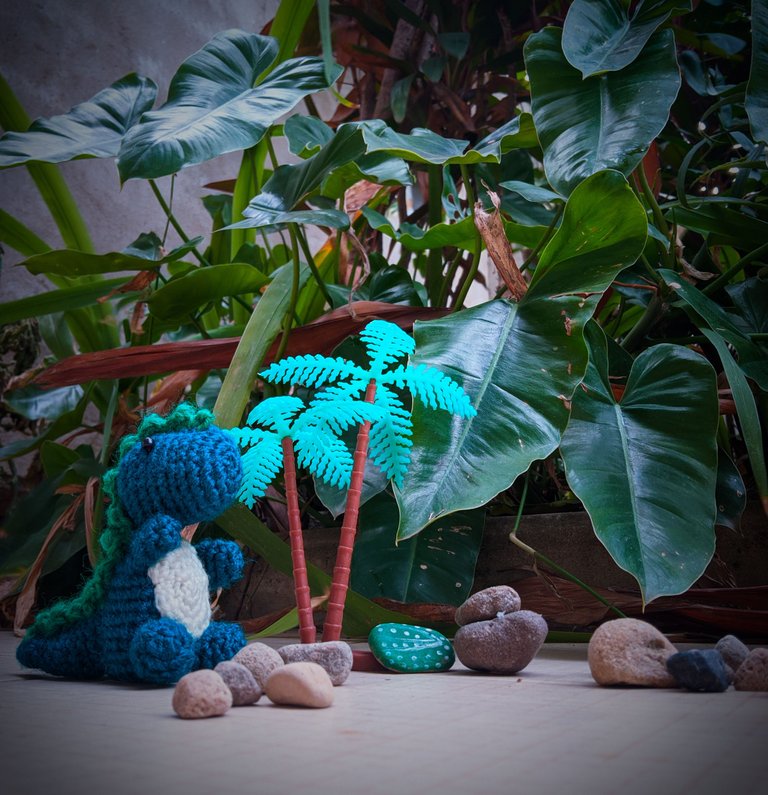
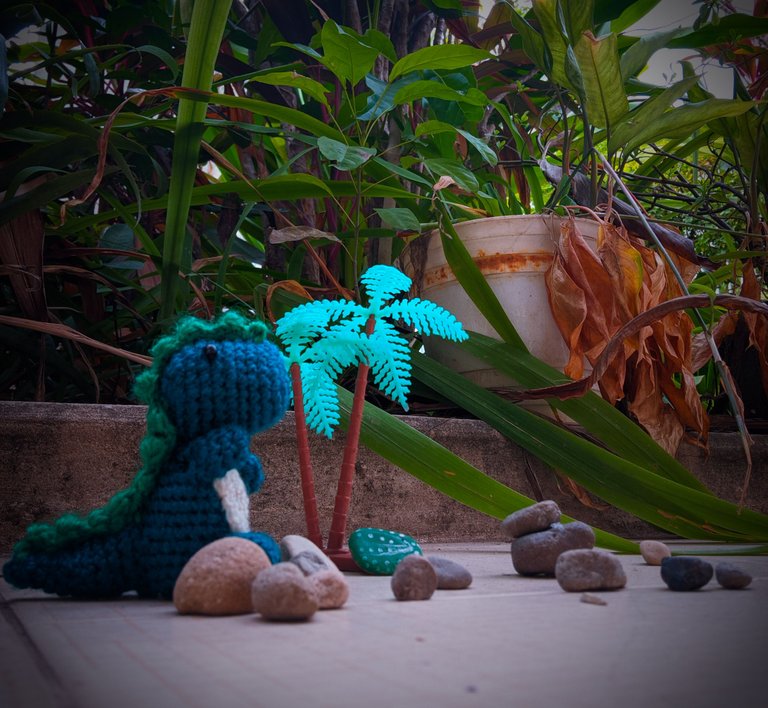
I liked the very nice result and it is ideal to place it on a keychain or simply as a decorative piece, hoping that you also liked it, I say goodbye thanking you for all the support and attention to my post, until a new opportunity.
Colocamos un poquito de rubor para darle color a esas mejillas y de esta manera tenemos finalizada nuestro simpático dinosaurio bebé en amigurumi. El resultado muy bonito me gustó bastante Y es ideal para colocarlo sobre llavero o simplemente como una pieza decorativa, esperando que también les haya gustado, me despido agradeciendo todo el apoyo y la atención a mi post, hasta una nueva oportunidad.
Todas las imágenes son de mi propiedad tomadas con redmi 9t y editadas con la aplicación Photoshop Express para Android.

En cada post que nos traes viene con una hermosa creación y ahora con unas fotos super geniales.
!discovery 35
Gracias ☺️☺️☺️
This post was shared and voted inside the discord by the curators team of discovery-it
Join our community! hive-193212
Discovery-it is also a Witness, vote for us here
Delegate to us for passive income. Check our 80% fee-back Program
This post has been manually curated by @steemflow from Indiaunited community. Join us on our Discord Server.
Do you know that you can earn a passive income by delegating to @indiaunited. We share more than 100 % of the curation rewards with the delegators in the form of IUC tokens. HP delegators and IUC token holders also get upto 20% additional vote weight.
Here are some handy links for delegations: 100HP, 250HP, 500HP, 1000HP.
100% of the rewards from this comment goes to the curator for their manual curation efforts. Please encourage the curator @steemflow by upvoting this comment and support the community by voting the posts made by @indiaunited.
Thanks @indiaunited 😊😊
https://twitter.com/1327070381216309249/status/1623154945724674051
https://twitter.com/1390678682671460352/status/1623184464888168451
The rewards earned on this comment will go directly to the people( @edwing357, @elmundodebetty ) sharing the post on Twitter as long as they are registered with @poshtoken. Sign up at https://hiveposh.com.
Gracias por todo el apoyo brindado saludos ☺️☺️
Una miniatura hermosa, gracias por compartir tu trabajo amiga, felicitaciones.
Gracias muchas gracias 😘😘
Me encanta como vas explicando el tejido del dino, es bastante bueno y se entiende a la perfección como se realizó. Muy buenas fotos. Me gustó mucho tu post, quedó bellísimo el Dino. Saludos!
Gracias 😊😊😊 me alegra que le haya gustado
¡Felicidades! Esta publicación obtuvo upvote y fue compartido por @la-colmena, un proyecto de Curación Manual para la comunidad hispana de Hive que cuenta con el respaldo de @curie.
Si te gusta el trabajo que hacemos, te invitamos a darle tu voto a este comentario y a votar como testigo por La Colmena.
Si quieres saber más sobre nuestro proyecto, te invitamos a acompañarnos en nuestro servidor de Discord.
Gracias por el apoyo @curie @la-colmena
Siempre logras sorprenderme con lo que haces, lo ultimo fue la cangreburguer con planton y ahora este precioso DINO es genial se ve super cute ademas que las fotos que sacaste estan super ambientadas, sabes mostrar lo que haces muy bien.
Congratulations, your post has been upvoted by @dsc-r2cornell, which is the curating account for @R2cornell's Discord Community.
Enhorabuena, su "post" ha sido "up-voted" por @dsc-r2cornell, que es la "cuenta curating" de la Comunidad de la Discordia de @R2cornell.