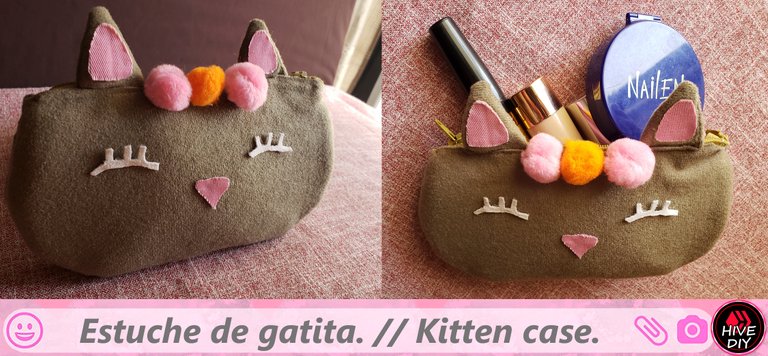
[ES-EN] Confecciona un lindo estuche de maquillaje. // Make a cute makeup bag.

Para toda chica, es importante guardar nuestros maquillajes en un lugar seguro y hermoso, un lugar donde atesoramos y mantenemos en orden todos nuestros implementos de bellezas.
For every girl, it is important to store our makeup in a safe and beautiful place, a place where we treasure and keep all our beauty supplies in order.
Hola queridísimos amigos. ¡Gente guapa! ¿Cómo están? Pues, espero que se encuentren súper bien, les mando las mejores energías positivas, y que este día sea de bendiciones para todos.
En esta oportunidad quiero compartirles esta genial idea, sé que a todas las chicas les va a encantar, como lo es crear nuestro propio estuche para maquillajes, este estuche lo quise hacer con la temática de una linda gatita al estilo kawaii, ya que son muy tiernos y me encanta como luce aunque debo confesar que no soy muy amantes de los gatos, ¿qué ironía verdad?, pero lo cierto es que esta temática para mi estuche me encanto, le dio ese toque muy chic y divertido.
Hello dearest friends. Handsome people! How are they? Well, I hope you are super well, I send you the best positive energies, and may this day be a blessing for all.
In this opportunity I want to share this great idea, I know that all the girls will love it, as it is to create our own makeup case, I wanted to make this case with the theme of a cute kawaii-style kitten, since they are very They are cute and I love how they look, although I must confess that I am not a cat lover, what an irony, right? But the truth is that I loved this theme for my pencil case, it gave it that very chic and fun touch.
Este lindo estuche, lo podemos utilizar para lo queramos, puede ser como en mi caso para el maquillaje, para guardar tus lápices, crayones o simplemente para guardar cualquier objeto delicado que necesitemos proteger, ya que este estuche lo realice acolchonado y así brindar protección a nuestros cosméticos, con la calidad de uno fabricado.
Para realizar este hermoso estuche de maquillaje, utilice materiales que estoy segura que todos podemos tener en casita, un retazo de tela de terciopelo y cualquier cierre que tengamos disponible, bueno amigos acompáñenme en este lindo y divertido paso a paso, espero que lo disfruten tanto como yo, así que manos a la obra.
We can use this beautiful case for whatever we want, it can be as in my case for makeup, to store your pencils, crayons or simply to store any delicate object that we need to protect, since this case is padded and thus provides protection to our cosmetics, with the quality of a manufactured one.
To make this beautiful makeup case, use materials that I am sure we can all have at home, a piece of velvet fabric and any closure that we have available, well friends, join me in this cute and fun step by step, I hope you enjoy it so much like me, so let's get to work.
Materiales:
• Para la cara externa de nuestro estuche, utilice tela de terciopelo de color verde oliva.
• Para la parte interna, utilice retazo de tela color rosa
• Retazo de tela blanca aterciopelada, para lo que será las pestañas de nuestra gatita.
• Para darle lo acolchonado a mi estuche, utilice un retazo de maya de espuma.
• Cierre de 19cm.
• Pompones de color rosa y naranja.
• Hilo y aguja.
• Silicona.
• Hoja
• Tijera.
Materials:
• For the outside of our case, use olive green velvet fabric.
• For the inner part, use a piece of pink fabric
• Scrap of velvety white fabric, for what will be our kitten's eyelashes.
• To give my case padding, I used a piece of foam mesh.
• 19cm closure.
• Pink and orange pom poms.
• Thread and needle.
• Silicone.
• Leaf
• Scissor.
Pasó a paso del proceso:
Step by step of the process:
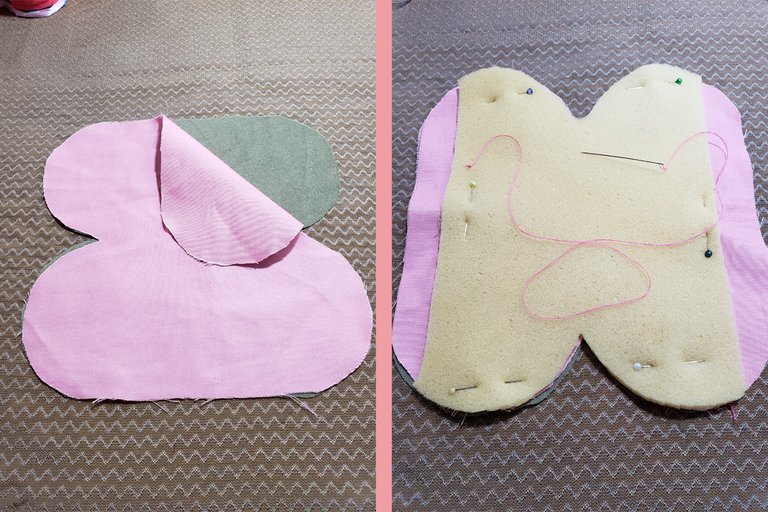
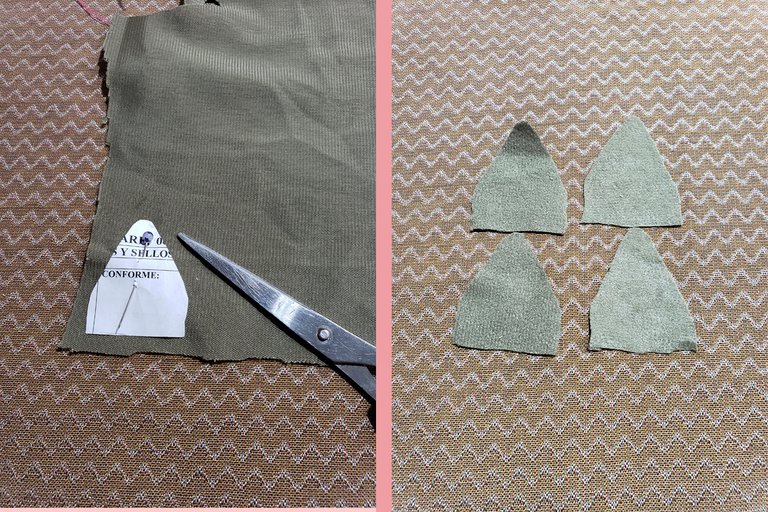
• Lo primero que haremos, es sacar los patrones en papel, dándole la forma a lo que será el estuche, en mi caso lo hice con la forma ovalada, también sacando los patrones de las orejitas y la nariz de nuestra gatita.
• The first thing we will do is take out the patterns on paper, giving it the shape of what will be the case, in my case I did it with the oval shape, also taking out the patterns for the little ears and nose of our kitten.
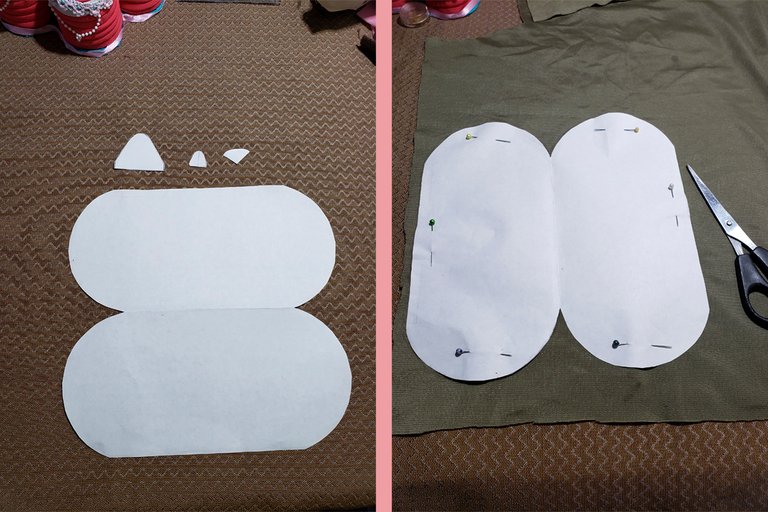
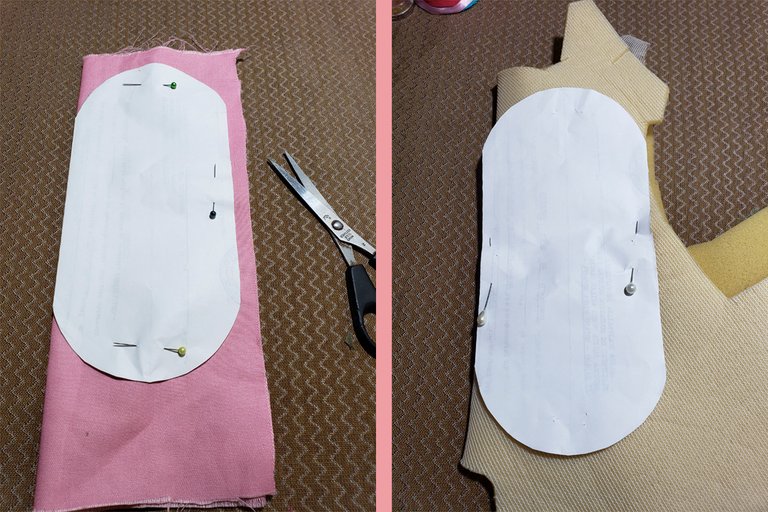
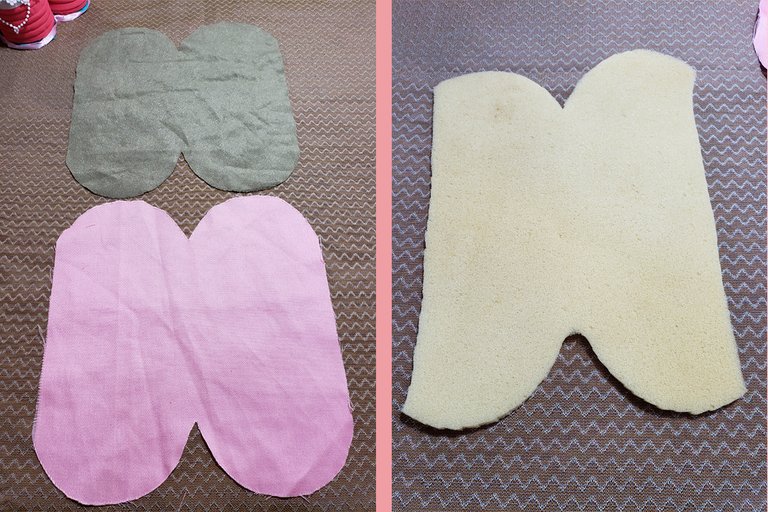
• Una vez listo los patrones, procedemos a sacar las partes del estuche en los dos tipos de tela que elegimos, en el caso de la maya cortaremos dándole un marguen de 1 a 2cm para poder darle el dobles a la hora de coser.
• Once the patterns are ready, we proceed to remove the parts of the case in the two types of fabric that we chose, in the case of maya we will cut giving it a margin of 1 to 2cm to be able to double it when sewing.sewing.
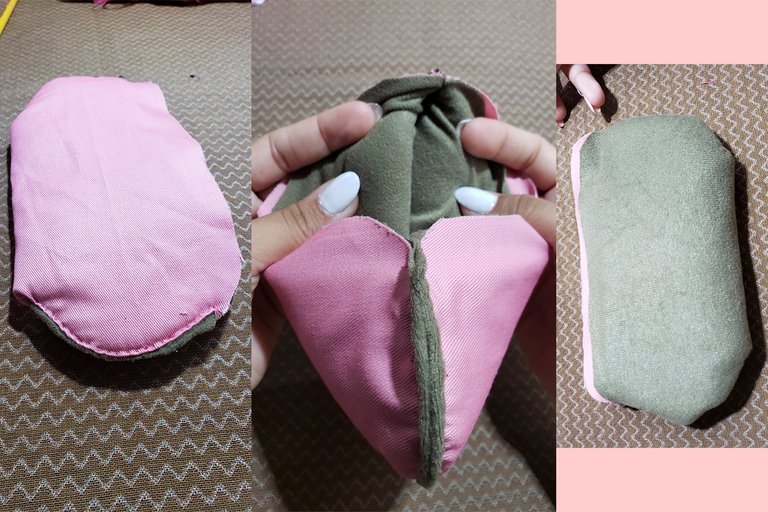
• Listos los 3 cortes, procedemos a unir las caras externas e interna de nuestro estuche, y sobre lo que será la parte interna colocamos la maya espuma, aseguramos con alfileres y cosemos solo en las secciones laterales.
• Once the 3 cuts are ready, we proceed to join the external and internal faces of our case, and on what will be the internal part we place the foam mesh, secure with pins and sew only in the lateral sections.
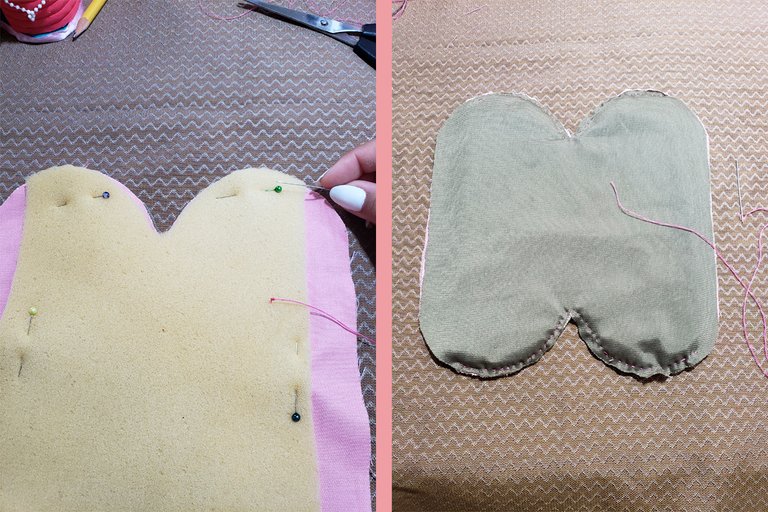
• Luego de coser los laterales, desenfundamos o le damos la vuelta a la funda, doblamos dejando la parte que elegimos como interna, expuesta para cocer los bordes laterales de nuestro estuche.
• After sewing the sides, we remove or turn the cover over, we fold leaving the part we chose as internal, exposed to sew the side edges of our case.
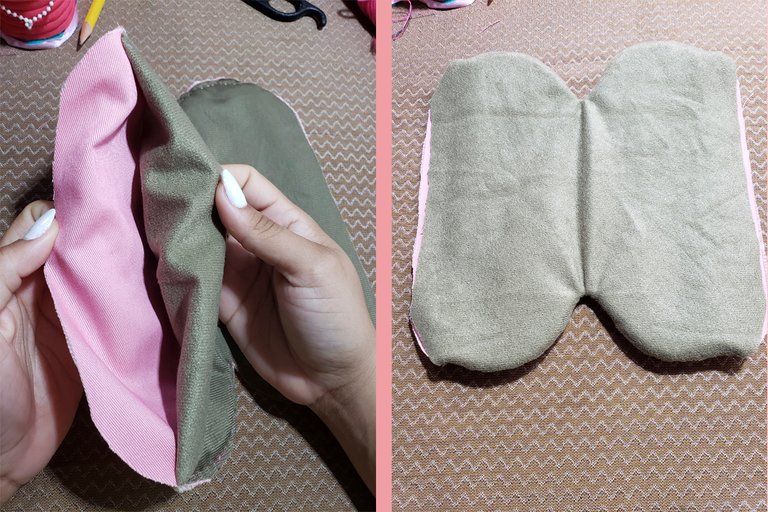
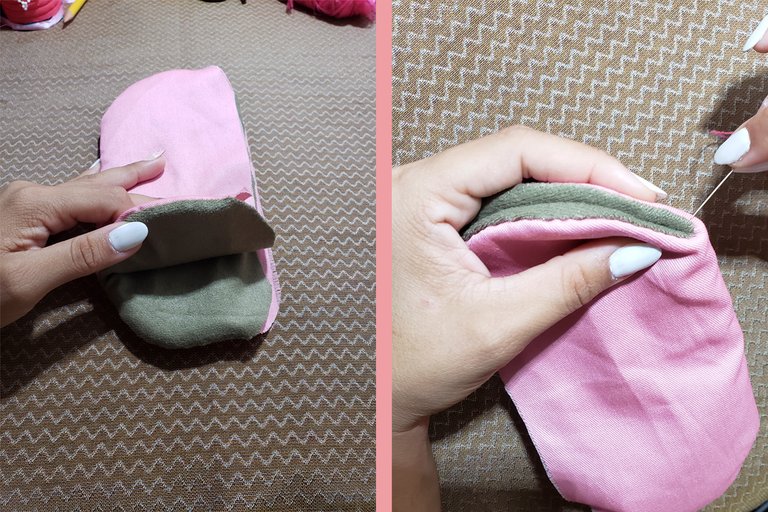
• Una vez que hayamos cosido los laterales, le damos la vuelta al estuche para que así la costura quede en la parte interna del estuche.
• Once we have sewn the sides, we turn the case over so that the seam is on the inside of the case.
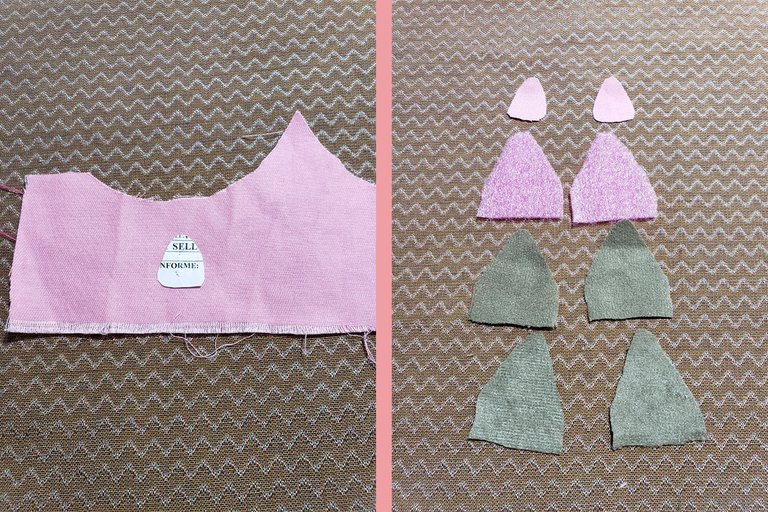
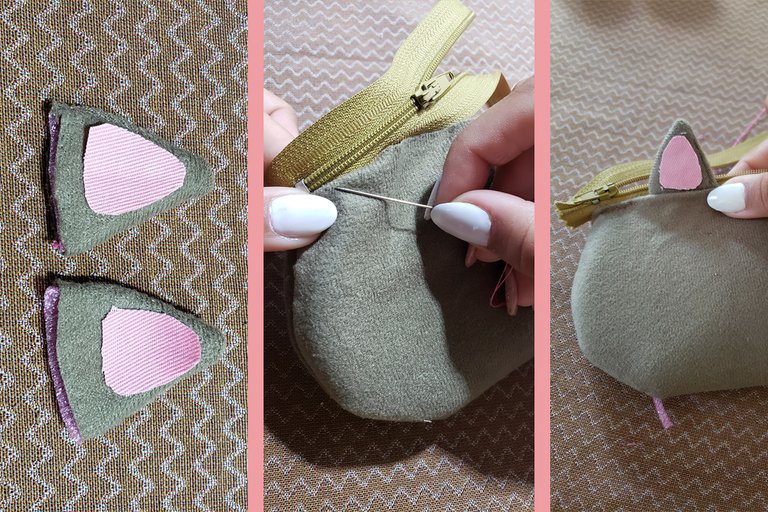
• Ahora pasamos a cortar las orejitas, sacamos 4 partes iguales, y dos de lo que será los orificios de las orejitas de nuestra gatita, de color rosa para darle ese aspecto natural que tienen los gatitos.
• Now we proceed to cut the ears, we get 4 equal parts, and two of what will be the holes of the ears of our kitten, pink to give it that natural look that kittens have.
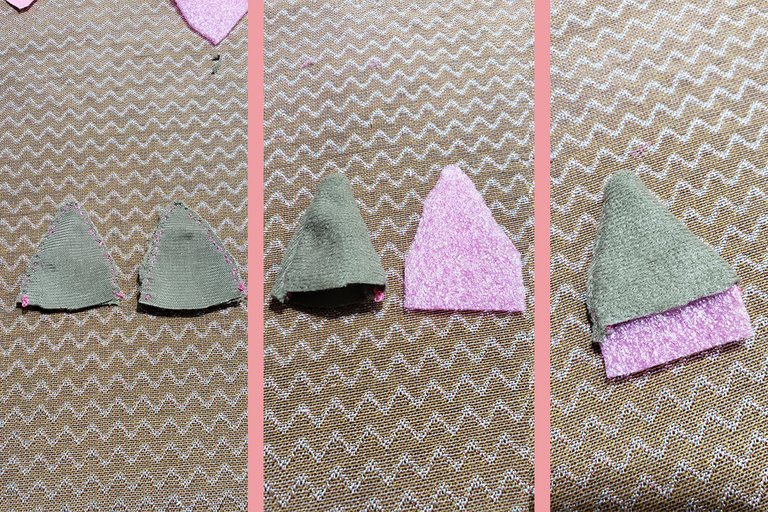
• Cocemos las 4 partes de las orejas para así formar las dos orejitas y la rellenamos con una maya de espuma o cualquier elemento que tengamos disponible para este fin.
• We cook the 4 parts of the ears to form the two little ears and fill it with a mesh of foam or any element that we have available for this purpose.
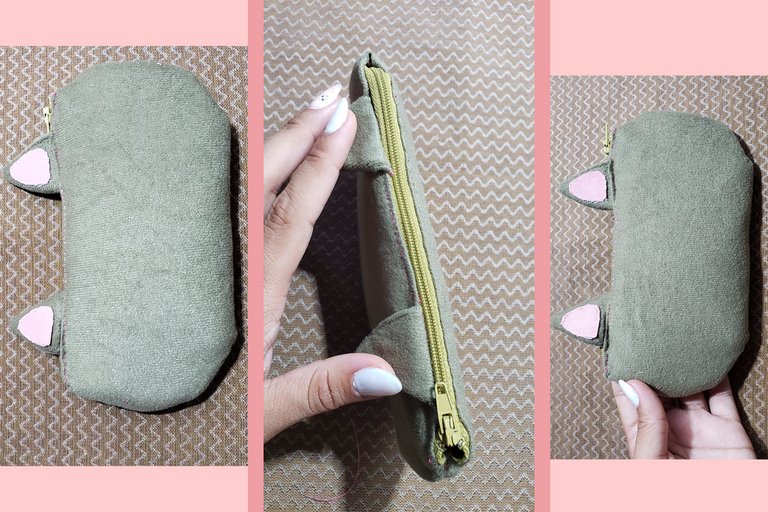
• Listas nuestras orejitas, cocemos el cierre por todo el borde del estuche, dejando un espacio donde las insertaremos.
• Ready our ittle ears, we sew the closure around the edge of the case, leaving a space where we will insert them.
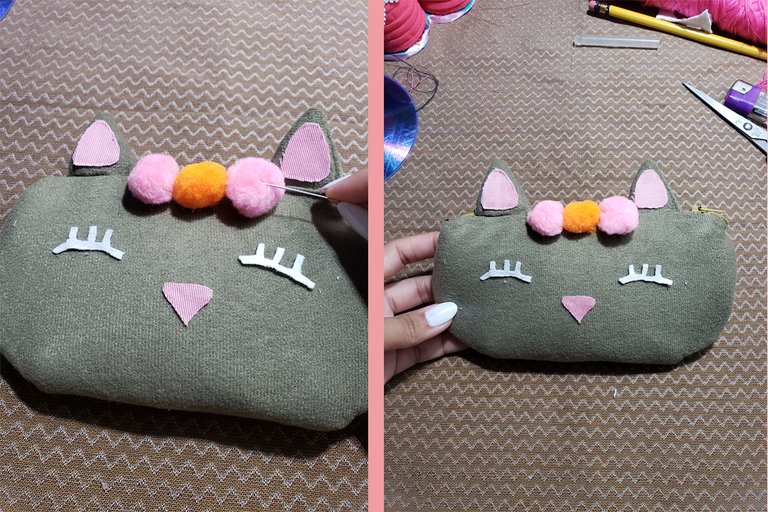
• Luego con la tela blanca terciopelo sacamos las pestañas de nuestra gatita y con la tela rosa que usamos para las orejitas sacamos la forma de la naricita la ubicamos y pegamos en nuestro estuche.
• Then with the white velvet fabric we take out our kitten's eyelashes and with the pink fabric that we use for the little ears we take out the shape of the little nose, locate it and paste it in our case.

• En mi caso quise darle un toque coqueto y le coloqué tres pomponcitos de color rosa y naranja entre las dos orejitas, simulando una coronita.
• In my case I wanted to give it a flirty touch and I placed three pink and orange pompoms between the two ears, simulating a Crown.
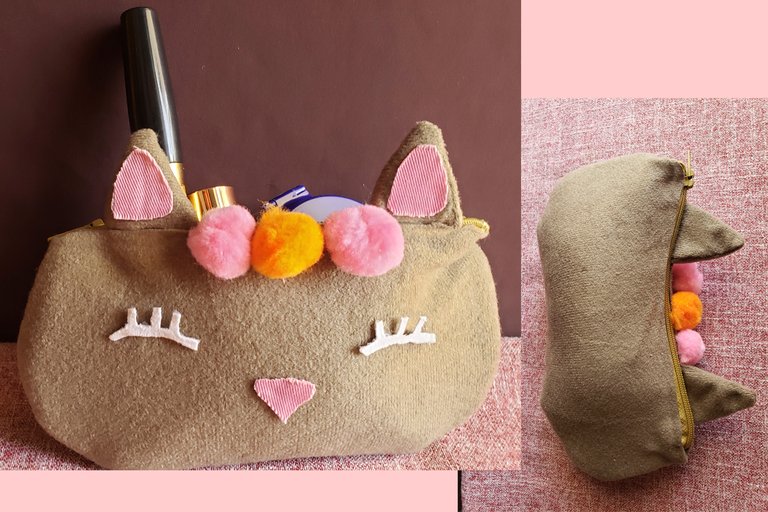
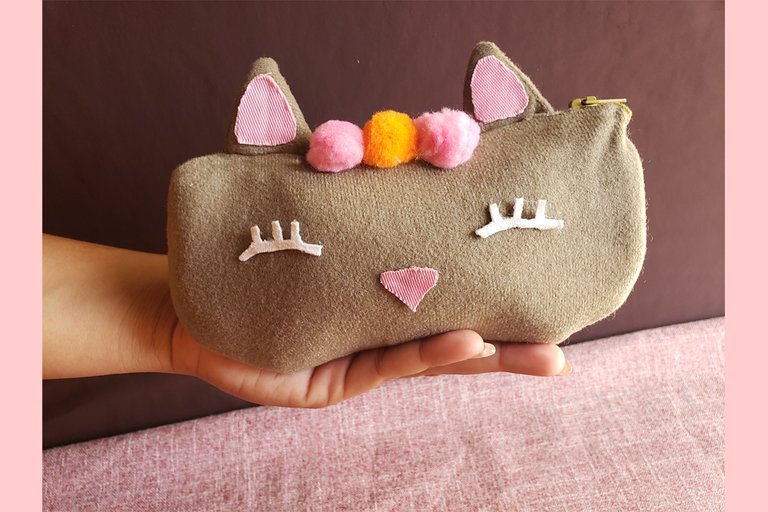
• Y listo amigos, así queda nuestro lindo estuche de gatita kawaii convertida en una confección artesanal, y me complace mostrárselas.
• And that's it, friends, this is how our cute kawaii kitty case turned into an artisan confection looks like, and I'm pleased to show it to you.
Beauties, this has been all for today, I hope you had fun and enjoyed this step by step, thank you very much for coming this far, I did it with all the love in the world for you, I love you so much see you in a next post, bye bye.
Recursos:
Todas las imágenes son de mi propiedad.
Fueron editadas por psp 6
Imágenes tomadas por Samsun A20
Traducido por traductor de google.
Means:
All images are my property.
They were edited by psp 6
Pictures taken by Samsun A20
Translated by google translator.
![]()
This post has been manually curated by @steemflow from Indiaunited community. Join us on our Discord Server.
Do you know that you can earn a passive income by delegating to @indiaunited. We share 100 % of the curation rewards with the delegators.
Here are some handy links for delegations: 100HP, 250HP, 500HP, 1000HP.
Read our latest announcement post to get more information.
Please contribute to the community by upvoting this comment and posts made by @indiaunited.
Thank you very much for the support and invitation to your discord, it's a pleasure, greetings. 🤗
Wow, me encantó, está súper lindo 😊
Muchas gracias, @paugomez me alegra mucho que te haya gustado, gracias por comentar saludos y un brazo. 🤗
De verdad es un estuche muy coqueto. Y me gustó también lo pulcro del acabado. Me di un paseo por tu blog y Tienes interesantes creaciones. Buen trabajo @cutiepink26. Esperamos ver a menudo tus creaciones.☺️
!discovery 25
Muchísimas gracias, @maridmc me alegra mucho que te haya gustado, lo hago con todo el amor del mundo y me siento encantada de que te haya gustado mi blog, siempre es un placer poder compartir mis creaciones con ustedes. Saludos y un abrazo.❤️🤗
This post was shared and voted inside the discord by the curators team of discovery-it
Join our community! hive-193212
Discovery-it is also a Witness, vote for us here
Delegate to us for passive income. Check our 80% fee-back Program
Thank you very much for your invitation, it is a pleasure to be part of your community, greetings. 🤗
Hola @cutiepink26, está muy lindo el portacosméticos, el toque creativo de que sea una gatita, está el cuchi, me encanta. Saludos.
Hola, @jessiencasa, gracias me alegra mucho que te haya encantado, si le di ese diseño ya que se ve muy tierno y coqueto. Gracias por pasar por aquí y comentar, saludos y un abrazo ❤️🤗
Muy hermoso y adorable, la forma quedó bonita y la textura de la tela me encantó! Buen trabajo
Hola, @bleuclair gracias, me alegra mucho que te haya gustado y si ese tipo de tela a mí me encanta porque es muy suave al tacto y le da un toque delicado, muchas gracias por comentar, saludos y un abrazo. ❤️🤗
Congratulations @cutiepink26! You have completed the following achievement on the Hive blockchain and have been rewarded with new badge(s):
Your next target is to reach 1000 upvotes.
You can view your badges on your board and compare yourself to others in the Ranking
If you no longer want to receive notifications, reply to this comment with the word
STOPSupport the HiveBuzz project. Vote for our proposal!
Me encanta, ideal para mis maquillajes
Me alegra que te haya gustado, si es un estuche ideal para guardar estos elementos tan preciados por nosotras jeje, gracias por pasar por aquí y comentar, saludos y un abrazo. ❤️🤗
Thank you for sharing this amazing post on HIVE!
Your content got selected by our fellow curator @stevenson7 & you just received a little thank you via an upvote from our non-profit curation initiative!
You will be featured in one of our recurring curation compilations and on our pinterest boards! Both are aiming to offer you a stage to widen your audience within and outside of the DIY scene of hive.
Join the official DIYHub community on HIVE and show us more of your amazing work and feel free to connect with us and other DIYers via our discord server: https://discord.gg/mY5uCfQ !
If you want to support our goal to motivate other DIY/art/music/homesteading/... creators just delegate to us and earn 100% of your curation rewards!
Stay creative & hive on!
Musichimas gracias por el apoyo, es un gusto unirme a su discord, gracias por la invitación, saludos. 🤗