[ESP-ENG] Making cute overalls for a special child | Confeccionando lindo Mono para un niño especial
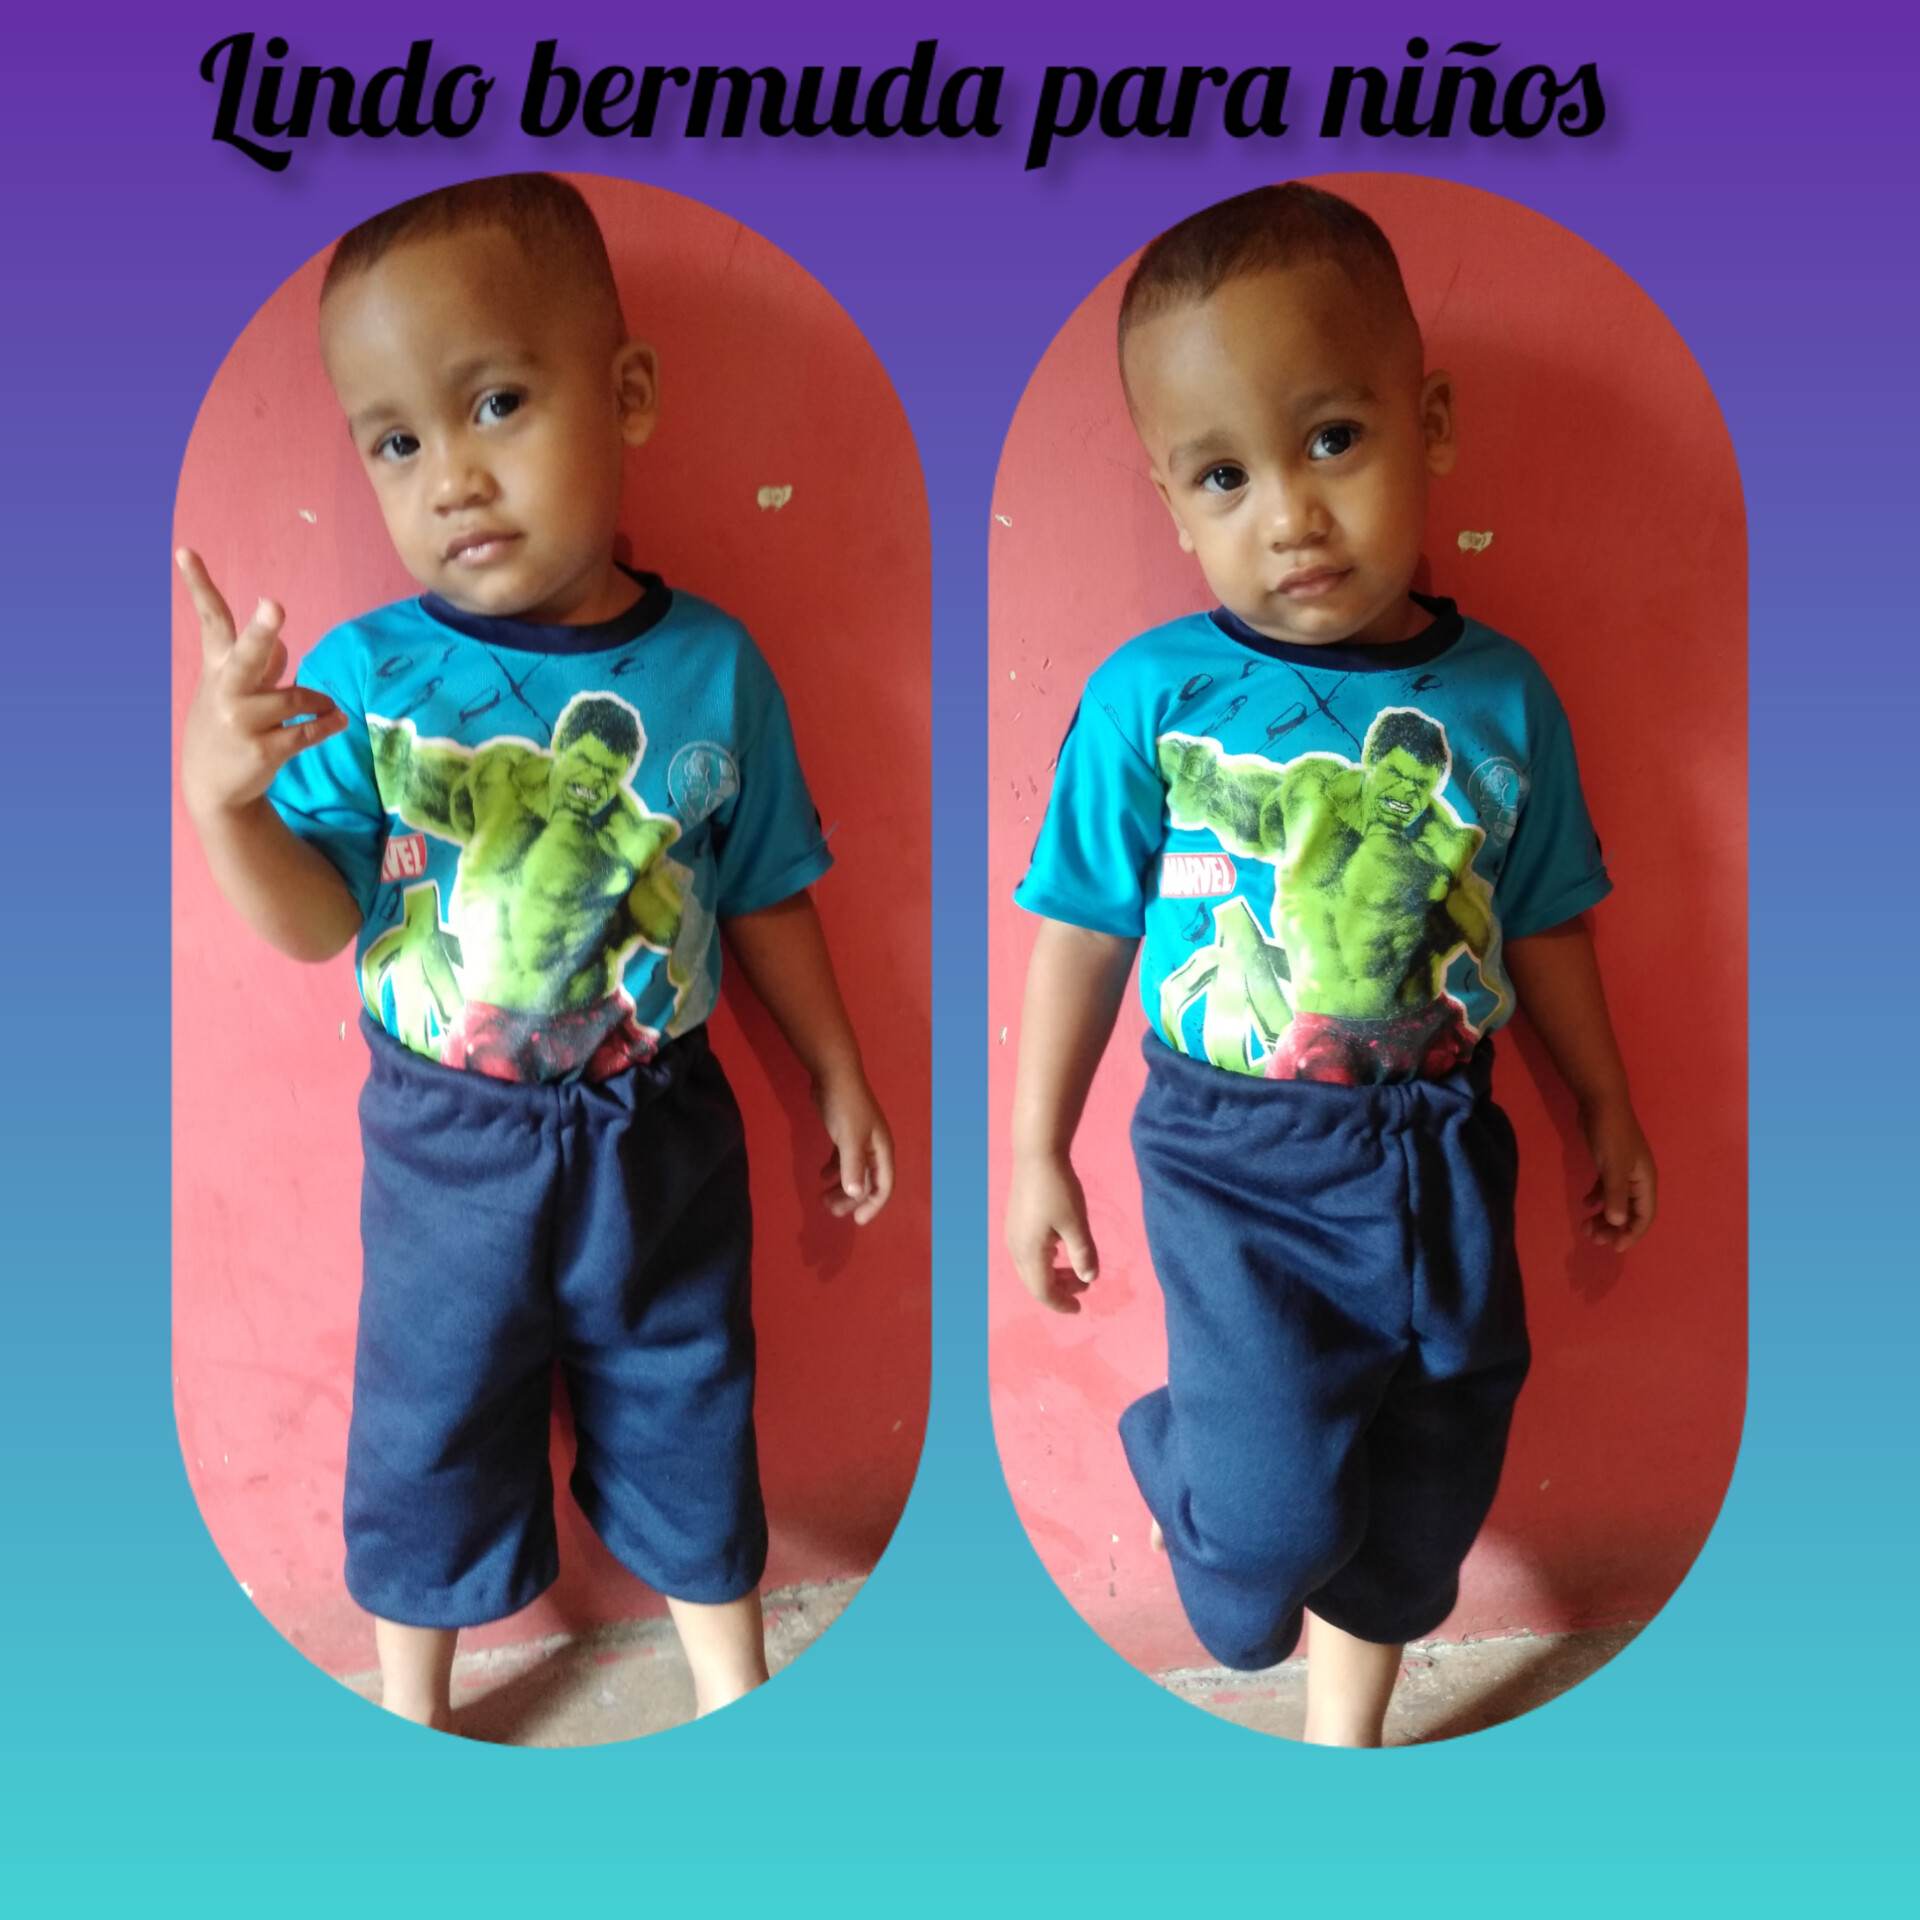
Hello friends of hive, welcome once again to a new post made with love and dedication to show you all the magic that is in sewing and in our creativity. Today I want to show you a little tutorial of 4 steps to make a very cute monkey for children, I made this monkey to give it to a neighbor because he does not have many pants, so with love I made it for him so let's see the step by step of this cute creation.
.jpg)
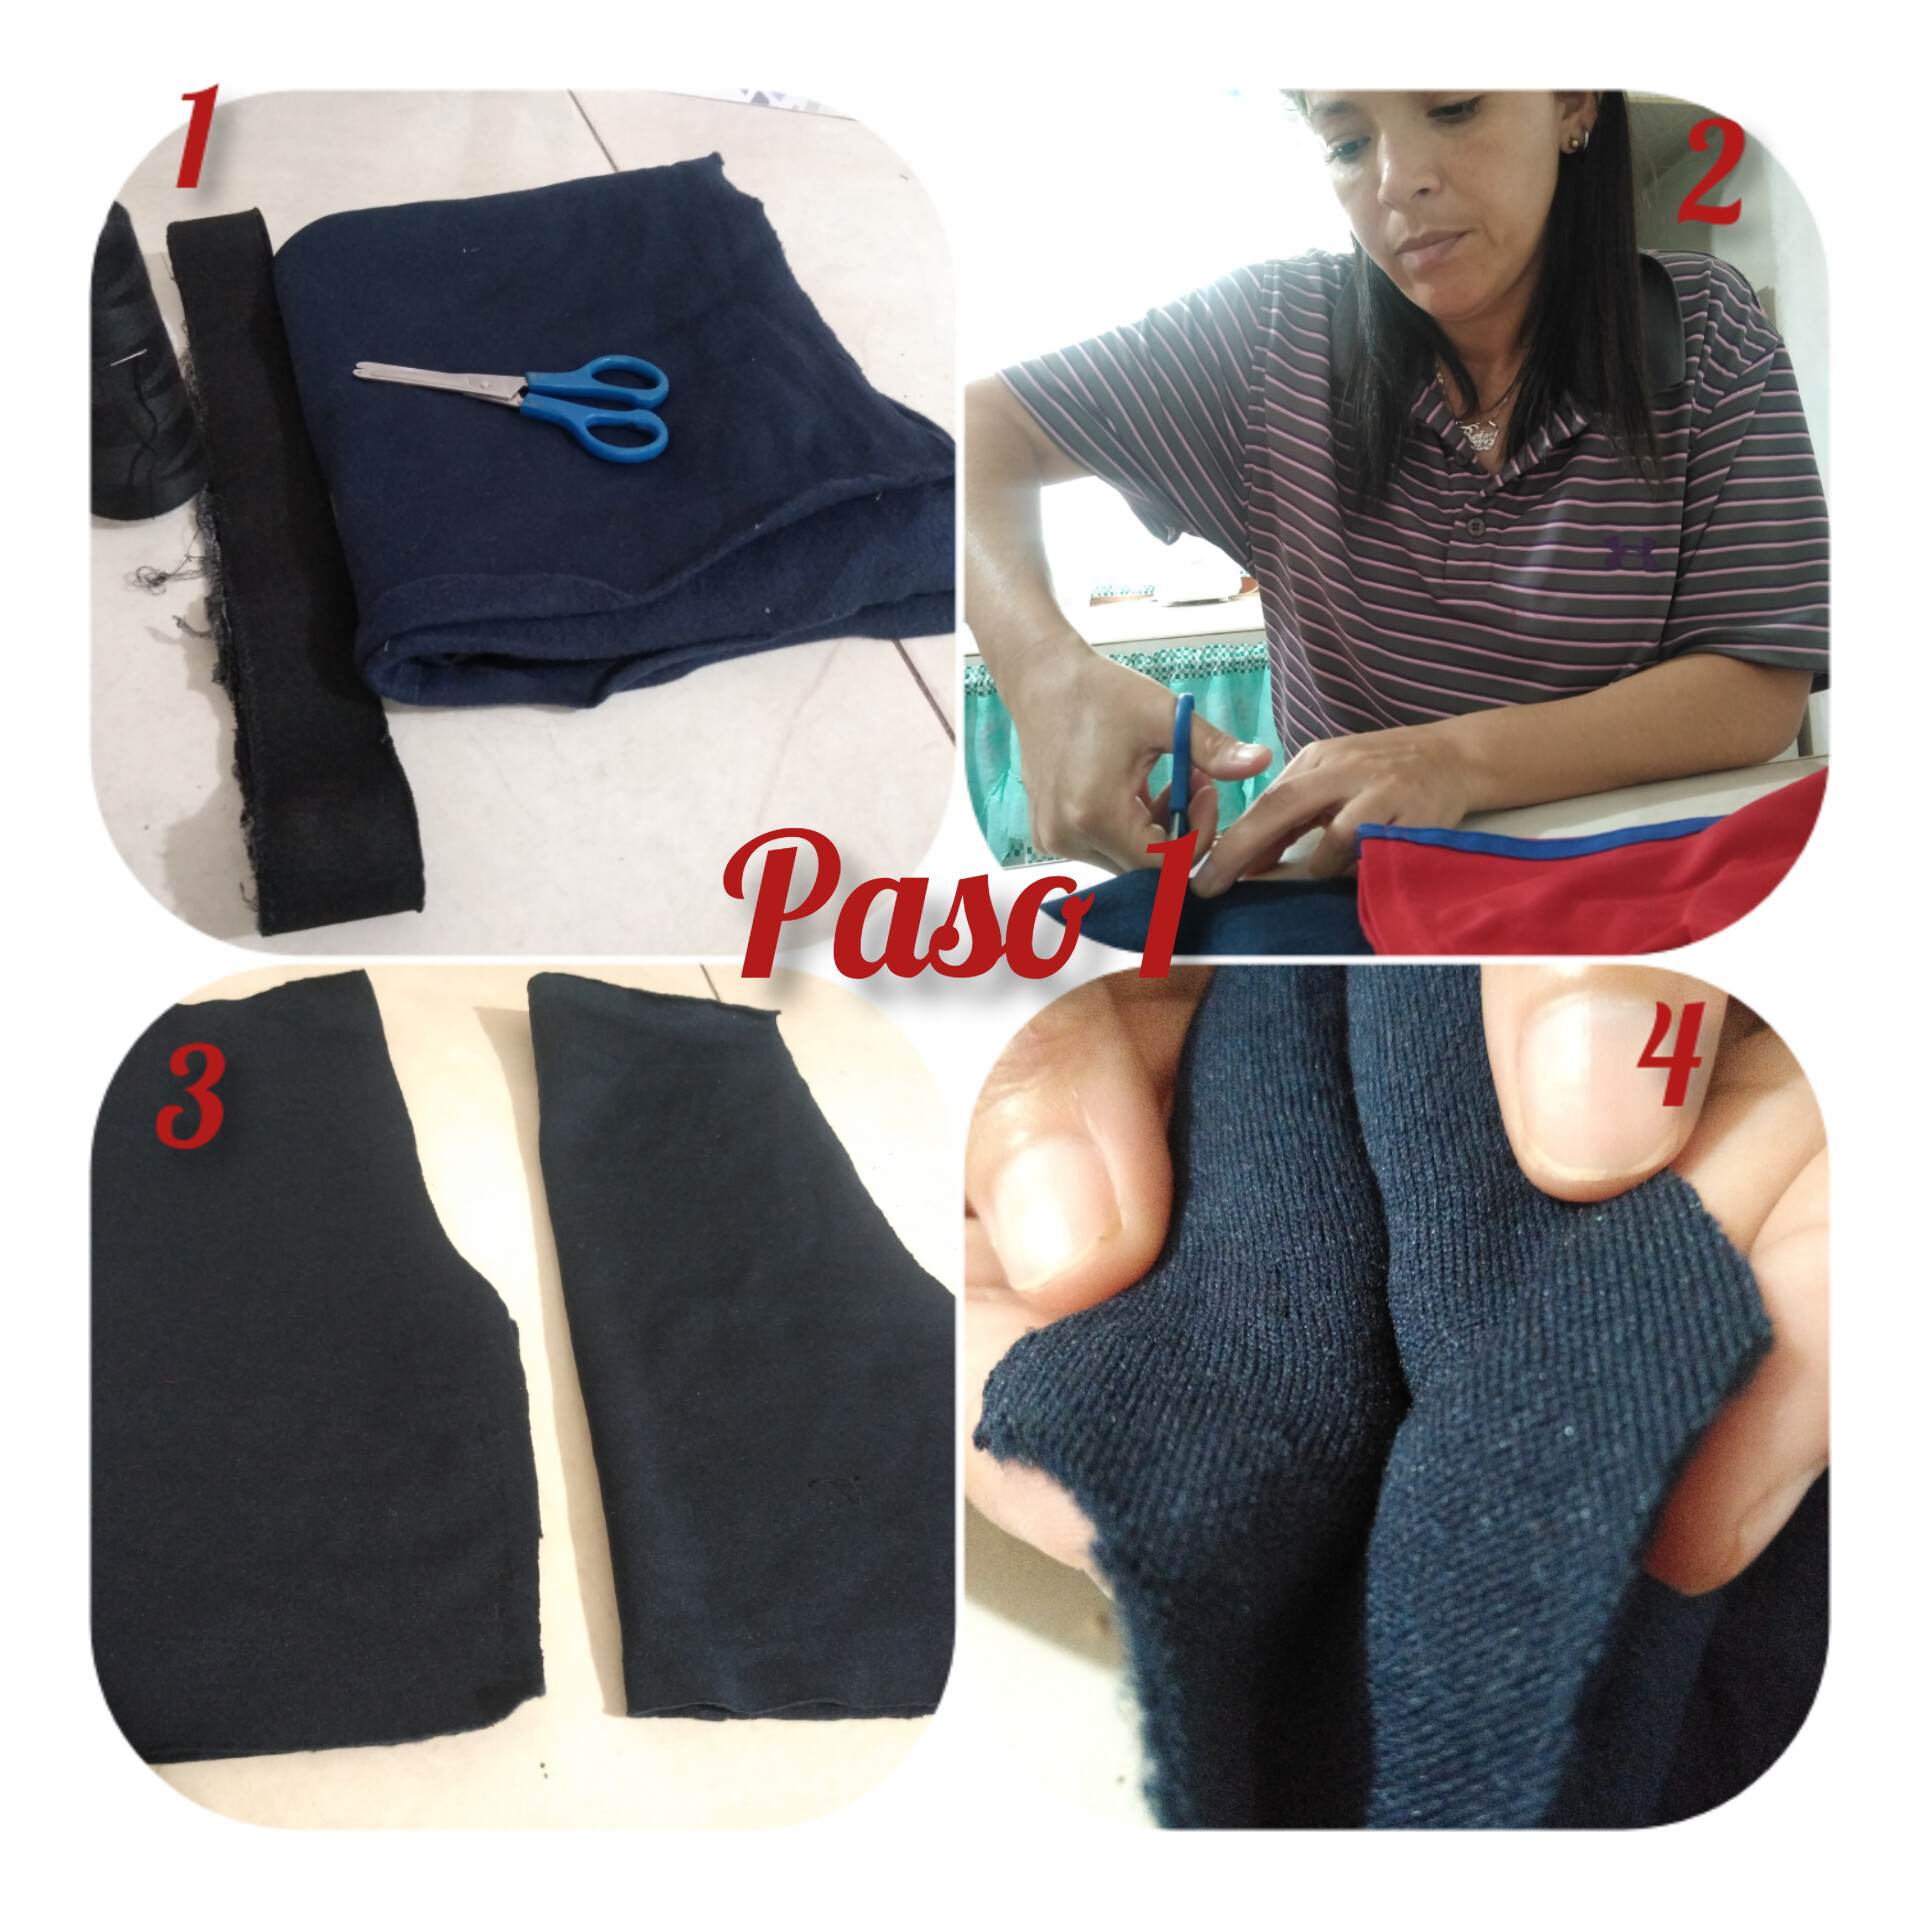
Paso 1: Para realizar esta linda prenda de ropa vamos a necesitar por supuesto la tela para mono, lo que haremos o vamos a necesitar será una medida de esa persona a la que le haremos la prenda del pantalón, lo que procedí a hacer fue que con la medida del niño corté las piezas del monito para que le quedara a su medida, corté las piezas tal cual a su tamaño, la parte delantera y trasera del mono y la pretina. Ahora lo que procedí a hacer fué coser la parte de las entre piernas.
Step 1: To make this nice piece of clothing we will need of course the fabric for overalls, what we will do or we will need will be a measure of that person to whom we will make the pants garment, what I proceeded to do was that with the child's measure I cut the pieces of the overalls to fit him, I cut the pieces to his size, the front and back of the overalls and the waistband. Now what I proceeded to do was to sew the part between the legs.
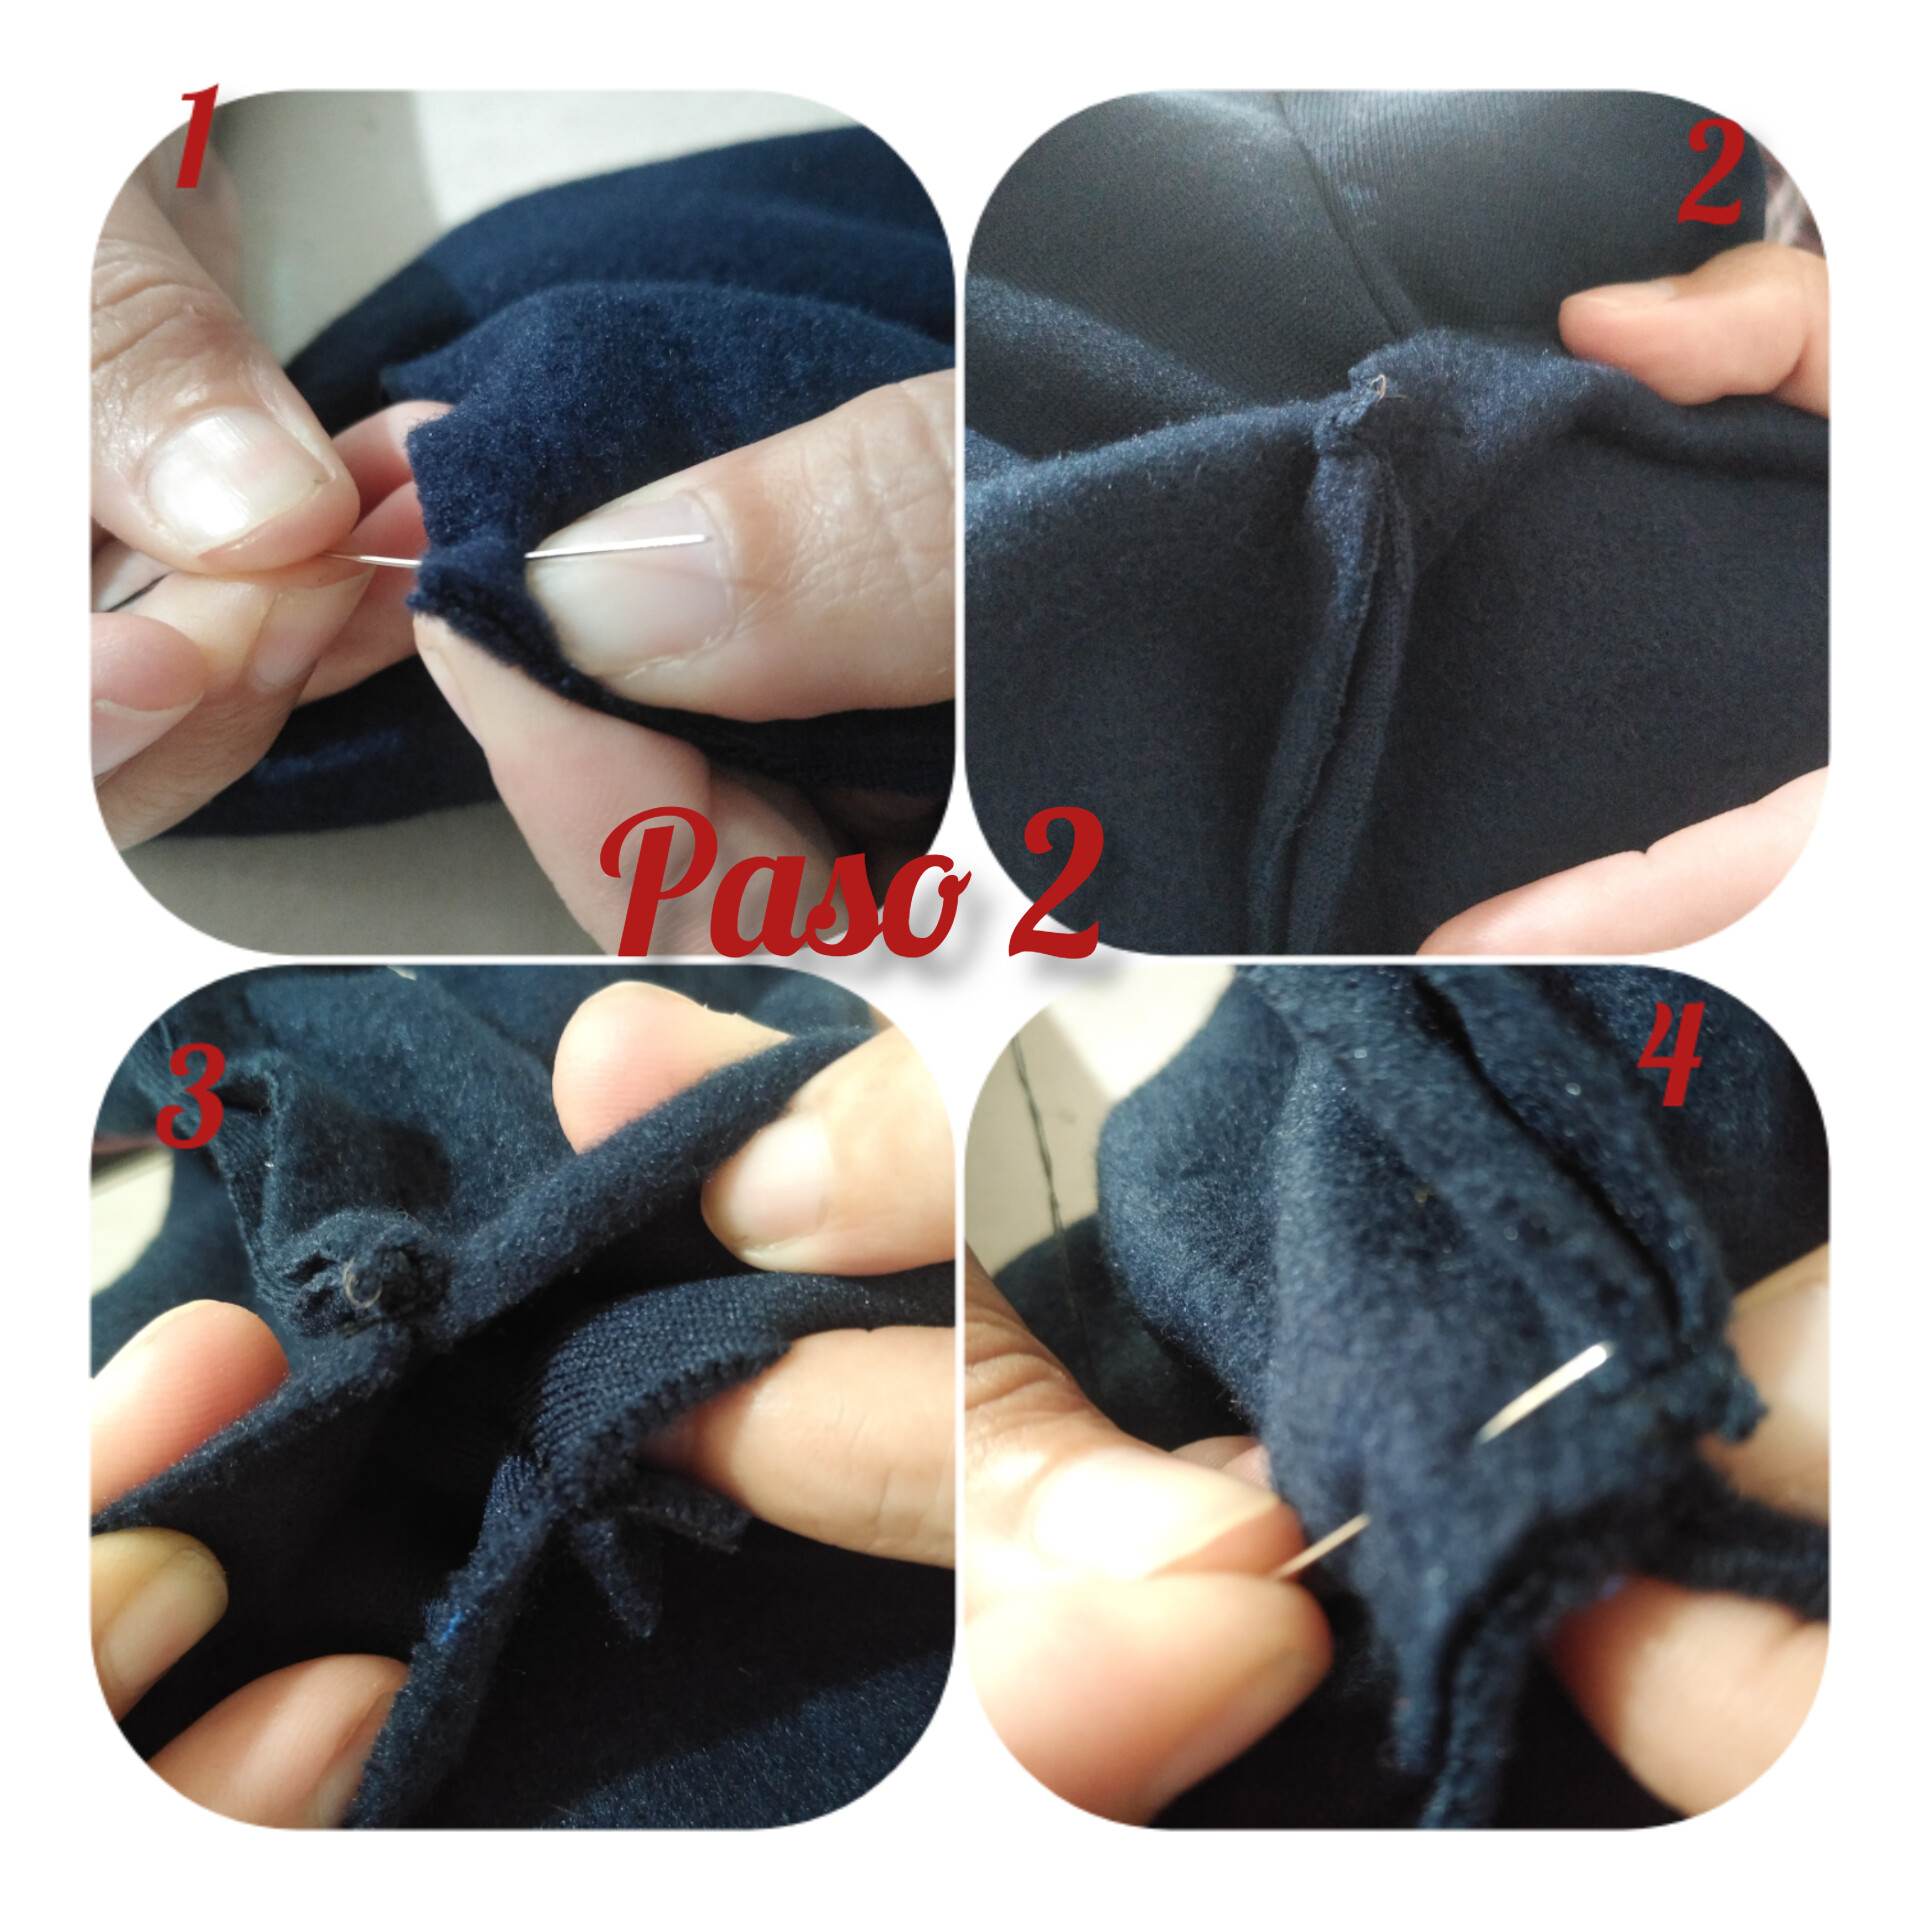
Paso 2: coseremos cuidadosamente y con mucha paciencia ya que recordemos que es a mano que debo coser ya que mi máquina aún está dañada, coseré y uniré el fundillo de mi linda creación, así como en la imagen va mostrando.
Step 2: we will sew carefully and with a lot of patience since we must remember that it is by hand that I must sew since my machine is still damaged, I will sew and join the sleeve of my beautiful creation, as shown in the image.
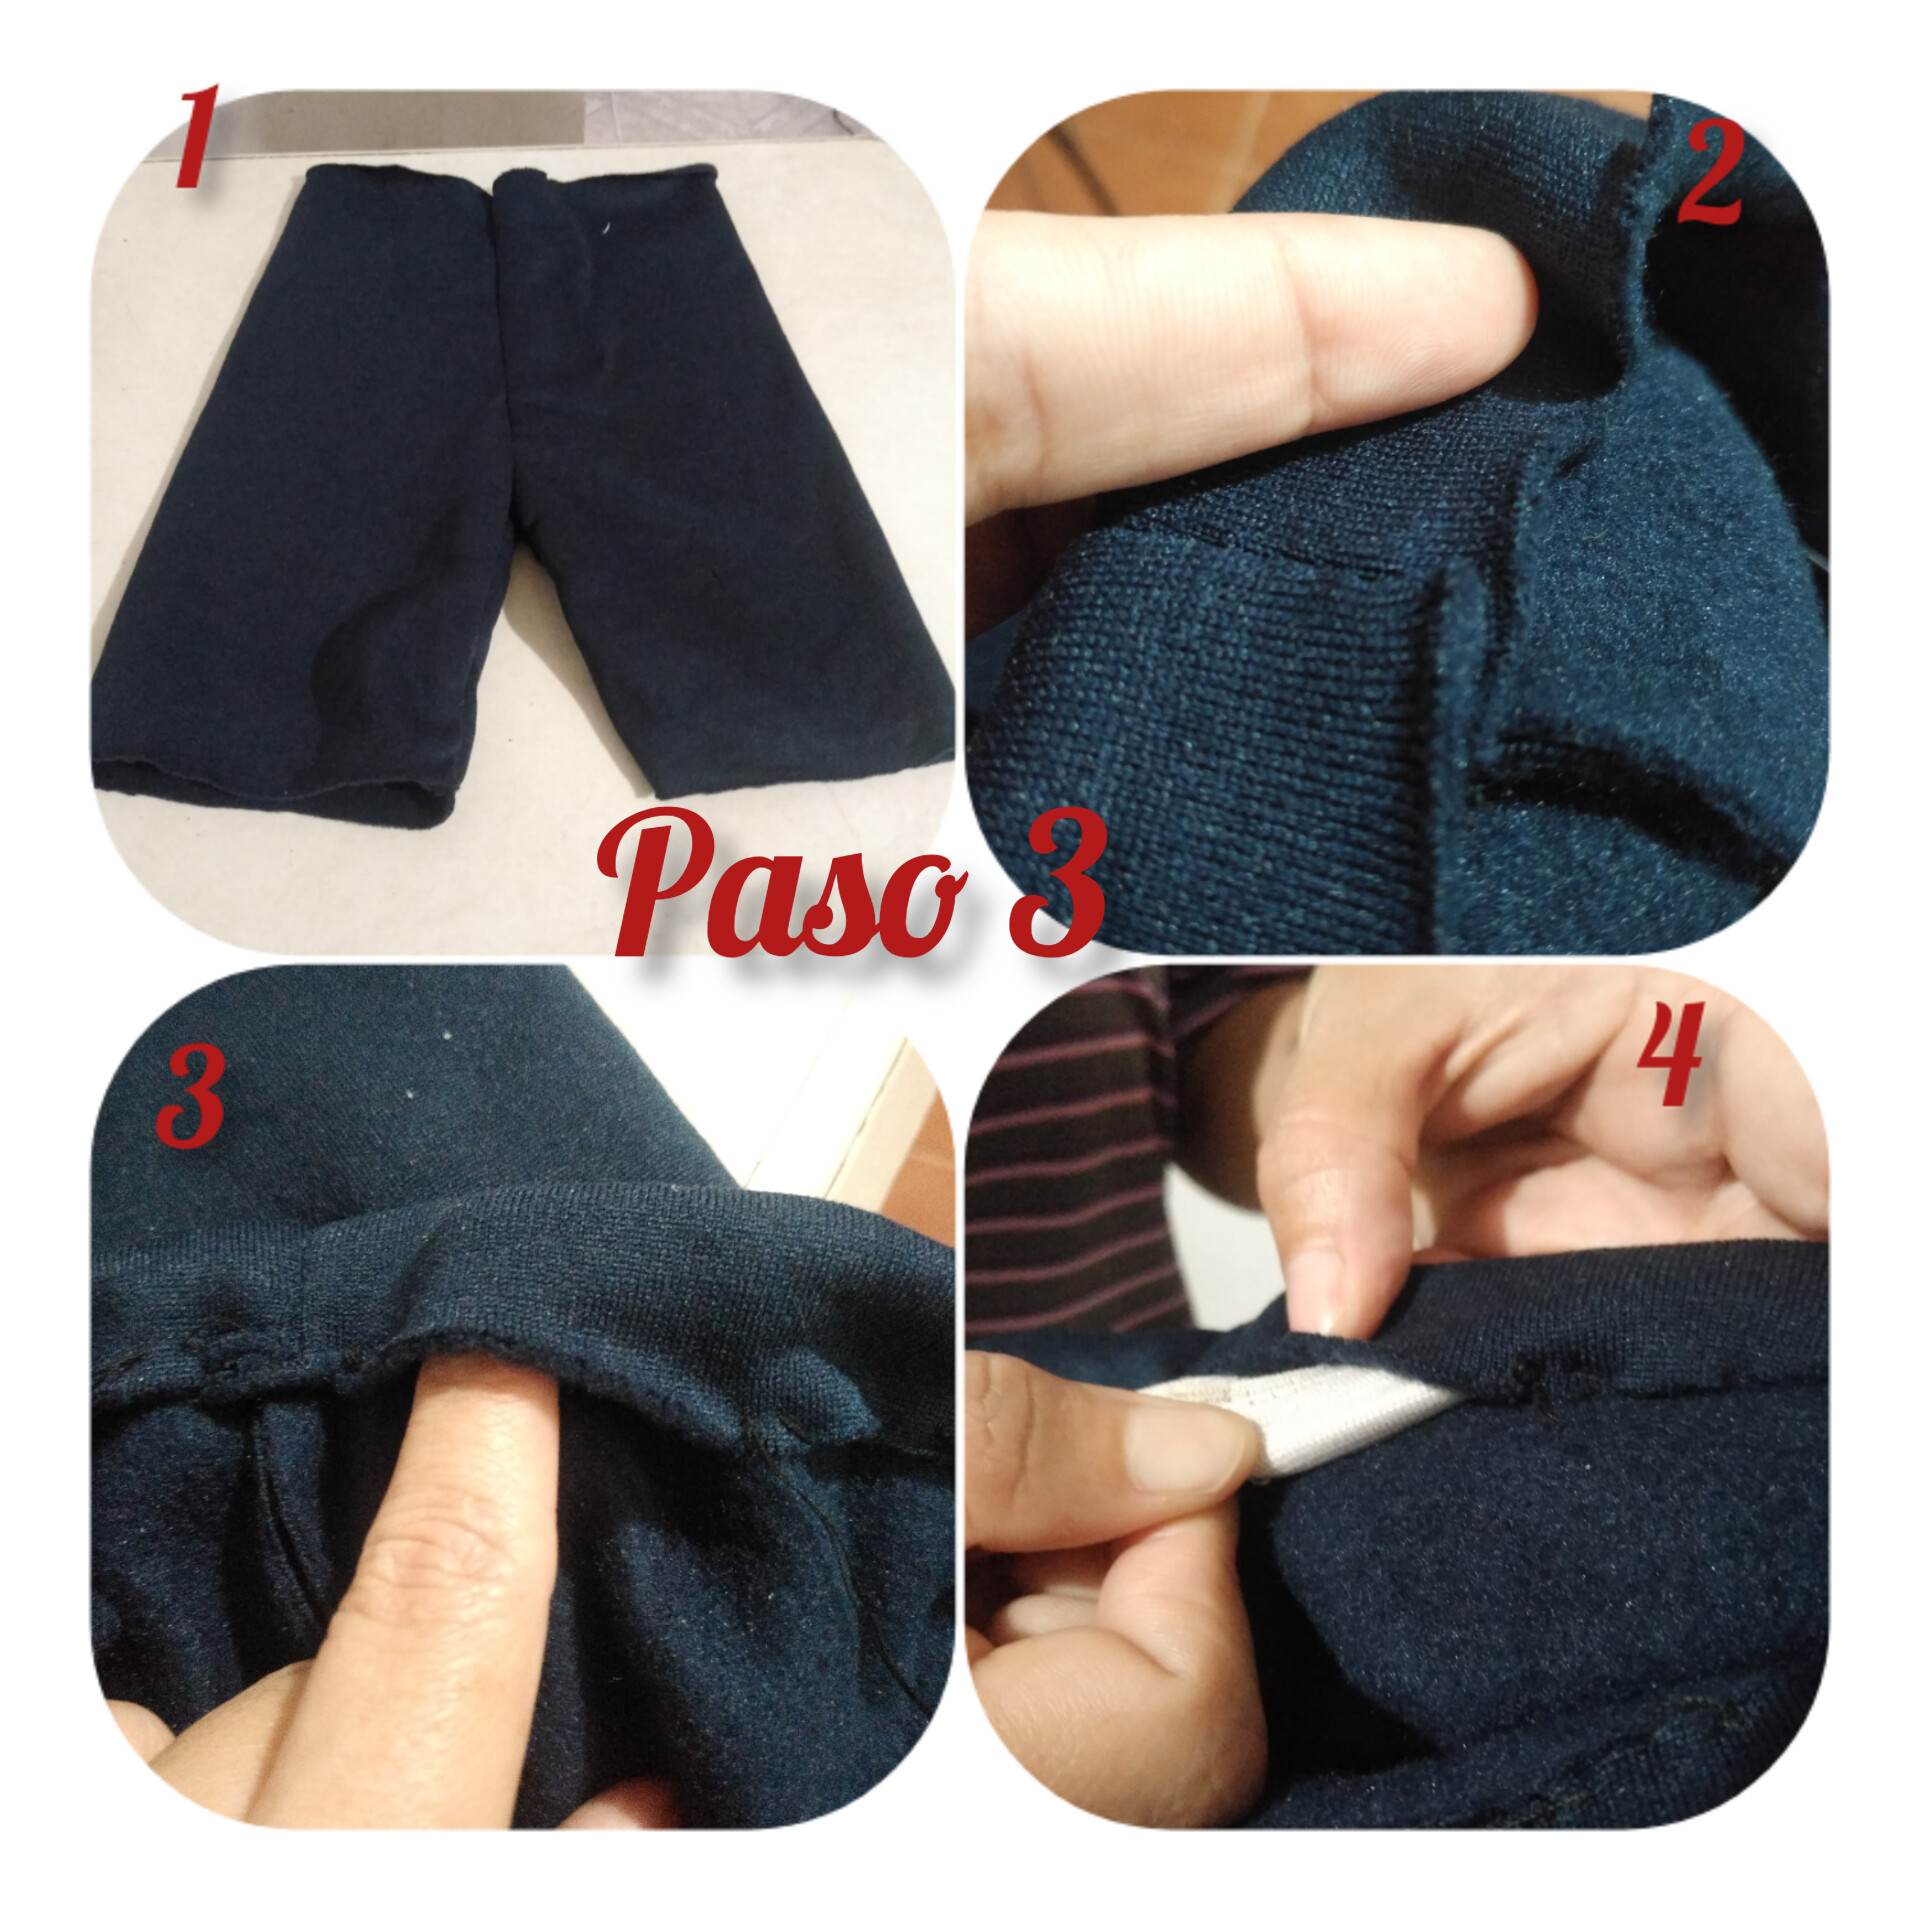
Paso 3: Luego de haber cosido el fundillo y el interior de las piezas de las piernas y también por los lados, allí esta la imagen de como va quedando mi lindo mono, lo que procederé a hacer será coser la pretina del monito, coseré cuidadosamente cuidando de no lastimarme el dedo, entonces meteremos la elástica a la pretina del monito y coseremos.
Step 3: After sewing the sleeve and the inside of the leg pieces and also on the sides, there is the image of how my cute monkey is coming out, what I will proceed to do is to sew the waistband of the monkey, I will sew carefully taking care not to hurt my finger, then we will put the elastic to the waistband of the monkey and sew.
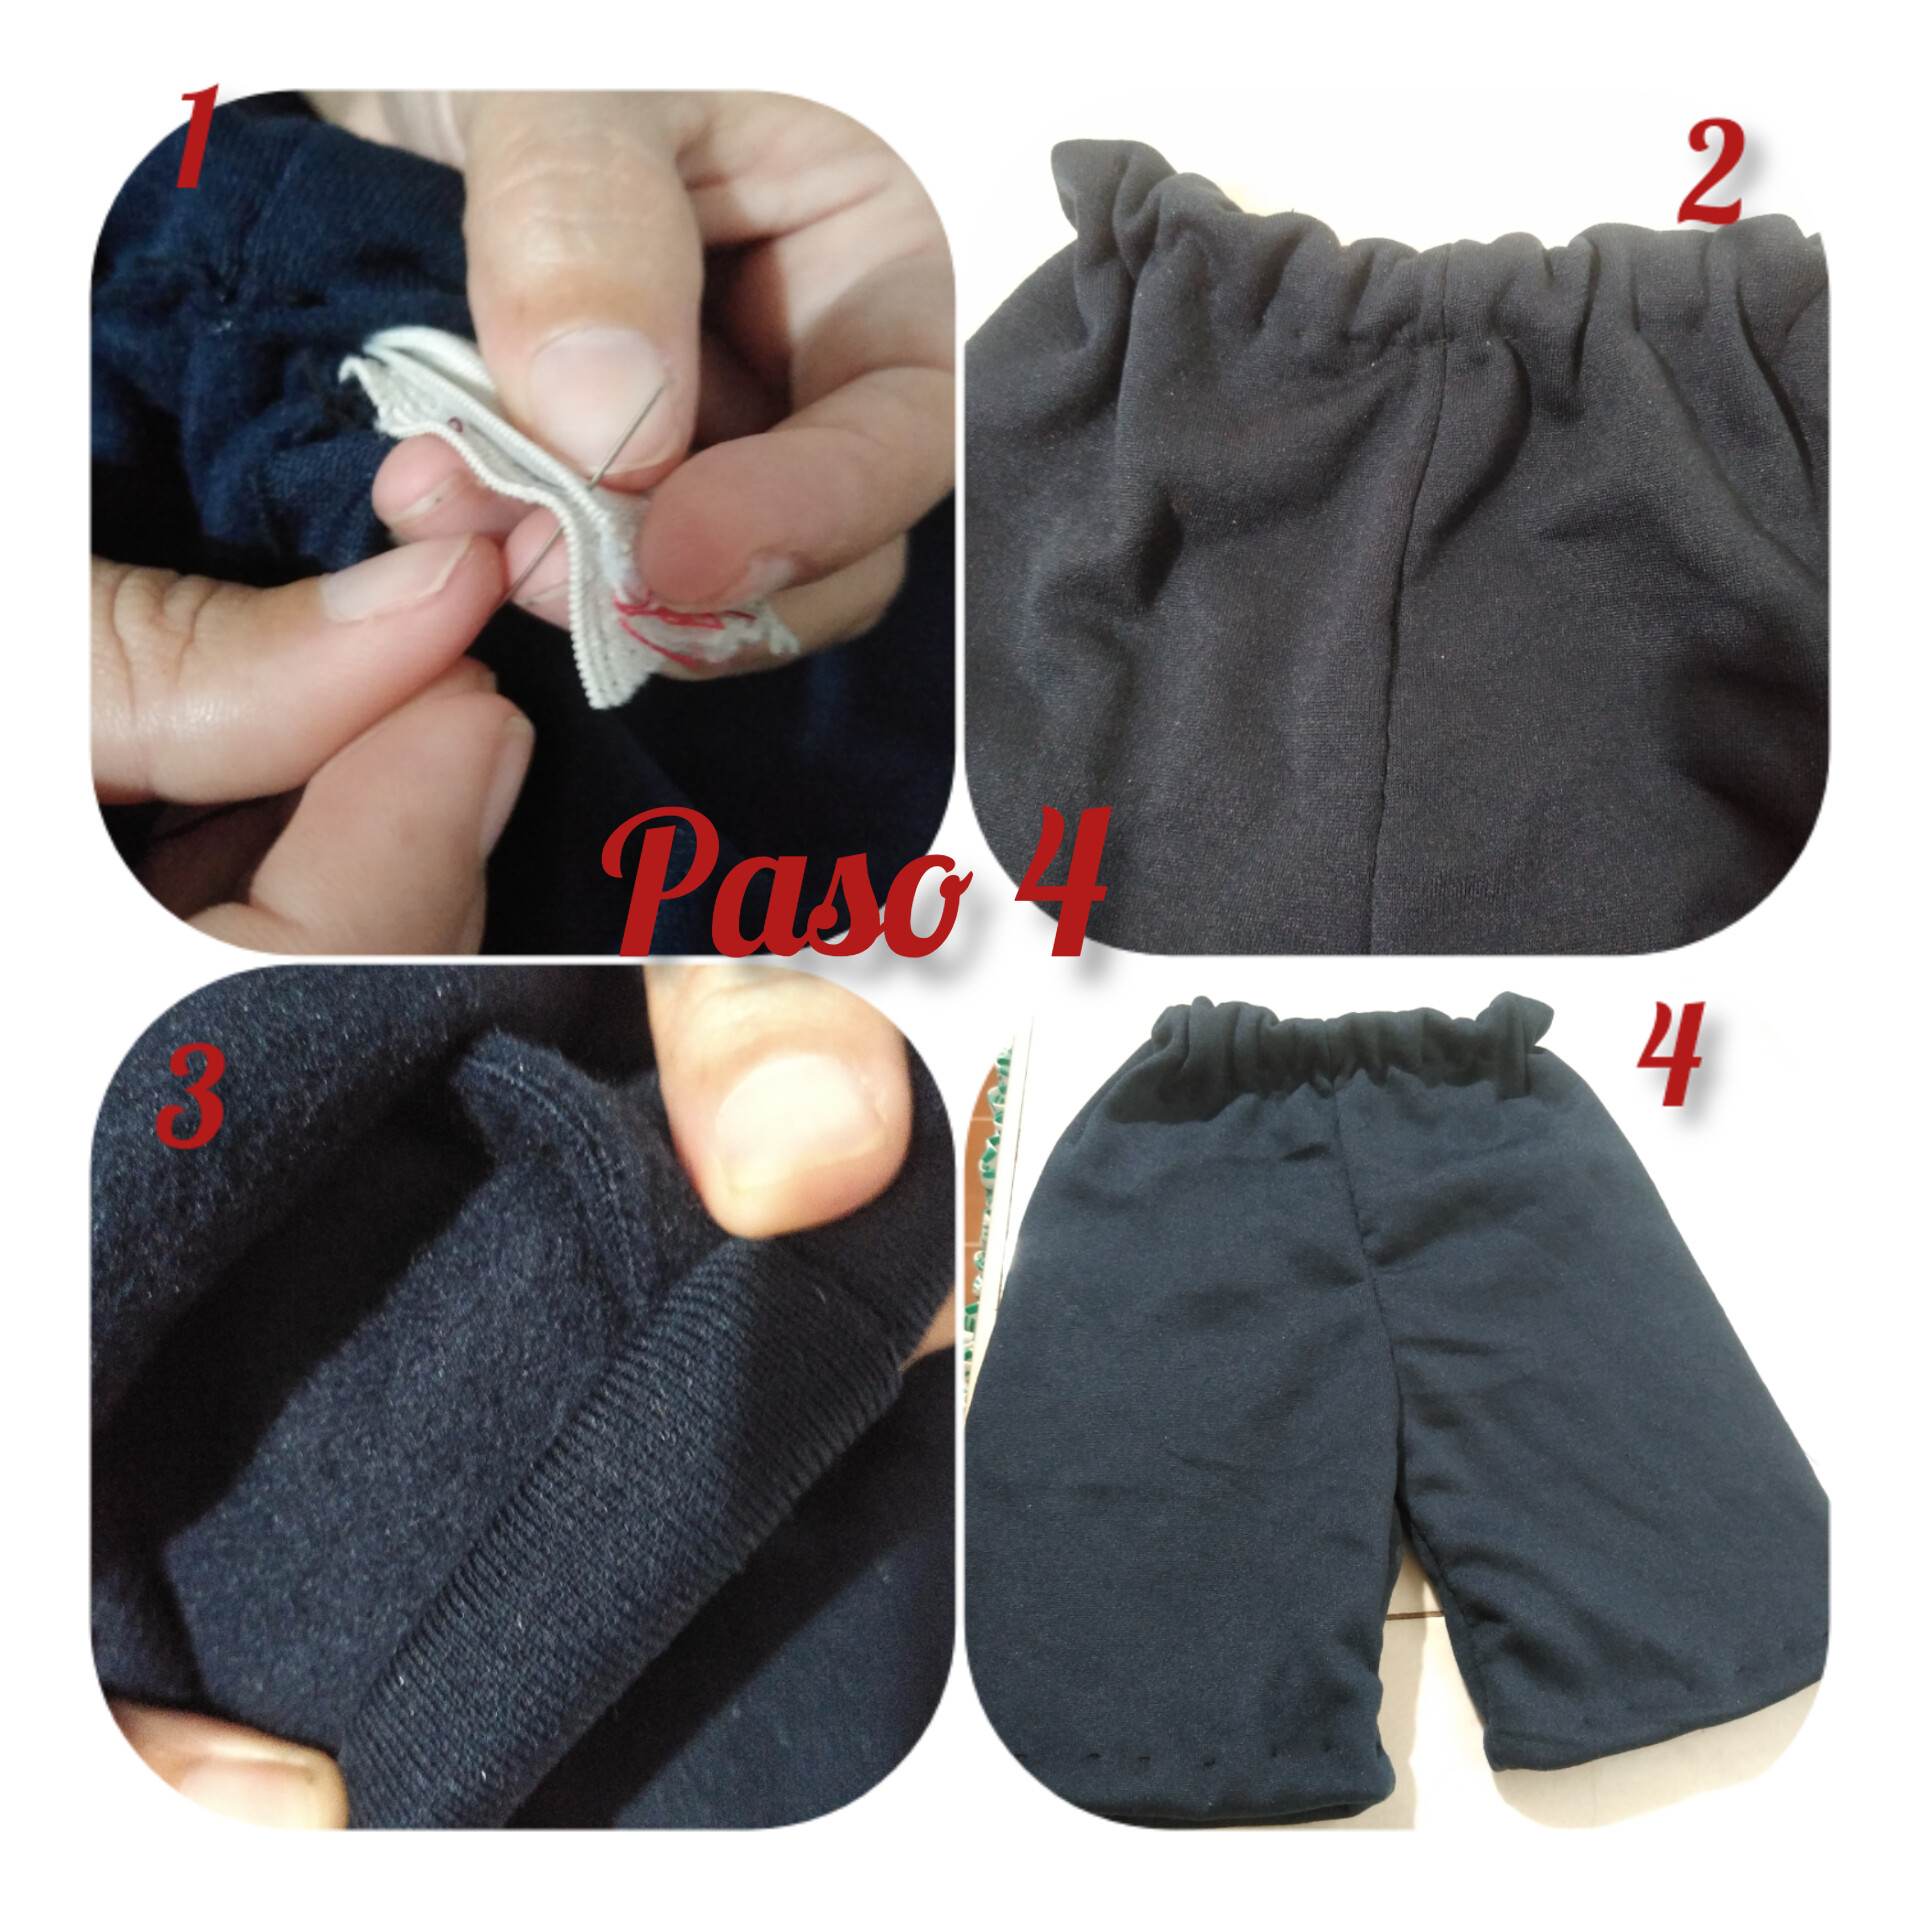
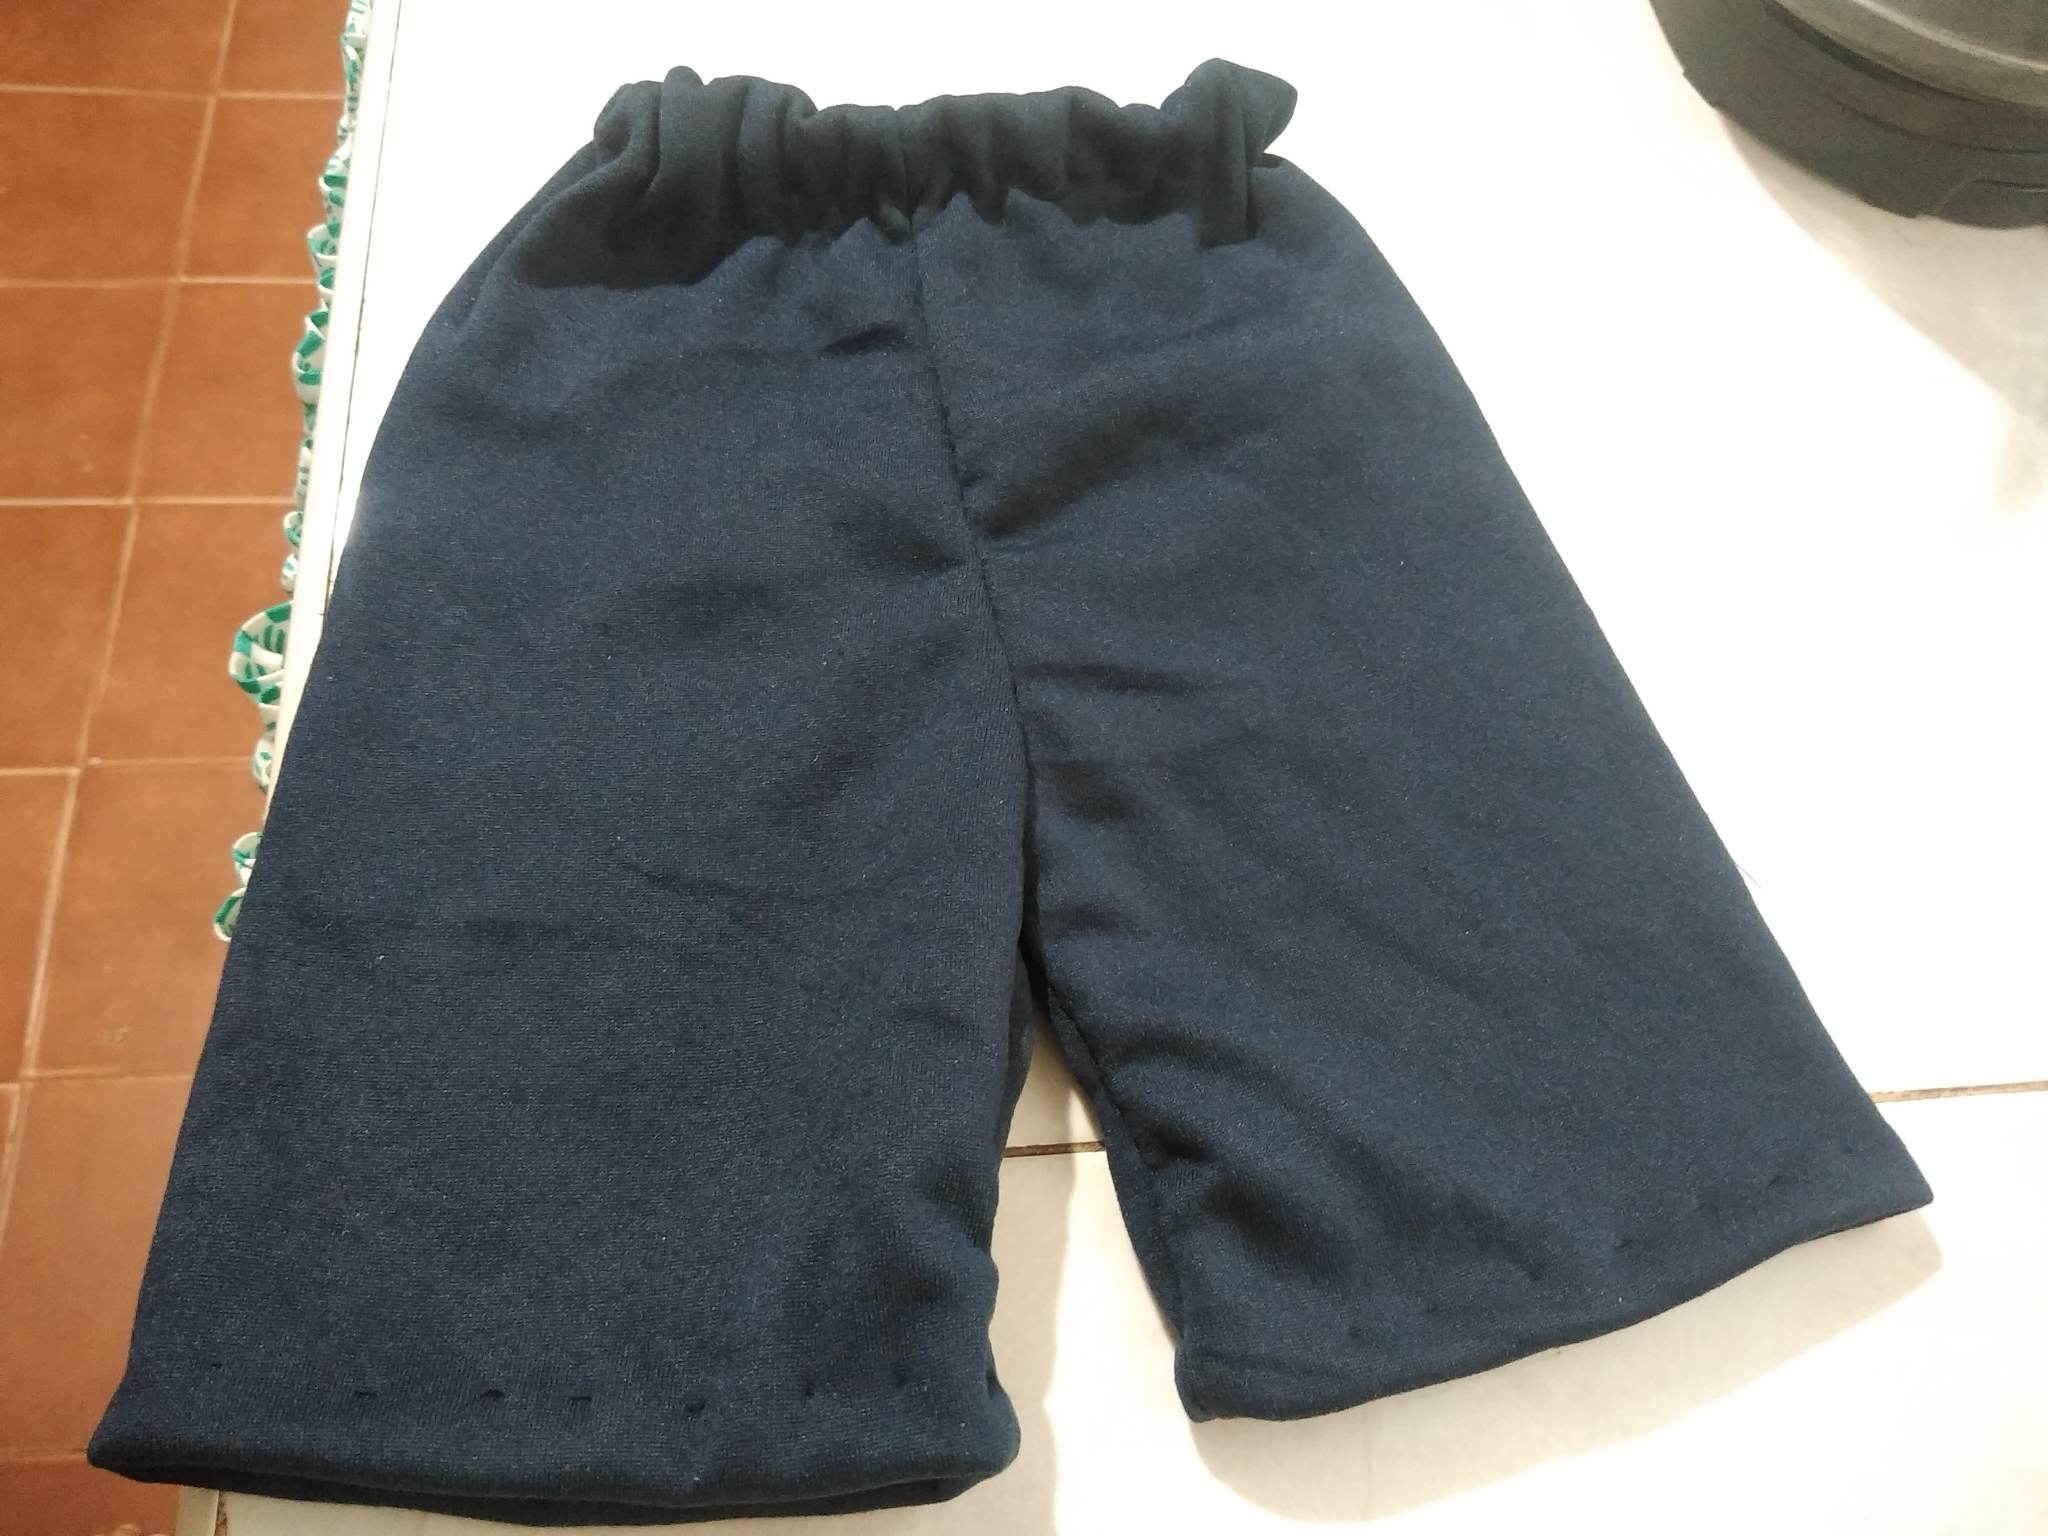
Paso 4: coseremos la elástica, es decir los dos extremos que quedan para que al momento de el niño usar el monito no se le suelte, coseremos ambos extremos y luego los colocamos dentro de la pretina y coseremos, lo cual nos dará un resultado as´pi como el de la foto, y lo último que haremos será tomar el ruedo de nuestro lindo monito, de esta manera damos por culminada nuestra linda creación, espero que les haya gustado mucho tanto como a mi.
Step 4: we will sew the elastic, that is to say the two remaining ends so that when the child wears the monkey it will not come loose, we will sew both ends and then we place them inside the waistband and sew, which will give us a result as'pi as the one in the photo, and the last thing we will do is to take the ruffle of our cute monkey, in this way we finish our cute creation, I hope you liked it as much as I did.
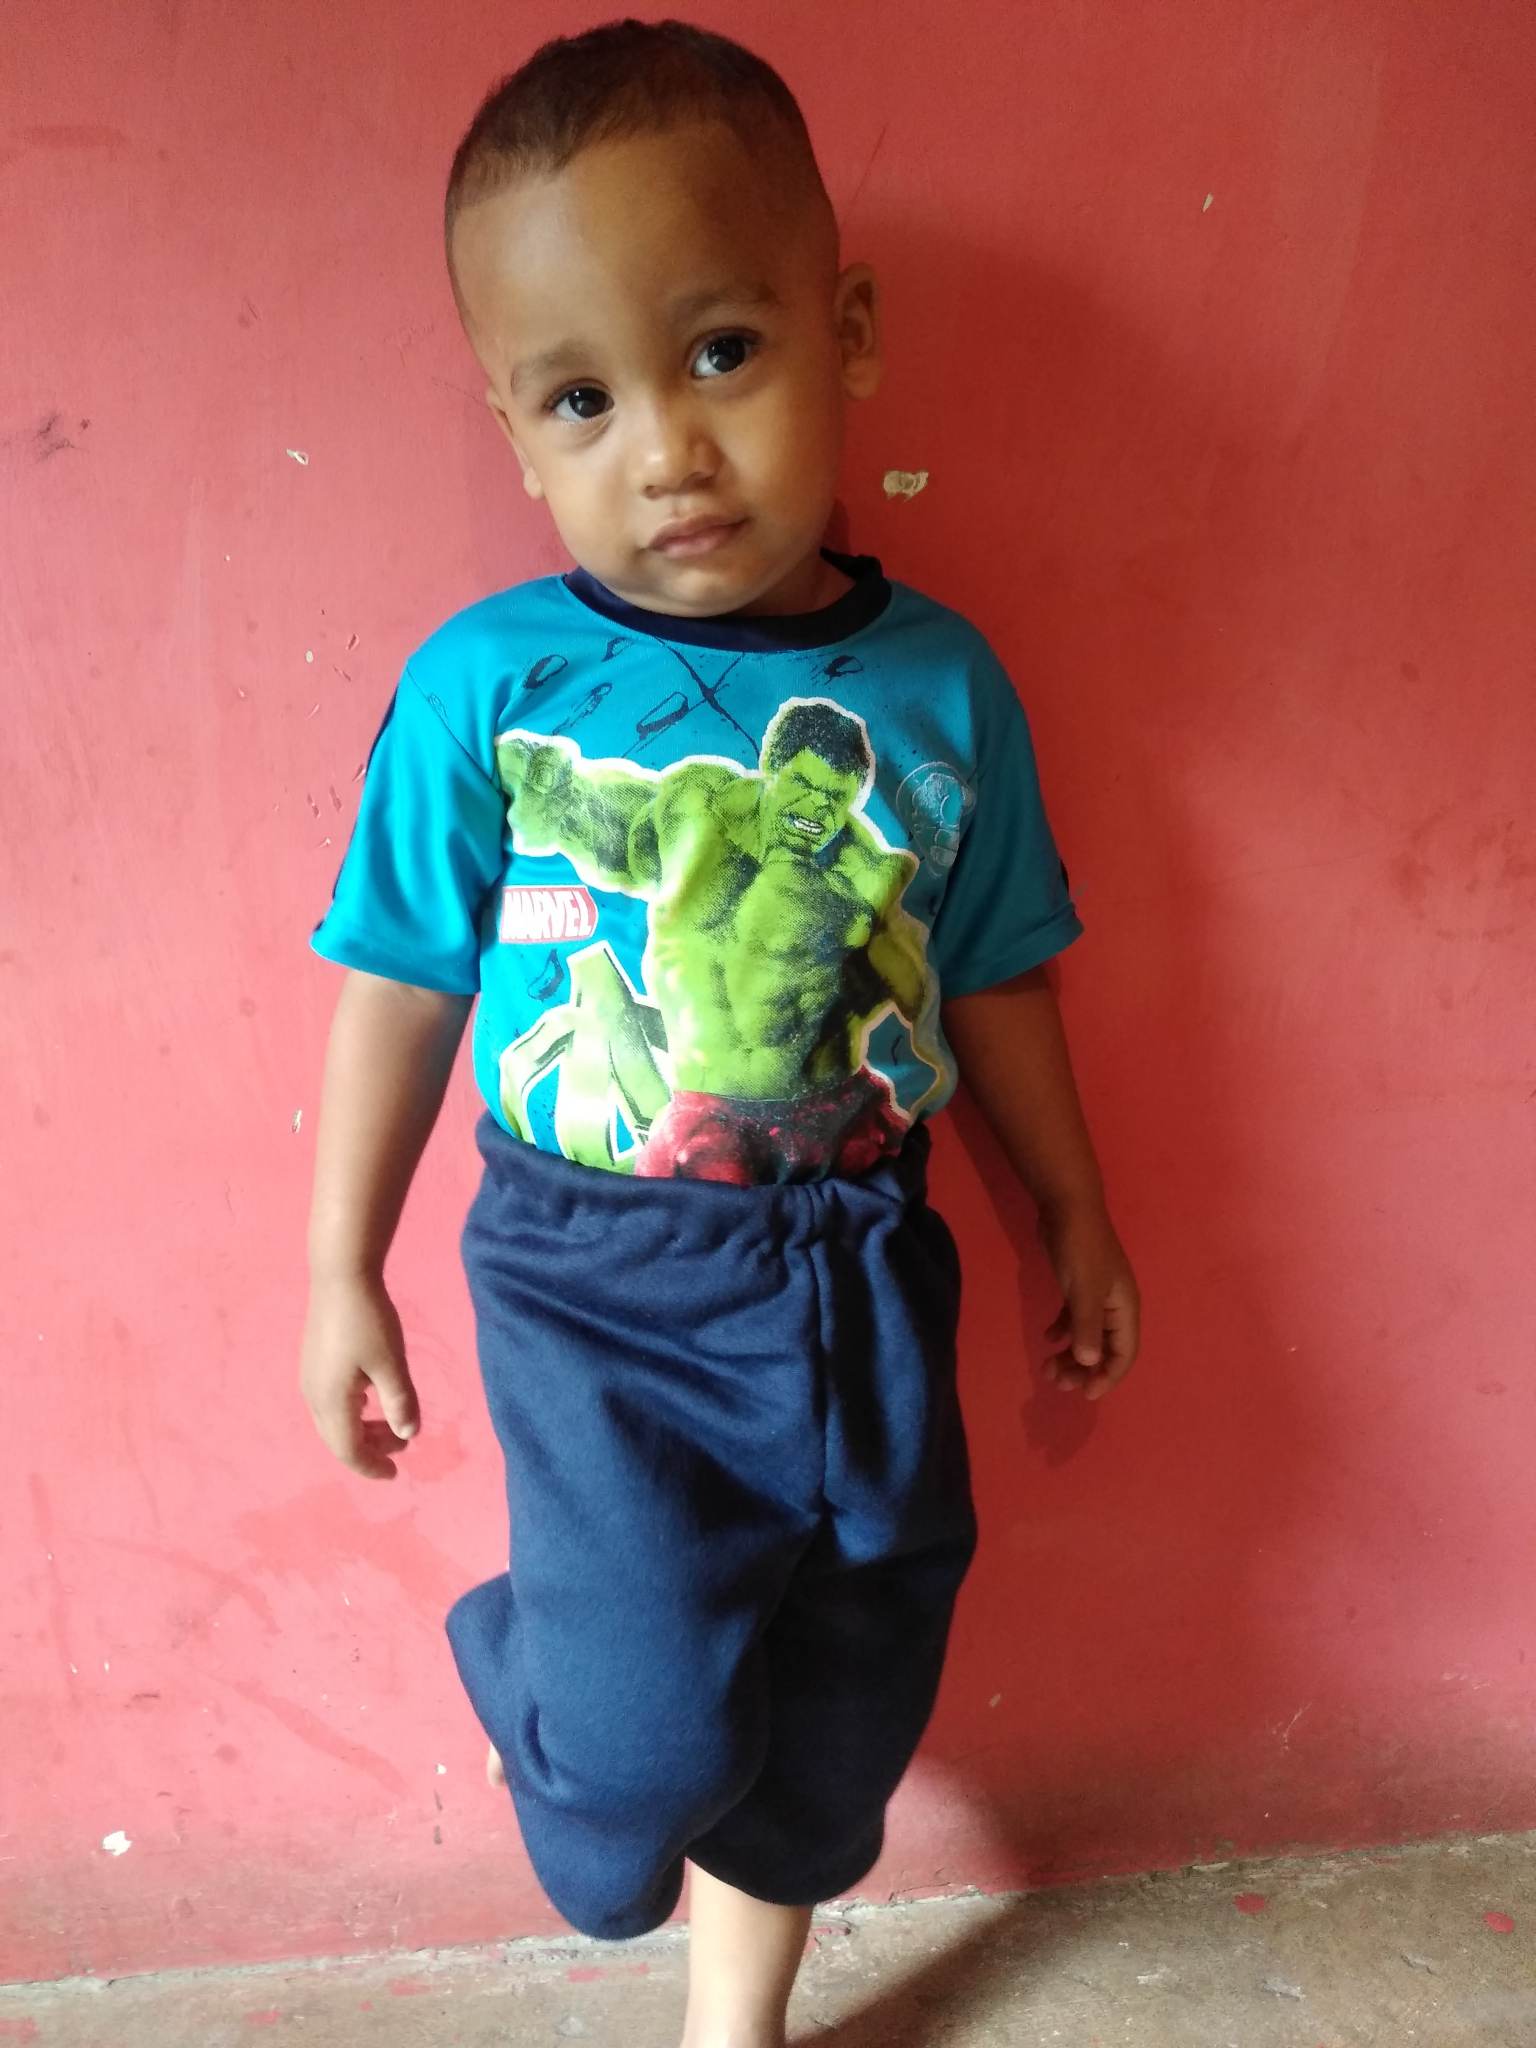
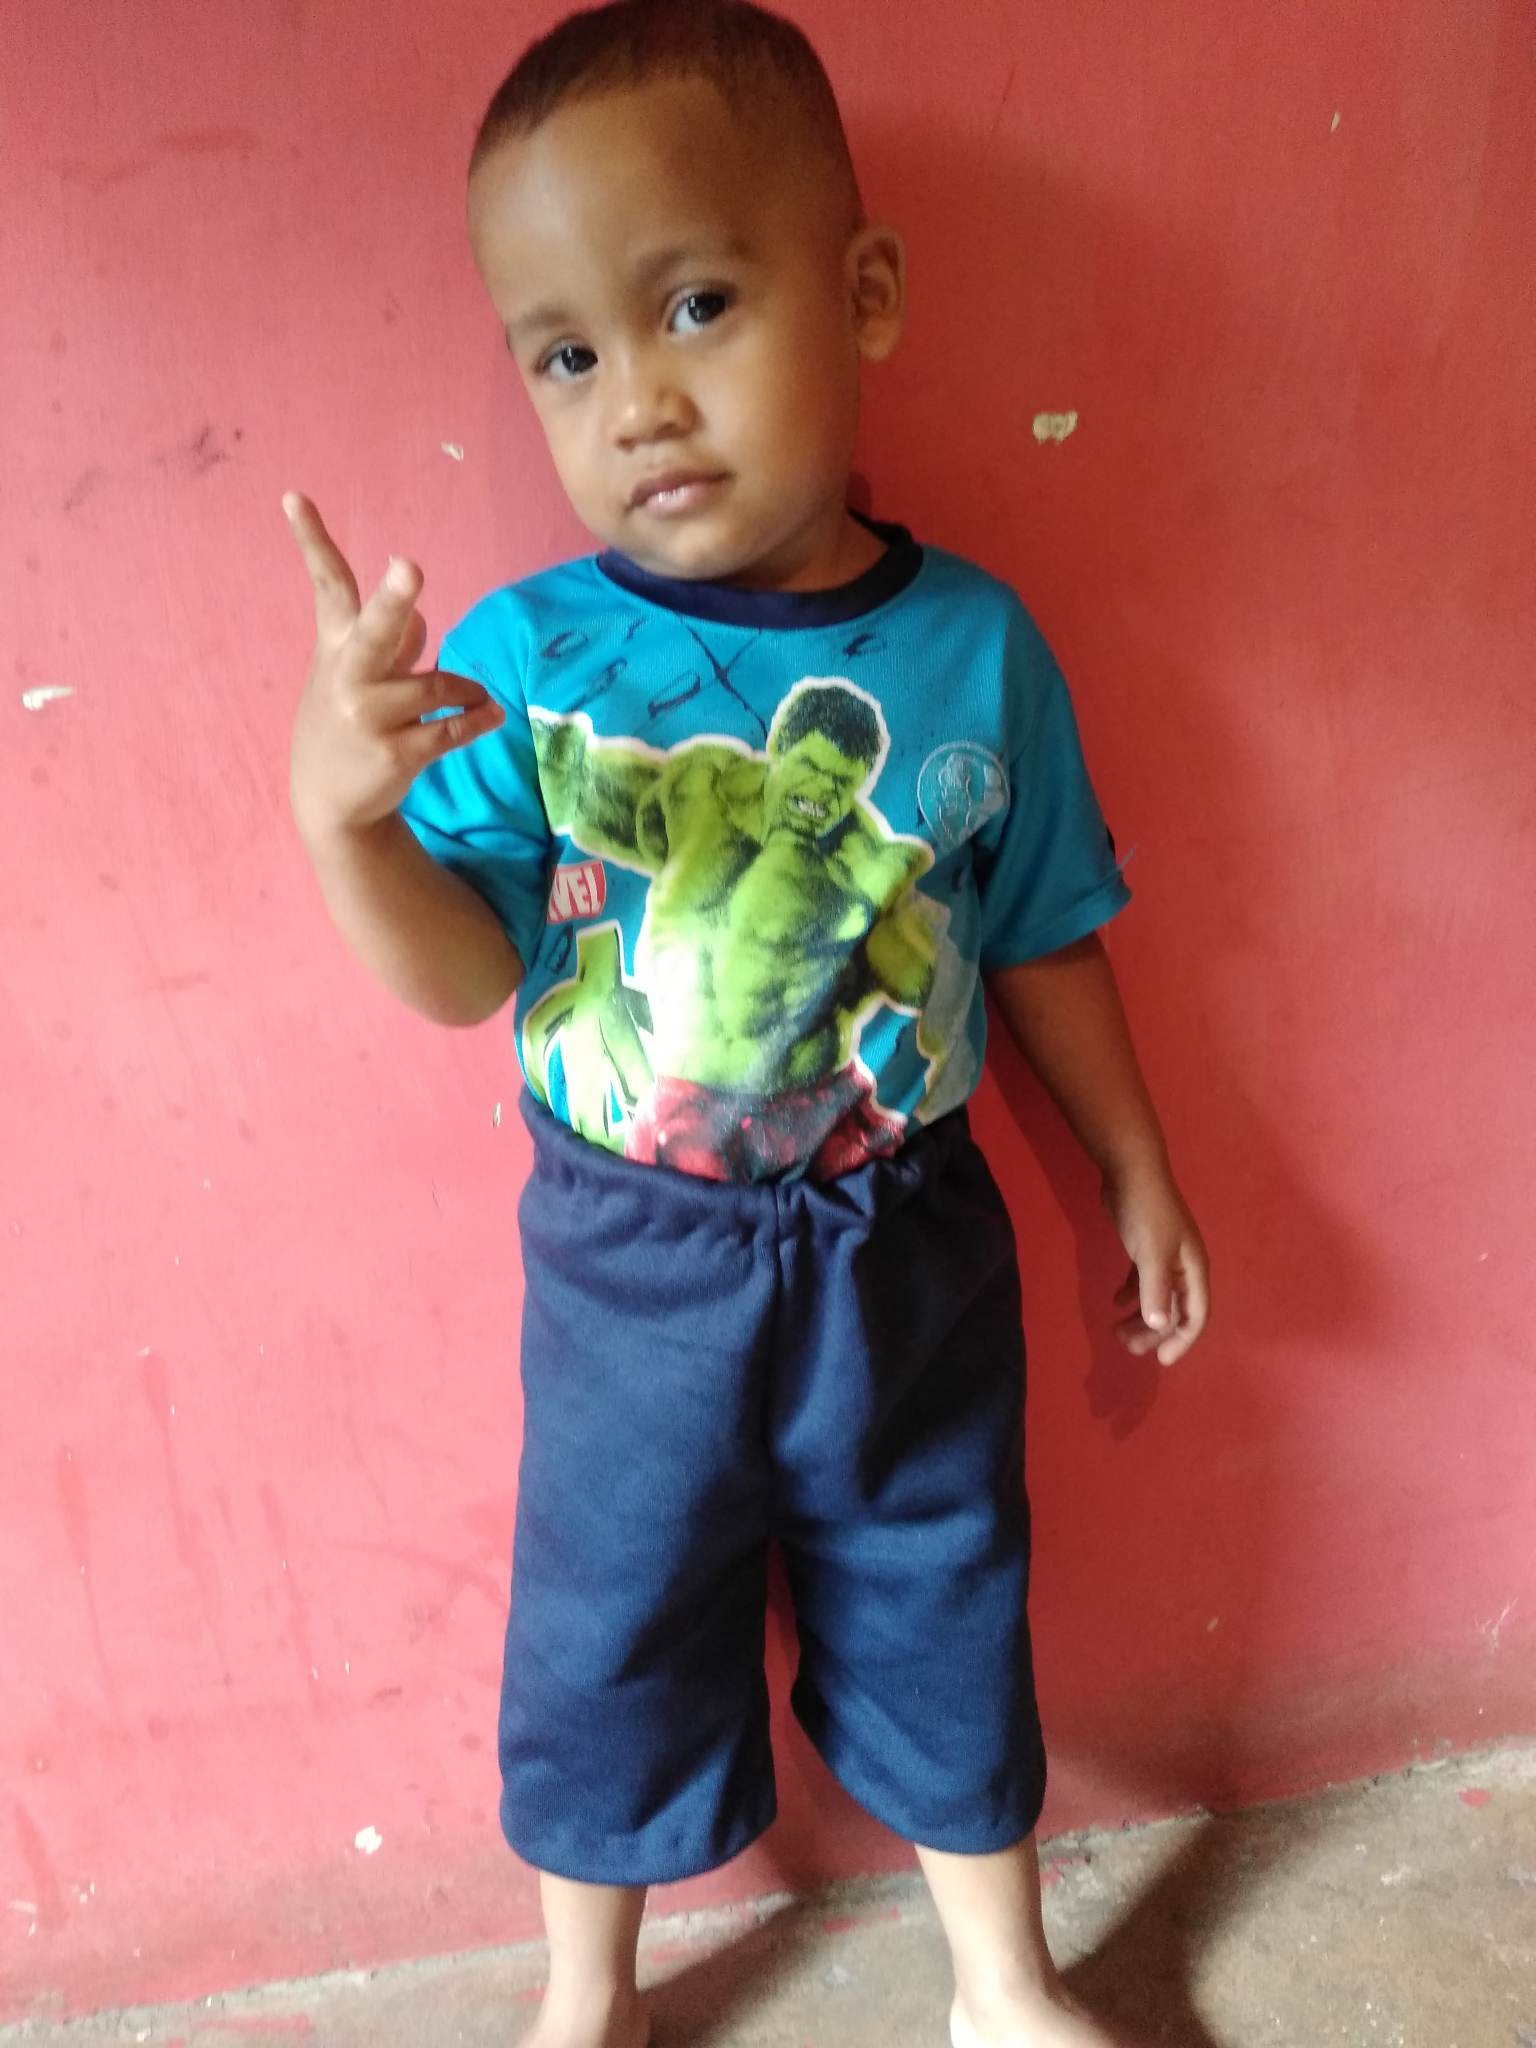
Final Result.

!discovery 27
!diy
This post was shared and voted inside the discord by the curators team of discovery-it
Join our Community and follow our Curation Trail
Discovery-it is also a Witness, vote for us here
Delegate to us for passive income. Check our 80% fee-back Program
Thank you for sharing this post on HIVE!
Your content got selected by our fellow curator stevenson7 & you just received a little thank you upvote from us for your great work! Your post will be featured in one of our recurring compilations which are aiming to offer you a stage to widen your audience within the DIY scene of Hive. Stay creative & HIVE ON!
Please vote for our hive witness <3
Que bonito gesto tuviste con tu vecinito,seguro sabrá apreciar tu trabajo, admiro que tengas la dispocisión para coser a mano este tipo de proyectos. Gracias por compartir, saludos y bbendiciones.
Wow this is really amazing. Even though you sew with hand it still look beautiful compare if you were using machine that one it will be too perfect. Thanks so sharing this tutorial I love it