[ESP-ENG] Creating a beautiful hat for my daughter | Creando un bello gorro para mi hija

Hello friends and friends of hive, what a joy to share with you all once again, today I want to show you how to make a beautiful hat that I made for my daughter juliet, the truth is that it is totally different from many others but it is super cute, so I want to show you the step by step so you can also do it for your girls or so you can give it to a family member, so let's see the step by step.
.jpg)
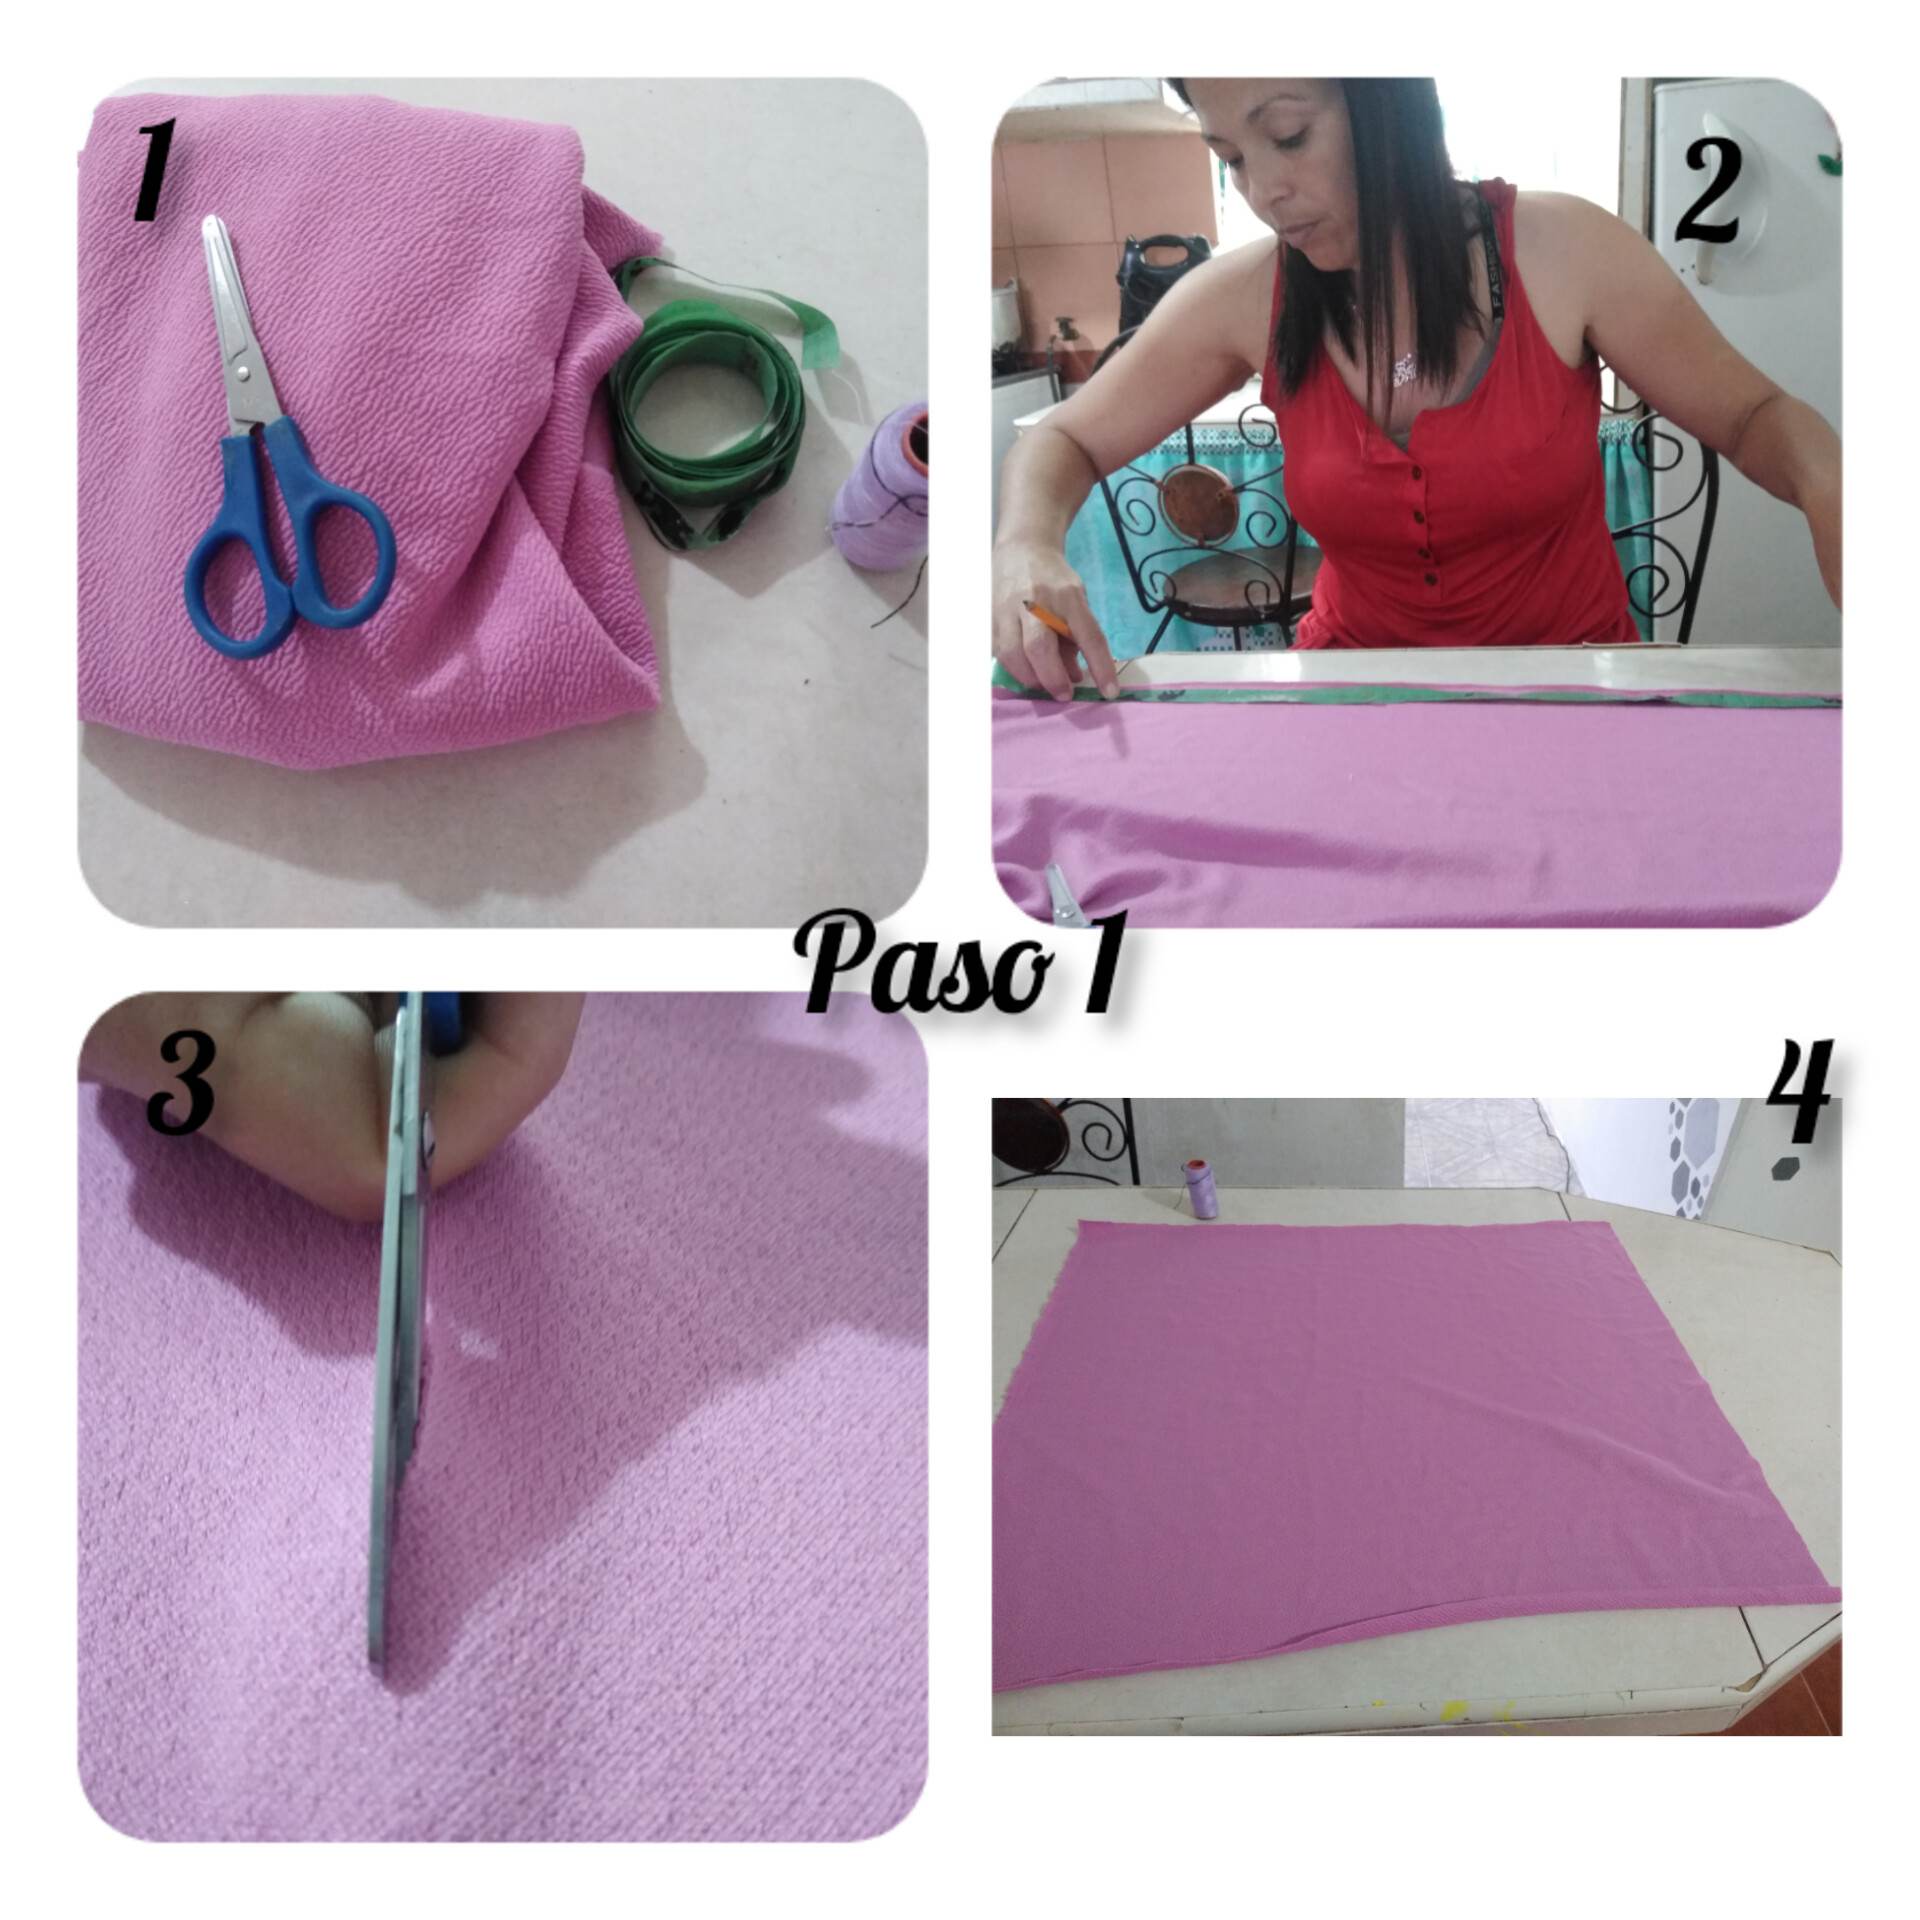
Paso 1: Los materiales que vamos a necesitar para hacer este lindo gorro serán: Una tela que debe ser dura, ya que para un tipo de gorro así no podemos usar una tela blanda ya que no quedará como debe quedar, entonces vamos a usar una tela dura, en este caso elegí un color lindo, el lila, nuestra cinta métrica, hilo, tijera, recordando que esto lo haré a mano. Lo que procederé a realizar será medir en la tela la medida de la cabeza de mi hija para que la medida pueda ser la exacta y el gorro no le vaya a quedar ni tan ancho ni tan apretado. Entonces procederé a cortar un cuadrado con la misma medida que le tomé a ella, el cuadrado llevará la misma medida en todos sus lados.
Step 1: The materials we will need to make this cute hat will be: A fabric that must be hard, because for a type of hat like this we can not use a soft fabric because it will not be as it should be, then we will use a hard fabric, in this case I chose a nice color, lilac, our tape measure, thread, scissors, remembering that I will do this by hand. What I will proceed to do is to measure on the fabric the size of my daughter's head so that the measurement can be exact and the hat will not be too wide or too tight. Then I will proceed to cut a square with the same measurement I took for her, the square will have the same measurement on all sides.
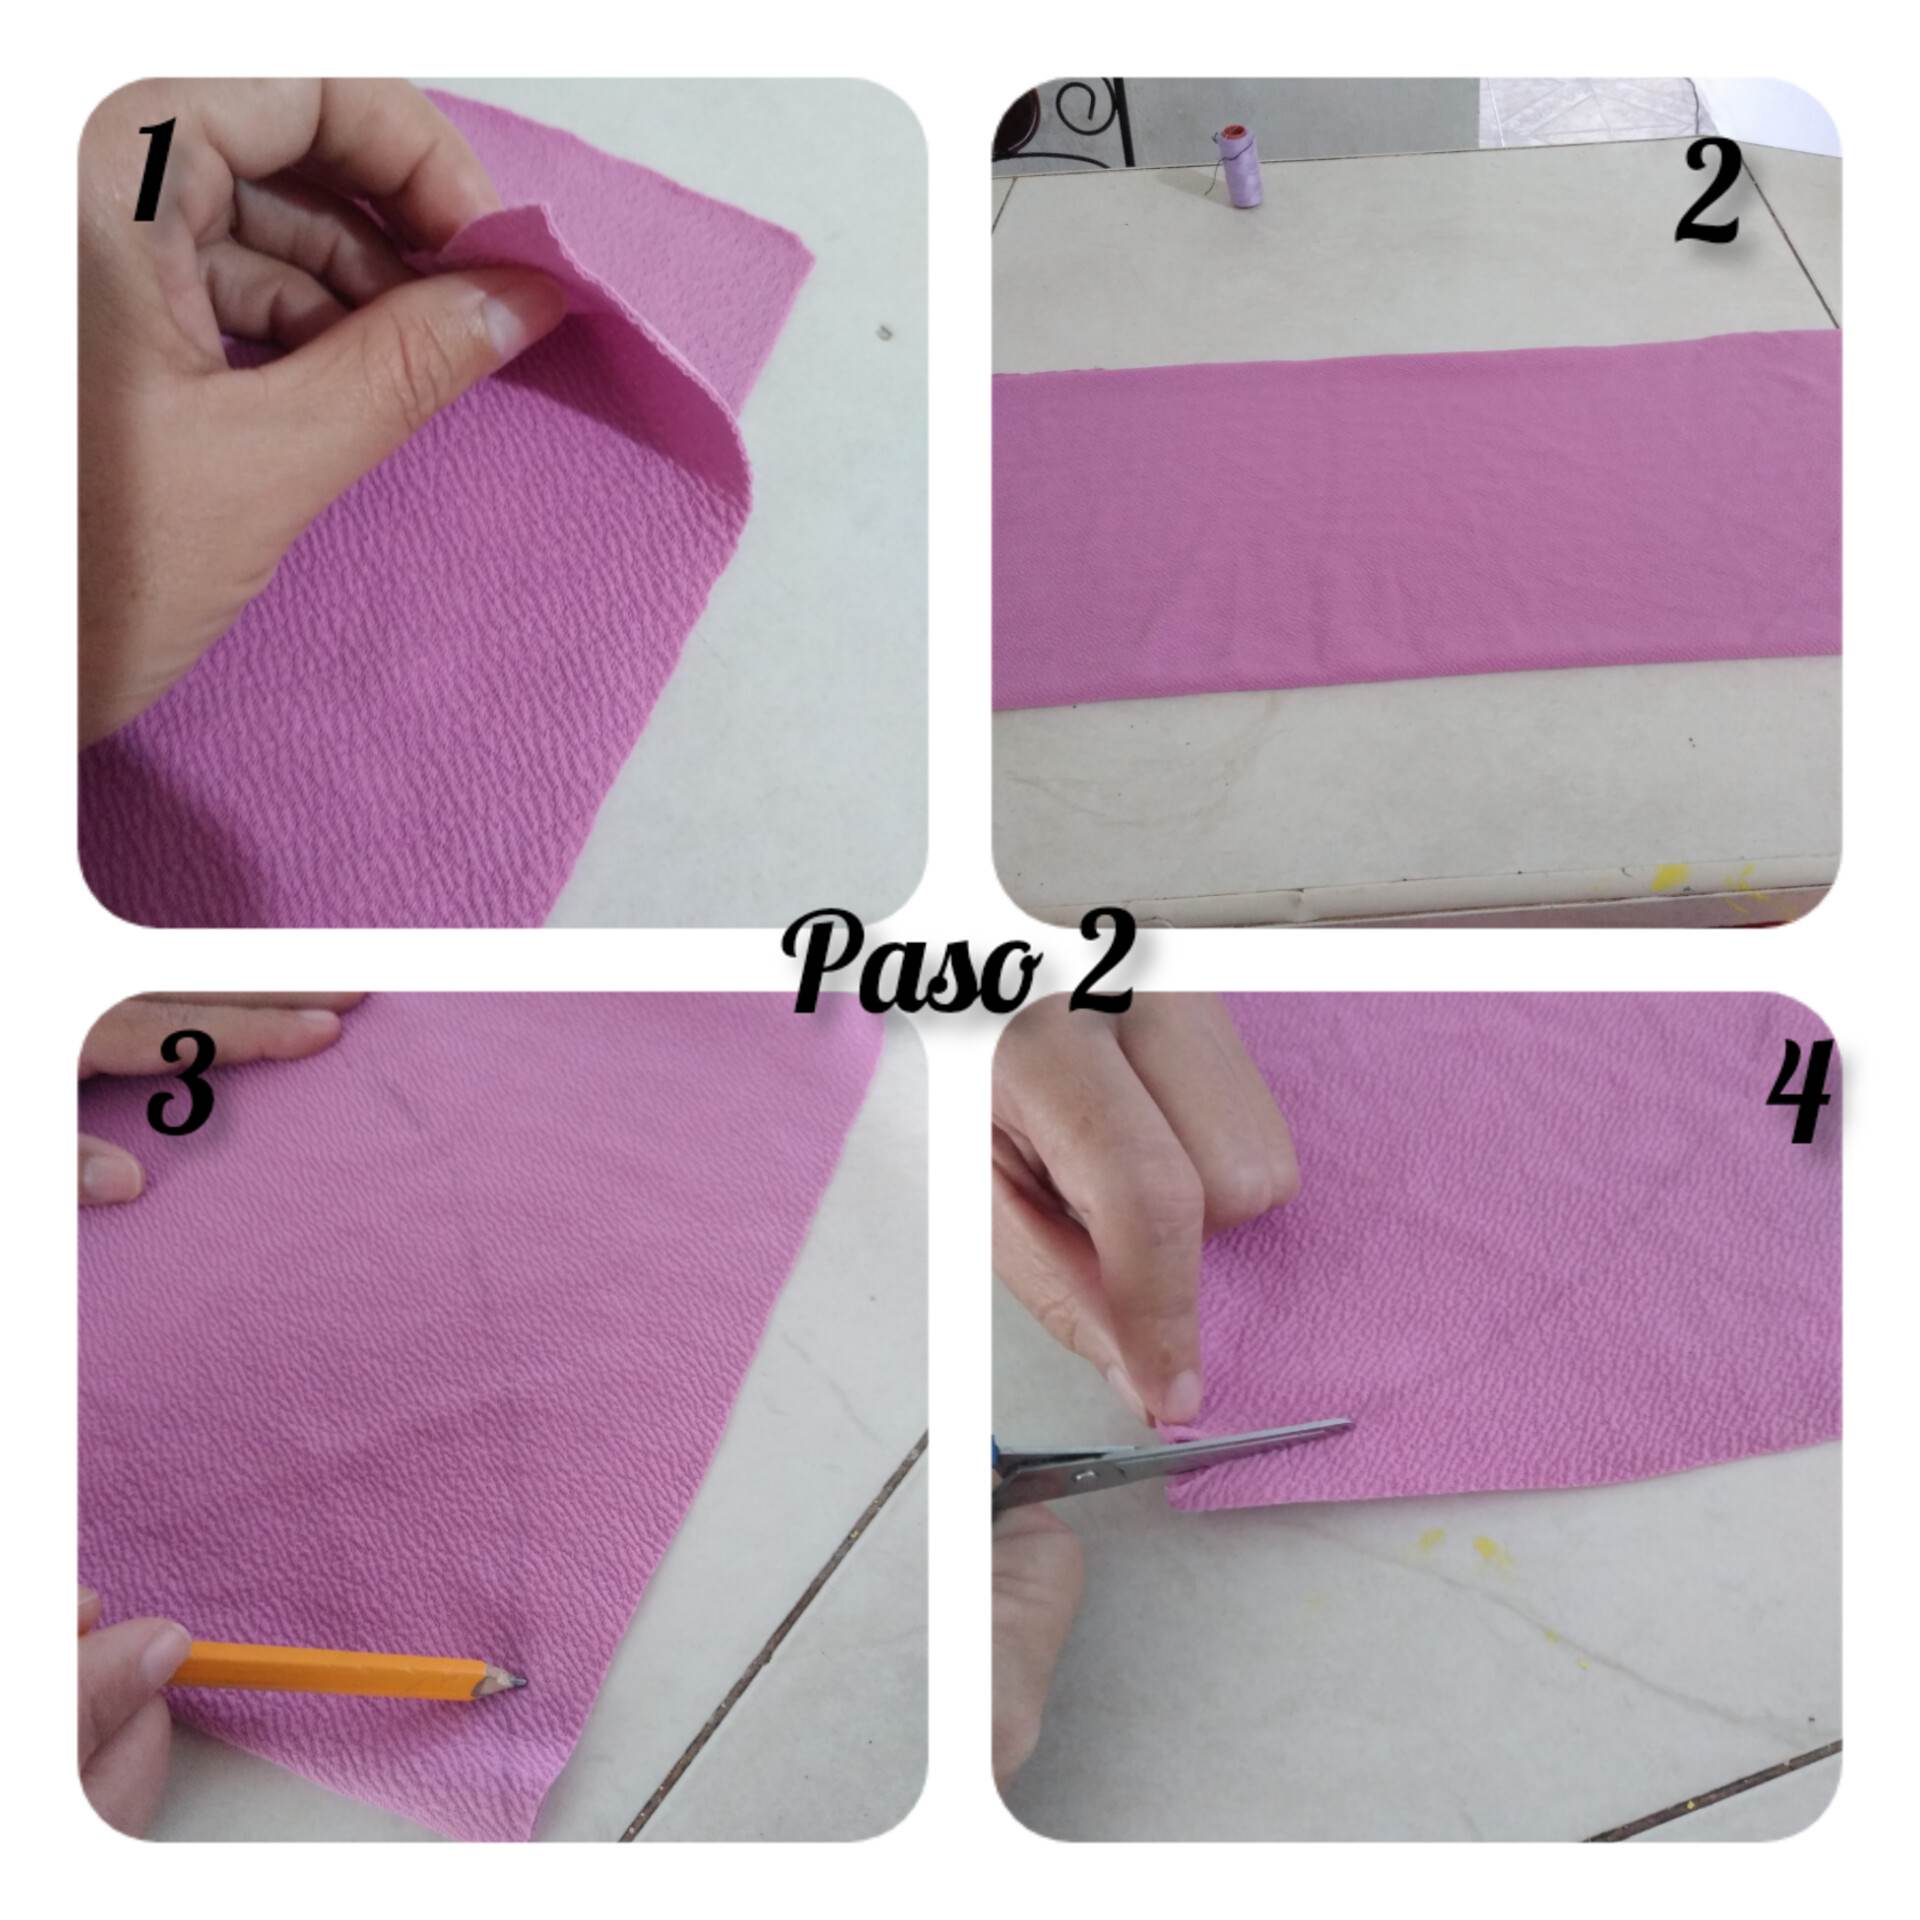
Paso 2: Lo que haremos ahora será proceder a dibujar en la figura cuadrada que ya habíamos cortado, procederemos a marcar con un lápiz en la parte de arriba la forma ovalada o circular, y esto lo procederemos a cortar.
Step 2: What we will do now is to proceed to draw on the square figure that we had already cut, we will proceed to mark with a pencil at the top the oval or circular shape, and this we will proceed to cut.
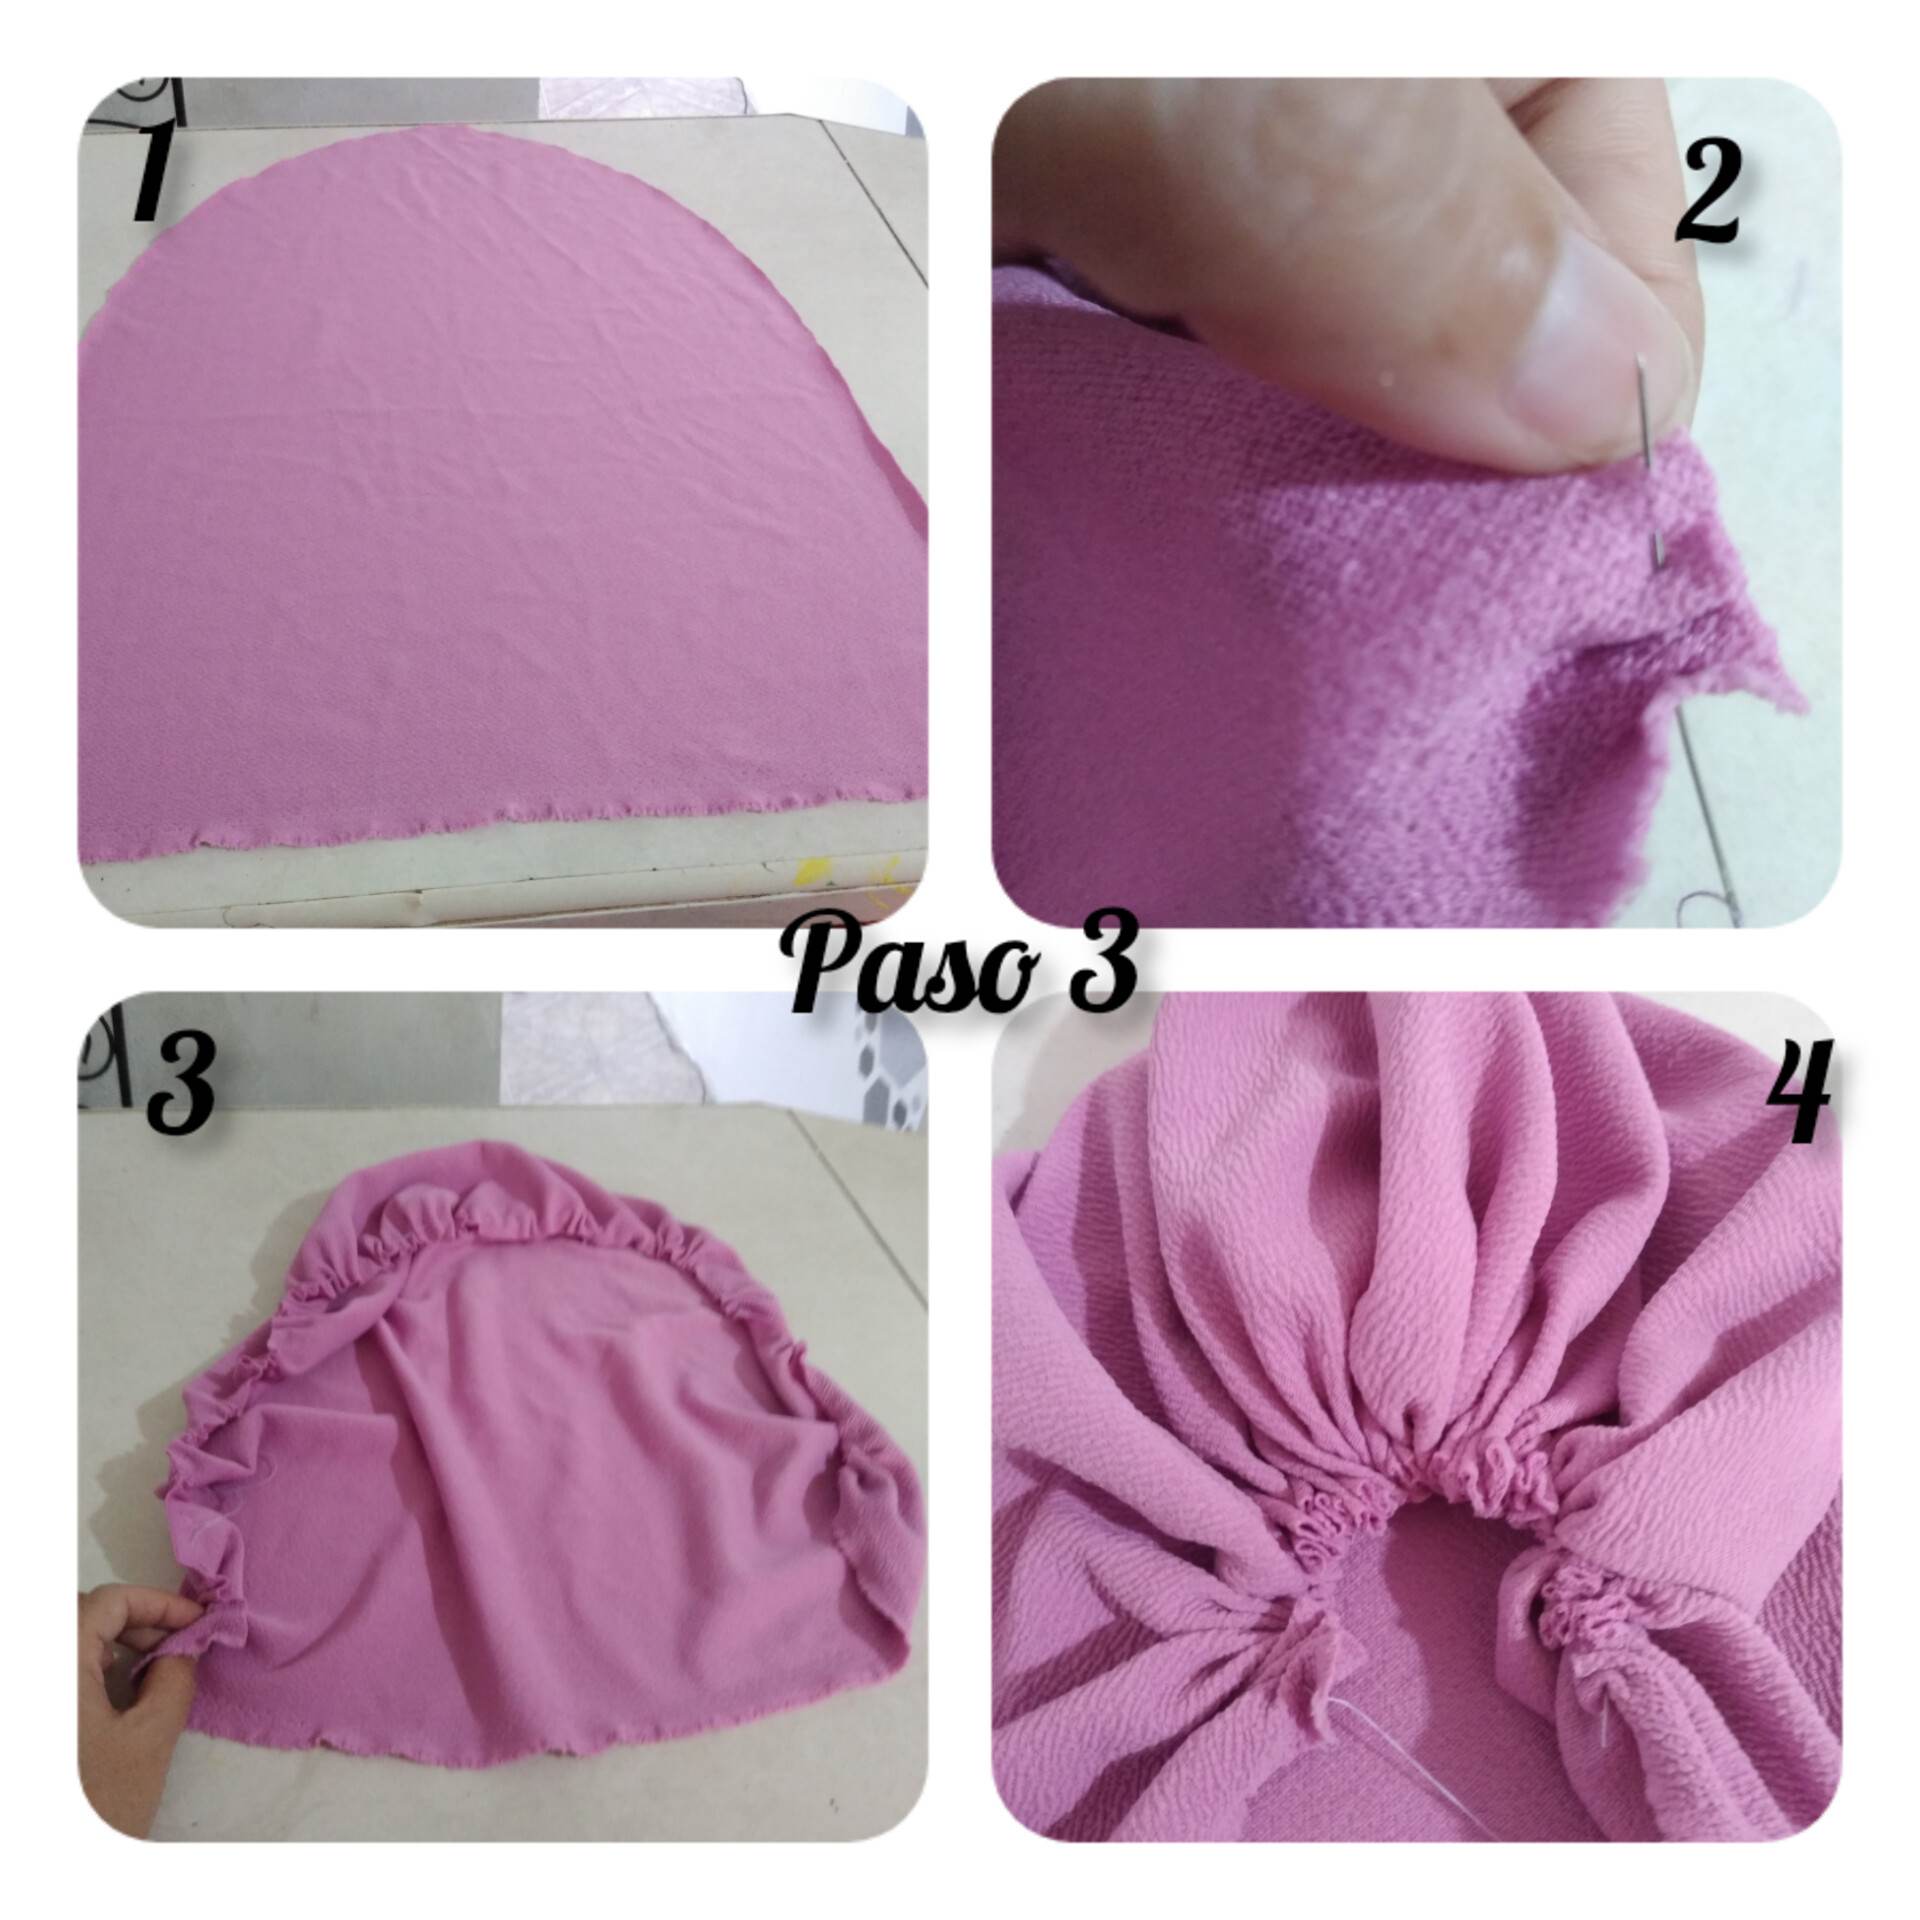
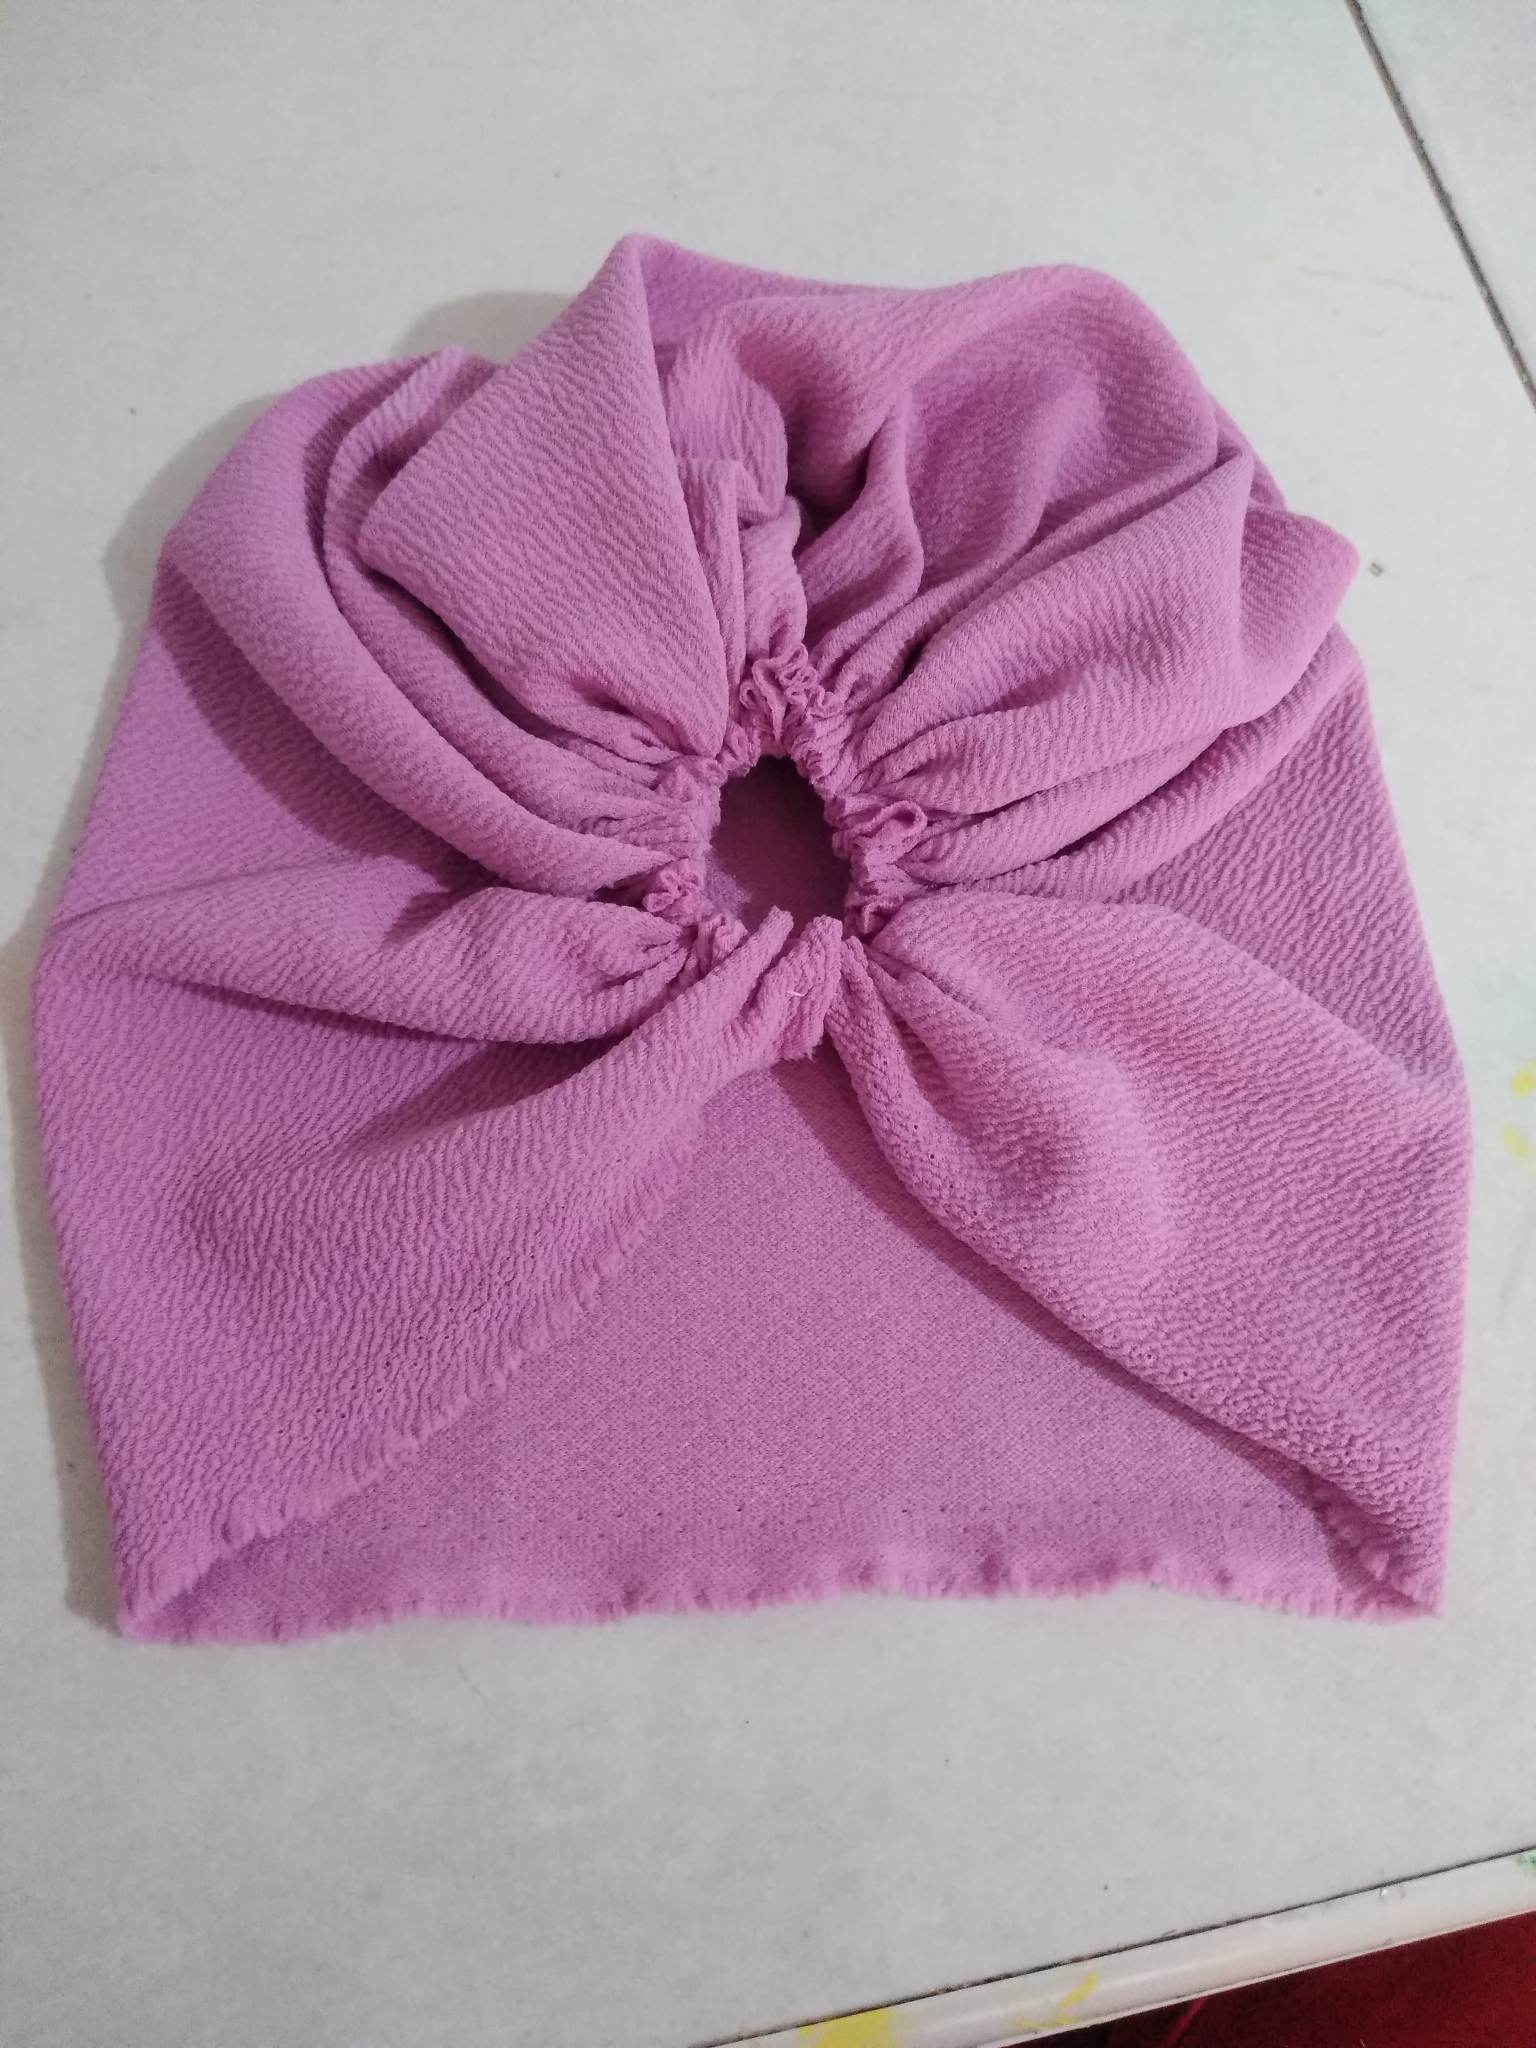
Paso 3: así debe quedar la pieza que usaremos para hacer nuestro gorro, lo que haremos ahora será comenzar a coser todo el borde ovalado, como lo muestra la imagen, esto nos ayudará a arruchar nuestro gorro e irá quedando así como lo muestra la imagen, la verdad es fascinante el resultado, iremos jalando poco a poco hasta arruchar y coseremos abajo dejando así un agujero en medio y de esta manera culminamos los pasos para hacer un lindo gorro.
Step 3: this should be the piece that we will use to make our hat, what we will do now is to start sewing all the oval edge, as shown in the image, this will help us to wrinkle our hat and it will be as shown in the image, the truth is fascinating the result, we will pull little by little until wrinkling and sew down leaving a hole in the middle and thus culminate the steps to make a nice hat.
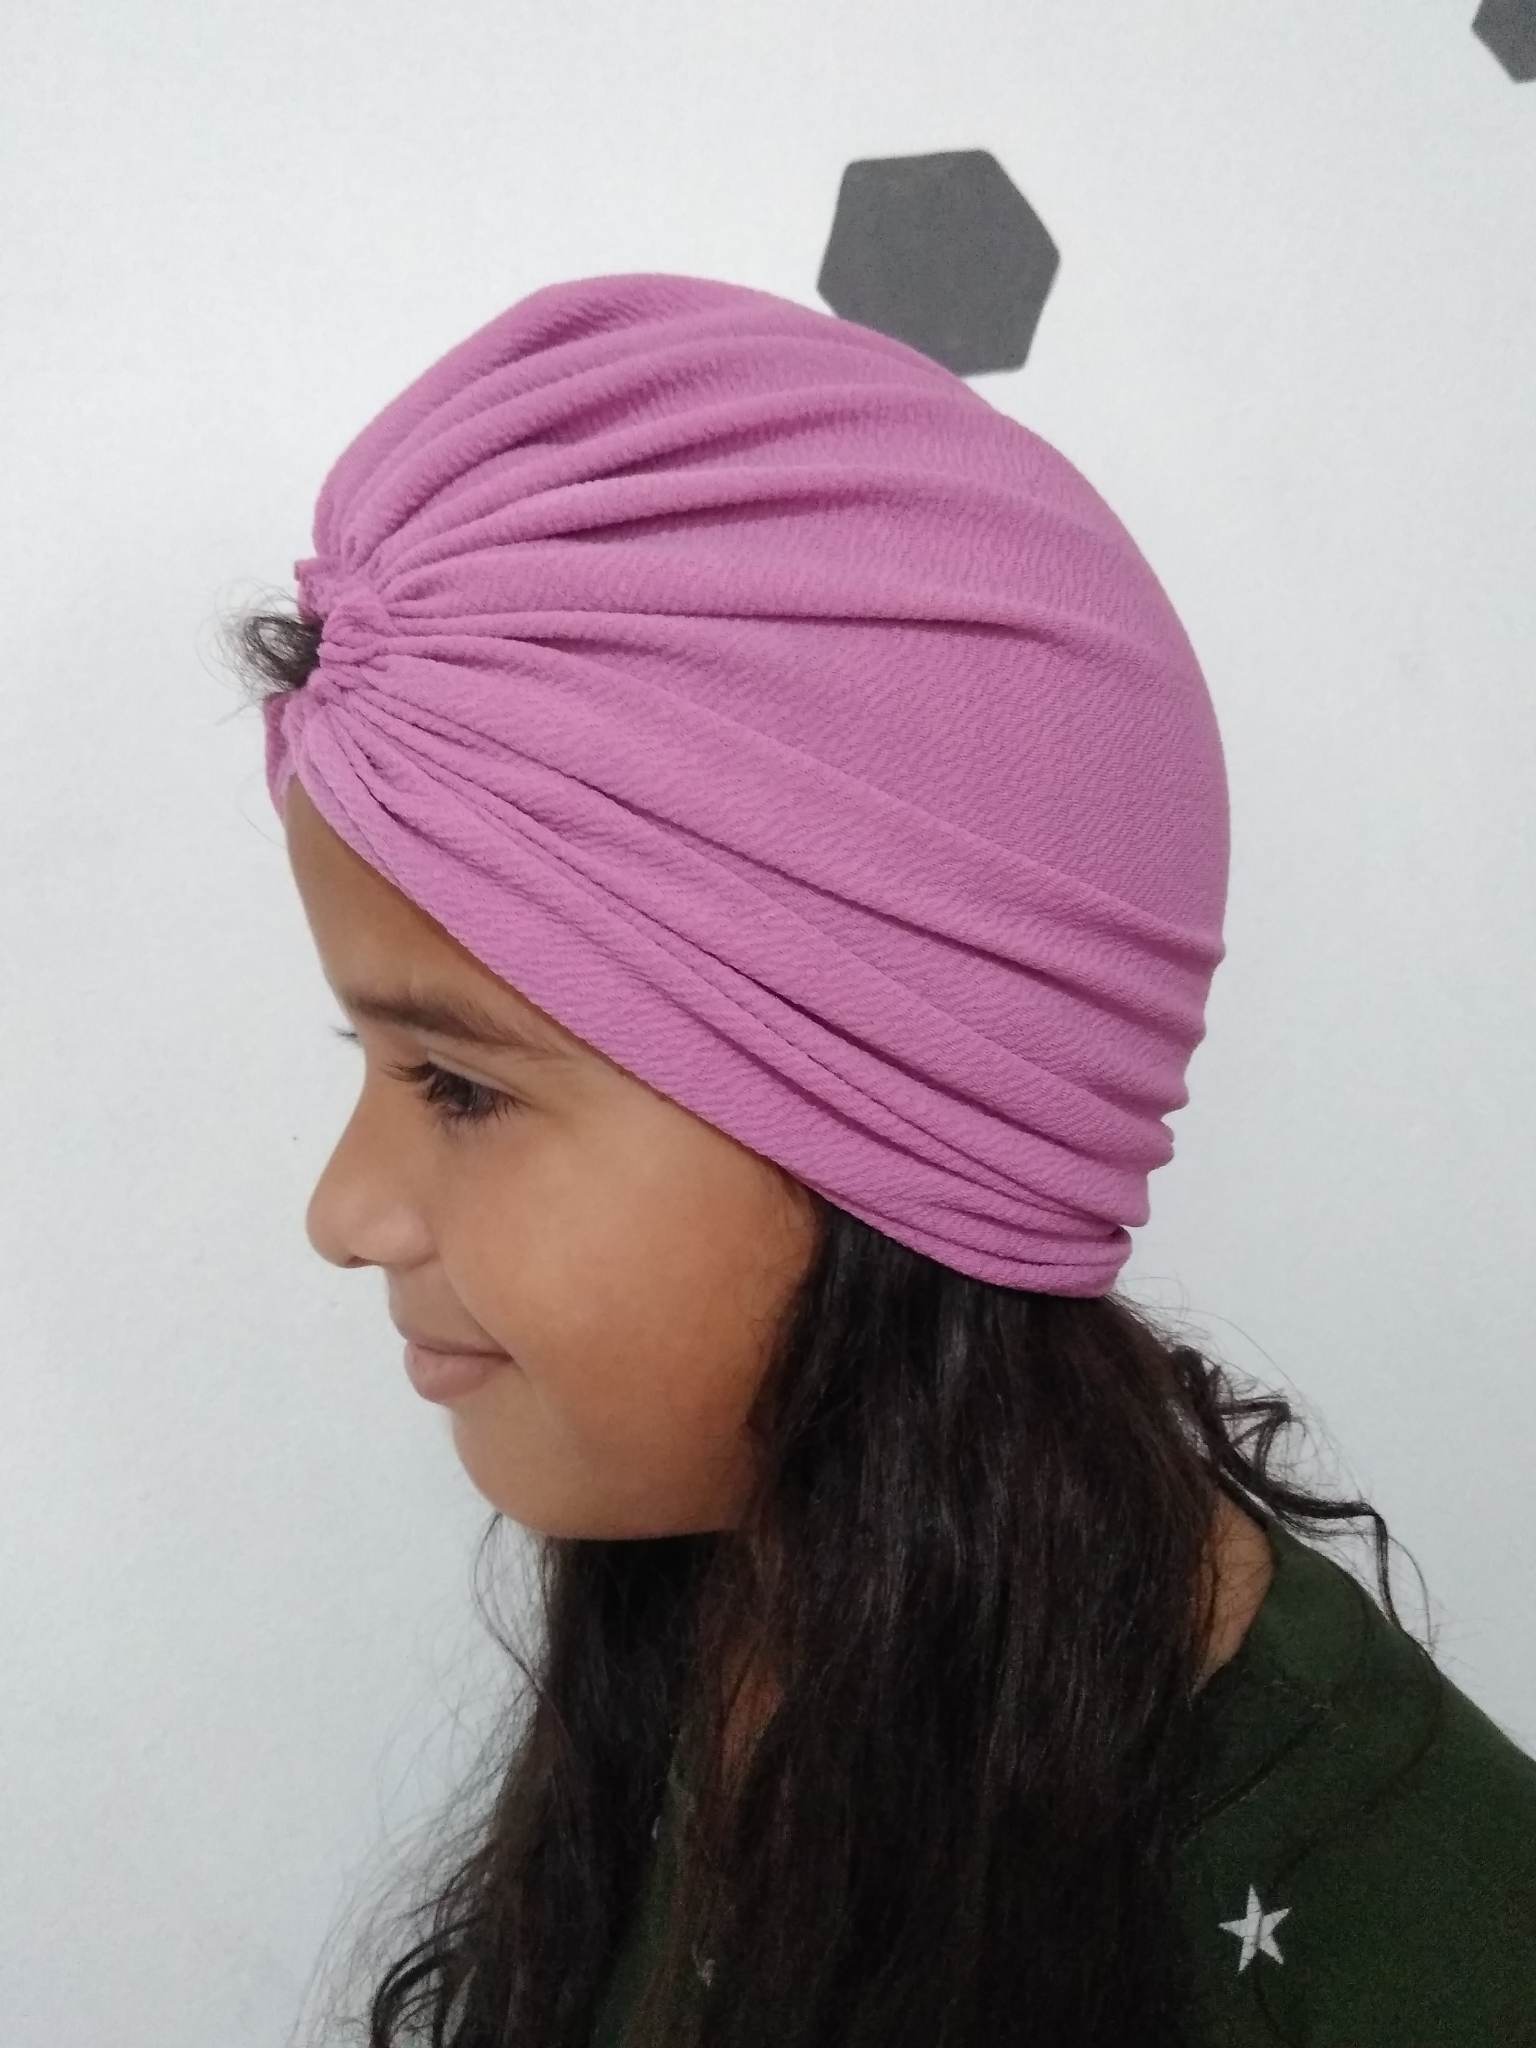
Final Result.


That is so beautiful. Looks to fit her quite nicely. ❤️
!discovery 30
!diy
This post was shared and voted inside the discord by the curators team of discovery-it
Join our Community and follow our Curation Trail
Discovery-it is also a Witness, vote for us here
Delegate to us for passive income. Check our 80% fee-back Program
Thank you for sharing this post on HIVE!
Your content got selected by our fellow curator stevenson7 & you just received a little thank you upvote from us for your great work! Your post will be featured in one of our recurring compilations which are aiming to offer you a stage to widen your audience within the DIY scene of Hive. Stay creative & HIVE ON!
Please vote for our hive witness <3
https://twitter.com/1480885722559102976/status/1633123625971879936
The rewards earned on this comment will go directly to the people( @semarekha ) sharing the post on Twitter as long as they are registered with @poshtoken. Sign up at https://hiveposh.com.
It's really a great idea and you have completed the entire steps very efficiently, well done.
Indeed you have done a great job. Weldone. I love the color and it look so beautiful