[ESP-ENG] Beautiful shirt design - December and its Surprises | Hermoso diseño de camisa - Diciembre y sus Sorpresas
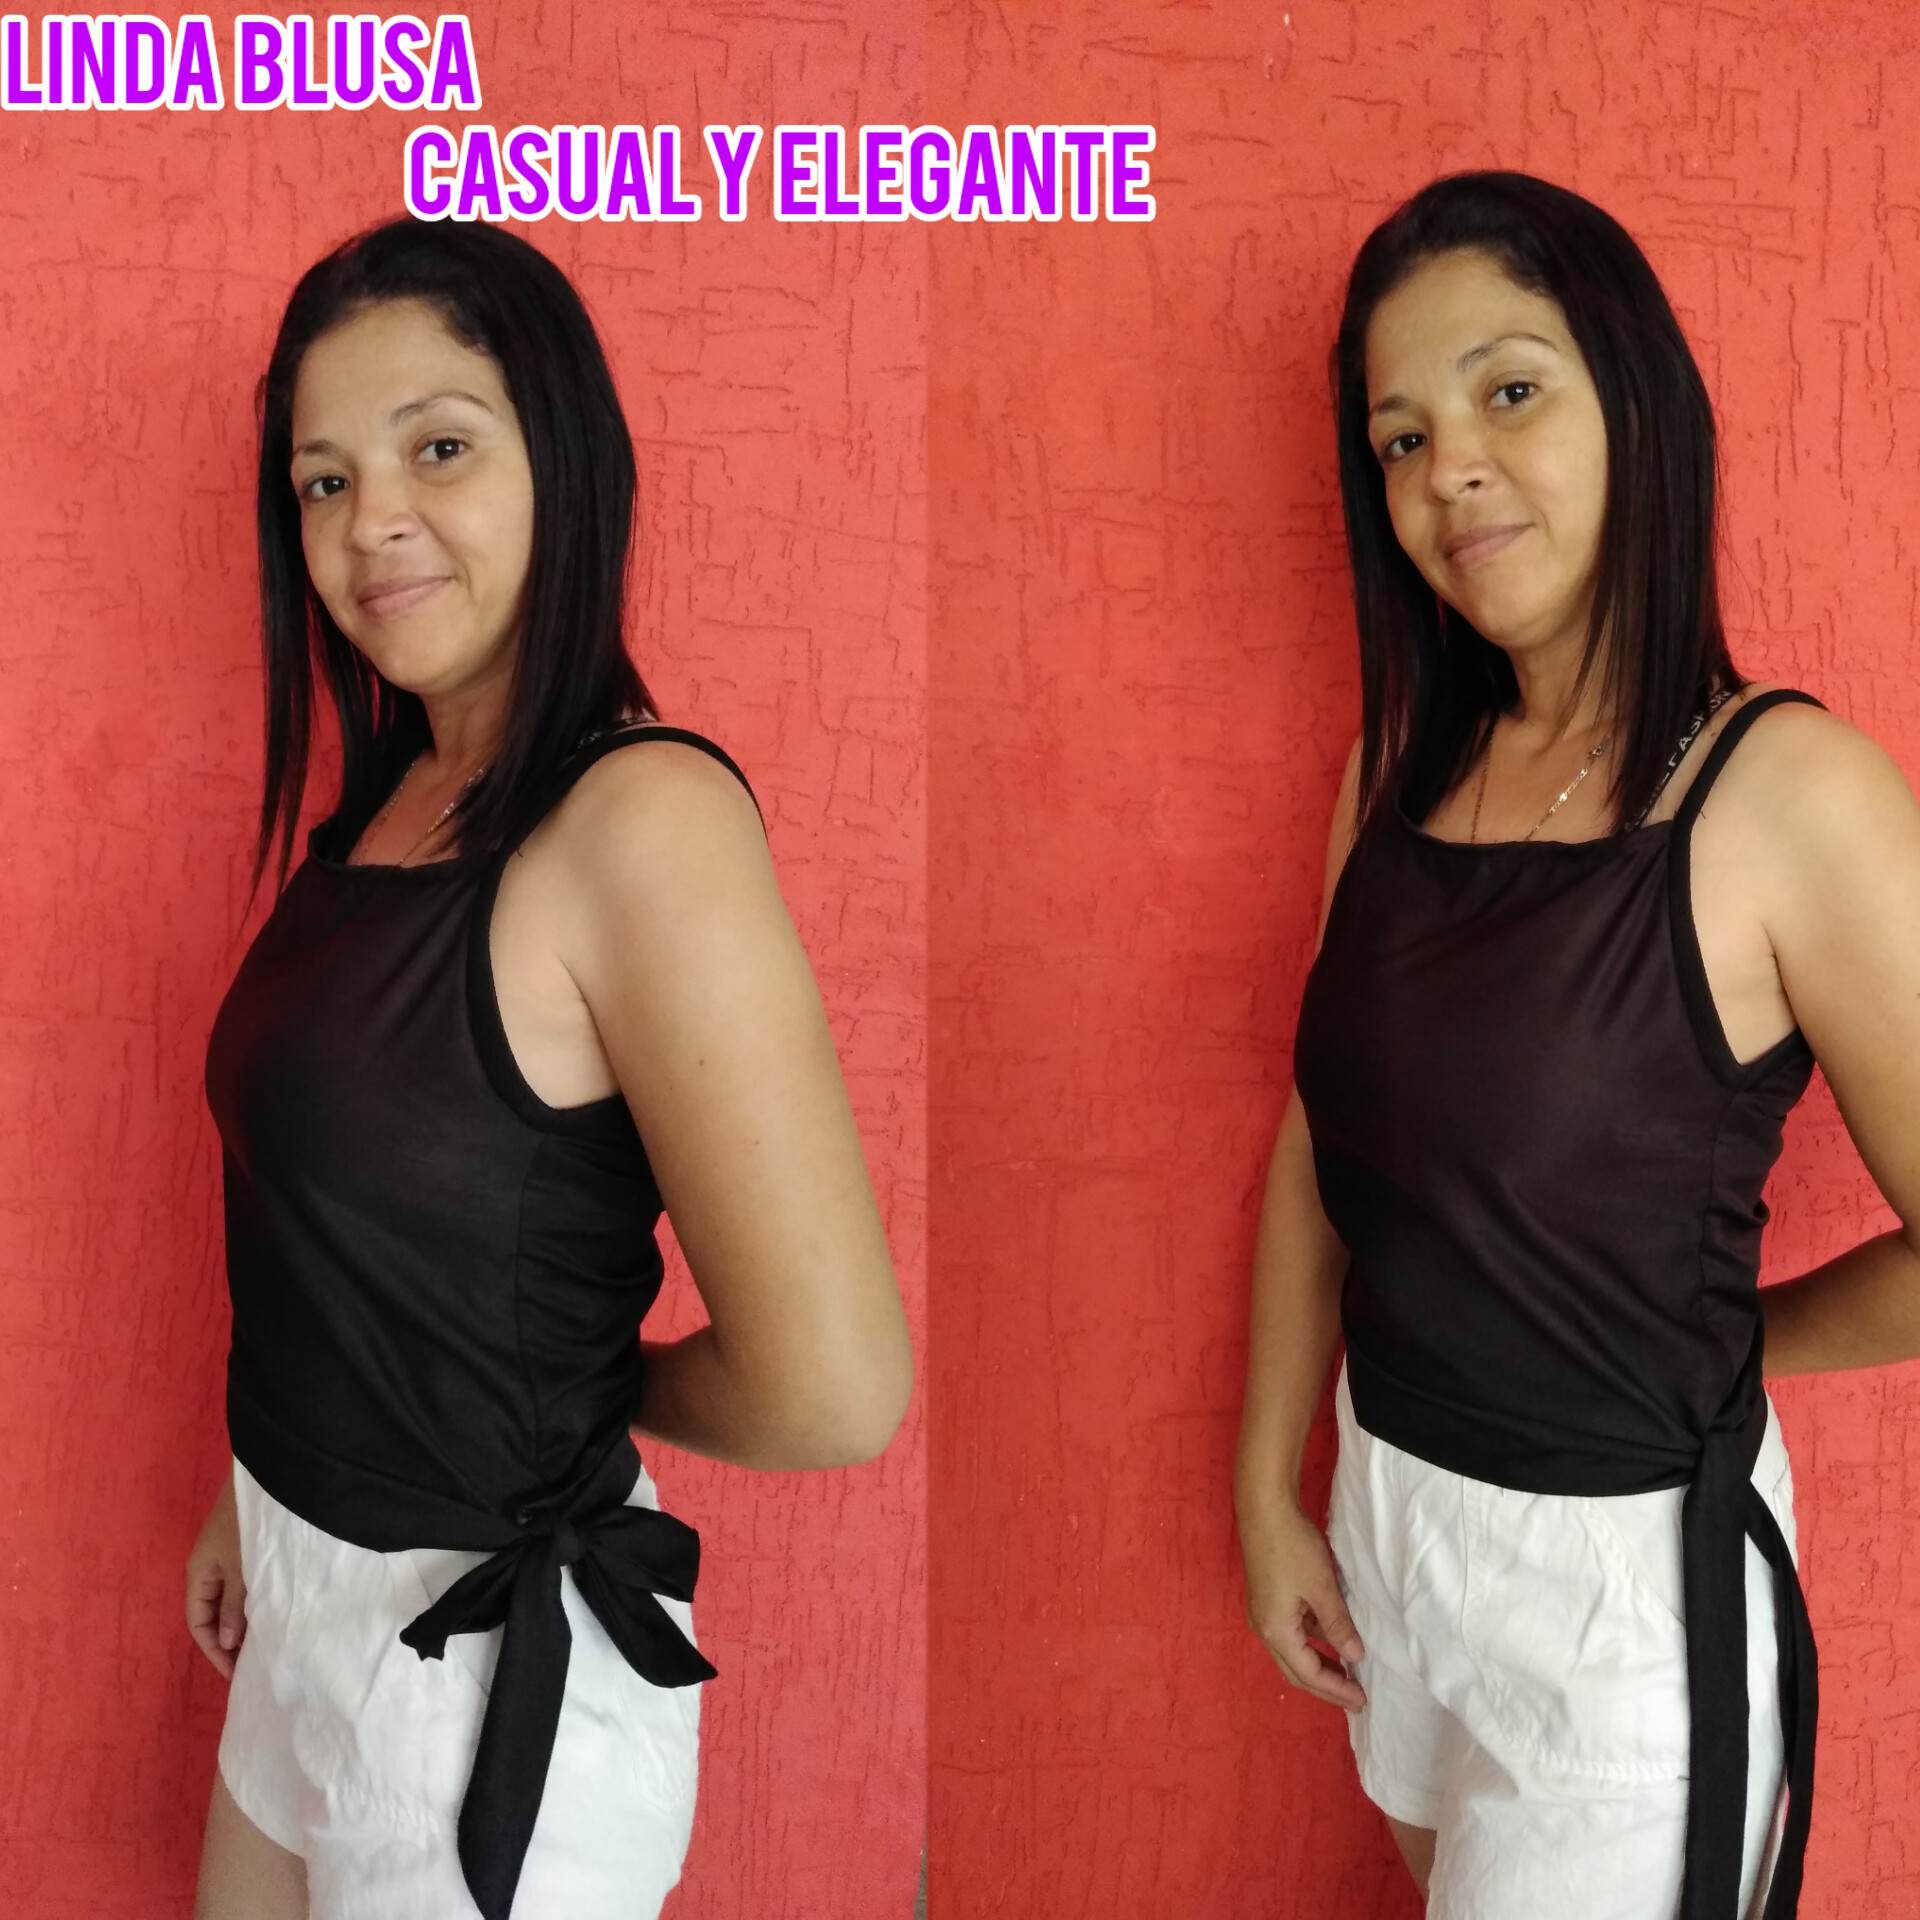
Hello to all my hive friends, I hope you all are well, today I come again with you all to show you a small tutorial on how to make a super simple shirt but with a different model at the bottom, it is super cute and different from the others, so let's see the step by step:

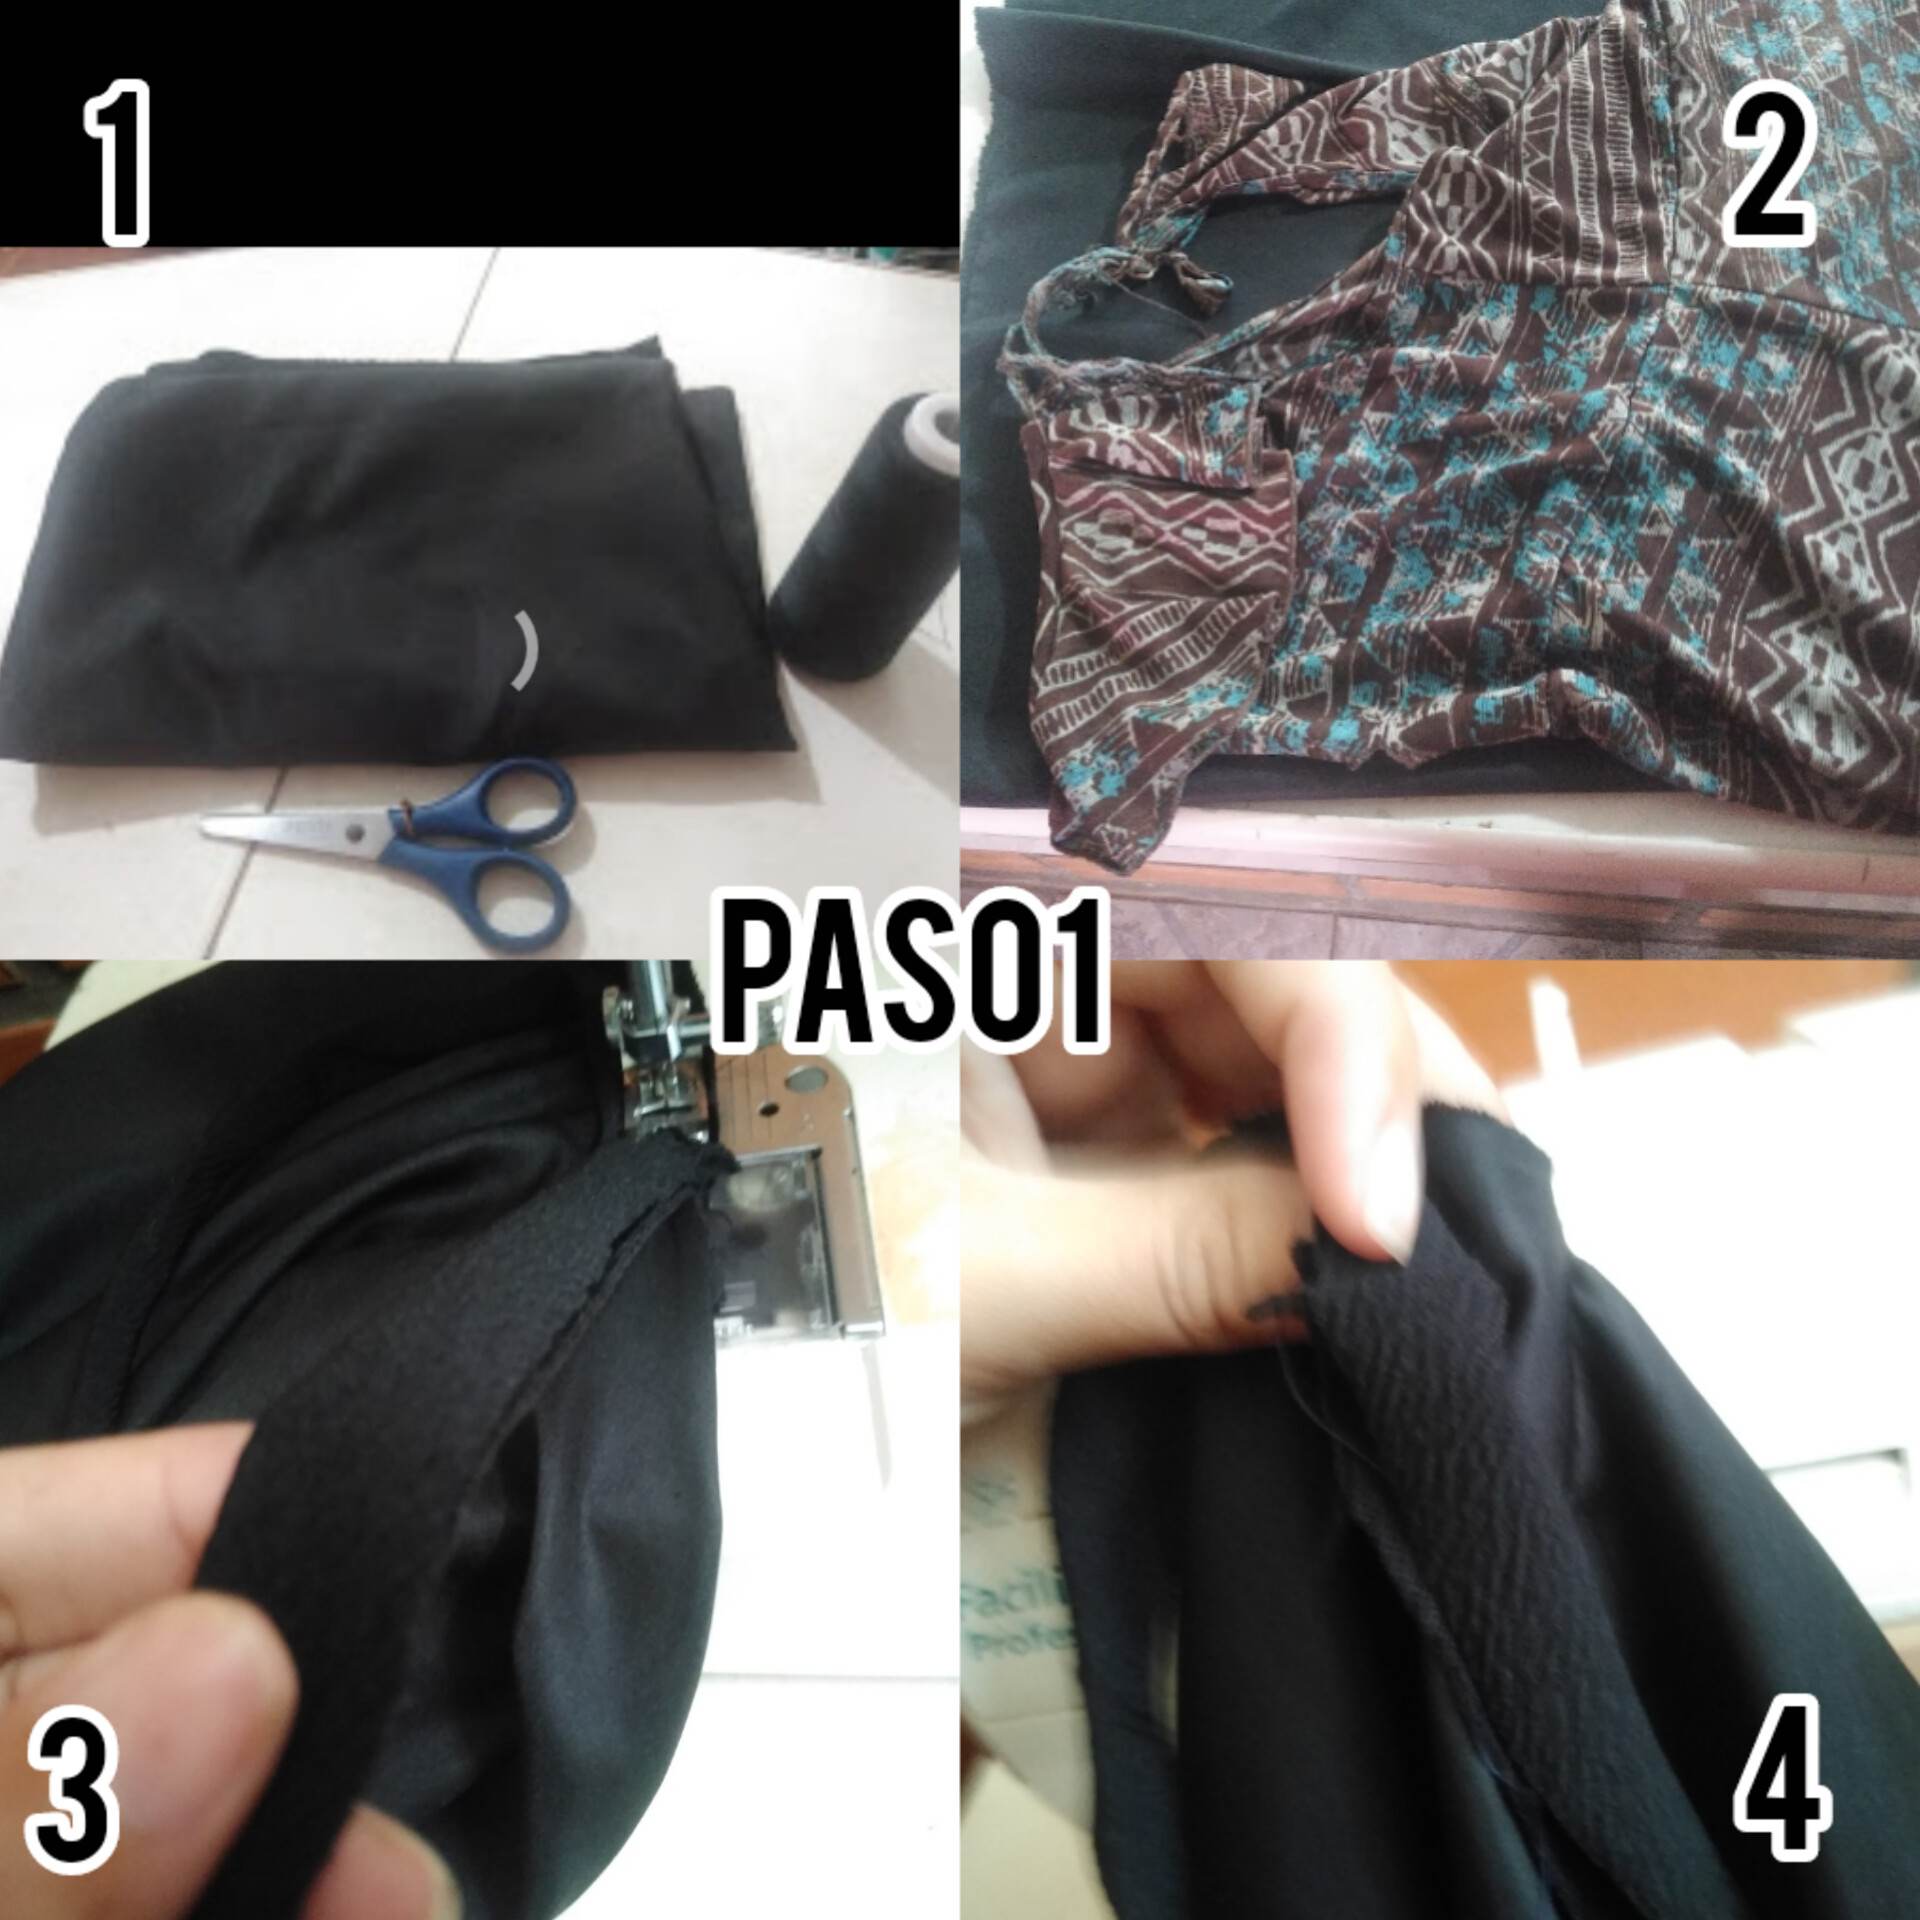
Paso 1: Vamos a necesitar un metro de tela, de la tela de nuestra preferencia, y del color de nuestra preferencia, procuremos que sea una tela dura para que pueda dar vida a la camisa con el soporte a la vista, tijera e hilo. Procederemos a usar una medida para cortar nuestra camisa, luego de ya tener las piezas cortadas que son la parte delantera y la trasera, los tiros de la camisa y toda la tira que irá en el ruedo de la camisa y formará como un lazo. Vamos a coser primeramente con cuidado los tiros de la camisa.
Step 1: We will need a meter of fabric, the fabric of our preference, and the color of our preference, let's make sure it is a hard fabric so it can give life to the shirt with the support in sight, scissors and thread. We will proceed to use a measure to cut our shirt, after having already cut the pieces that are the front and back, the straps of the shirt and all the strip that will go in the hem of the shirt and form a loop. We are going to carefully sew the shirt straps first.
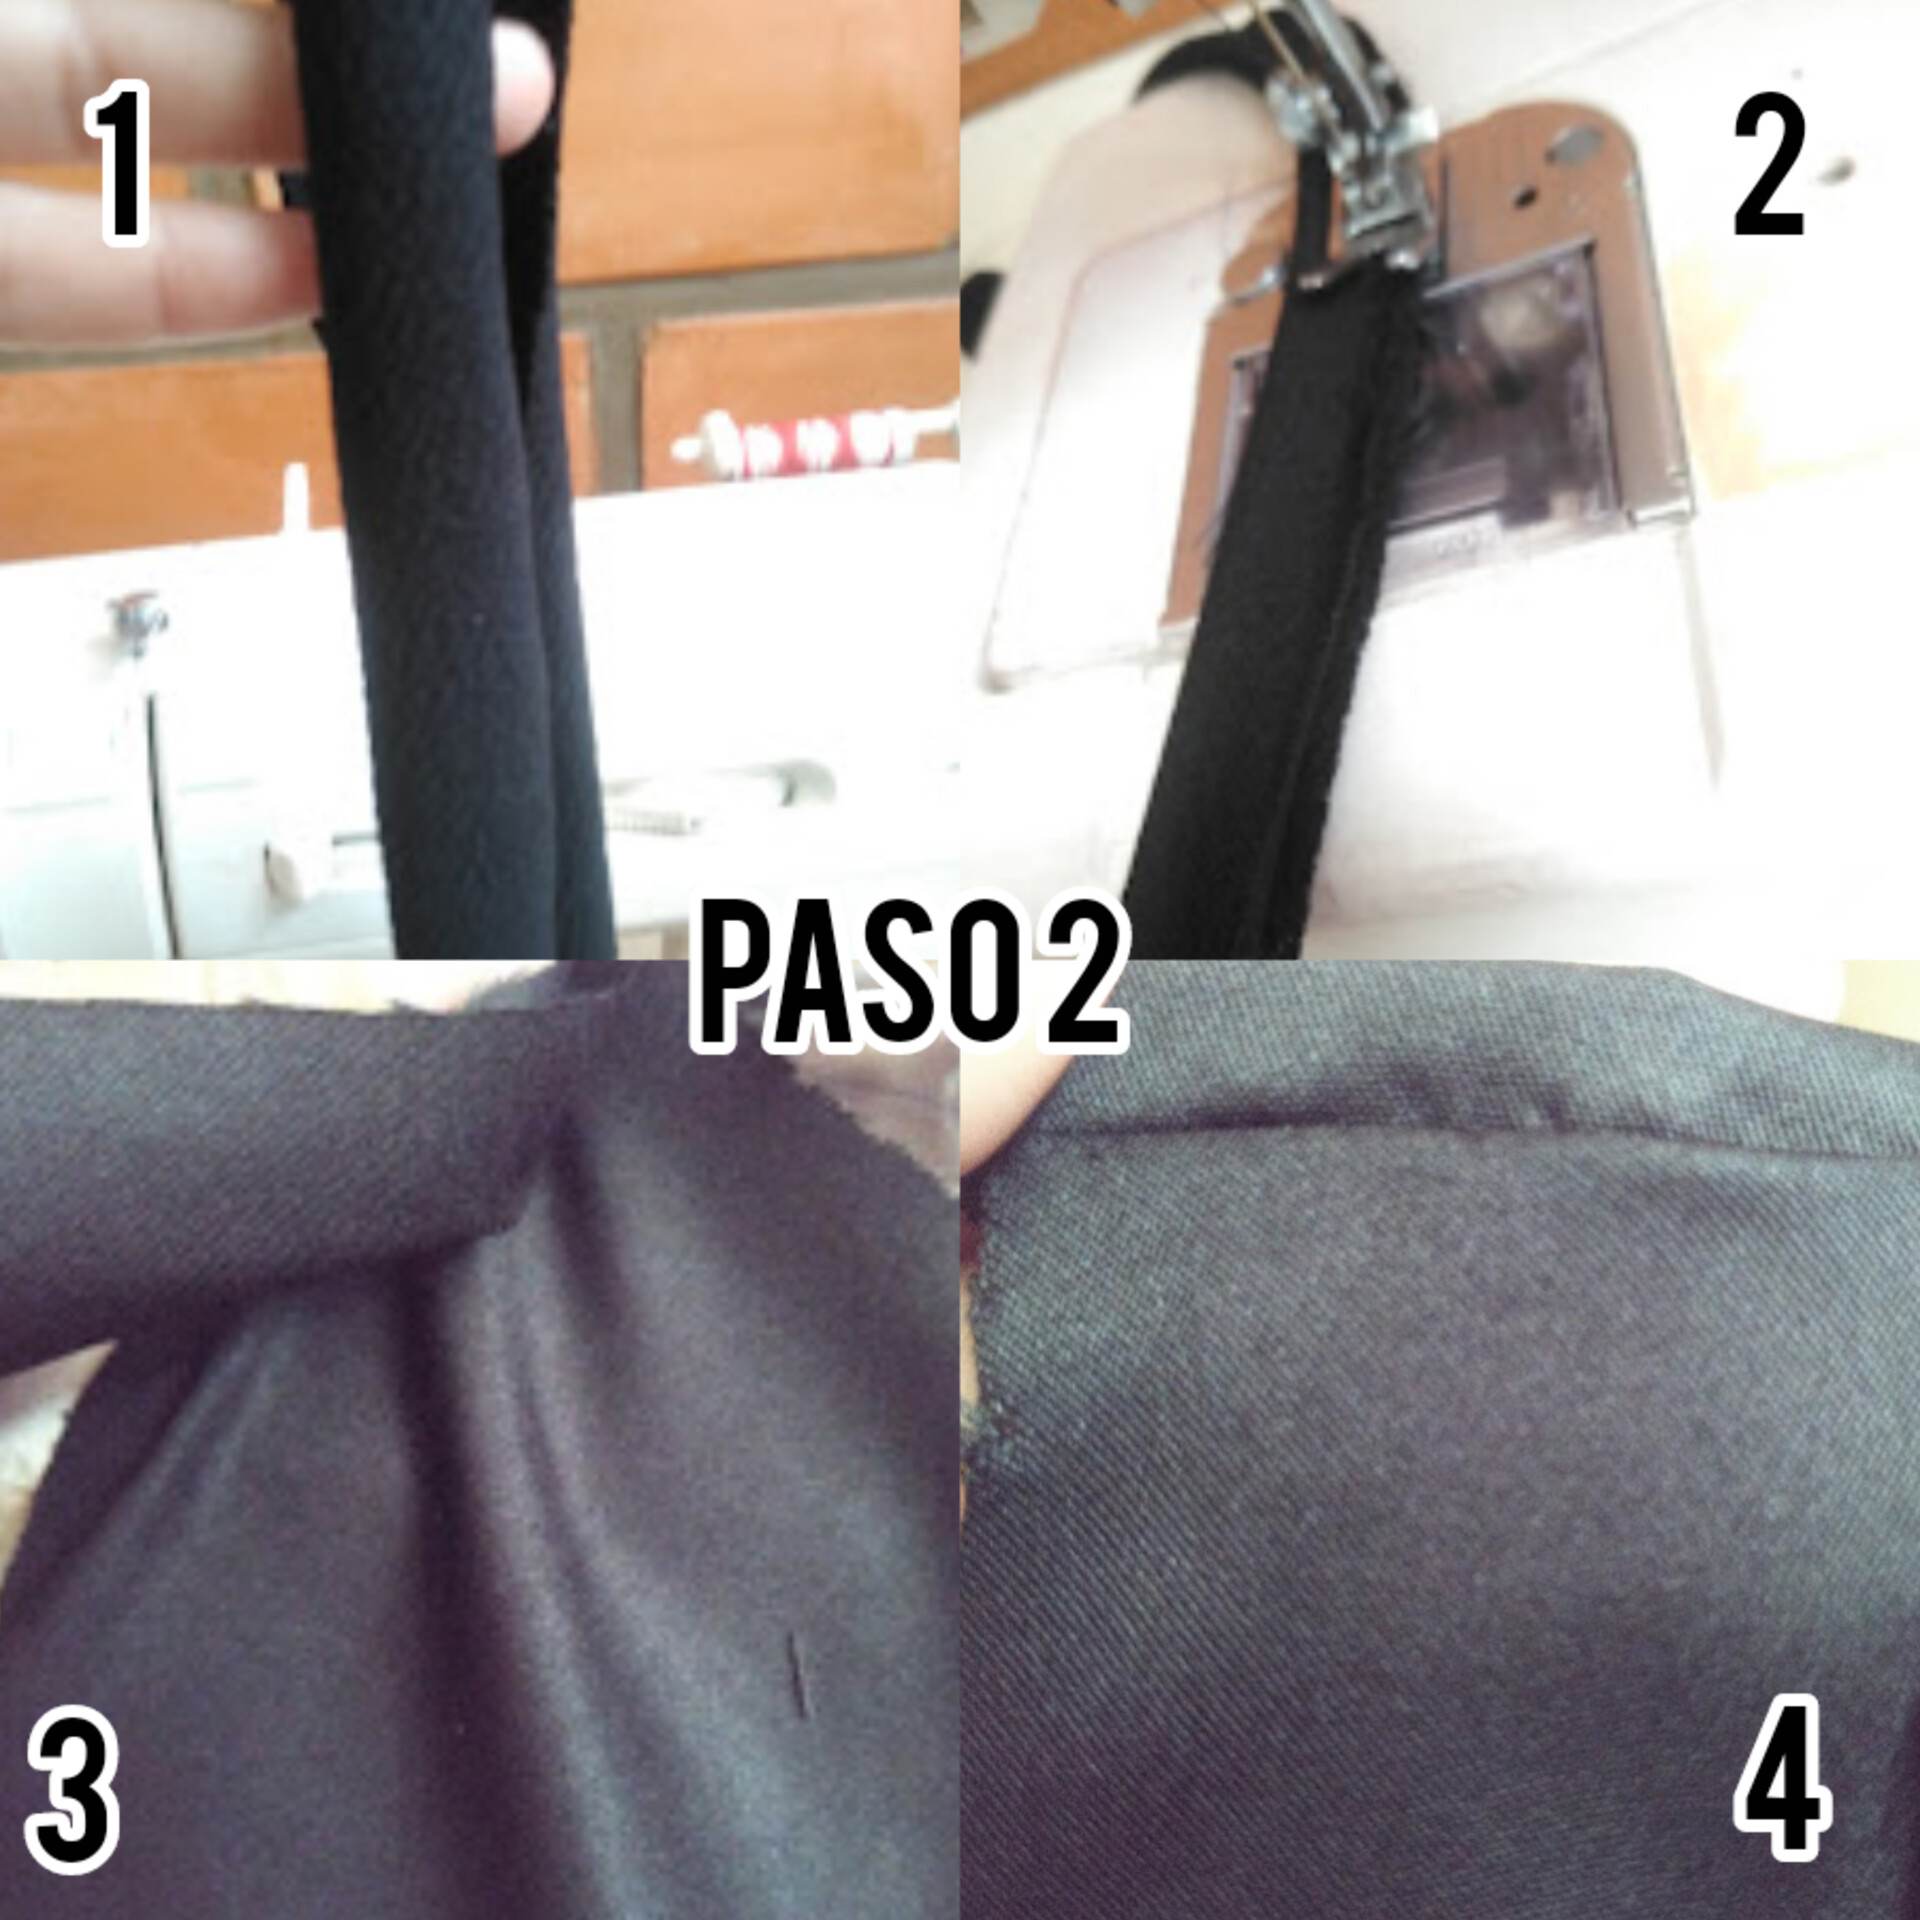
Paso 2: Coseremos los tiros de las camisas de manera que el acabado sea limpio y lindo, luego procederemos coser los tiros a la camisa ya que los hicimos primero a parte y luego lo unimos a la camisa.
Step 2: We will sew the shirt straps so that the finish is neat and nice, then we will proceed to sew the straps to the shirt since we first made them separately and then attached it to the shirt.
Paso 3: Aquí tenemos el tiro cosido a la camisa, el tiro viene de arriba y baja a la parte de la axila para que se vea mucho mas lindo el acabado, cosimos los laterales de la camisa también y vamos cerrando cada parte de la camisa.
Step 3: Here we sew the shot to the shirt, the shot comes from the top and goes down to the armpit so that the finish looks much nicer, we sew the sides of the shirt as well and we close each part of the shirt.
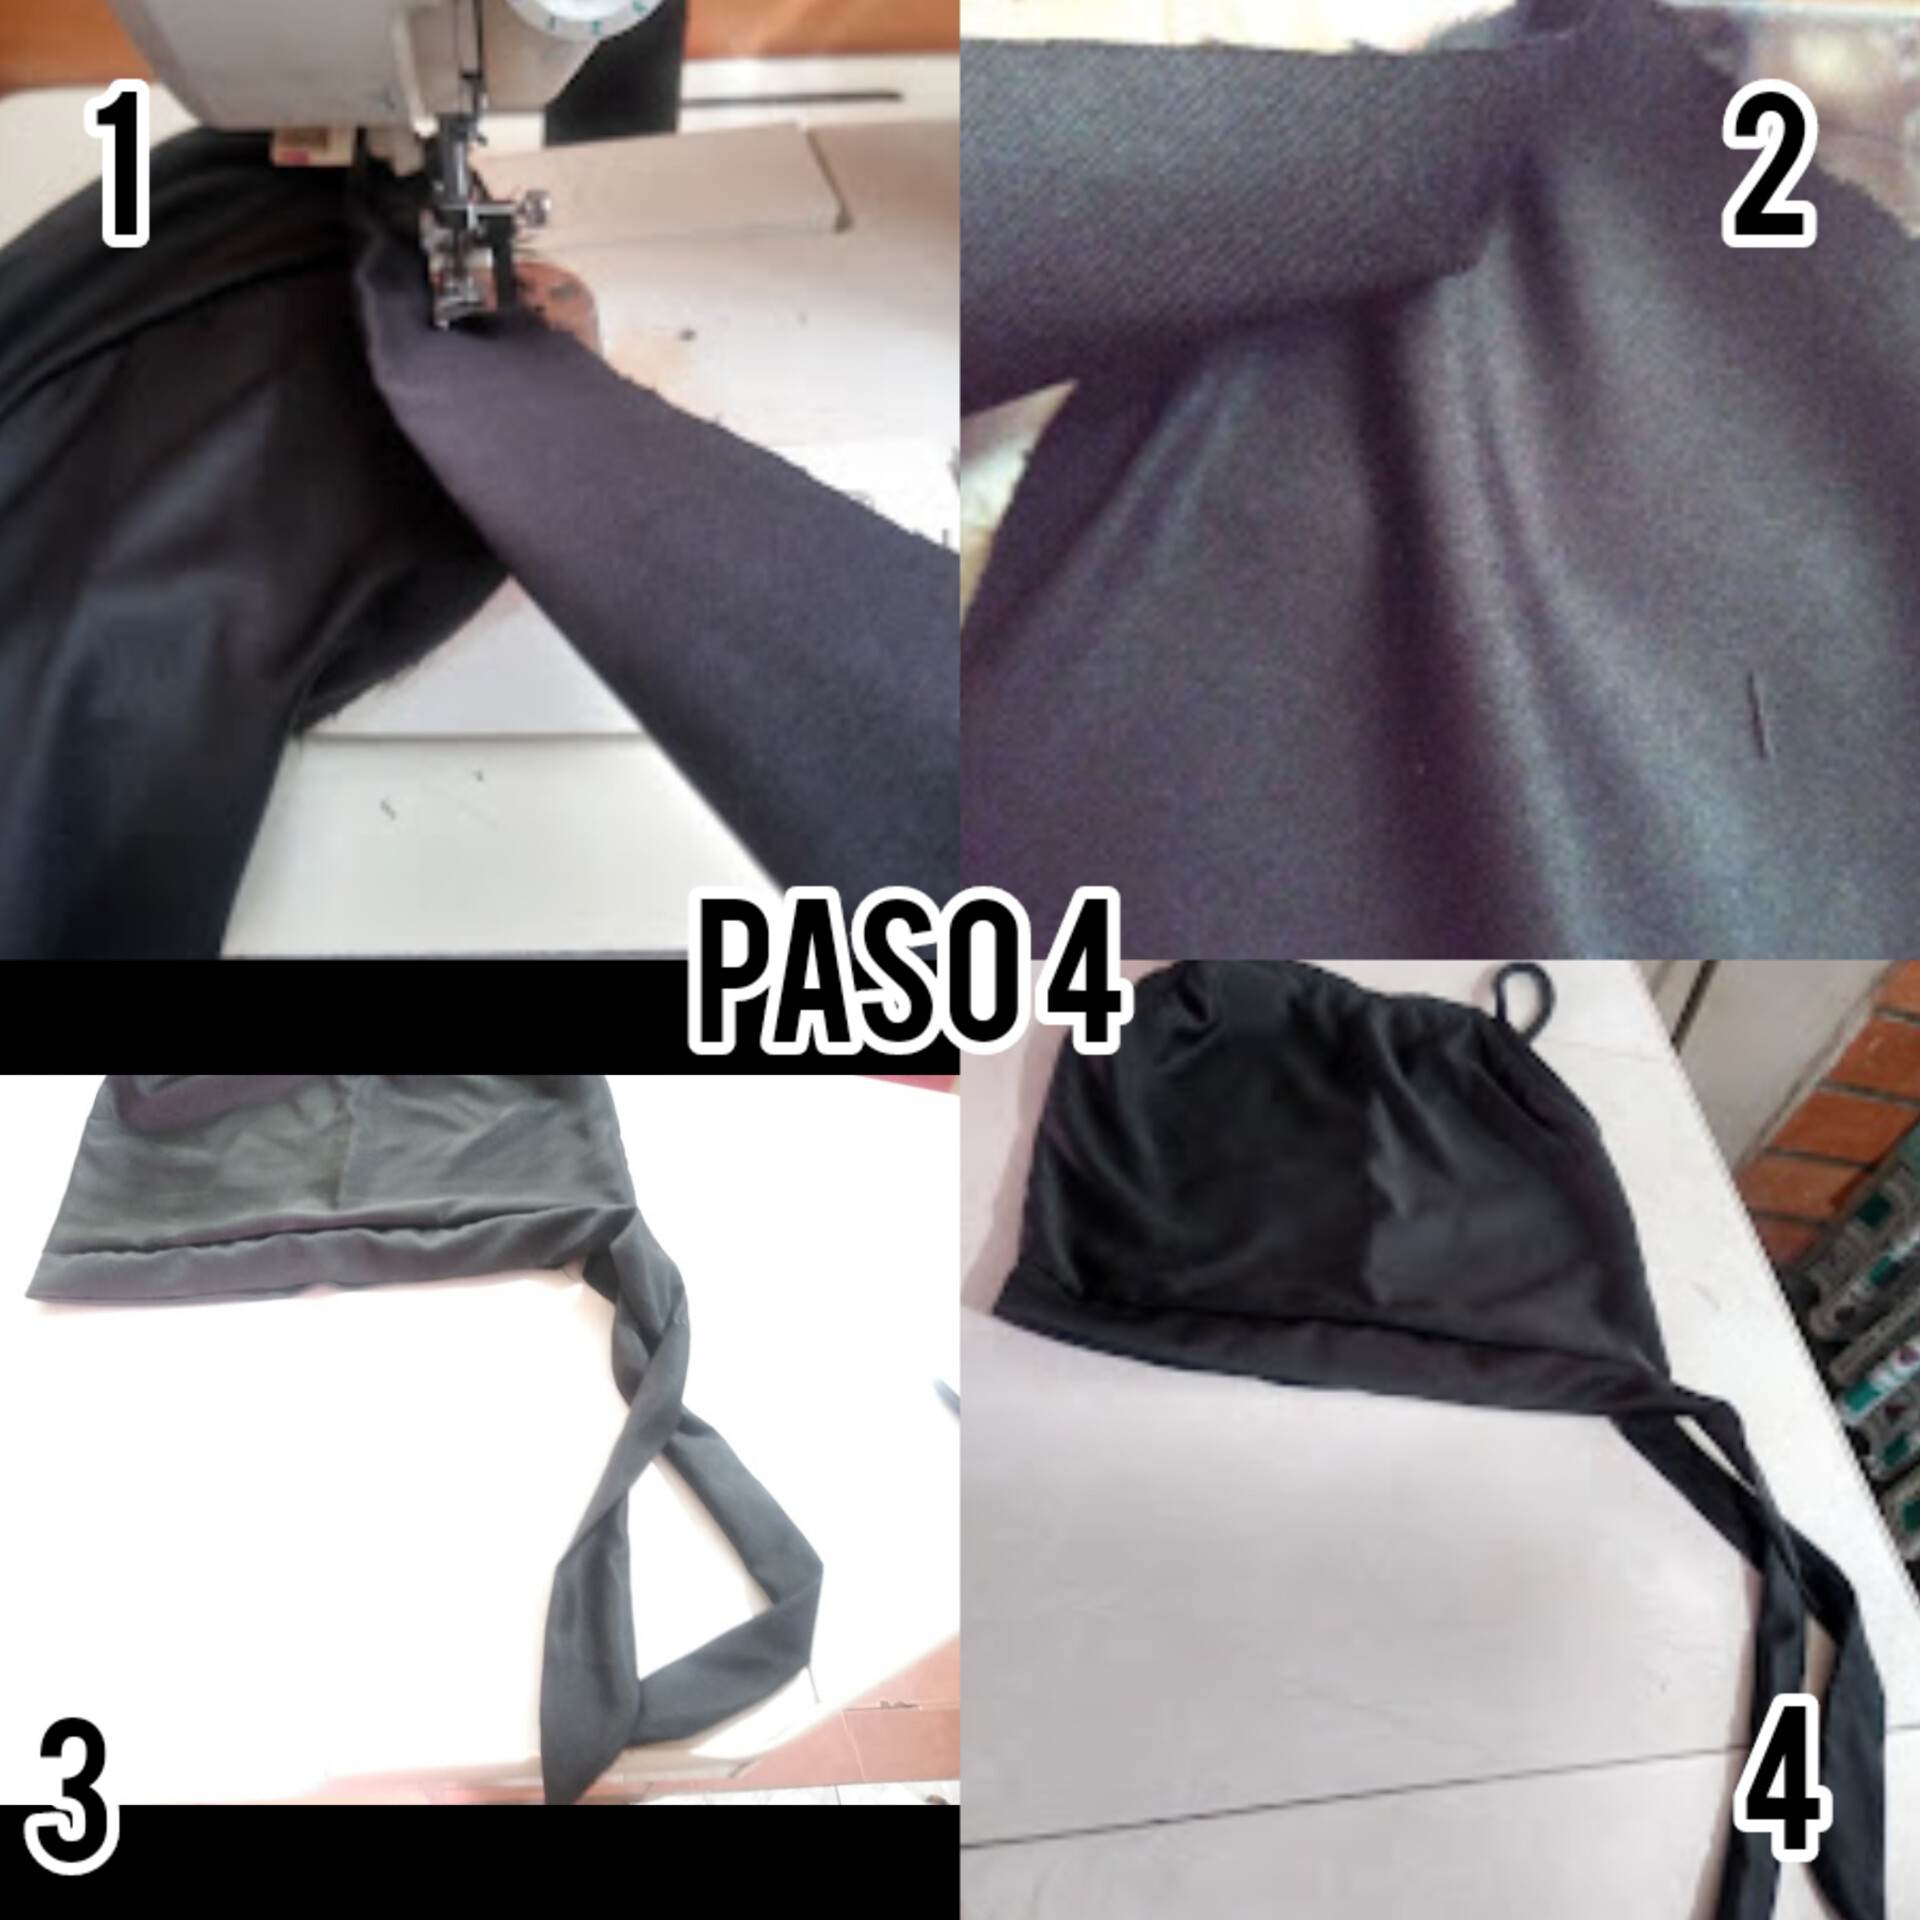
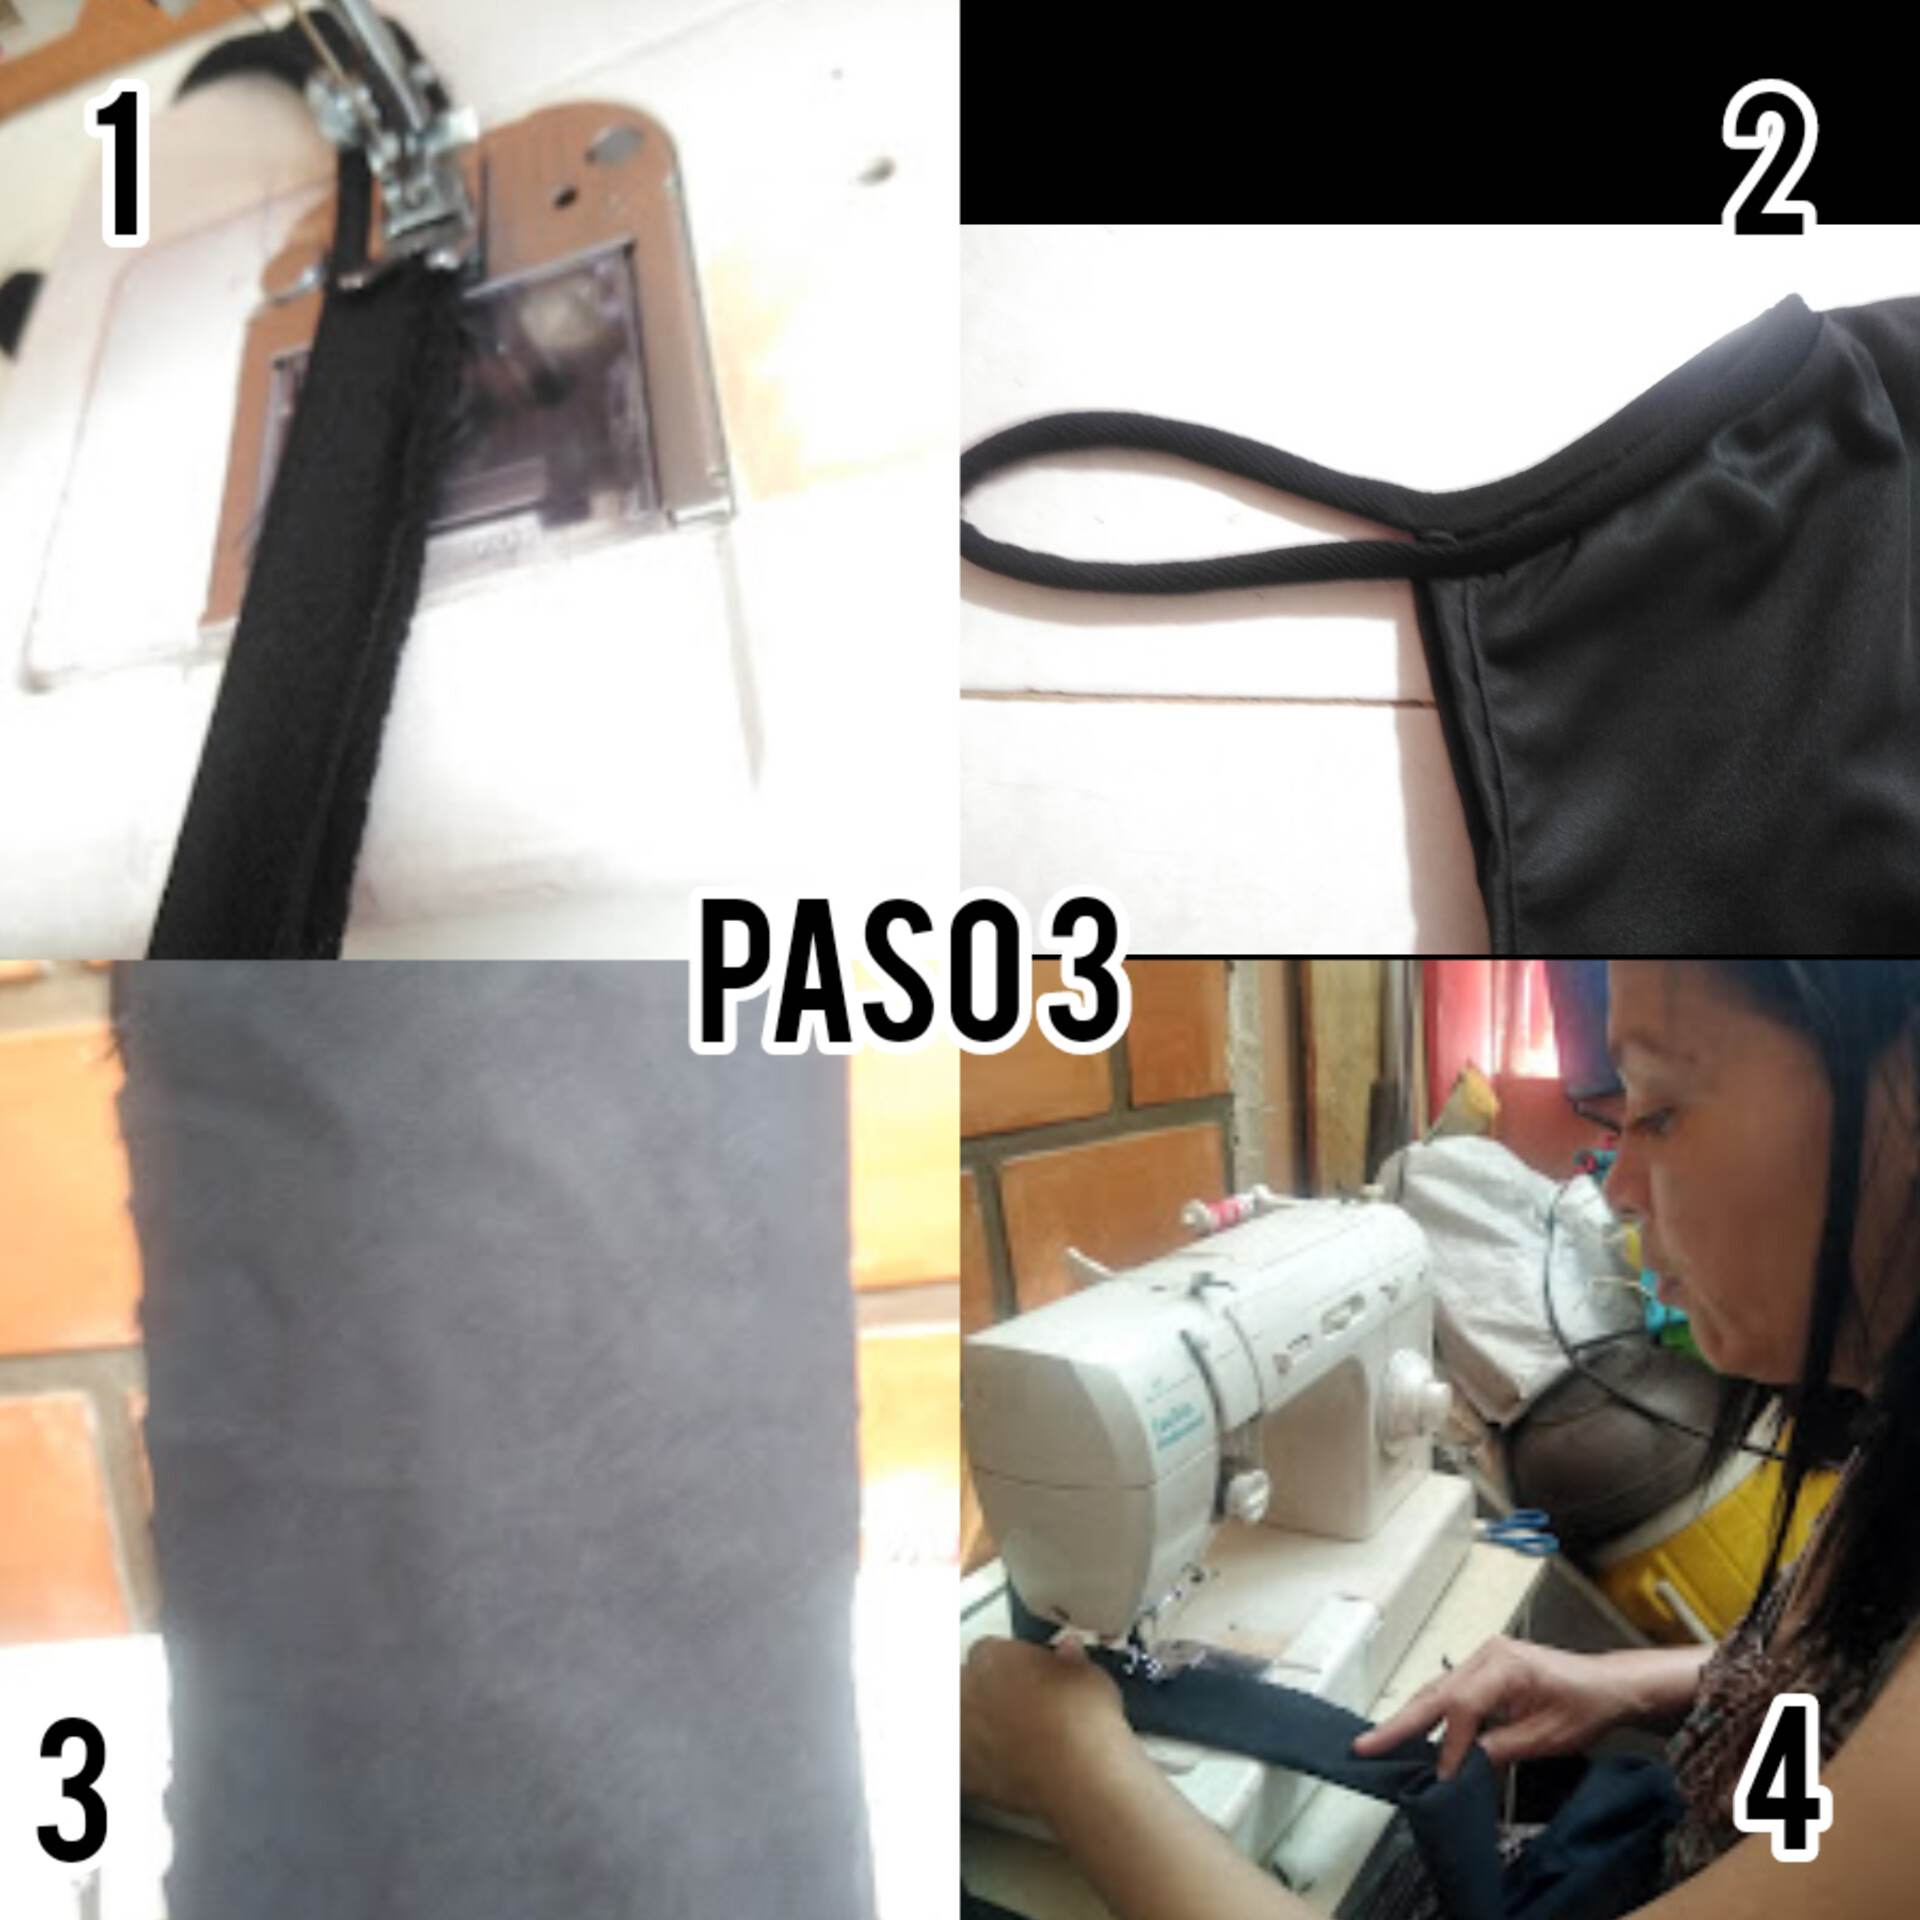
Paso 4: Procederemos a coser la tira a la camisa, la función de este lazo o tira, como lo queramos llamar, es dar una vista mas linda a la camisa, procurando que tengamos un modelo diferente y que al momento de usar la camisa podamos vestirla.
Step 4: We will proceed to sew the strip to the shirt, the function of this loop or strip, as we want to call it, is to give a nicer view to the shirt, trying to have a different model and that at the time of using the shirt we can dress it.
Final Result.


!discovery 27
!DIY
This post was shared and voted inside the discord by the curators team of discovery-it
Join our community! hive-193212
Discovery-it is also a Witness, vote for us here
Delegate to us for passive income. Check our 80% fee-back Program
Un corte simple pero muy elegante, es una camisa que puede combinar con pantalones incluso con faldas, excelente tu post.
gracias y lo mejor es que se realiza con poca tela
Thank you for sharing this post on HIVE!
Your content got selected by our fellow curator stevenson7 & you just received a little thank you upvote from us for your great work! Your post will be featured in one of our recurring compilations which are aiming to offer you a stage to widen your audience within the DIY scene of Hive. Stay creative & HIVE ON!
Please vote for our hive witness <3
Muchas feliicdades, te quedò muy bonita. el diseño se ve fresco para cualquier momento del dia.
gracias amiga
I love the dress it look so beautiful on you
gracias amigo
Hola, muy creativa y sobre todo elegante, especial para todo momento. Esa confección quedo muy bien.
gracias amiga y lo podemos combinar con shor t o pamtalon largo