Woodworking Wednesdays | The Frame Goes First!


We move onwards in the online luthierie classes and it's time to start the second instrument we'll be building during these 4 months. It's a Flamenco Box Drum or Flamenco Cajon. It will be a very interesting build. Among the options given in the course, I chose this alongside the Bongos because it's a very popular instrument.
Let's dive in the process and see how the frame is made!
You can follow along a in-action ASMR short about this project here


To start this build we basically need to make a box. One of the ways to start a box is by making a frame, then adding the bottom. The last part is the lid that closes the whole structure. There's a catch. This isn't a normal box, it's also a drum! So it is a bit more challenging.
Before starting the process, I want to tell a bit about the history of this instrument. The Box Drum came to be in Peru. It used to be a fruit box and as many of the percussion instruments is Latin America, it is something that was developed by the African slaves. Flash forward to the 70s and the instrument became so popular that famous Spanish Flamenco Guitarist, Paco de Lucia, once saw this one during a concert in Peru and decided it would be a good addition to the Flamenco Music Genre. The Peruvian Box Drum was brought to Spain where it was modified and the Flamenco Box Drum was born.
This is a big summary. Today, both instruments coexists since they have very different sound qualities even when the construction is fairly similar. You'll see where the difference is. But first, we have a frame to build.
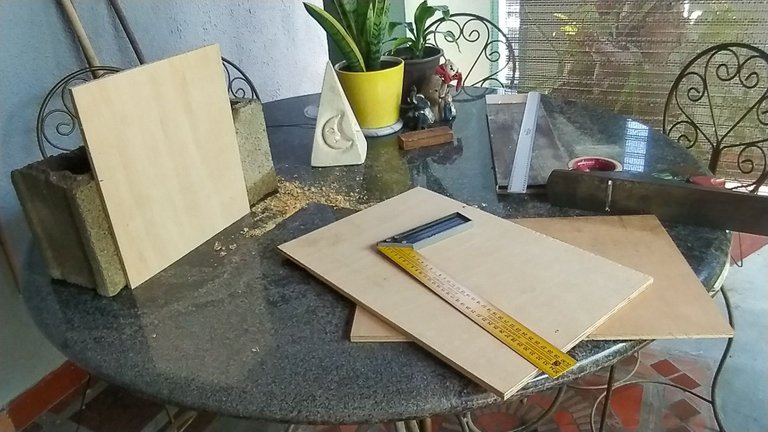
We are using 9mm plywood for this build too. A neighbor helped my with the cuts and we can jump in after a bit of sanding the edges. To put it together, we need to make the box and make sure the sides are at a 90 degree angle. Then, we need to use masking tape to mark this the corners. With this in place, we can move forward to applying the glue.

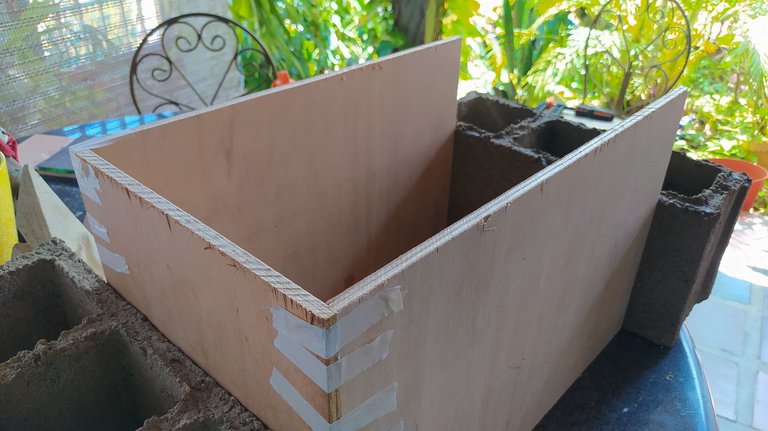

Now comes the hard part. As I didn't any corner clamps, I needed to think on a way to press the pieces and keep them together while the glue did its job. I found these cement blocks around the house and both helped me a lot. So, we place the pieces between the blocks and try to apply some pressure. We don't need a lot of it but enough to keep them tight.
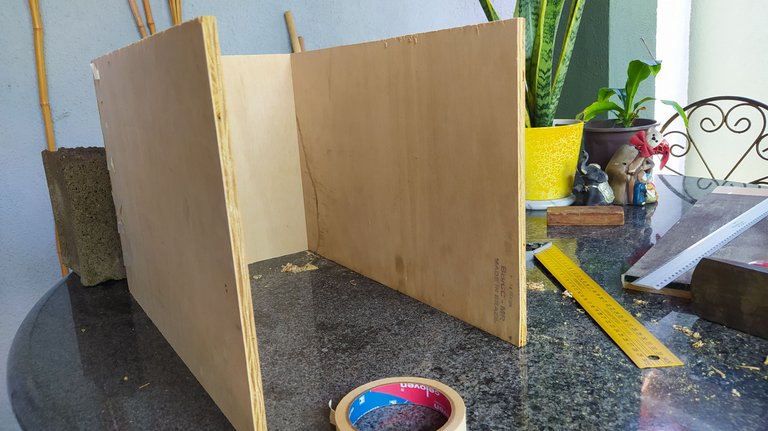
We could glue both top and bottom at the same time, but it's safer to but one part and then the other to avoid a bad alignment. The structure needs to be on 90 degrees on each corner since the drum is played by sitting on it. Having a bad frame could mean the instrument could come apart on stage.
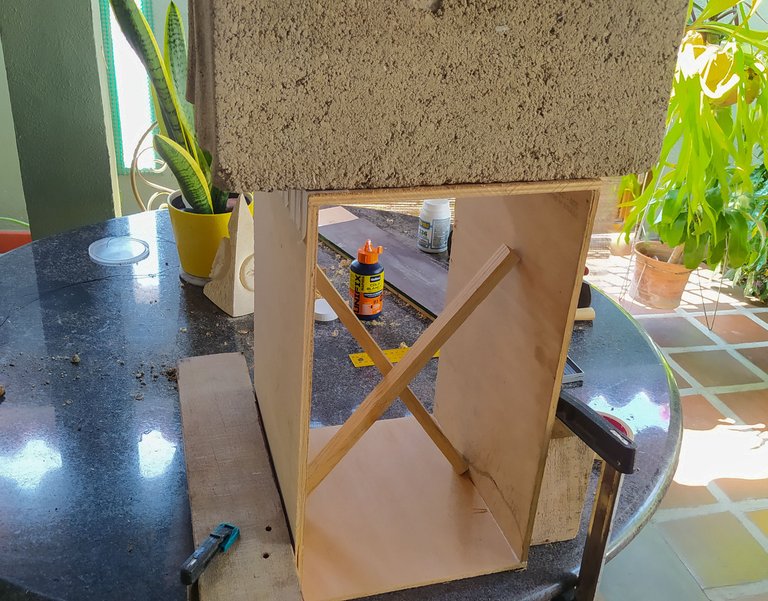


Once the sides are ready, we can use the blocks to glue the missing square. It will be easier as have part of the structure ready. But it isn't a piece of cake. We need to place the blocks on top of the structure taking into consideration their placement. If we screw this up, the whole thing will crumble like Jenga blocks and stuff will brake. To prevent this from happening, we need to adjust everything before placing the blocks and them avoid moving anything else.
As before, we need to make sure the angle in the corners is 90 degrees. Once we have made sure of that, we can place the blocks of top of the structure. We can also place these wood pieces inside the structure in case the whole thing wants to collapse to the inside. And as an extra safety measure, we can place something else at each side to prevent it from moving outwards.
It will just be a matter of time before we have a frame ready to keep working.
This has been all for this entry. Next time, we'll see how the box keeps getting more like the instrument we want to make. Thanks a lot for reading. Don't hesitate to leave a comment! I'll be more than glad to answer it!
Primero el Marco
Seguimos con avanzando con las clases online de lutheria y es tiempo de comenzar el segundo instrumento que estaremos construyendo este cuatrimestre. Se trata de un Cajón Flamenco. Este será un proyecto muy interesante. Entre las opciones que nos dieron para construir en el taller, escogí los Bongos y este porque son instrumentos muy populares y versátiles.
Sin más que decir, es hora de comenzar. ¡Primero el marco!
Puedes seguir este proyevto en formato de video ASMR aquí.
La idea general para comenzar este proyecto es armar una caja. Una de las maneras de empezar es por el marco. Luego, se coloca el fondo. Lo último que se suele hacer es colocar la tapa de la estructura. Solo que aquí hay un detalle. Esto no es una caja común y corriente, ¡es un tambor! Eso ya supone otros detalles a considerar.
Antes de ir de lleno al proceso, me gustaría contarles un poco sobre la historia de este instrumento. El Cajón es un instrumento de origen peruano. En principio, se trataba de una caja para cargar frutas. Sin embargo, como es el caso con los intrumentos de percusión en América Latina, su uso musical fue desarrollado por los esclavos africanos. Si nos vamos hasta los años 70 del siglo pasado (1970s), el instrumento se volvió tan popular que el famoso guitarrista español de flamenco, Paco de Lucía, se interesó por este luego de una presentación que tuvo lugar en Perú. Ahí, según cuentan, pensó que sería una buena adición a los instrumentos que componen la batería del flamenco. El Cajón Peruano fue llevado a España y, allí, fue modificado para convertirse en lo que hoy día conocemos como Cajón Flamenco.
Esto es un resumen muy breve sobre el origen de este instrumento. Hoy día, ambos coexisten debido a la diferencia de sonido que ambos producen. Su construcción tiene una diferencia interna. Eso lo veremos más adelante. Primero, vamos con el marco.
Estaremos utilizando multilaminado de 9mm para este proyecto. Un vecino me ayudó con conseguir los cortes de las piezas a las medidas. Así que luego de limpiar los bordes, podemos comenzar a armarlo. Para esto, tenemos que asegurarnos de que los lados queden todos a 90°. Luego, utilizamos cinta de enmascarar para fijar estas uniones. Con la cinta en su lugar, podemos aplicar el pegamento.
Ahora viene lo complicado. Como no tenía prensas para esquinas, tuve que buscar una manera que matener las piezas juntas y aplicar presión para que el pegamento hiciera su trabajo. Me encontré estos bloques de cemento en la casa. Fueron de mucha ayuda. Entonces, colocar las piezas entre los bloques y aplicamos presión. No tiene que ser demasiada, solo lo necesario para mantener todo junto.
Podríamos pegar ambas piezas cuadradas (de arriba y abajo) al mismo tiempo, pero es más seguro colocar una a la vez para mantener la alineación. La estructura del cajón debe ser sólida. Esto solo se consigue a los 90°. La razón detrás de esto es simple: el cajón se toca sentándose sobre él. Si la estructura no es buena, se puede romper en el escenario o donde se este ejecutando.
Una vez que los lados se encuentran pegados a uno de los cuadrados, podemos pegar el otro. Será más fácil porque ya buena parte de la estructura está armada. Sin embargo, no es que ya no haya dificultad alguna. Al estar utilizando peso para esto, es posible que si las piezas no están bien colocadas y el peso equilibrado, todo se podría venir abajo y acabar con el trabajo que hemos hecho. Algo así como ver una torre de Jenga venirse abajo. Para evitar esto, tenemos que ajustar todo antes de colocar el peso encima de la estructura. Una vez lo hayamos hecho, debemos evitar tocar o mover el marco.
Tenemos que tener presente que estas esquinas nuevas deben estar a 90° también. Cuando hayamos ajustado esto, colocaremos los bloques encima del marco. Además podemos agregar unos listones de madera en el centro para evitar que la estructura colapse hacia adentro. Podemos hacer algo parecido afuera y colocar un tope para evitar que se mueva hacia afuera.
Será cuestión de esperar unos momentos para tener el marco listo y seguir trabajando.
Esto ha sido todo por esta ocasión. En la próxima entrega, veremos como la caja sigue sumando piezas y se ve más como el instrumento que queremos construir. ¡Gracias por leer! No dudes en dejar tu comentario. Los contestaré todos con gusto.
Fotos/Photos 📷: taken by me (Redmi Note 8)
Edición/Editing 🎬: by me, made with Adobe Photoshop Lightroom.
Follow me on Instagram for enquires and commission.
If you'd like to help the workshop grow, you can make a donation here. You can find me at discord as bertrayo#1763
https://leofinance.io/threads/bertrayo/re-leothreads-jsk32rkh
https://leofinance.io/threads/chacald.dcymt/re-leothreads-q5abwzhe
The rewards earned on this comment will go directly to the people ( bertrayo, chacald.dcymt ) sharing the post on LeoThreads,LikeTu,dBuzz.
Me encanta ver desde el principio como se va formando el instrumento. Ya quiero verlo terminado. Gracias por compartir 😊
!VSC
@chacald.dcymt has sent VSC to @bertrayo
This post was rewarded with 0.1 VSC to support your work.
Join our photography communityVisual Shots
Check here to view or trade VSC Tokens
Be part of our Curation Trail
@chacald.dcymt ha enviado VSC a @bertrayo
Éste post fue recompensado con 0.1 VSC para apoyar tu trabajo.
Únete a nuestra comunidad de fotografía Visual Shots
Consulte aquí para ver o intercambiar VSC Tokens
Se parte de nuestro Trail de Curación
Está terminado, pero son tantas fotos que vamos por partes por aquí.
Muchas gracias por tu apoyo. 😁
Aww que increíble y como la música ayuda a esa presenciar esa fusión de culturas con esos resultados tan maravillosos.
Sí, vale. Muchas cosas salen de ahí. Todo lo que compone los sonidos exóticos de la música del sur de España, es producto de la conquista árabe. Siempre hay historias de este tipo donde las culturas se mezclan y tenemos resultados bien interesantes.
Yay! 🤗
Your content has been boosted with Ecency Points, by @hive-130560.
Use Ecency daily to boost your growth on platform!
Support Ecency
Vote for new Proposal
Delegate HP and earn more
Si quieres formar parte de nuestro trail de curación ingresa a HIVEVOTE, haciendo clic en la imagen del capybara aristocratico. Capybaraexchange tu casa de cambio, rapida, confiable y segura
Que increíble! Ahora iré viendo de a poco las fotografías de este gran trabajo! Me encanta el paso a paso. Gracias Andrés!❤️
El paso a paso porque ya el cajón está listo y sonando. Solo que no puedo lanzar todo el contenido de una. Gracias a ti. ❤️✨❤️
Lo sé jaja pero me va a encantar ver esas publicaciones, ahh muy linda tu foto de perfil!😀
Tenía que aprovechar las fotos que me saqué para algo.
Sos fotogénico jajaja
Para nada. Ja, ja, ja, ja. Solo me creo que mi parte de creador de contenido
Los lentes te dan estilo... eso si
Por eso me veo fotogénico.
Ahh buee.... como digas.jajajajajaja
Me voy a cenar!
Congratulations @bertrayo! You have completed the following achievement on the Hive blockchain And have been rewarded with New badge(s)
You can view your badges on your board and compare yourself to others in the Ranking
If you no longer want to receive notifications, reply to this comment with the word
STOPCheck out our last posts: