[ENG- ESP] Beautiful wire tendrils / Hermosos zarcillos en Alambrismo /@alexanderflx
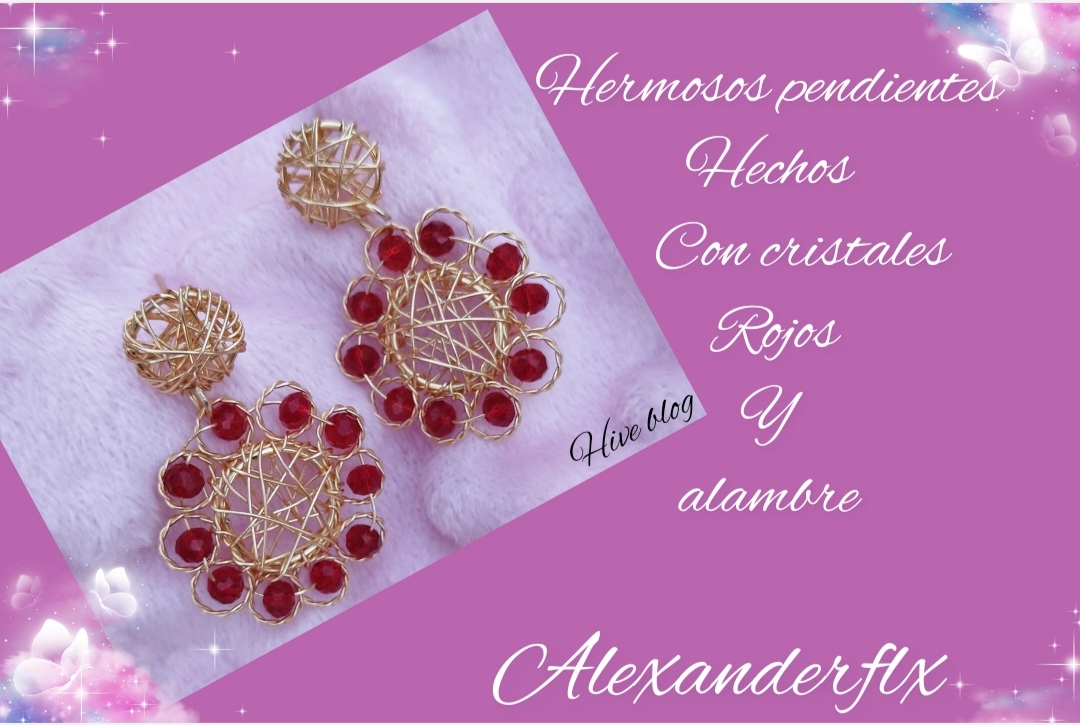
Hello, happy night everyone, I hope you are well, I am in this community thanks to the invitation of many people, it is my first time in this community, so I want to introduce myself, my name is Edgar Alexander, I am from the island of Margarita and I really like the jewelry, tonight I want to share with you one of my creations, these earrings are very pretty, the color of the crystals is very striking, I want to tell you that the wire rope technique is my passion, I really like this technique, the things that can be done with her, I hope you like these earrings without further ado we will go step by step.
Hola feliz noche para todos espero se encuentren bien, me encuentro en esta comunidad gracias a la invitación de mucha personas es mi primera ves en esta comunidad por eso quiero presentarme, mi nombre es Edgar Alexander soy de la isla de margarita y me gusta mucho la bisutería, la noche de hoy quiero compartir con ustedes una de mis creaciones estos pendientes son muy lindo el color de los cristales es muy llamativo, quiero decirle que la técnica de alambrismo es mi pasión me gusta mucho esta técnica las cosas que se pueden hacer con ella, espero que les guste estos pendientes sin más que decir pasaremos al paso a paso.
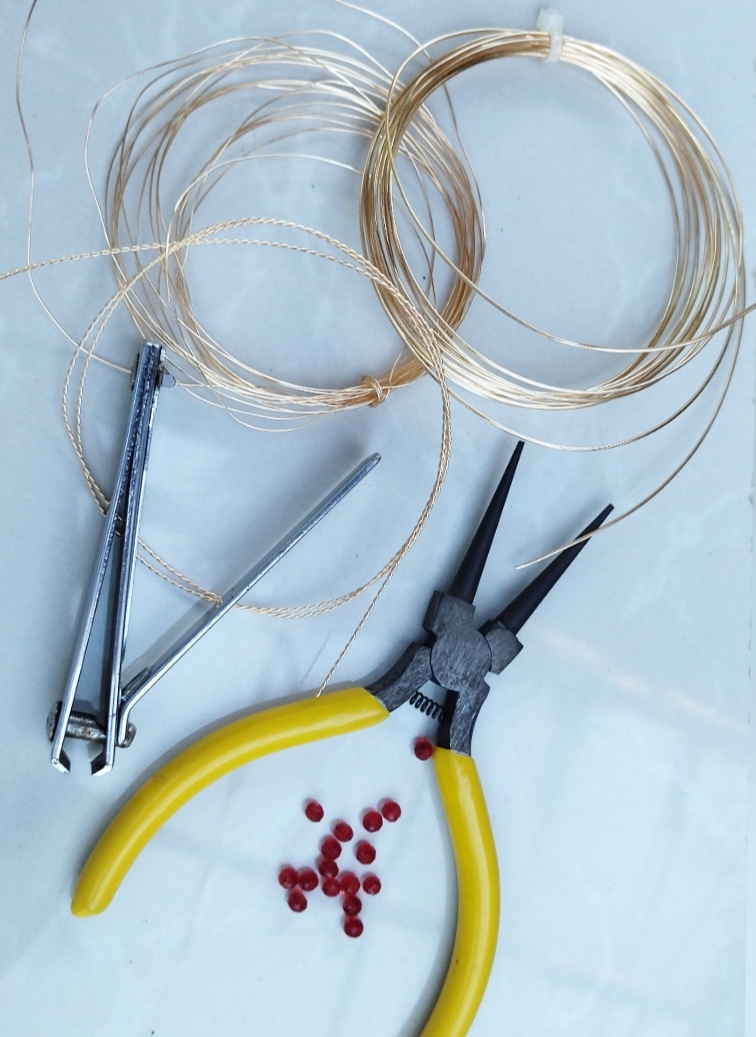
- 20 gauge jewelry wire.
- 26 gauge jewelry wire.
- jewelry tweezers.
- Medium bright red stones.
Que necesitamos .
Alambre de bisuteria calibre 20
Alambre de bisuteria calibre 26.
pinzas de bisutería.
piedras Medianas brillantes color rojo.
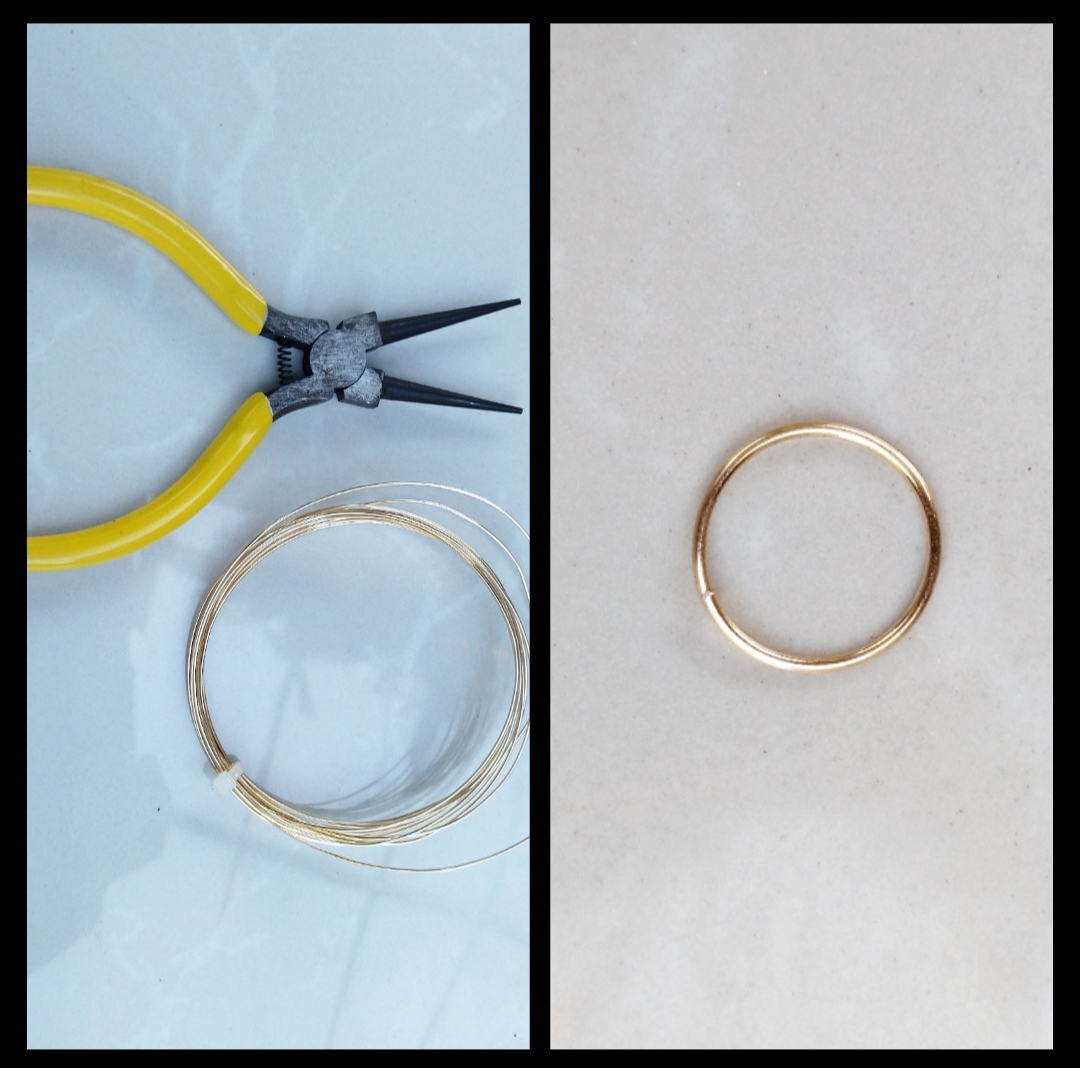
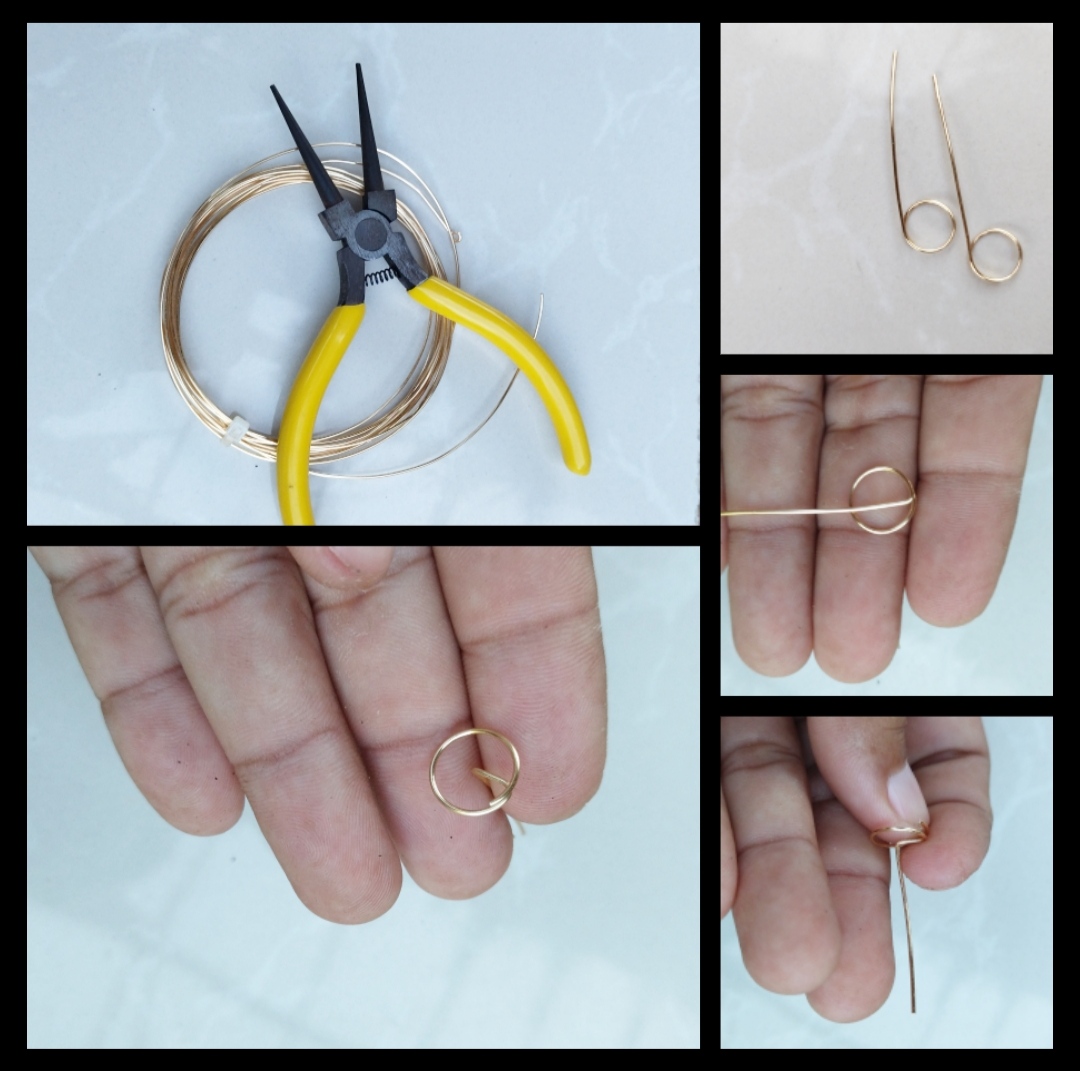
Step 1: To start with our first step we will cut a piece of 20 gauge wire after cutting the piece of wire we will make a round one with our pliers if you do not have pliers you can use an injector or something round with which it is easier for us to do the round one after having our round we will take a wire that we have intertwined to make that piece of wire we cut two pieces of 26 gauge wire and we will twist it then we will make several round ones as you can see in the photo there are approximately 10 small round ones.
Paso 1: Para empezar con nuestro primer paso cortaremos un trozo de almabre calibre 20 luego de cortar el trozo de alambre aremos un redondo con nuestras pinzas si no tienen pinzas pueden utilizar una inyectadora o algo redondo con el que se nos aga más fácil hacer el redondo luego de tener nuestro redondo tomaremos un alambre que tenemos entrelazados para hacer ese trozo de alambre cortamos dos trozo de alambre calibre 26 y lo entorcharemos luego aremos varios redondo así como ven en la foto son aproximada mente 10 redondo pequeños.

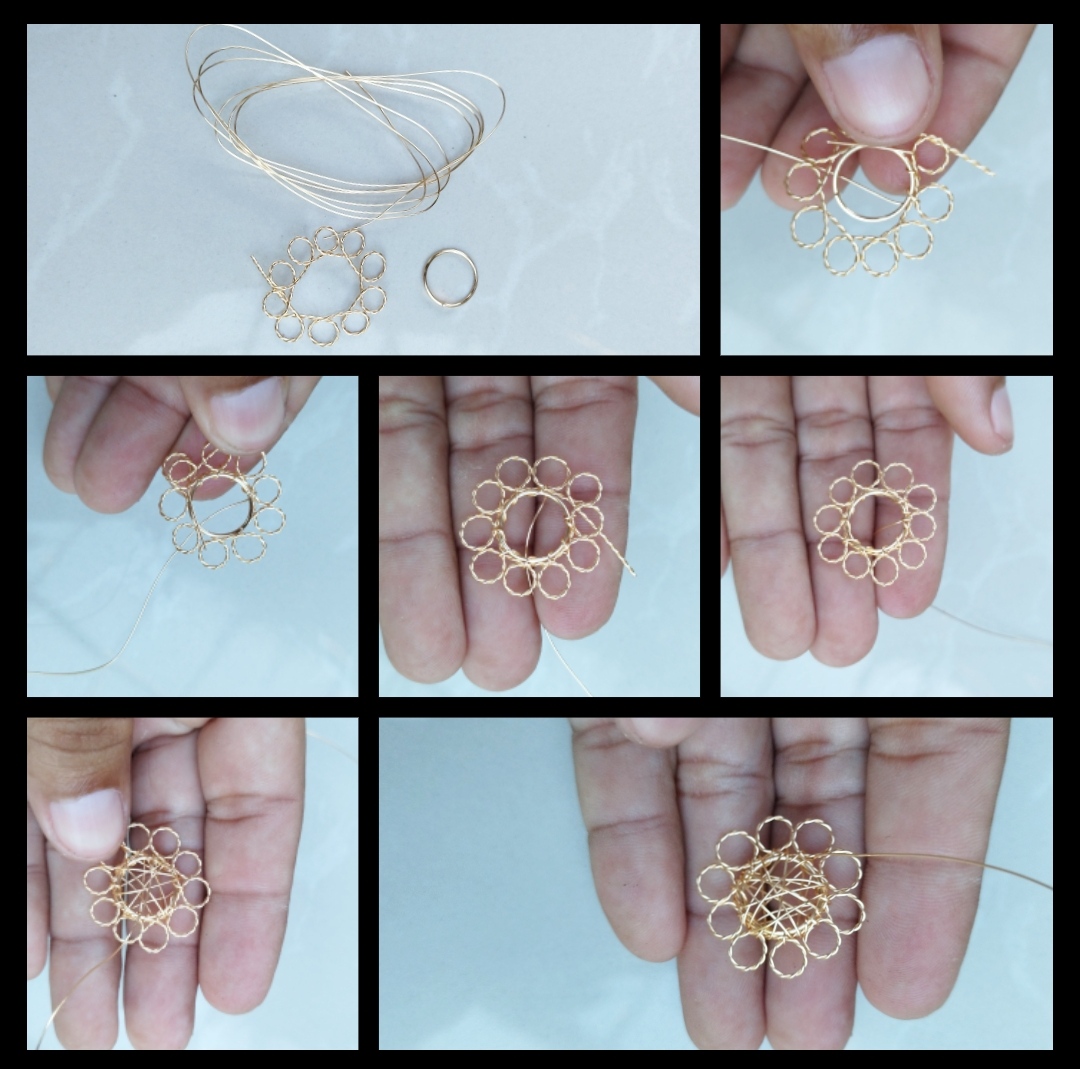
Step 2: For our second step we will join the round one we made and the small round ones as we will cut it, we will cut a piece of 26 gauge wire a little long to be able to work well and not have ties in our earrings then we will tie the tip of the wire joining the two pieces after securing we will continue passing it through each small hole embracing the other piece in the same way when we have the two pieces very well joined we will pass the envelope in the middle of the round ones crossing the wire as you can see we do not cut the wire we continue using the same piece of wire so cut a piece of wire long enough.
Paso 2: Para nuestro segundo paso uniremos el redondo que hicimos y los redondo pequeños como lo aremos cortaremos un trozo de alambre calibre 26 un poco largo para poder trabajar bien y no tener empates en nuestros pendientes luego amarraremos la punta del alambre uniendo las dos piezas luego de asegurar seguiremos pasándolo por cada agujero pequeño abrazando de igual forma la otra pieza cuando tengamos muy bien unidas las dos piezas pasaremos el sobre en medio de los redondo cruzando el alambre como pueden ver no cortamos el alambre seguimos utilizando el mismo trozo de alambre por eso corte un trozo de alambre lo suficientemente largo.
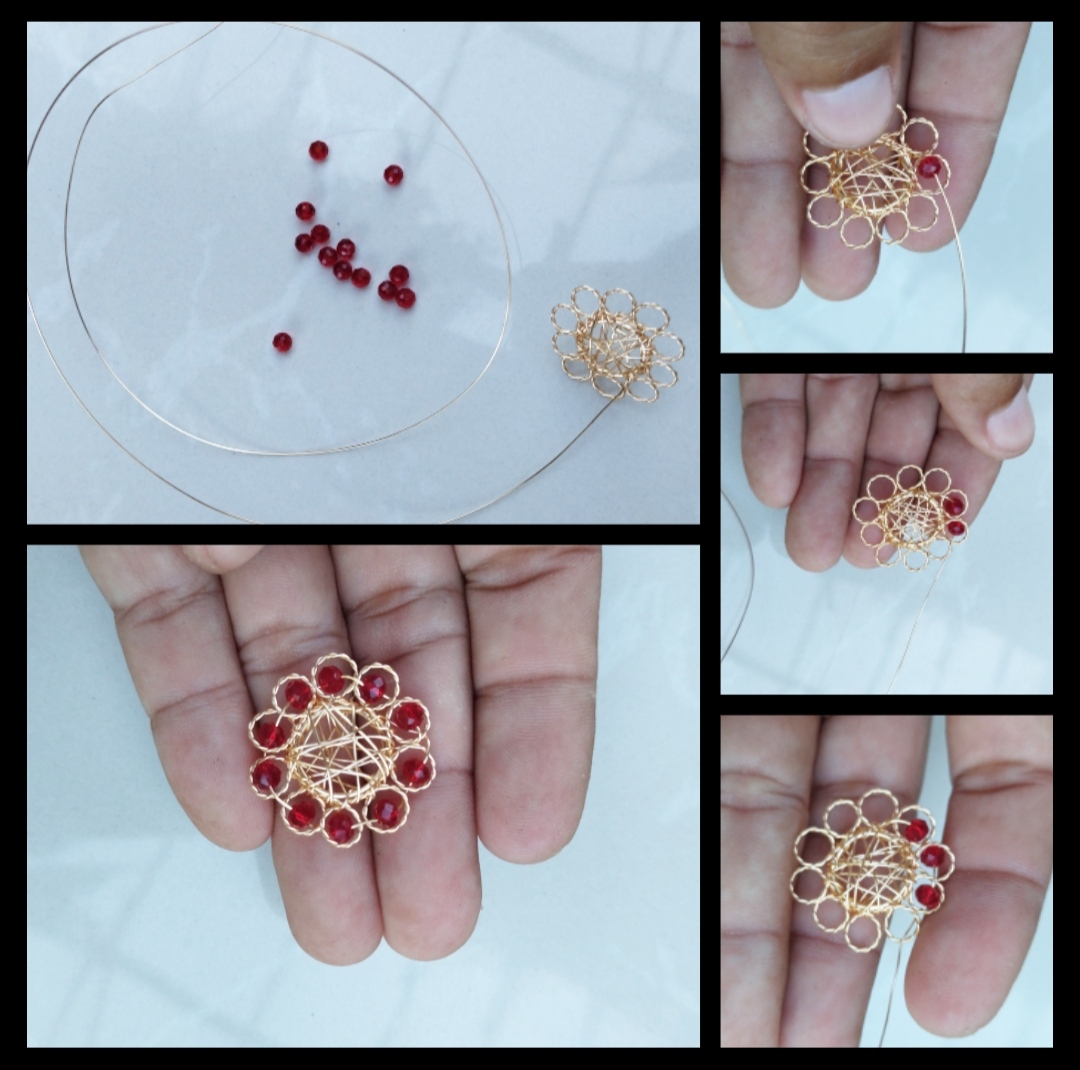
Step 3: For our third step we will use the piece that we made and we will put a little color on it so we will also use the red stones as you can see in the photo I have not cut the wire since I will continue working with it, for this step we will pass in wire zigzag through the middle of each round shows that we are doing it, we will put a stone in each round as it is in the photo
Paso 3: Para nuestro tercer paso utilizaremos la pieza que hicimos y le pondremos un poco de color así que también utilizaremos las piedras rojas como pueden ver en la foto no e cortado el alambre ya que seguiré trabajando con el, para este paso pasaremos en alambre en zigzag por en medio de cada redondo muestras que lo estemos haciendo pondremos una piedra en cada redondo así como está en la foto
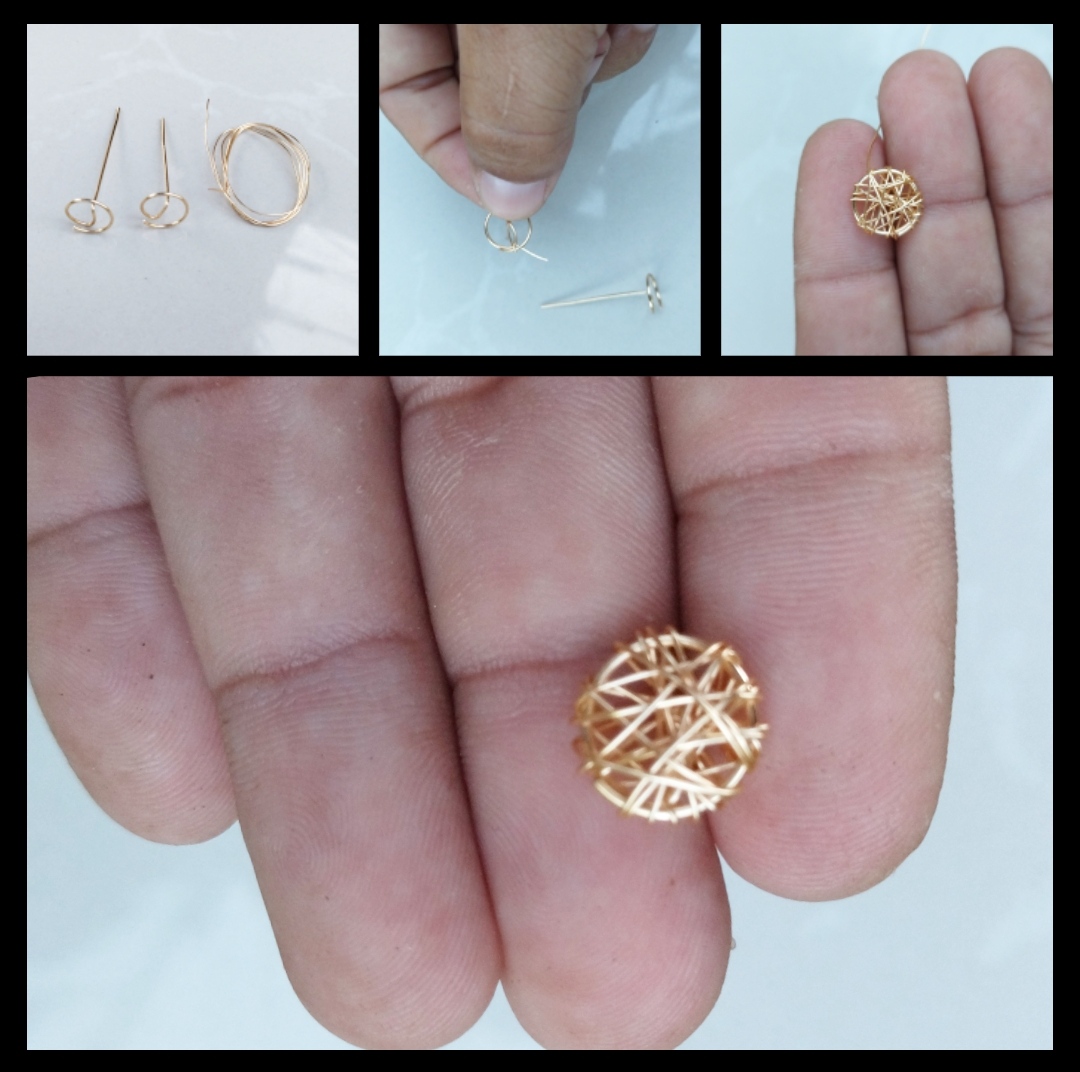
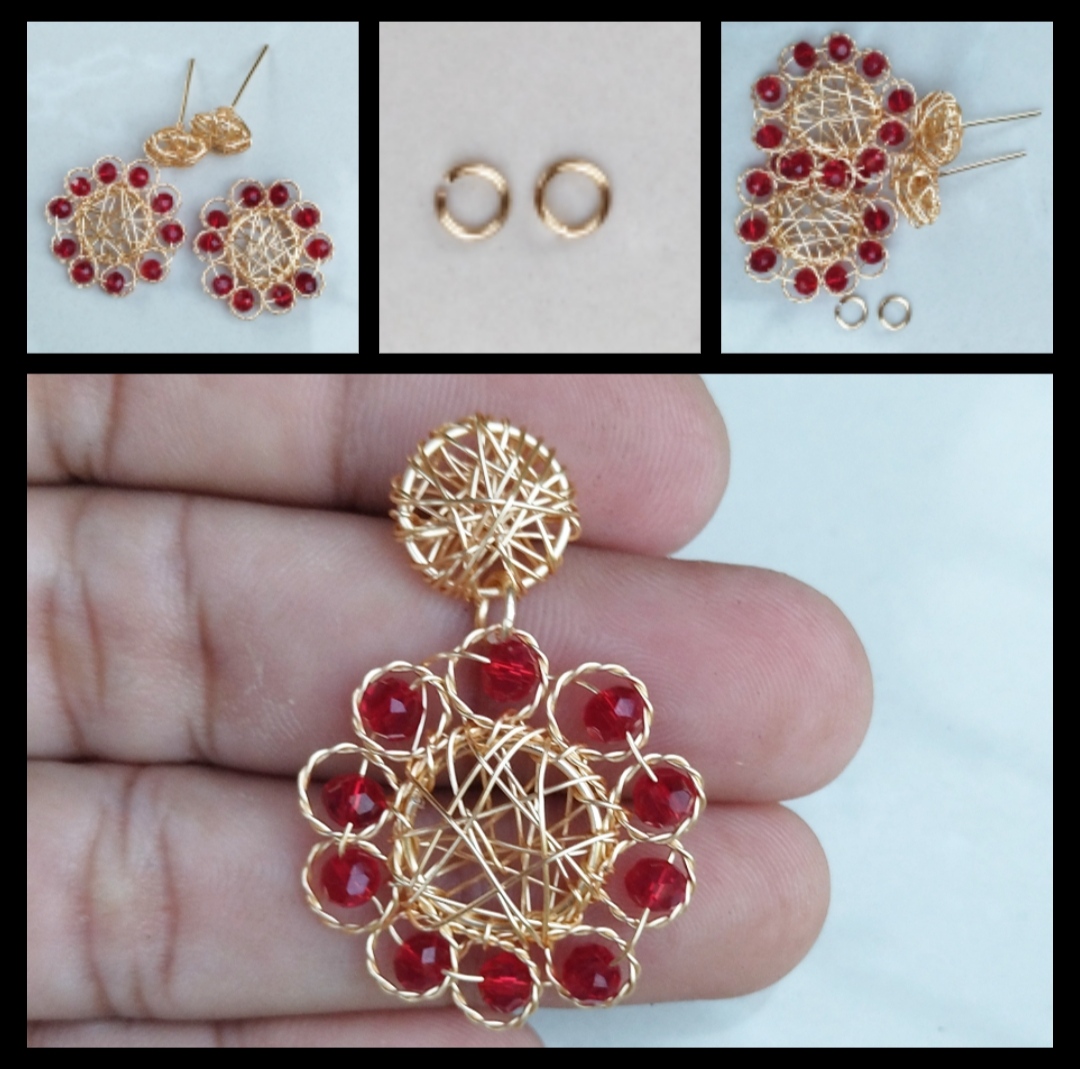
Step 4: for our last step we will take 20-gauge wire and we will make a round to compile to the one we did in our first step, after making the round we will leave a piece of wire a little long then we will bend it downwards followed by another double backwards and that's it we have the piece now we decorate it with some 26 gauge wire we cross it very well until we have a kind of nest as you can see we already have the four pieces now we must join them we will join it making two very small round ones and we will put a piece in the round one and then the another we close with the tweezers and ready we already have some beautiful earrings.
Paso 4: para nuestro último paso tomaremos alambre calibre 20 y aremos un r dondo compilar al que hicimos en nuestro primer paso luego de hacer el redondo dejaremos un trozo de alambre un poquito largo luego doblamos hacia abajo seguido de otro dobles hacia atrás y ya tenemos la pieza ahora la adornamos con un poco de alambre calibre 26 cruzamos muy bien asta tener una especie de nido como pueden ver ya tenemos las cuatro piezas ahora debemos unirlas la uniremos haciendo dos redondo muy pequeños y meteremos en el redondo una pieza y luego la otro cerramos con las pinzas y listo ya tenemos unos hermosos pendientes.
<Beautiful Wire Rope Tendrils
<Hermosos zarcillos en Alambrismo

Todas las Fotos son de mi autoría y fueron tomadas con mi Celular Redmi 9T
Thank you for sharing this post in the DIYHUB Community!
Your content got selected by our fellow curator semarekha & you just received a little thank you upvote from us for your great work! Your post will be featured in one of our recurring compilations which are aiming to offer you a stage to widen your audience within the DIY scene of Hive. Stay creative & HIVE ON!
Please vote for our hive witness <3
!discovery 25
This post was shared and voted inside the discord by the curators team of discovery-it
Join our community! hive-193212
Discovery-it is also a Witness, vote for us here
Delegate to us for passive income. Check our 80% fee-back Program
I love the tendril and have always wanted to make something unique too.
Hola espero que agas algo único te deseo mucha suerte.👍
Hola @alexanderflx. Hermoso trabajo, se ven muy elegantes y el color rojo los hace ver aún más bonito. ¡Saludos!
Hola, si el color es muy llamativo, que bueno saber que llamo su atención 😁👍 feliz día