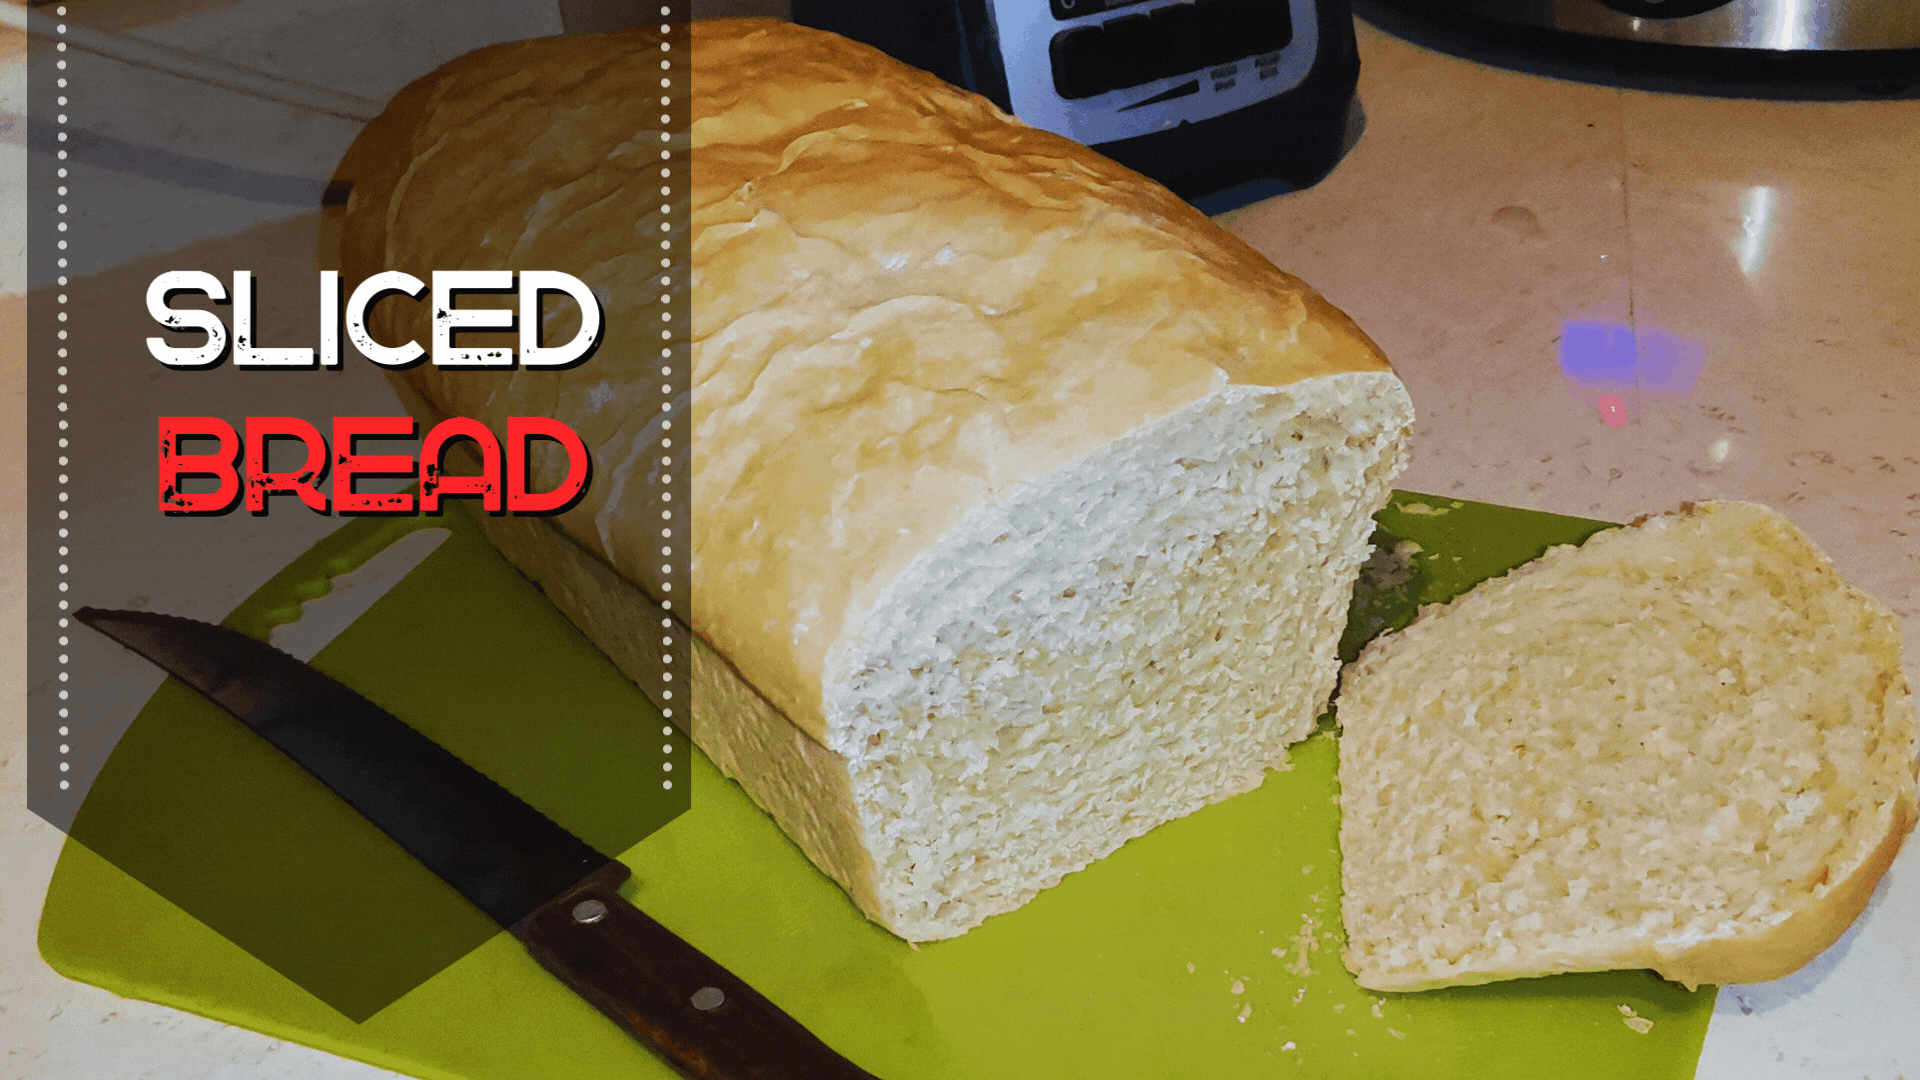
Homemade sliced bread | Recipe [En/Es]

Who can resist a delicious homemade bread? I definitely can't, that's why looking for a different option to the typical sandwich bread sold in supermarkets, I started searching and trying different recipes until I found one that is practically perfect in everything. Not only the result is delicious, but the process is very simple and the kneading time is relatively short.
Baje para ver la versión en español o haga clic - AQUÍ -
This recipe that I am sharing with you today I have already prepared it four times and although all of them have turned out well, over time I have been changing little details to make it just as I need it and as it is within my possibilities to prepare. There are quantities and ingredients that I have had to change from the original recipe, especially the type of flour, because, for example, I have not been able to get strong flour, so I have replaced it with all-purpose flour and I have only had to adjust the quantity.
The result of this recipe is a delicious bread that can be used to make sandwiches, or toasted and eaten with jam or butter. I even recently used this same recipe to make buns, which are also perfect. It is delicious, easy to make and although it takes some time to rise, it is totally worth it, in fact, at home we have already abandoned commercial bread and we only eat this one.
Without further ado, let's go with the recipe.
INGREDIENTS
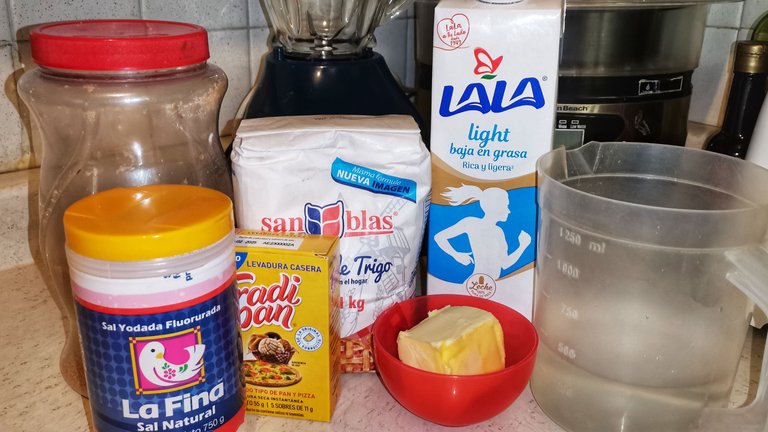
- 500 g + 4 tablespoons all-purpose flour
- 1 teaspoon of dry yeast
- 250 g milk
- 130 g lukewarm water
- 30 g butter
- 1/2 teaspoon sugar
- 1 teaspoon salt
PREPARATION
In a glass mix the warm water (it should not burn), the sugar and the dry yeast, stir until dissolved. Let stand between 10 and 15 minutes.
2.- While the yeast is activated, heat the milk in a pot, once it comes to a boil let it boil for one minute, taking care that it does not overflow. Once the minute has elapsed, cover and let it cool until the yeast is activated.
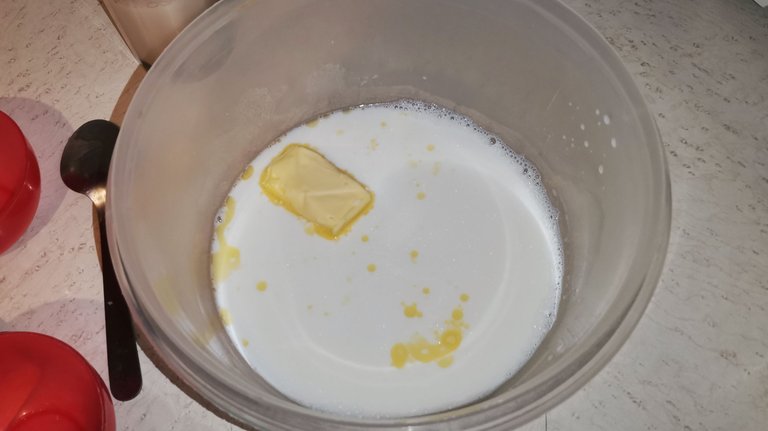
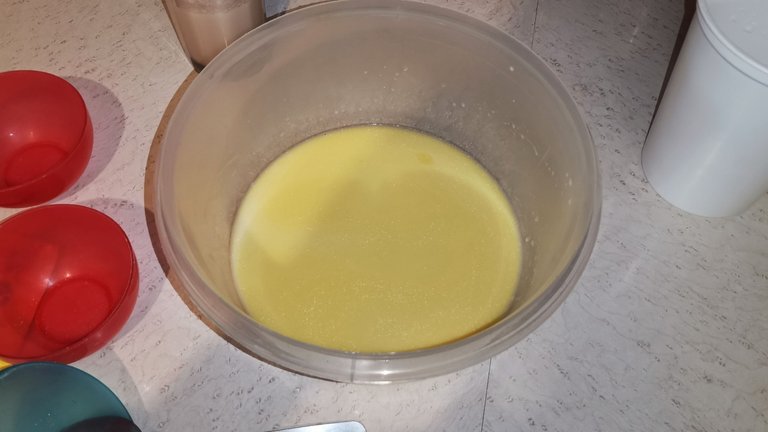
3.- In a large bowl, add 200 g of warm milk (it should not be burning), salt and butter, mix well with a spoon until the butter is completely dissolved.
4.- Add half a cup of flour and beat with a hand or electric mixer until the flour is completely mixed. Once all the lumps are dissolved, add the activated yeast and mix again with a spoon.


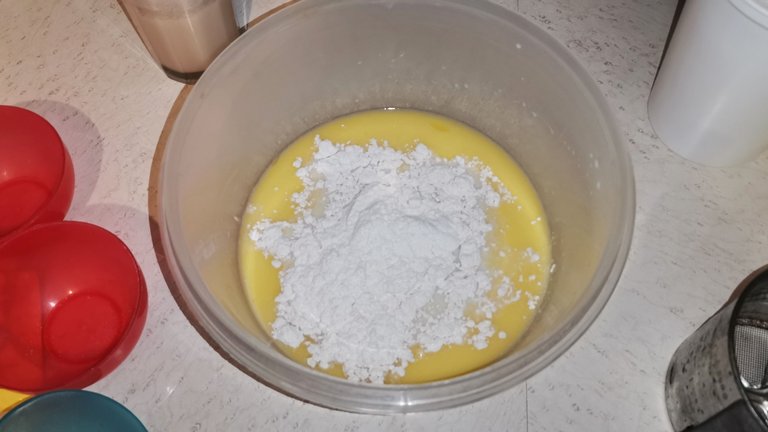
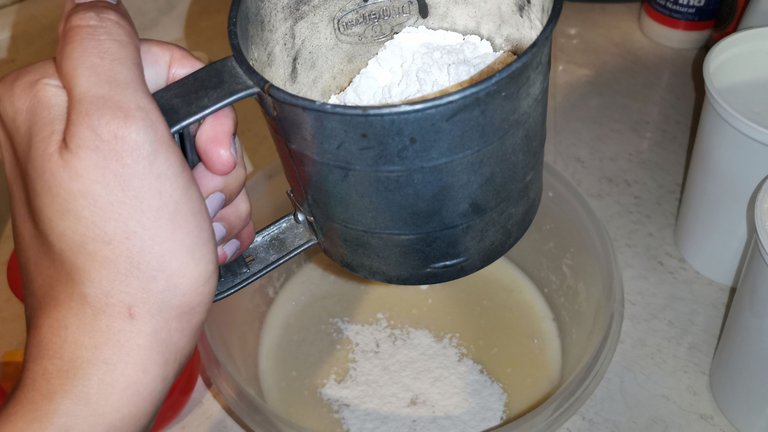
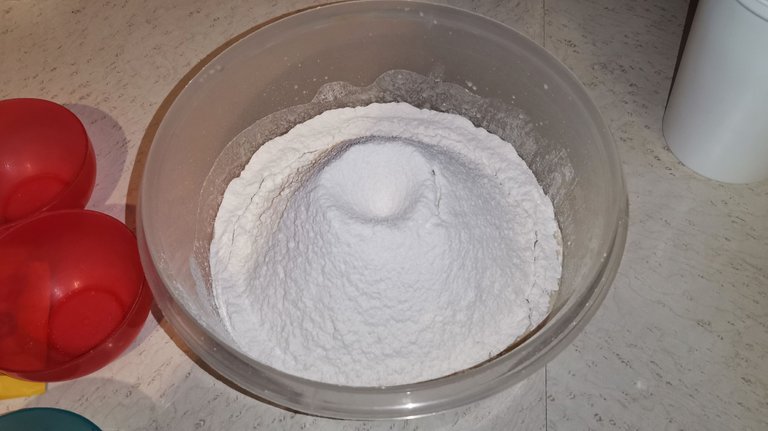
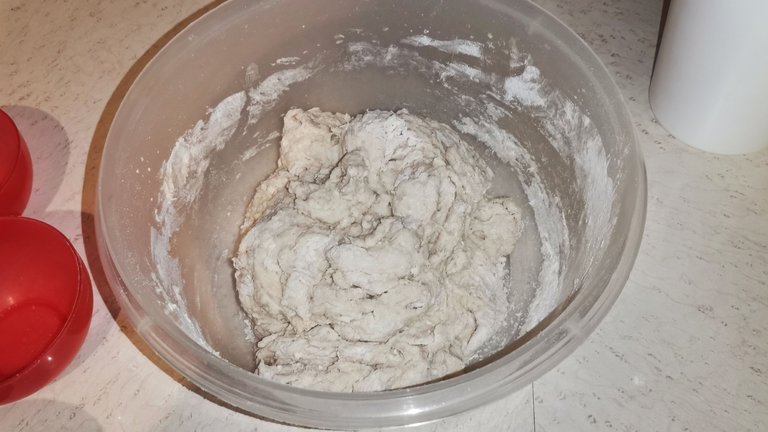
5.- Add the rest of the flour, sifting it over the previous mixture.
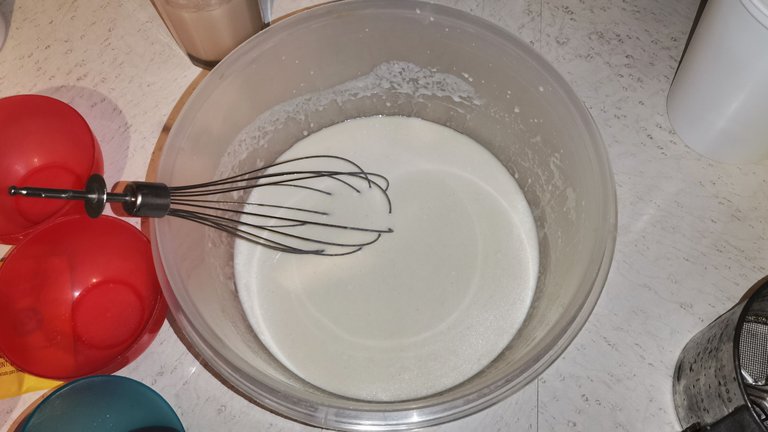
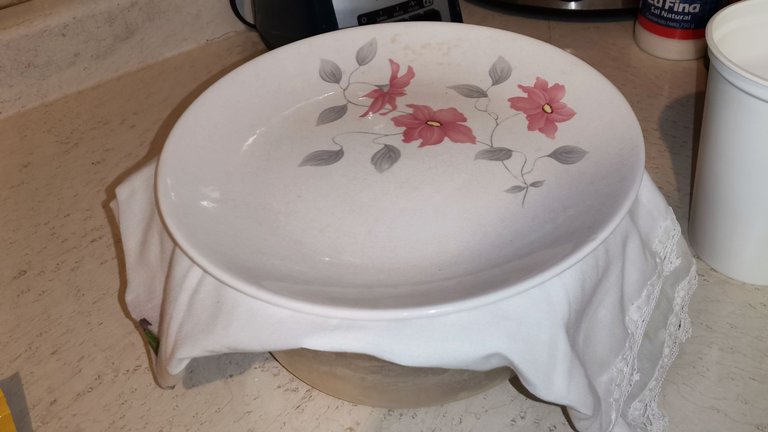
6.- Mix everything with a spoon until everything is well incorporated, cover with a cloth or kitchen towel and let it rest for 20 minutes.
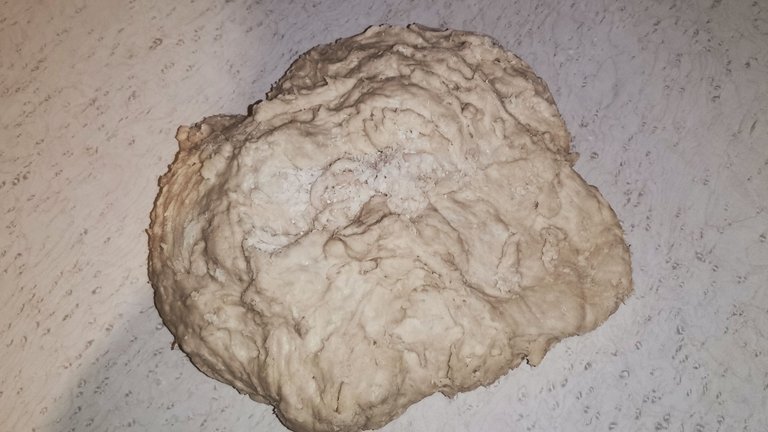
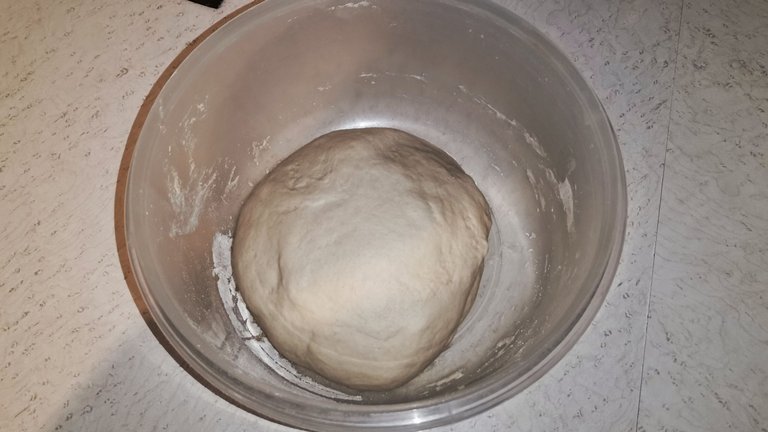
7.- Once this time has elapsed, turn the dough out onto a clean table and begin to knead in an enveloping manner, until the dough becomes smooth and no longer feels sticky. I usually knead for 15 minutes, but if everything goes well with 10 minutes of kneading the dough can also be perfect.
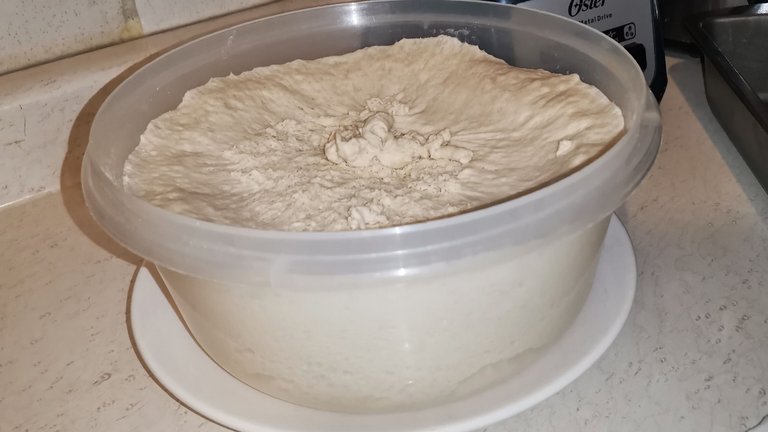
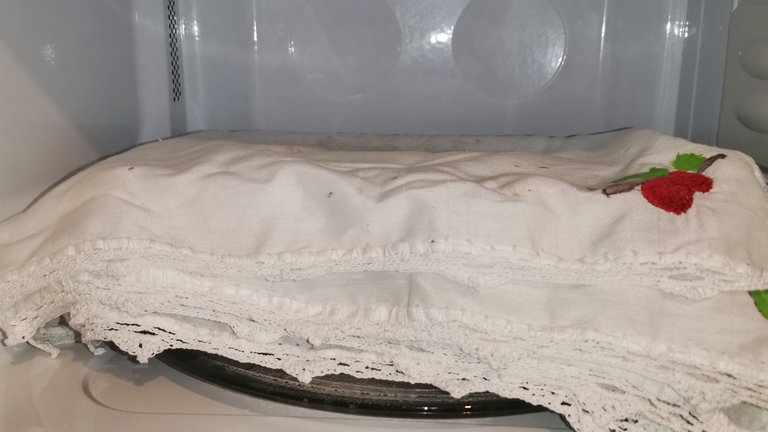
8.- We put our dough in a bowl, cover it with a cloth or kitchen towel, keep it in a warm place without drafts until it doubles in size. I usually keep it in the microwave and leave it for 1 hour and a half, or up to two hours if it is cold.
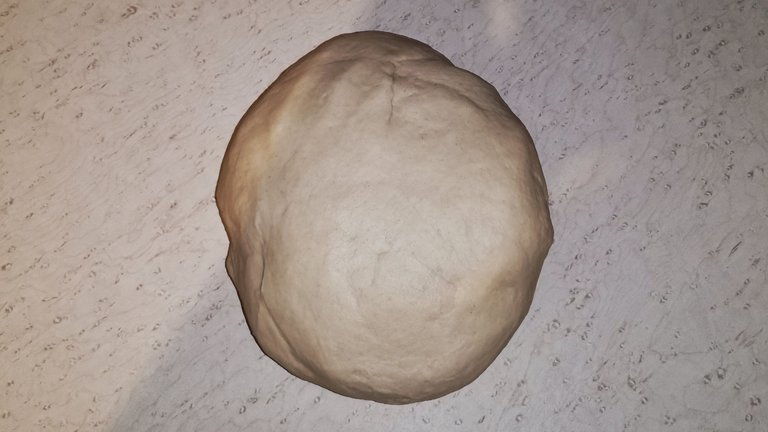
9.- After the rising time, we turn our dough on a clean surface and knead for one minute, trying to "deflate" the dough. We cover it and let it rest for 10-15 minutes.
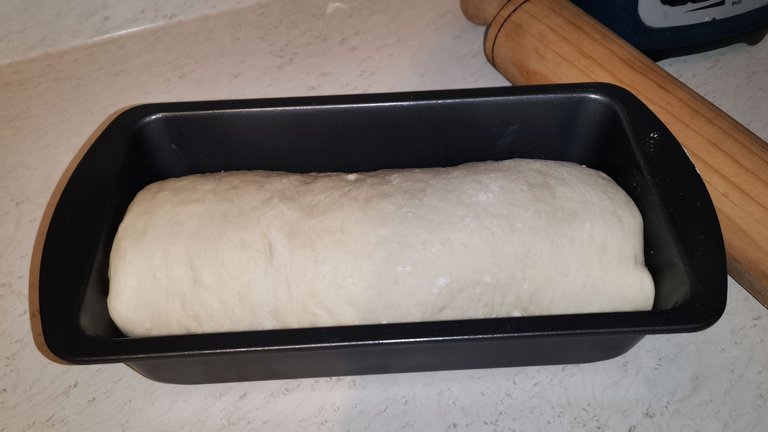
10.- Butter the bread pan we will use and set aside.
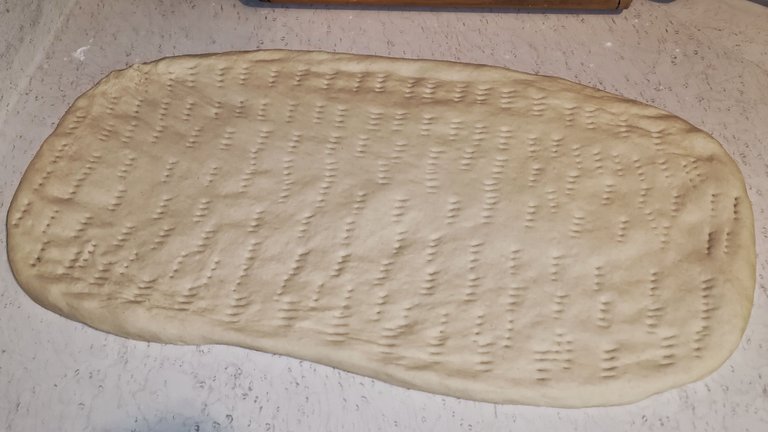
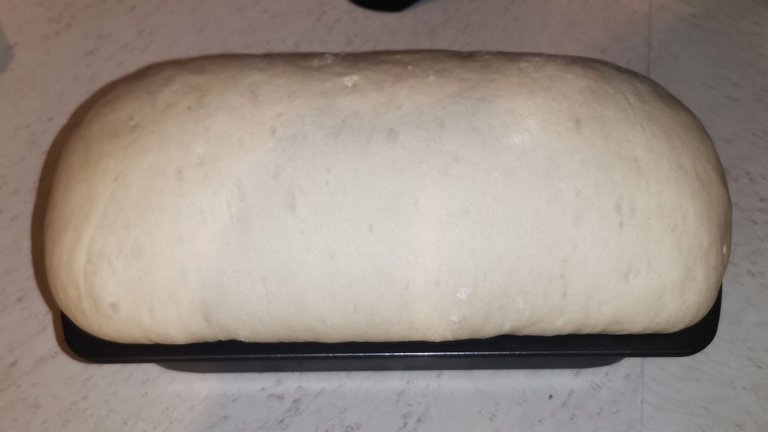
11.- Uncover our dough and extend it in the shape of a more or less thin rectangle, we can do it with our hands or with a rolling pin.
12.- Prick the surface of the dough with a fork, without piercing it completely.
13.- Roll the dough and place it in the previously buttered mold. Cover with a cloth or kitchen towel and let it rise until it doubles in size. I leave it in the same place as the first rise (microwave) and it usually takes 1 hour 30 minutes.

14.- After this time, we uncover our dough and let it rest for 20 minutes more.
15.- Preheat the oven to 180° for the same 20 minutes. In the lower part of the oven we put a tray with enough water, I put 500 ml.
16.- Bake the bread at 180° for 45 minutes or until it is at the point that you like.
17.- Let the bread rest in the oven turned off for 5 minutes. Take it out and let it cool for 5 more minutes before unmolding.

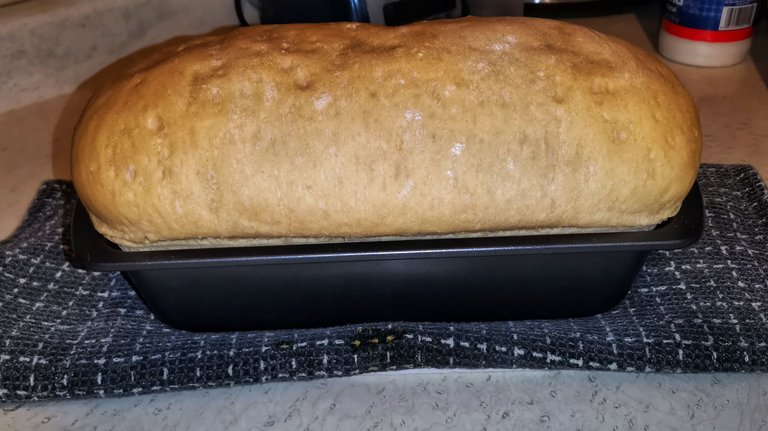


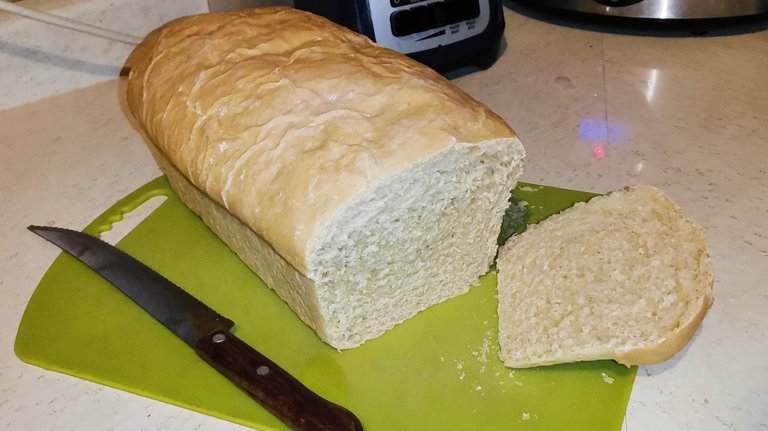
18.- Place our loaf of bread on a wire rack and let it cool completely before slicing.
NOTES
- If you can get strong flour, you will only need 500 g of flour.
- The liquids are measured in grams to avoid variations, I recommend that you do it this way.
- The teaspoon measurements are made with measuring spoons, not coffee or soup spoons.
- The butter should preferably be at room temperature.
- Actually 200 g of milk are used, not 250 g as it says in the ingredients, but I put that extra 50 g because it is more or less what evaporates during boiling, you should weigh it before adding it to the mixture.
- It is a simple recipe, but it takes quite some time to prepare, take your precautions and start preparing it in the morning.
- I like to slice the bread the day after I bake it, I feel it makes it easier for me.
- If you don't eat a lot of bread and are afraid it will go bad because it contains no preservatives, you can slice it and freeze it in airtight containers or bags. When you are going to eat it, simply heat it or toast it, whichever you prefer.
That's all friends, it is a somewhat long process, however, it is totally worth it to have such a tasty bread always at our disposal. I hope you liked the recipe and that you are encouraged to try it.
Pan de molde casero | Receta

¿Quién se puede resistir a un delicioso pan casero? Yo definitivamente no puedo, es por eso que buscando una opción diferente al típico pan de sandwich que vender en los supermercados, me puse a buscar y a probar diferentes recetas hasta que di con una que es prácticamente perfecta en todo. No solamente el resultado es delicioso, sino que el proceso es muy sencillo y el tiempo de amasado es relativamente corto.
Esta receta que hoy les comparto ya la he preparado cuatro veces y aunque todas me han quedado bien, con el tiempo le he ido haciendo cambiando detallitos para que quede justamente como la necesito y como está en mis posibilidades de preparar. Hay cantidades e ingredientes que he tenido que cambiar de la receta original, sobre todo el tipo de harina, porque, por ejemplo, no he logrado conseguir harina de fuerza, así que la he sustituido por harina de todo uso y solo he tenido que ajustar la cantidad.
El resultado de esta receta es un pan delicioso que sirve tanto para hacer sandwiches, como para tostarlo y comerlo con mermelada o mantequilla. Incluso hace poco utilicé esta misma receta para hacer panes tipo bollito, que también quedan perfectos. Es delicioso, fácil de hacer y aunque lleva algo de tiempo por levado, vale totalmente la pena, es más, en casa ya abandonamos el pan comercial y solo consumimos este.
Sin más vamos con la receta.
INGREDIENTES
- 500 g + 4 cucharadas de harina de todo uso
- 1 cucharadita de levadura seca
- 250 g de leche
- 130 g de agua tibia
- 30 g de mantequilla
- 1/2 cucharadita de azúcar
- 1 cucharadita de sal
PREPARACIÓN
1.- En un vaso mezclar el agua tibia (no debe quemar), el azúcar y la levadura seca, mover hasta que se disuelvan. Dejar reposar entre 10 y 15 minutos.
2.- Mientras se activa la levadura ponemos a calentar la leche en una olla, una vez que llegue a hervir la dejamos en ebullición durante un minuto, cuidando que no se desborde. Una vez trascurrido el minuto tapamos y dejamos enfriar hasta que la levadura esté activada.
3.- En un recipiente amplio, agregamos 200 g de leche tibia (no debe estar quemando) la sal y la mantequilla, mezclamos bien con una cuchara hasta disolver por completo la mantequilla.
4.- Incorporamos media taza de harina y batimos con un batidor de mano o eléctrico hasta que la harina se haya mezclado por completo. Una vez disuelto todos los grumos, agregamos la levadura activada y mezclamos nuevamente con una cuchara.
5.- Agregamos el resto de la harina cerniéndola sobre la mezcla anterior.
6.- Mezclamos todo con una cuchara hasta incorporar todo muy bien, tapamos con una tela o paño de cocina y dejamos reposar durante 20 minutos.
7.- Una vez trascurrido ese tiempo volcamos la masa sobre una mesa limpia y comenzamos a amasar de forma envolvente, hasta que la masa se vuelva tersa y deje de sentirse pegajosa. Yo normalmente amaso durante 15 minutos, pero si todo les sale bien con 10 minutos de amasado también puede quedar perfecta la masa.
8.- Colocamos nuestra masa en un recipiente, lo tapamos con una tela o paño de cocina, lo guardamos en un sitio cálido y sin corrientes de aire hasta que duplique su tamaño. Yo normalmente lo guardo en el microondas y lo dejo 1 hora y media, si está haciendo frío hasta dos horas.
9.- Pasado el tiempo de levado, volcamos nuestra masa en una superficie limpia y amasamos durante un minuto, intentando "deshinchar" la masa. La tapamos y la dejamos reposar durante 10-15 minutos.
10.- Enmantequillamos el molde para pan que utilizaremos y lo reservamos.
11.- Destapamos nuestra masa y la extendemos en forma de rectángulo más o menos delgado, podemos hacerlo con las manos o con un rodillo.
12.- Pinchamos la superficie de la masa con un tenedor, sin atravesarla por completo.
13.- Enrollamos la masa y la colocamos en el molde que enmantequillamos anteriormente. Tapamos con una tela o toalla de cocina y dejamos que leve hasta duplicar su tamaño. Yo la dejo en el mismo sitio que la primera levada (microondas) y normalmente se tarda 1 hora 30 minutos.
14.- Trascurrido ese tiempo, destapamos nuestra masa y la dejamos reposar 20 minutos más.
15.- Ponemos a precalentar el horno a 180° durante los mismos 20 minutos. En la parte inferior del horno ponemos una bandeja con suficiente agua, yo coloco 500 ml.
16.- Horneamos el pan a 180° durante 45 minutos o hasta que esté en el punto que les agrade.
17.- Dejamos reposar el pan dentro del horno apagado durante 5 minutos. Lo sacamos y dejamos enfriar durante 5 minutos más antes de desmoldar.
18.- Colocamos nuestra hogaza de pan sobre una rejilla y dejamos enfriar por completo antes de rebanar.
NOTAS
- Si consiguen harina de fuerza solamente necesitarían 500 g de harina.
- Los líquidos están medidos en gramos para evitar variaciones, les recomiendo que lo hagan de esta forma.
- Las medidas de cucharaditas están hechas con cucharas medidoras, no son de café o de sopa.
- La mantequilla debe estar, de preferencia, a temperatura ambiente.
- En realidad se usan 200 g de leche, no 250 g como dice en los ingredientes, pero coloco esos 50 g extras porque es más o menos lo que se evapora durante la ebullición, deben pesarla antes de agregarla a la mezcla.
- Es una receta sencilla, pero que lleva bastante tiempo de preparación, tomen sus precauciones y comiencen a prepararlo en la mañana.
- A mí me gusta rebanar el pan al día siguiente de haberlo horneado, siento que se me facilita bastante.
- Si no comen mucho pan y temen que se les vaya a dañar porque no contiene conservadores, pueden rebanarlo y congelarlo en recipientes o bolsas herméticas. Cuando lo vayan a consumir simplemente deben calentarlo o tostarlo, lo que prefieran.
Eso es todo amigos, es un proceso algo largo, sin embargo, vale totalmente la pena tener un pan tan sabroso siempre a nuestra disposición. Espero que les haya gustado la receta y que se animen a probarla.

Fotos tomadas por mí - Imágenes editadas en Canva.
Chama se ve más bello ese pan!! Yo tengo un molde de esos, le diré a José que prepare porque a mi no me gusta amasar ni un poquito.
Gracias por compartir mana
Pruébenlo mana, está muy rico y es facilísimo de hacer, eso se amasa cuando mucho 15 minutos, aunque yo lo he amasado menos y queda ufff, delicioso. Es un 10/10 el resultado, se los prometo.
Besos mana 😘
Quede enamorada de ese pan.
No me llevo mucho con las masas porque no me levantan.
Pero trataré de seguir estos pasos al pie de la letra.
Pero no tengo de esos moldes. Será que sirve para hacer tipo pan de bodega, de esos pequeños?
Se ve muy buena la receta, las fotos están geniales amiga.
Este leva porque leva amiga. Si no tienes de esos moldes puedes dividir la masa, darle la forma que tu quieras y ponerlo en una bandeja enmantequillada. Yo hice unos ahorita en forma de bolita y quedan excelentes. Te dejo la foto de como quedaron.
Un abrazo, muchas gracias por pasar y comentar 🤗
Congratulations @adalathu! You have completed the following achievement on the Hive blockchain And have been rewarded with New badge(s)
Your next target is to reach 5000 comments.
You can view your badges on your board and compare yourself to others in the Ranking
If you no longer want to receive notifications, reply to this comment with the word
STOPTo support your work, I also upvoted your post!
Nada más rico que un pan recién hecho, la casa queda con un riquísimo aroma uff que rico ajaja, se ve que el pan te quedó sumamente esponjoso.
Así es amiga, queda superesponjoso. Es delicioso, ojalá que puedas prepararlo.
Muchas gracias por pasar y comentar 🤗