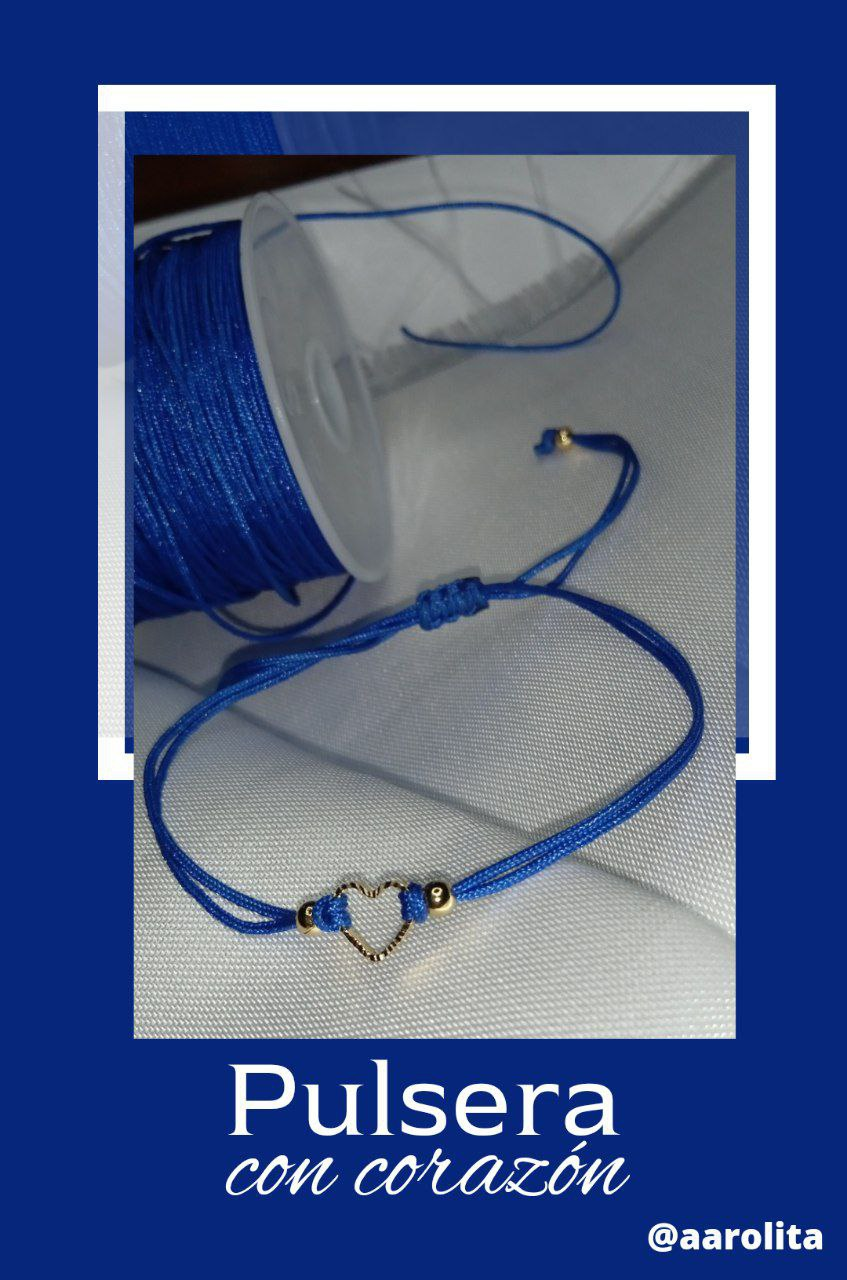
[Eng/Esp] Bracelet with heart/ Pulsera con corazón.
Hello hello, friends of the Jewelry 💎 community, I hope you are feeling very well today.
Hola hola, amigos de la comunidad de Jewelry 💎, espero que se encuentren muy bien el día de hoy.
Nothing attracts more attention than simple things, I am a faithful fan of things that do not require much work. That's why I want to show you a simple way to make a bracelet that won't even take ten minutes to make. During the time that I was working with the jewelry, this was one of the most acclaimed and adulated by the clientele, they asked for them in different colors and to wear them as a couple, which is ideal since a heartshaped connector is used, it gives the message perfect. So I will show you this idea so that at some point when you need to make a gift, quickly, nicely and cheaply, you can make this bracelet.
Nada llama más la atención que las cosas sencillas, soy una fiel fan de las cosas que no llevan mucho trabajo. Por eso les quiero mostrar una forma sencilla de hacer una pulsera la cual no tomará ni diez minutos hacerlas. El tiempo que estuve trabajando con la bisutería está era una de las más aclamadas y aduladas por la clientela, las pedían de diferentes colores y para usarlas en pareja, lo que es ideal ya que se utiliza un conector en forma de corazón, da el mensaje perfecto. Así que les mostraré esta idea para que en algún momento cuando les haga falta hacer un regalo, rápido, bonito y barato realicen esta pulsera.
The materials that I will use are:
Los materiales que utilizaré son:
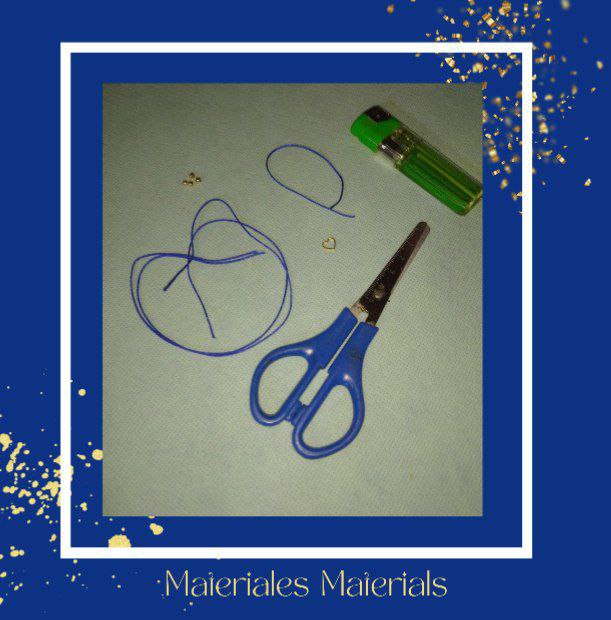
- 2 threads of 30cm each, royal blue.
- A 12cm thread, also royal blue.
- A connector, in the shape of a heart.
- Four gold pellets for jewelry.
- A scissors.
- A lighter.
- 2 hilos de 30cm cada uno, color azul rey.
- Un hilo de 12cm, de color azul rey también.
- Un conector, en forma de corazón.
- Cuatro balines para bisuteria dorados.
- Una tijera.
- Un encendedor.
Steps to make this bracelet:
Pasos para realizar esta pulsera:
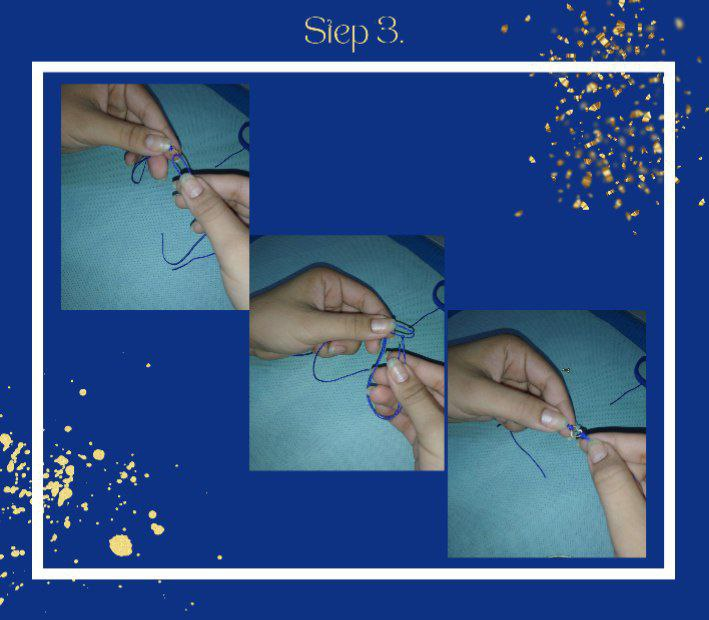
1.I will start by taking one of the 30cm threads, and I will fold it in half. I will take the connector and I will put the folded part of the thread through the center from the bottom to the top, about halfway through the thread.
1.Comenzaré tomando uno de los hilos de 30cm, y lo doblare por la mitad. Tomare el conector y meteré la parte doblada del hilo por el centro de abajo hacia arriba como hasta la mitad del hilo.
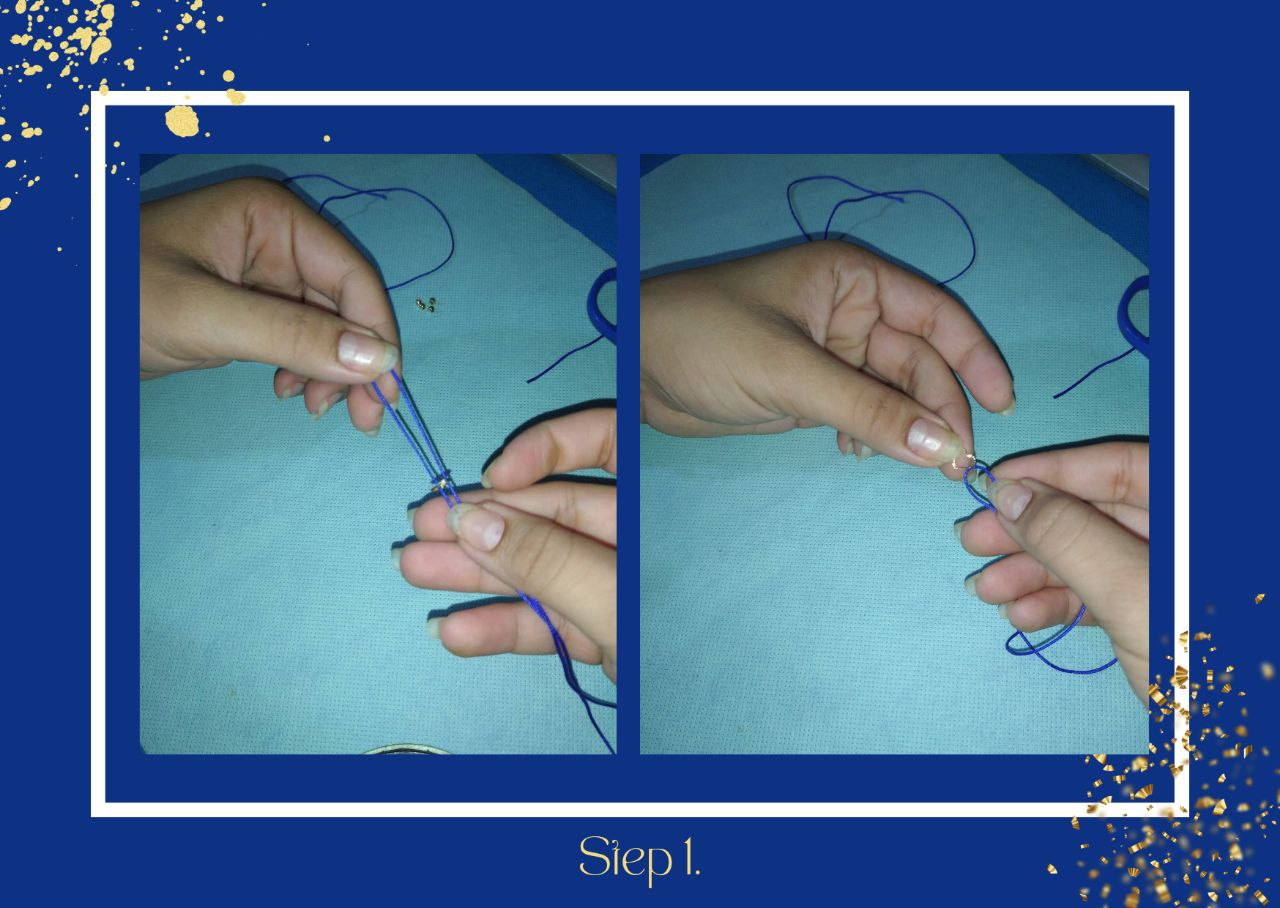
2.The next thing we are going to do is put the two ends through the hole we made with the thread and pull it. As I show you in the picture.
2.Lo siguiente que vamos a hacer será meter los dos extremos por el agujero que hicimos con el hilo y lo jalamos. Como le muestro en la imagen.
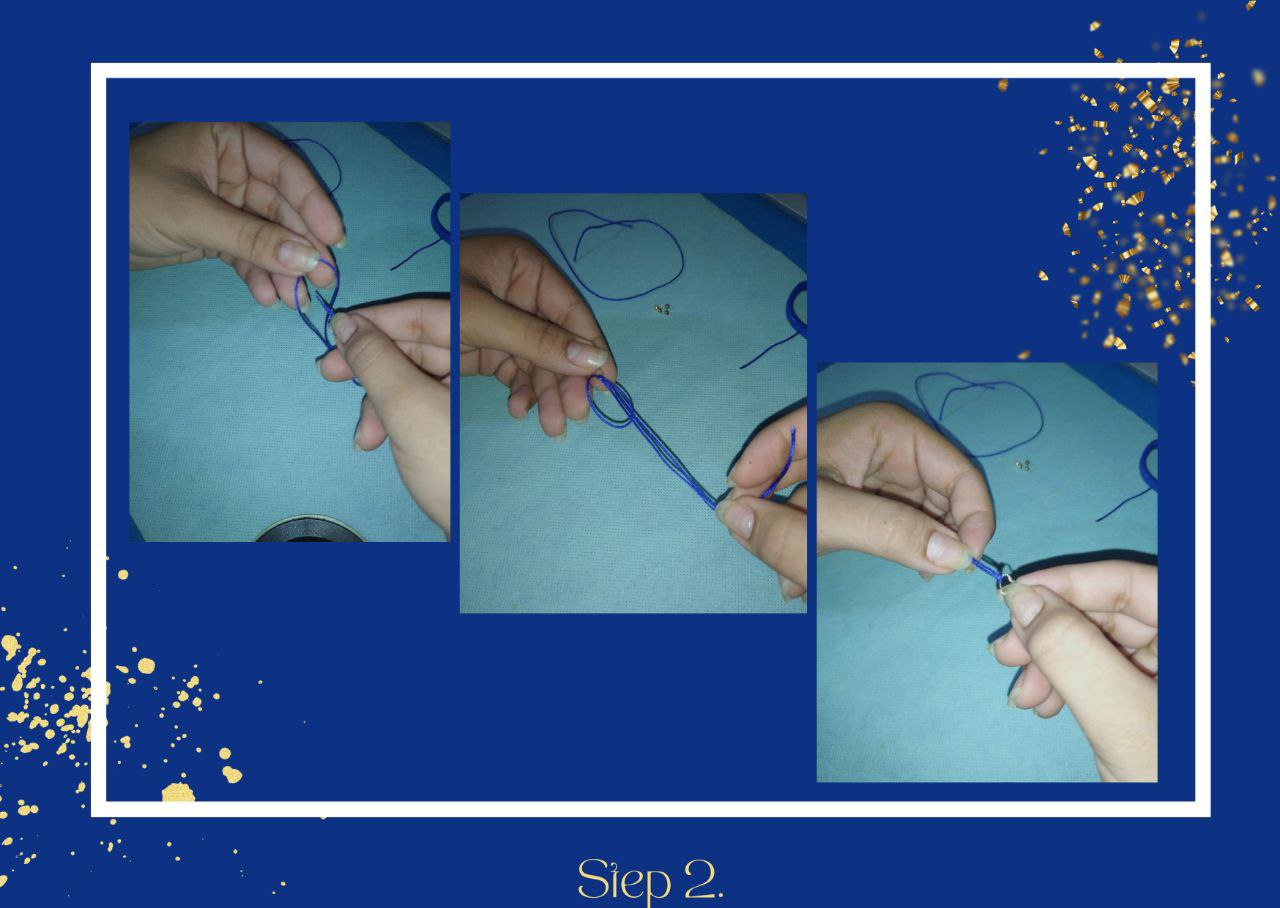
3.We will do the same procedure on the other side of the heart with the other thread. I'll tuck the folded part of the thread through the center from the bottom up about halfway through the thread.
3.Haremos el mismo procedimiento del otro lado del corazón con el otro hilo. Meteré la parte doblada del hilo por el centro de abajo hacia arriba como hasta la mitad del hilo.
4.Now to secure the knot I am going to place a pellet on each side. He burned the tips before to make it easier for me to put the pellet in.
4.Ahora para asegurar el nudo voy a colocar un balin de cada lado. Quemó las puntas antes para que se me haga más fácil meter el balin.
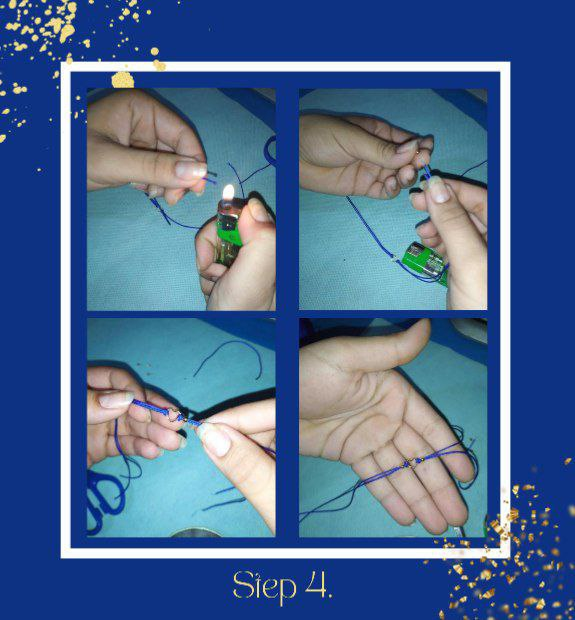
5.The next step will be to tie the bracelet with a flat knot. I join the four threads from the ends giving shape to the bracelet.
5.El próximo paso será amarrar la pulsera con un nudo plano. Junto los cuatro hilos de los extremos dándole forma a la pulsera.
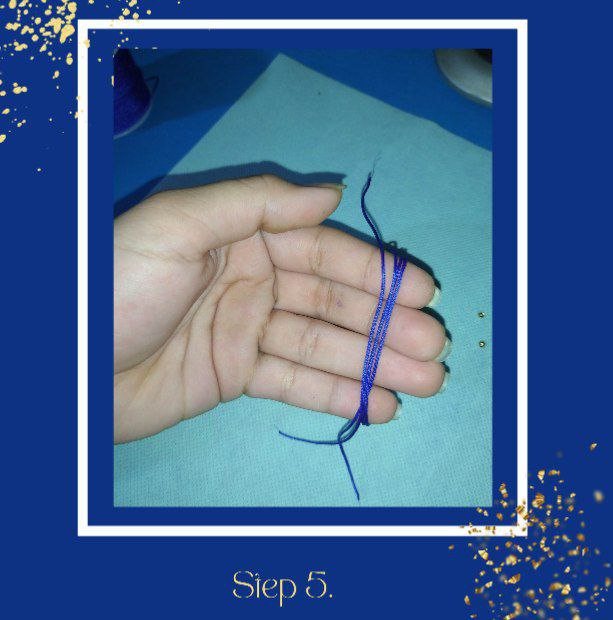
6.The 12 cm thread is placed below these threads, forming a C on the right side and the other two ends on the left side.Of the threads at the ends I will place one above and another below forming an X, the one below I will introduce through the C that I formed at the beginning, I tighten and I already have my first flat mooring knot
6.Se coloca el hilo de 12 cm por debajo de estos hilos, formando una C del lado derecho y los otros dos extremos del lado izquierdo. De los hilos de los extremos colocaré uno arriba y otro debajo formando una X, el que esta por debajo lo voy a introducir por la C que forme al comienzo, aprieto y ya tengo mi primer nudo plano del amarre.

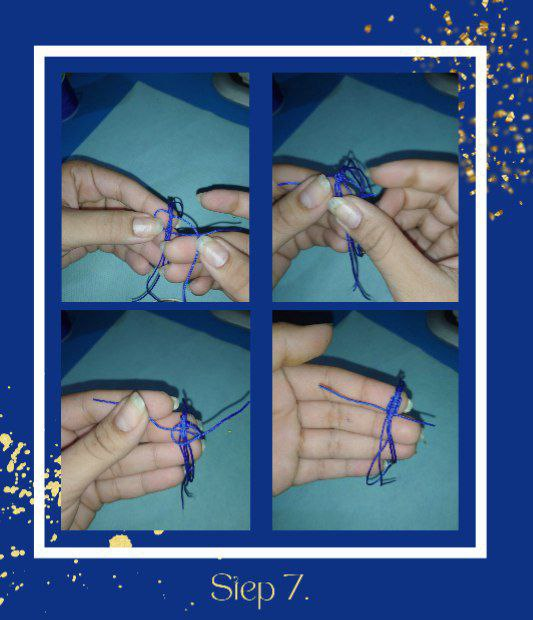
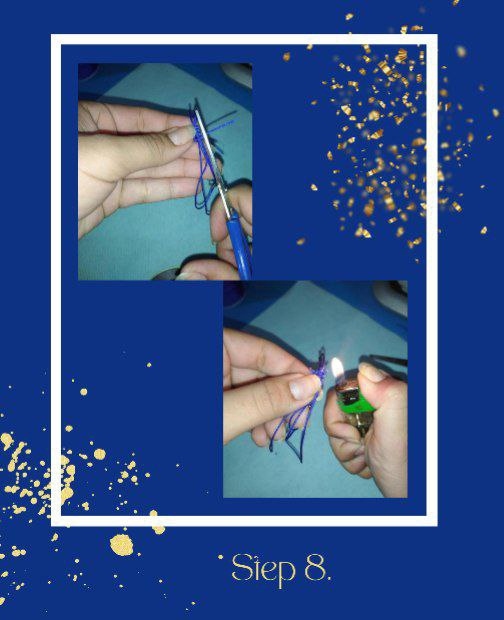
7.I will do the same but now on the left side. And so on about four times or until you have the mooring of the desired length.
7.Haré lo mismo pero ahora del lado izquierdo. Y así sucesivamente unas cuatro veces o hasta tener el amarre del largo deseado.
8.Now I will cut the ends that were left over from each side and with the help of a lighter I am going to burn it to ensure that it does not fade.
8.Ahora cortaré los extremos que me sobraron de cada lado y con ayuda de un encendedor voy a quemarlo para asegurar que no se desteja.
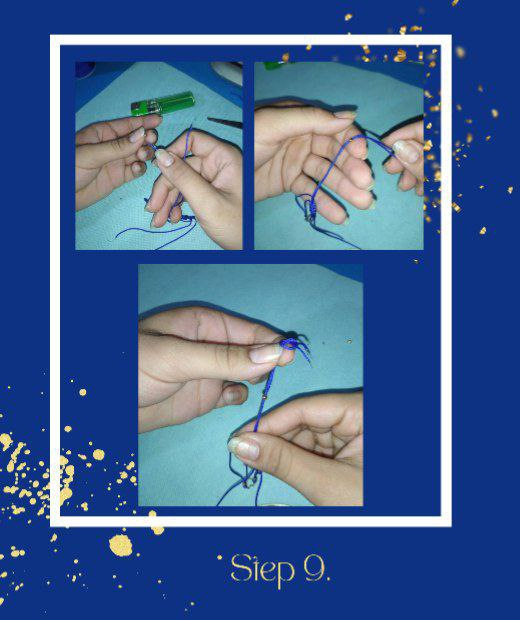
9.The last step will be to place a ball at the end of each side of the two threads of the bracelet as decorations, and tie a knot so that they do not come off.
9.El último paso será colocar un balín al final de cada lado de los dos hilos de la pulsera como adornos, y hacerle un nudo para que no se salgan.
10.As you can see, it is very pretty and simple as I told you, I hope this idea will help you at some point. Thanks for supporting me and reading my post until the end.
10.Como pueden ver, es muy bonita y sencilla como les dije, espero que les sirva en algún momento esta idea. Gracias por apoyarme y haber leído mi post hasta el final.

All the images were taken from my Redmi 9A phone. Edited in "Canva"
Todas las imágenes fueron tomadas desde mi teléfono Redmi 9A. Editadas en "Canva".
A mí me encantan los accesorios de este estilo; sencillos, fácil de realizar, poco material y muy bonitos. Además el color azul 💙 es uno de mis favoritos.
Beautiful and elegant!
!discovery 30
This post was shared and voted inside the discord by the curators team of discovery-it
Join our Community and follow our Curation Trail
Discovery-it is also a Witness, vote for us here
Delegate to us for passive income. Check our 80% fee-back Program
Congratulations @aarolita! You have completed the following achievement on the Hive blockchain And have been rewarded with New badge(s)
Your next target is to reach 2250 upvotes.
You can view your badges on your board and compare yourself to others in the Ranking
If you no longer want to receive notifications, reply to this comment with the word
STOPCheck out our last posts:
Support the HiveBuzz project. Vote for our proposal!
Me encantó el color que elegiste, y el diseñó muy bonito, es la clase de pulseras que no me quitaría nunca porque se adapta a casi todos los estilos.
Excelente trabajo
Que lindo y con ese color azul que lo hace elegante y casual a la vez
Te quedó muy bonito. Y hermoso el color 😊