NodeJS nodemailer - Send Mails Through NodeJS
Repository:
https://github.com/nodejs/node
What Will I Learn?
- You will learn how to set up a nodejs project
- You will learn how to use nodemailer to send emails through nodejs
Requirements
- Node.JS
- nodemailer (package)
Difficulty
- intermediate
Curriculum
The Tutorial
Hello guys, today you will learn how to create nodejs mail service script.
Setting up the project files
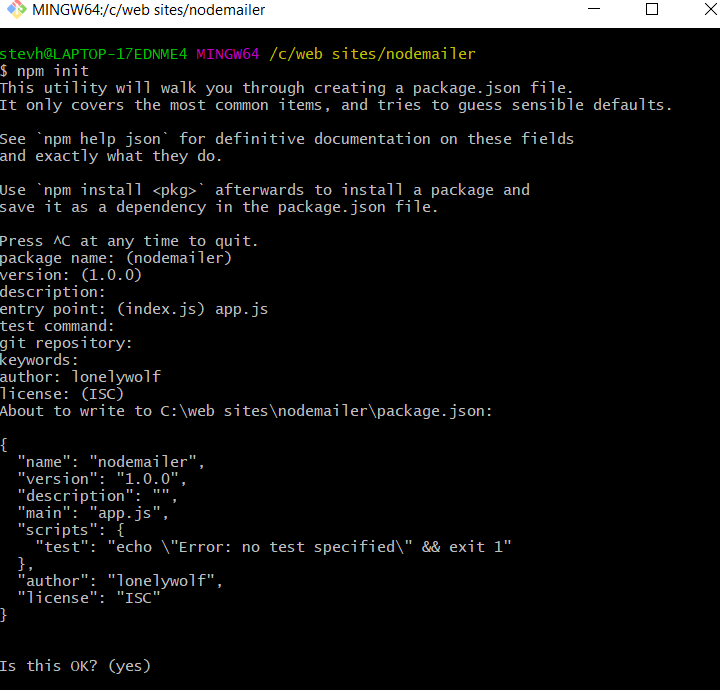
create a new project, call it in any name you want, I call it "nodemailer"
npm init
at the new folder, create a new node project using the code above...
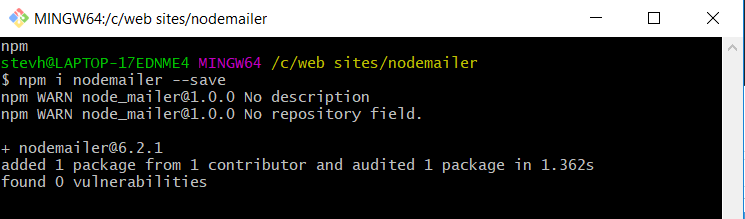
great now you need to install all the packages and the nodemailer package.
npm install nodemailer --save
what does it do?
because you set up the project, now you have a json file with all of the packages you need to install, nodejs is not part of that so we're installing it and on the way, it's installing all of the others!
Good! now you can start creating your script, create a new file called app.js or whatever name you chose for you "entry point" script (Main script)!
Creating the script
so first let's clear some things for this tutorial we will learn how to send mail via Google because it's the most popular service.
now you need to create the transporter, the transporter is the function that will contact with nodemailer, the transporter contains the SMTP(the mail service) and your email details (address and password).
why does it need the password? pretty easy, it can't send anything without your address, don't worry, unless you're sharing that script you don't need to be afraid to lose your password,
for the worst case you can create a new account specifically for that.
Creating the sending function
after all of that, all you need to do is to create the function that will send the email and you're all set!
// Mail Send Function
function sendMail(mail, to, title, body){

}
mail - the sender (you)
to - the receiver
title - the title of the mail
body - the subject of the mail (the content)
now you need to create a json object that will contain all of them because the transporter requires a json object to send the mail.
  let mailOptions = {
      from: mail,
      to: to,
      subject: title,
      text: body
  };
as easy as it is, I don't need to explain what is what and why.
great now all you need to do is to send the E-mail via the transporter!
  // sending the mail with all of the options (sender, reciever, title and subject[body])
  transporter.sendMail(mailOptions, function(err, res){
    if(err) {
        console.log(err);
    }else{
        console.log('Email Sent Succesfully!');
        console.log(`Title: ` + title);
        console.log(`Result: \n` +  res);
    }
  });
so we're using the json object email options because the transporter need a json object and it doesn't get the vars one by one.
if it gets an error we're sending a log to the console so we will know the error and what we need to fix,
if not we're sending all of the data we need,
the title to make sure it sent the right data.
and then we get the result from the transporter!
Suggestions
so what you can do with it?
you can check out my last tutorial (mention notification)
and make a combination of the two, for example, save the data of 5 mentions and then send it to yourself / the account that got notified.
you can make a code verification via email, I used it in a few of my projects in the past.
you can do whatever you want with that!
Running + results
so to run it all you need to do is to create your body, the title and send it to someone, you can test it with yourself!
example -
sendMail("[email protected]", "[email protected]", "Test Email", "Hello, I'm a test<br>This is a mail from nodemailer!");
great now it should send the mail, make sure your email is not a 2-auth factor because you would not be able to log-in through the transporter.
I didn't have an email without 2-auth factor so I could not give you results of that,
but it should be perfectly okay!
the result you need to get :
Email sent successfully!
Title: Test Mail
Result:
XXXXXXXXXXXXXXXXXXXXXXXXXXXXXXXXX
XXXXXXXXXXXXXXXXXXXXXXXXXXXXXXXXXXXXXXXXXXXXX
XXXXXXXXXXXXXXXXXXX
Proof of Work Done
https://github.com/upmeboost-utopian
Thank you for your contribution @lonelywolf.
After reviewing your tutorial we suggest the following points listed below:
Your tutorial is quite short for a good tutorial. We recommend you aim for capturing at least 2-3 concepts.
Thanks for following some suggestions from the previous tutorial. However, it is necessary to improve the structure of the tutorial and to detail more.
Looking forward to your upcoming tutorials.
Your contribution has been evaluated according to Utopian policies and guidelines, as well as a predefined set of questions pertaining to the category.
To view those questions and the relevant answers related to your post, click here.
Need help? Chat with us on Discord.
[utopian-moderator]
Thank you I qppreciate that, can you tell me what I need to improve?
I think I don't understand.
Posted using Partiko Android
Thank you for your review, @portugalcoin! Keep up the good work!
Hi @lonelywolf!
Your post was upvoted by @steem-ua, new Steem dApp, using UserAuthority for algorithmic post curation!
Your post is eligible for our upvote, thanks to our collaboration with @utopian-io!
Feel free to join our @steem-ua Discord server
Hey, @lonelywolf!
Thanks for contributing on Utopian.
We’re already looking forward to your next contribution!
Get higher incentives and support Utopian.io!
Simply set @utopian.pay as a 5% (or higher) payout beneficiary on your contribution post (via SteemPlus or Steeditor).
Want to chat? Join us on Discord https://discord.gg/h52nFrV.
Vote for Utopian Witness!
Hey @lonelywolf
Hope you are GREAT today!
I just made a new token on Steem Engine - The "LUV" token! @luv.token
Looking for away to set up a tipping bot (so when I tag !luv the bot will drop a tip) or help with comments and such.
I read some of your articles and sounds like you know your stuff! Is this something you could help me with? Are you on Discord - I am under the name jacuzzi#5037 ).
Well would love to talk more! Thank you for your time!
Hi, @lonelywolf!
You just got a 0.17% upvote from SteemPlus!
To get higher upvotes, earn more SteemPlus Points (SPP). On your Steemit wallet, check your SPP balance and click on "How to earn SPP?" to find out all the ways to earn.
If you're not using SteemPlus yet, please check our last posts in here to see the many ways in which SteemPlus can improve your Steem experience on Steemit and Busy.