HP Integrity (Itanium) rx2660 server with OpenVMS
So we have a customer's HP Integrity (Itanium) rx2660 server with OpenVMS which hadn't been used for a good number of years. They decided they wanted some data from it but somehow the boot process had become corrupted. After a fair bit of research, I finally managed to get the thing up and running. Given the hoops, I had to jump through I thought I might as well upload some of the notes I made which might help someone.
If you're not a Geek you might find it pretty boring, you have been warned. 🤣
The first section is when the Server was broken
HP Integrity rx2660 server: Setting the Boot path
Plug the power cable in, there should be no need to press the power button, it should fire up on its own. (Obviously, if it doesn't press the power button)
The rx2660 is configured to boot off the network so it will probably look for network DHCP (This is why it had to have the network cables connected I believe?) press Esc a few times once you see it looking for DHCP and it will drop to a Shell Environment with the word shell> in yellow. Type exit and it will drop to that white EFI menu you've seen before.
With the up and down arrow keys navigate to "Boot menu" (Or edit boot menu, I can't remember?) press enter, you're looking for "Add boot menu entry" press enter you'll see the partitions press enter DO NOT NAVIGATE UP OR DOWN AT THIS POINT I think you see some more partitions press enter you should now see an entry second from bottom ending vms.efi use the arrow key and navigate to that, once highlighted press enter. A long box will open asking for you to name the entry, I've been using HPUX which is the standard but you can call it anything you like.
Press enter another long box opens asking for you to set parameters, don't enter anything just hit enter (There may be some Y/N questions can't remember, just say (Yes) Y.
Press the escape key (Esc) and you're back to the EFI menu and you should now see the entry HPUX navigate to that (Up/Down key) press enter and the screen should go blank with >HPUX in the top left. Wait a few minutes because vms is now booting. Once it's up (And you've no way of knowing). The screen will stay with HPUX on it till you log in via eTerm.
HP Integrity rx2660 server: Booting & Login
Plug the power cable in, there should be no need to press the power button, it should fire up on its own. (Obviously, if it doesn't press the power button)
Using the Monitor connected directly to the HP Integrity rx2660
On the Monitor screen, you will see the Boot Process, It is safe to press the “Space Bar” if a “Continue in X seconds” countdown appears. You will then be presented with the HP Integrity rx2660 boot menu which looks a bit like a BIOS menu. You then use the up/down arrow keys to navigate to either HPUX (Original install) or HPUX2 (Copy of HPUX) press enter. ) press “Enter” the screen on the Monitor should go blank with >HPUX in the top left. We are now finished with the Monitor connected to the HP Integrity rx2660
Console Connection (eTerm)
[You will need a console cable connected from the HP Integrity rx2660 server to a Workstation or Laptop (So long as they have serial ports)]
In our case, we will be using our TV. Turn the TV on with the red button on the remote. The meeting room Workstation is always on, it has the Wireless KB & M (And a cable Mouse) wake it up, the password starts with a capital:
Password:
Start E-term, select “Serial Connection” you should see an MP login request, if not press “Enter” and the request should appear on the eTerm screen.
MP Details: This will log you onto the HP Integrity rx2660 server Not the VMS
Username: Admin
Password: Admin
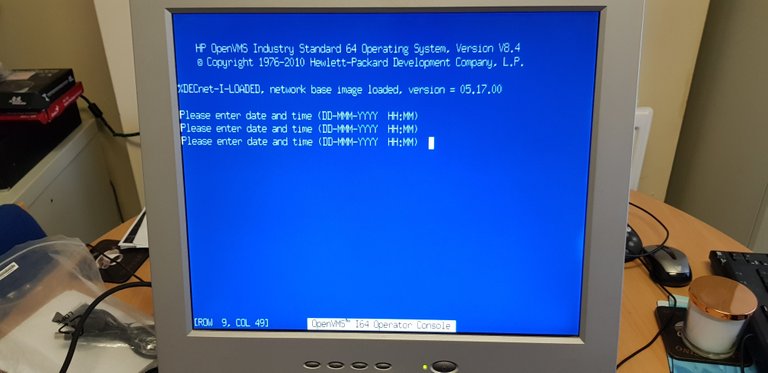
Once logged on you will be provided with some selection options, choose CO (Console Output) you will then be asked to set the time and date. This is in the format 13-Nov-2019 08:52 (I should probably set this in the configuration)
Open VMS
You will now be at the VMS login screen (You will also notice that a GUI Log-on has appeared on the Monitor). Press “Enter” to bring up the VMS log-on prompt, the VMS Welcome Screen should be showing.
Username:
Password:
Hi, @dickturpin!
You just got a 0.03% upvote from SteemPlus!
To get higher upvotes, earn more SteemPlus Points (SPP). On your Steemit wallet, check your SPP balance and click on "How to earn SPP?" to find out all the ways to earn.
If you're not using SteemPlus yet, please check our last posts in here to see the many ways in which SteemPlus can improve your Steem experience on Steemit and Busy.
Congratulations @dickturpin!
Your post was mentioned in the Steem Hit Parade in the following category:
Congratulations @dickturpin! You have completed the following achievement on the Steem blockchain and have been rewarded with new badge(s) :
You can view your badges on your Steem Board and compare to others on the Steem Ranking
If you no longer want to receive notifications, reply to this comment with the word
STOPDo not miss the last post from @steemitboard: