Part Three of Four Part Series - How To - Turn Sculpture into Finished Resin
Hello friends. Before we start our lesson for the day I want to extend my greatest appreciation for the support all of you have shown me for this project. Aside from the good feelings attained on the surface of my heart a deeper more important emotional state is created when people appreciate your efforts. In essence I speak of Motivation. It is so very important to each of us in the navigation of the ocean of life to have a purpose and direction. For artists and I'm sure many others that inhabit our Steem sphere appreciation for effort becomes the fuel for to continue. So in a much shorter turn of phrase, I thank you.
Now onward and upward with our mould making endeavors. If I correctly remember when we ended the last tutorial we'd finished wit the silicon portion of our mould. I didn't really have to remember; Actually, I just looked at post number 2. But, I thought that sentence might be more fun to write. Turns out it was.
Today we deal with adding a plaster hard mother-mold. It is absolutely necessary for most molds. Exceptions being when you might pour each half of a mould with rubber only. But that is a story for another day. First things first I imagine.
I forgot to make a picture of this but it's a good idea non-the-less; Draw a line down the center of your rubber mould with the sculpture still inside. For faces like we are dealing with today it is often a good idea to go from chin to base of skull traveling over the top of the head. Allowing for a the final hard shell too easily separate. This is only a general tip. How you decide your piece in half is up to you and based on the actual shape you are dealing with. It is just that with a face most times a line from chin over the nose to the base of the skull generally avoids any issues where a casted piece might get stuck in the mouther-mould. However you choose to do it, the principle is to avoid having, our old friend, the undercut from jutting deep into the hard plaster.
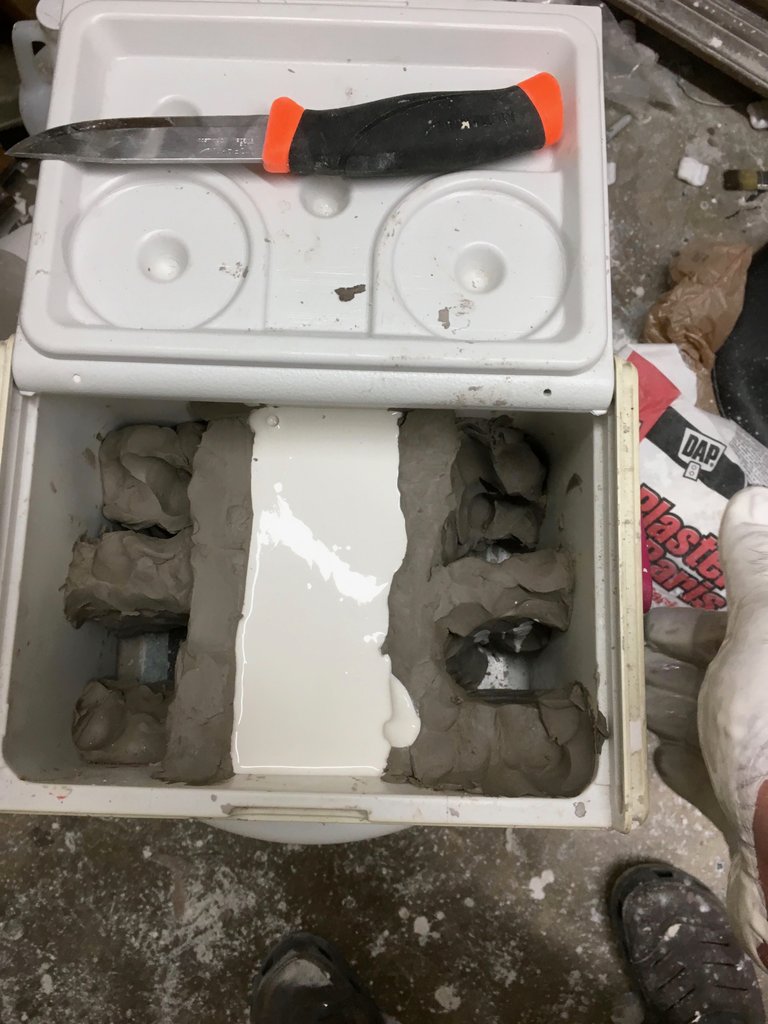
Now, in most cases you will either be building wall around your sculpture with clay or something like craft board. Sometime that Formica wood works pretty well. I will be using an old cooler for three of my walls. I am only doing this because I have good knowledge that I can remove the piece from this particular cooler after everything is solid. You may want to make everything out of clay or wood to begin with. Or experiment with different containers until you find one that suits your purposes.
Whatever you choose it is advisable to seal all seams where the walls meet. If using wood or craft board, hot glue works well to seal the edges of your wall. The hot glue also helps greatly to secure the bottom of the walls to whatever base you decide to use. This is important, you don't want things moving around on you when you are pouring.
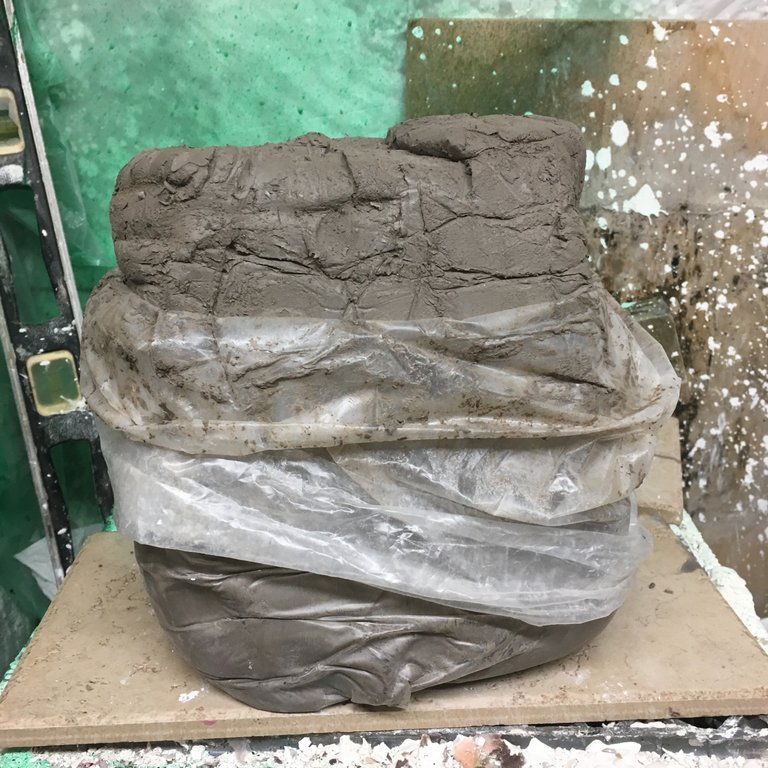
If using clay, I like WED clay, WED stands for Walter E. Disney. This clay is an industry standard for this kind of application. With that said any water based clay will work a this point in our process.
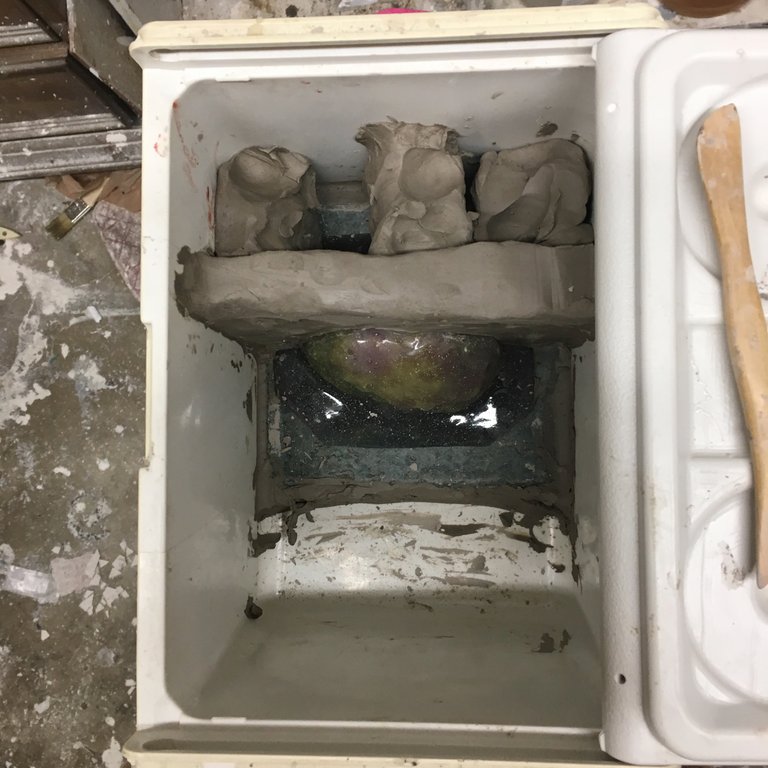
You will notice in the above picture showing the cooler and clay dividing walls, I have the piece divided in half. This process is done on one side first then after the plaster sets we remove the clay and do it all over for the other side. You'll notice that along with the center wall I have also built structural clay braces. This keeps the center wall from bulging outward when we pour the plaster. Notice also I've use clay to fill in any seems where wet plaster might leak the sides of the wall and the base.
A better view of the wall from a couple of angles for better viewing.
Once you have that set up and everything is determined to be firmly in place, it is time to clean things up. I use he tool you see to make sure I have an even surface and the seam lines on the walls are sealed. This is the point that I also make sure that the clay touching the silicone is in a strait line and centered. If you've use a sharpie to draw the line, remember you want your parting line to be on half of that sharpie black, with the other half showing. Something I forgot to show here. Another thing I forgot was to make sure that my original piece was properly centered on the original base before starting with the first layer of rubber. As you will see later this will make my mother mold thicker on one side than the other. Not such a big deal for this piece but not very professional either. Also it can cause issues for more complicated pieces or larger ones. Best to center things in the beginning.
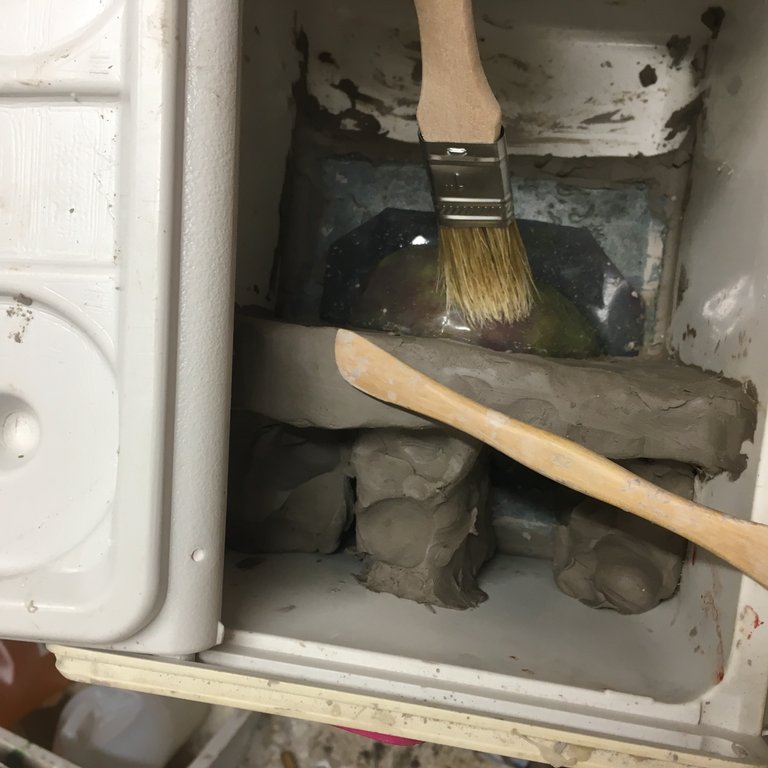
Here I'm using a brush to clean things up like dried clay and the dust. Puffs of air work great for this if you have access to such a thing.
Add key holes to the wall you've just build. This can also be done in reverse by adding metal nuts at this point, making little bumps. Whichever you do the plaster we are about to pour will have the opposite. I do it this way because I'm lazy and it's easy. Besides I've done it this way for about 3-4 years now and not had any issues. You should play around with it and see if you like one way over another. If you do it the opposite of me I'd love to know what you think. If it works better for you I'd be willing to change my ways.
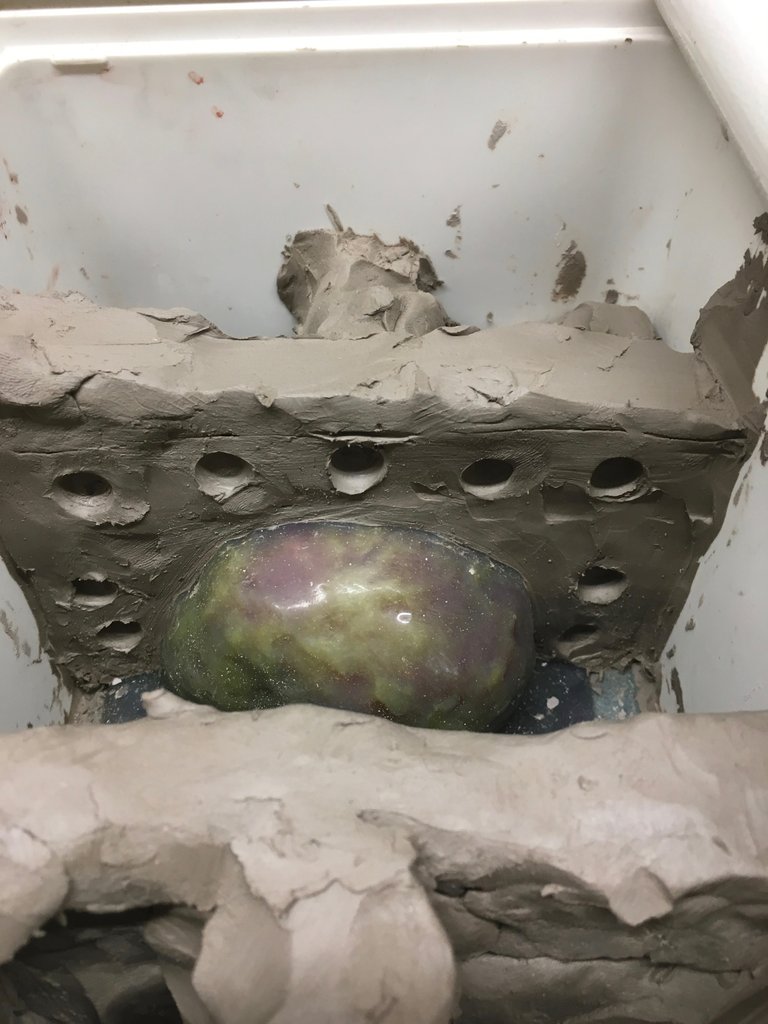
The purpose of these little wholes is to create keys that lock the two sides of the mother-mould into place while pouring your cast.
Now we build the outer wall. Basically doing the same as we did with the inner wall. Now you can see the cavity where we will be pouring our plaster. Notice that I have at least 3/4 to an inch distance the piece to the walls. Also the center wall is roughly the same distance above the piece. This seams to be the minimum distance for integrity of the mould. I've tried less and inevitably the mother-mould ends up cracked at some point. So remember 1 inch is a good place to start.
Time for to mix us up some plaster. Here I'm using an old plaster of paris container bought sometime in the past from a general hardware store. I no longer do this now I always buy larger bags of the stuff. Once you start using it for moulds you'll find you go through a lot of this stuff.
Health and Safety: I feel obliged at to point out some conditions that relate to health and safety concerns. I'm no doctor but I can't imagine breathing the dust from this stuff could be good for anybody. So if I might suggest, wear a mask that is rated for plaster dust. Better yet wear a mask and prep in a well ventilated area or out of doors. Healthy wealthy and wise ya know.
Ok for our small piece here, I fill this container about a third of the way with water. I then sift the plaster in by hand until I see little islands form. Many times I sift until the top of the mix begins to look like a dry lake bed.
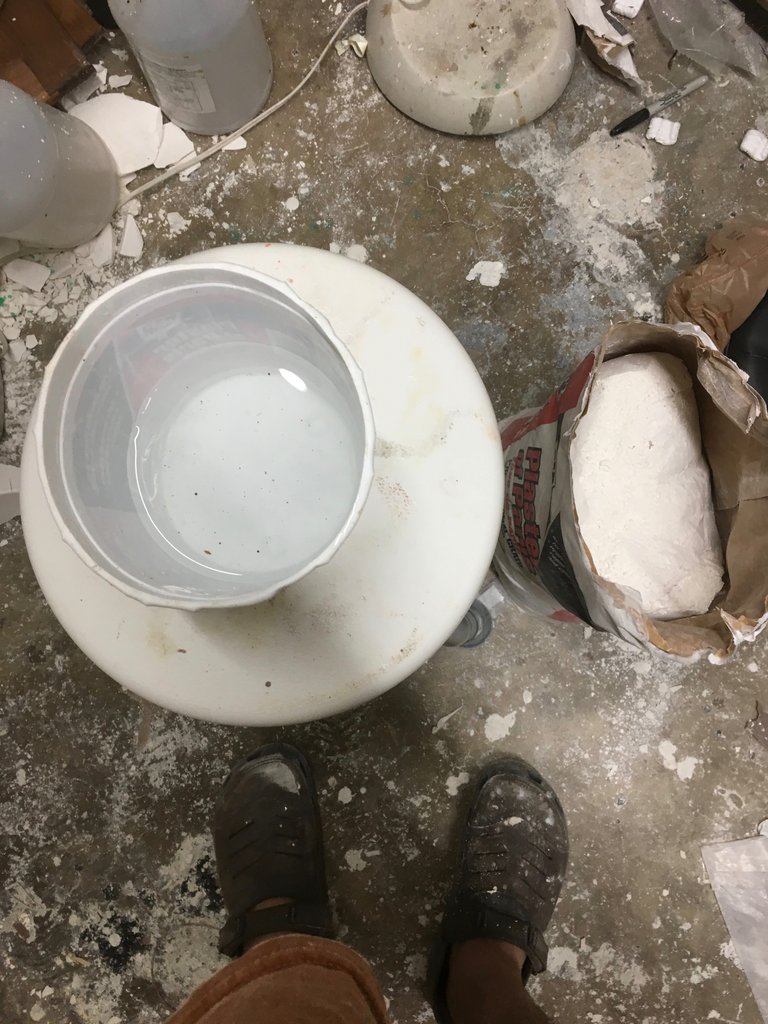
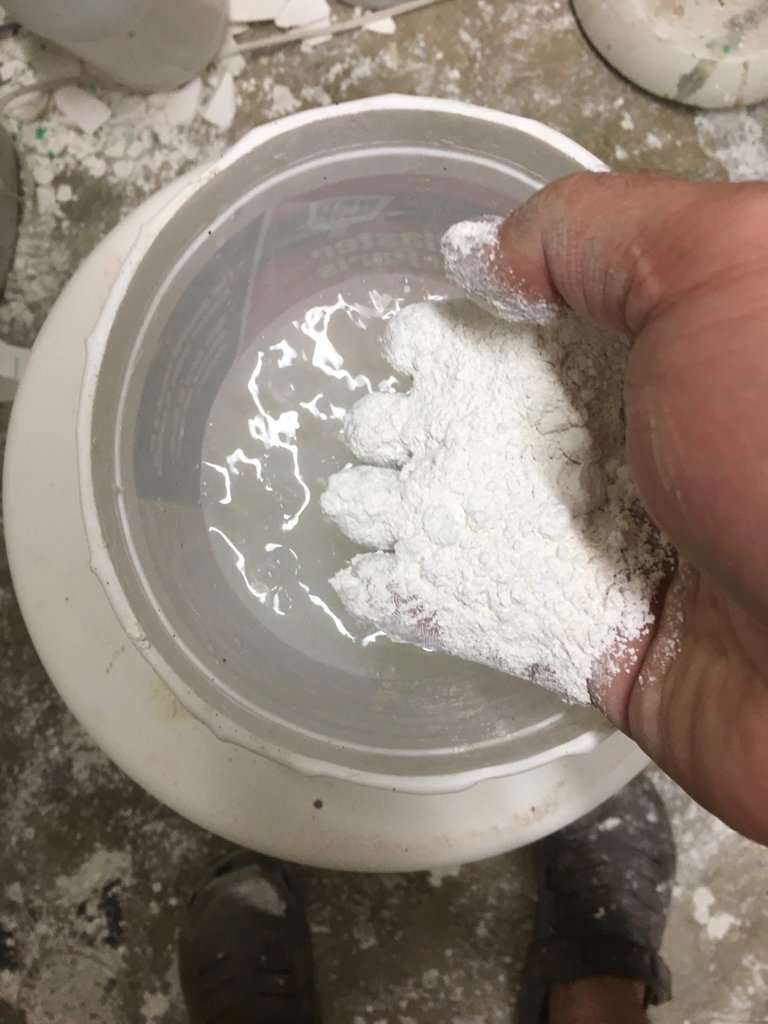
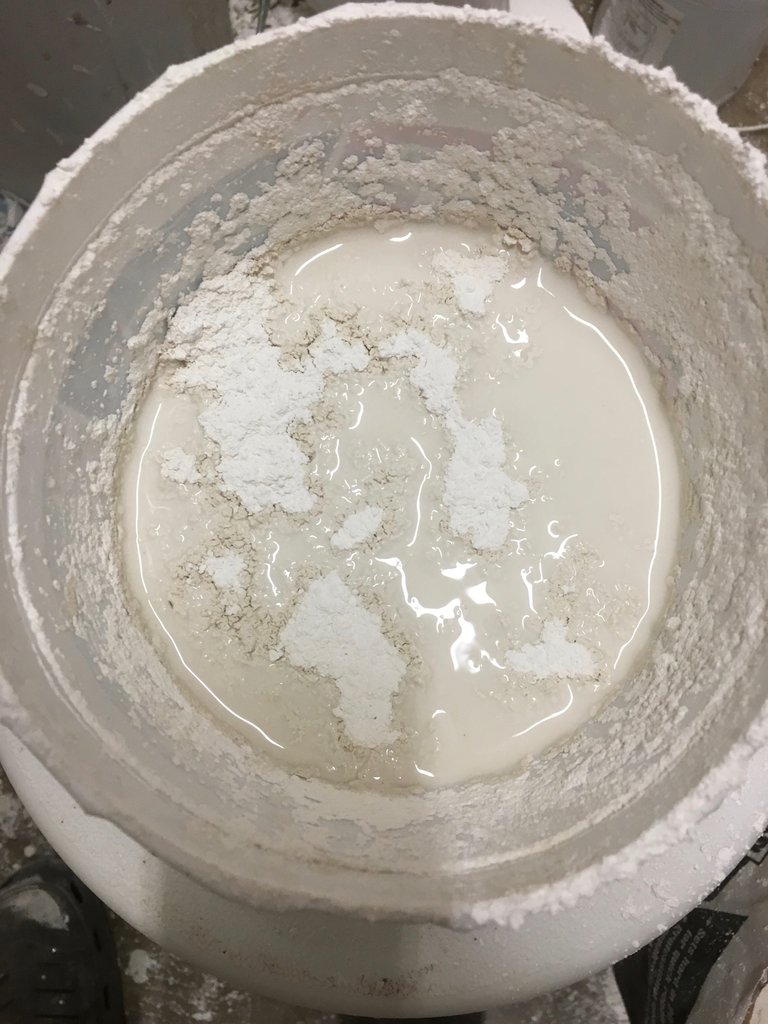
At this point let it slake for around 3min. Slake means just let it be and don't mess with it for 3 min. This allows the maximum saturation of the gypsum with water.
After letting the mixture slake for the time allotted we mix for another 3 or more min. What we are looking for is a nice creamy viscosity. Sorta like heavy cream, maybe a little thicker. I like to mix by hand making sure all lumps are squished and squashed out of existence. You might prefer to wear rubber gloves for this step. I don't because... Dunno, guess I just don't want to. I'm sure there is some deep seated rebellious psychological reason I don't, but I don't.
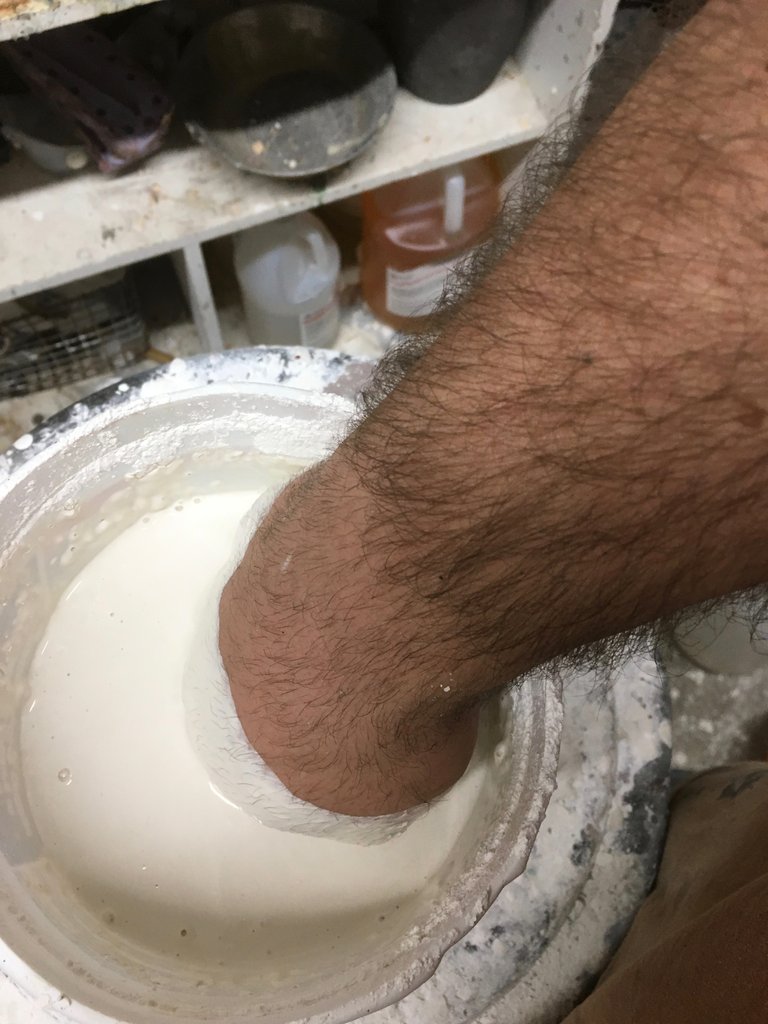
You'll notice that because of my stubbornness and also lacking enjoyment from tearing dry plaster out of my arm hair I have come up with quite a brilliant solution. I shave my arm hair in the problem areas. Now no more clumps of plaster sticking to my arm hair. There solved!
Anyway, after we get plaster to the desired consistency, we pour.
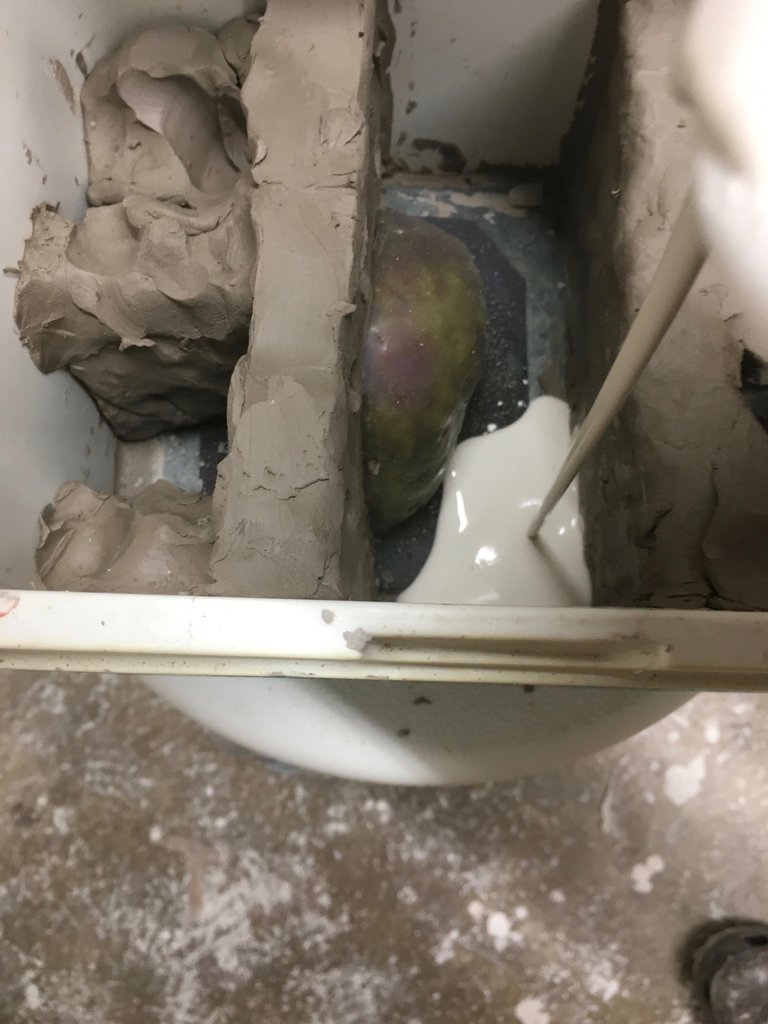
There we go. Half done. Go have lunch and when you get back the plaster will have set up and we can start on the other side.
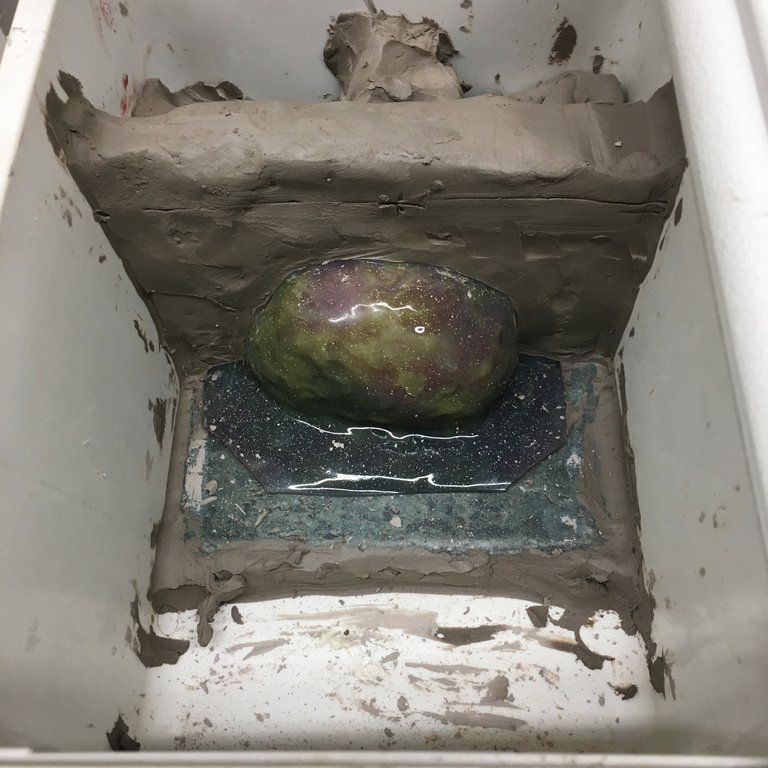
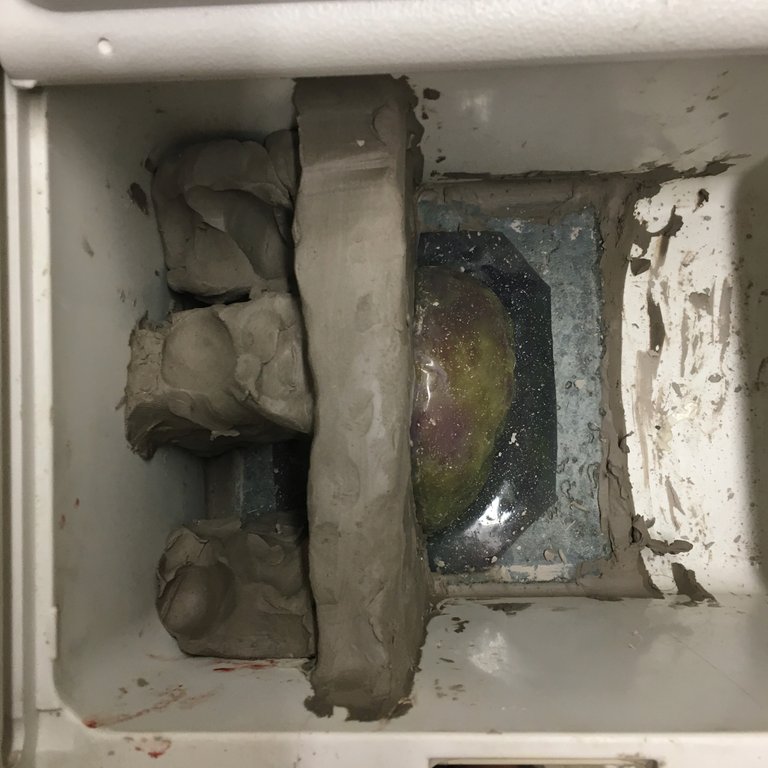
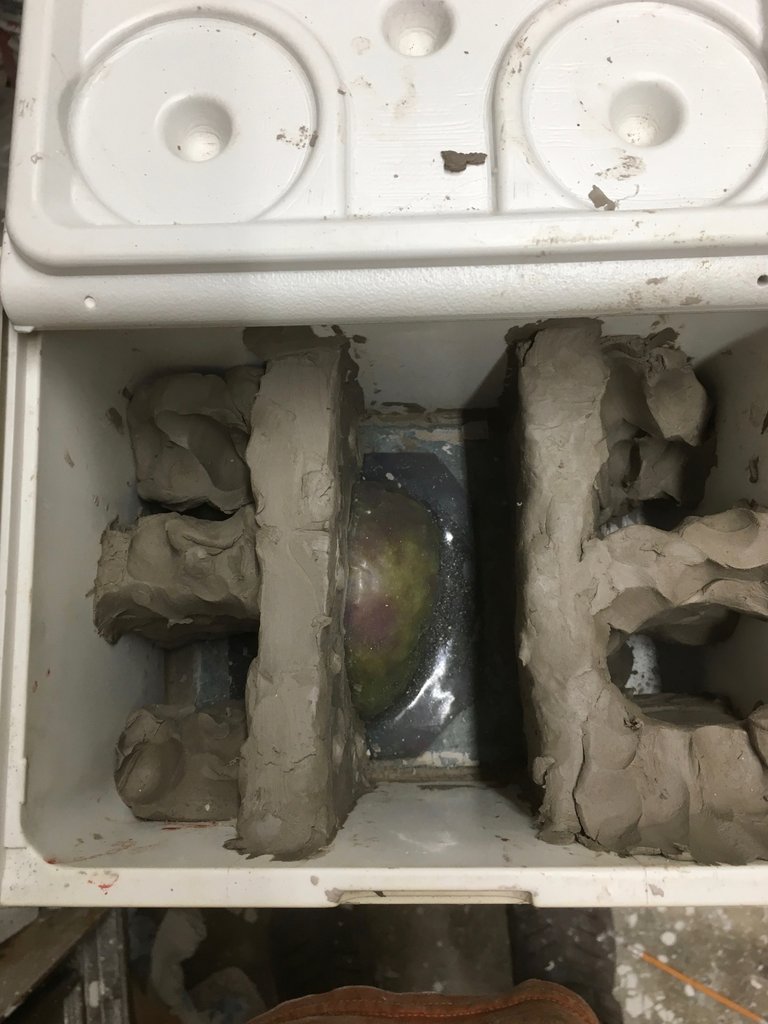
Are you back? Great! Now clean out all that clay so that you are left with something that looks like this.
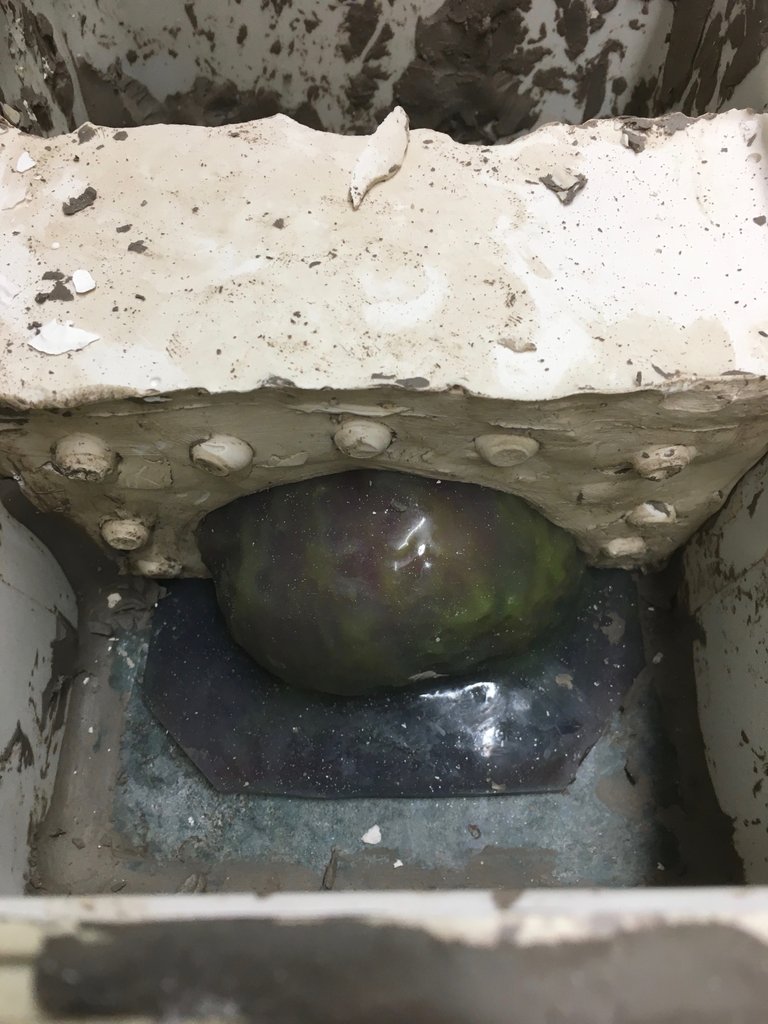
See the bumps? Those are what I was talking about making the little keys for the mold helping keep everything firmly in place.
Once everything is nice and cleaned up a good tip is to brush the plaster wall with past wax.
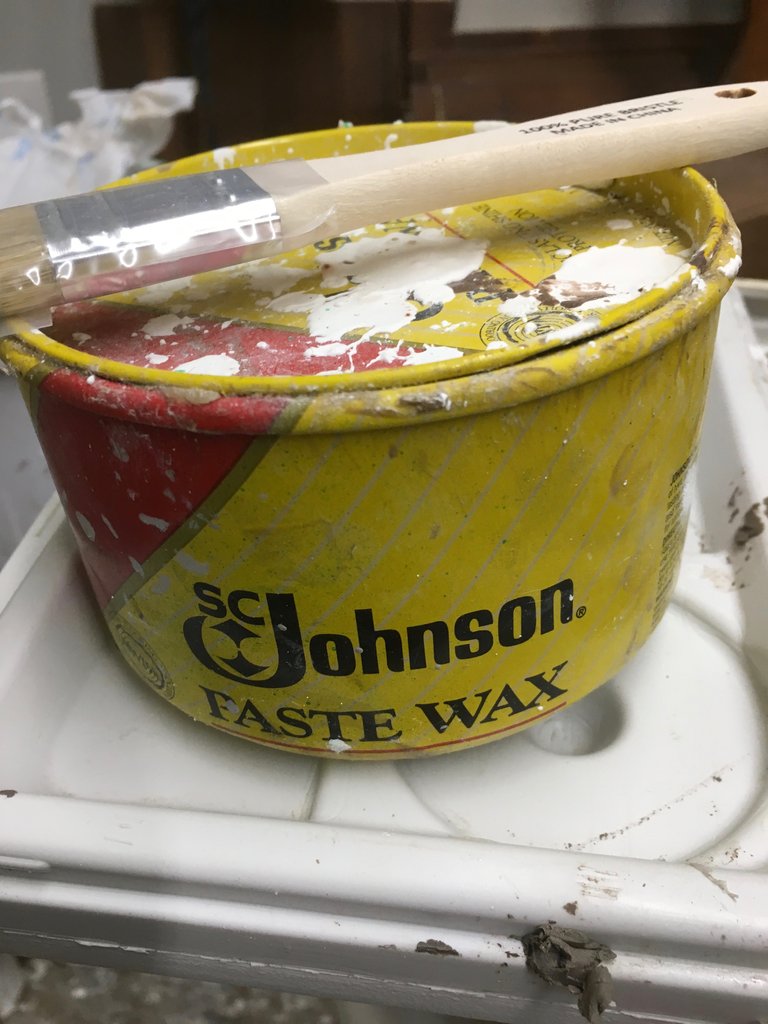
Wet plaster doesn't stick to cured plaster. But it can create quite the suction bond making it the dickens to get the two halves apart. The paste wax helps avoid this.
That's it. Once that cures you have yourself a genuine mother-mould. And as long a not dropped it will last the life of the mould.
Next time we address casting. We'll get into more about resins and how they work and lots of other fun things.
I hope you enjoyed todays tutorial. I am alway happy to answer any questions that I'm qualified to ask. Feel free to ask questions in the comments or DM me on discord. I normally respond pretty quickly, no more than a day at most. Ok, until next time.
Huge thanks to all,
Matt (SC)
Congratulations @sleepingcowboy! You have completed the following achievement on the Steem blockchain and have been rewarded with new badge(s) :
You can view your badges on your Steem Board and compare to others on the Steem Ranking
If you no longer want to receive notifications, reply to this comment with the word
STOPTo support your work, I also upvoted your post!
Vote for @Steemitboard as a witness to get one more award and increased upvotes!
Hello!
This post has been manually curated, resteemed
and gifted with some virtually delicious cake
from the @helpiecake curation team!
Much love to you from all of us at @helpie!
Keep up the great work!
Manually curated by @veryspider.
@helpie is a Community Witness.
For more information about our project,
please visit this month’s UPDATE post.
Thank you!
This post was shared in the Curation Collective Discord community for curators, and upvoted and resteemed by the @c-squared community account after manual review.
@c-squared runs a community witness. Please consider using one of your witness votes on us here
Thank you for sharing.
This looks like muuuch fun. Thanks for sharing!
I very much enjoy what I do. Never knew I would but I really like writing these tutorials also. Thank you for commenting.
Thank you for using the #build-it tag. We have rewarded this post from our @build-it.curator account with BUILD tokens in the form of an upvote.
Build-it is a central hub for DIY and How-To projects. It's an opportunity to find and share the latest in DIY, and How-To tutorials. The recommended tags required when creating a DIY article are #diy, #build-it. #how-to, or #doityourself. Please read our guide
Need help? Live technical support on Discord or Telegram
This project is run and supported by our witness @gulfwaves.net. If you like what we do, click here to vote for us