[Eng\Esp] How to make a sexy underwear.\ Como hacer una sexy ropa interior.
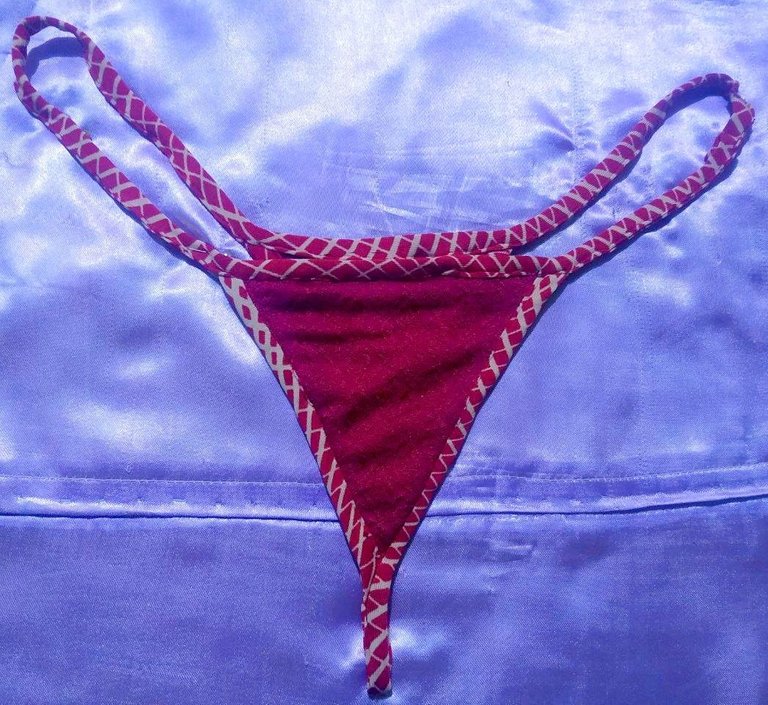
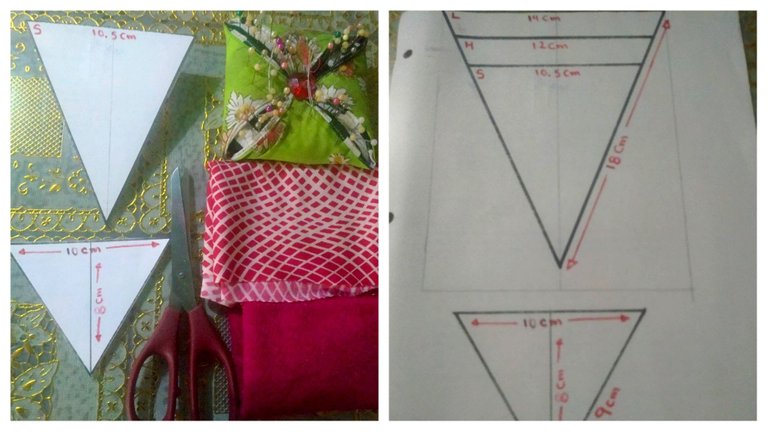
Hello my dear friends, I sent you a warm greeting. Today I am going to show you how to make a sexy intimate garment, which there are many ladies who today like to wear this kind of underwear. For my part I like to use it and well I will show you how they can be done by combining the colors, here I will leave you as a guide a pattern that I elaborate, identifying your measurements. In this case, I made it size s.
Hola mis apreciados amigos, les envió un cariñoso saludo. Hoy les voy a mostrar cómo elaborar una sexy prenda íntima, la cual hay muchas damas que hoy en día le gusta lucir esta clase de ropa interior. Por mi parte me gusta usarla y bueno le mostraré como se pueden hacer combinando los colores, por aquí les dejaré de guía un patrón que elabore, identificando sus medidas. En este caso yo lo elaboré talla s.
Materials:
• Burgundy fabric
• Stretch fabric
• Scissor
• Pins
• Pattern
Materiales:
• Tela color vinotinto
• Tela elástica
• Tijera
• Alfileres
• Patrón
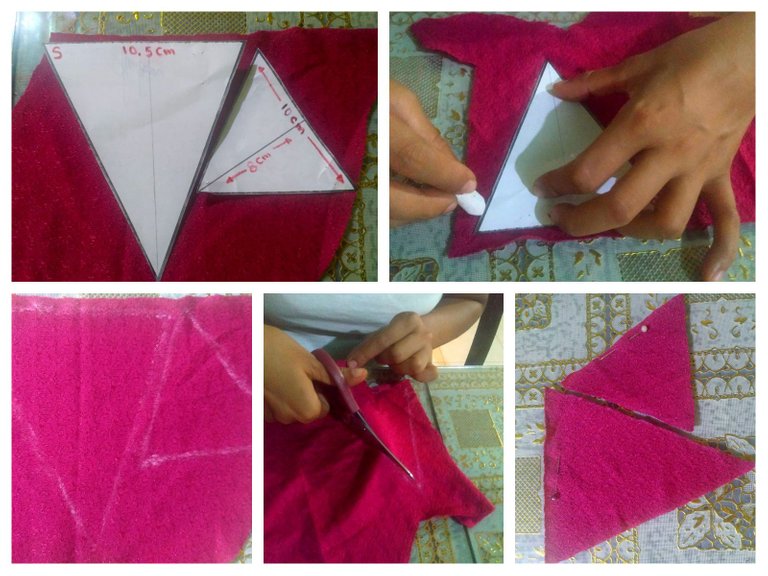
Step 1:
The first thing I did was chalk the pattern onto the fabric, and then cut.
Paso 1:
Lo primero que hice fue marcar con una tiza el patrón sobre la tela, y luego corte.
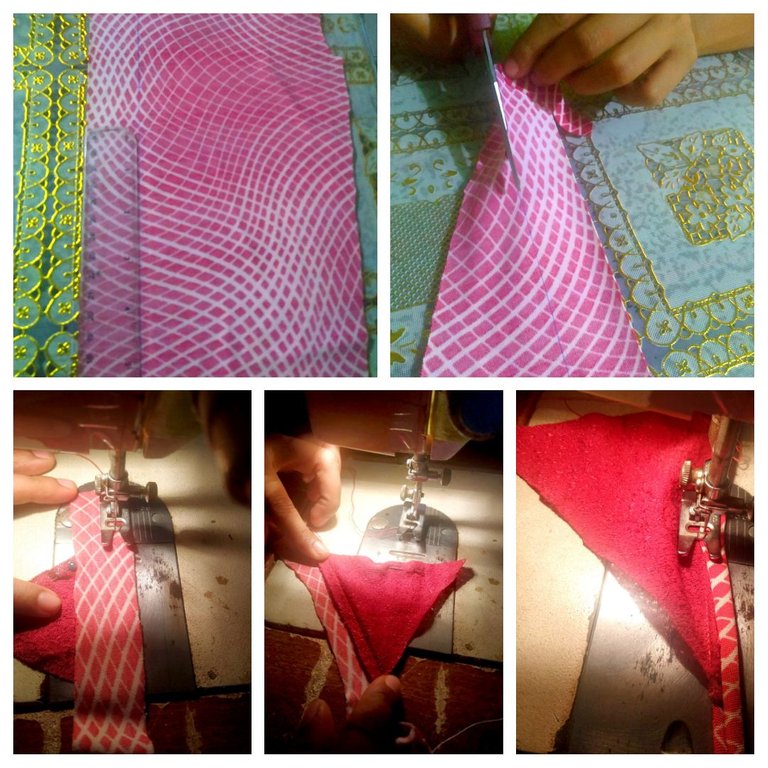
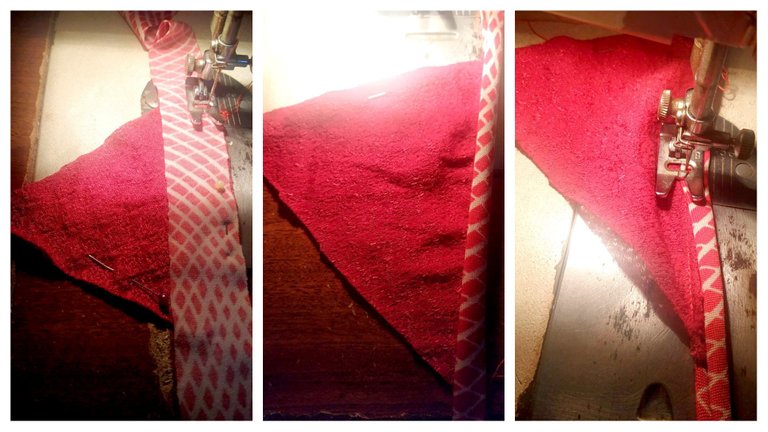
Step 2:
As it had no bias, I improvised with an elastic fabric and made a bias, which the strip that I cut for the elastic was 3 cm wide, and 1.40 cm long, then I proceeded to sew the elastic over the small triangle. First I sewed the fabric, then folded inward and sewn. And so the seam was on the inside and not the outside.
Paso 2:
Como no tenía sesgo improvise con una tela elástica e hice un sesgo, la cual la tira que corte para el elástico fue de 3 cm de ancho, y 1,40 cm de largo, después procedí a coser el elástico sobre el triángulo pequeño. Primero cosí la tela, después doble hacia adentro y cosí. Y así la costura me quedó por el lado de adentro y no por fuera.
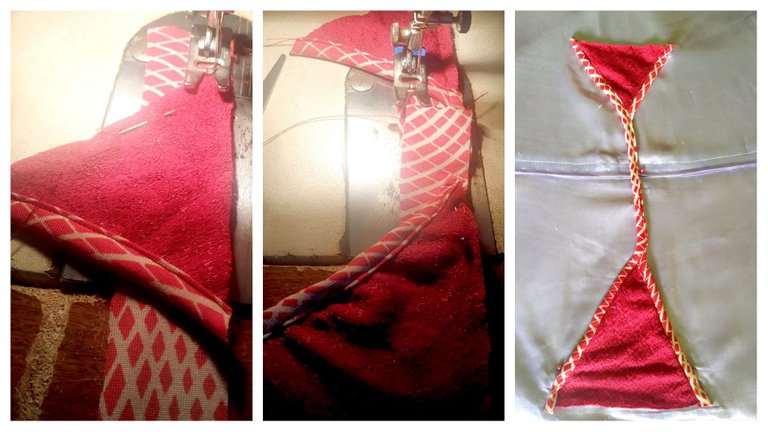
Step 3:
Now I proceeded to place the strip at the front of the thread, I did the same procedure as in the previous part. I sewed the fabric first, then fold in and sewed.
Paso 3:
Ahora procedí a colocarle la tira a la parte de adelante del hilo, hice el mismo procedimiento que en la parte anterior. Cosí primero la tela luego doble hacia adentro y cosí.
Step 4:
Here I sewed the triangle on the back, from there I measured 10 cm long and placed the front and sewed. This is the first part after sewing.
Paso 4:
Aquí cosí el triángulo de la parte trasera, de allí medí 10 cm de largo y coloqué la parte delantera y cosí. Esta es la primera parte después de coser.
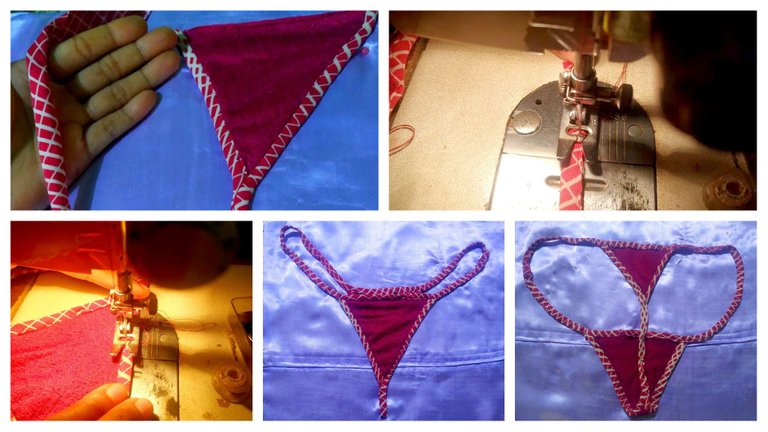
Step 5:
Then I started sewing this strip in the front and then the back. Once everything was placed, sewn, this was my result.
Paso 5:
Luego comencé a coser esta tira en la parte delantera y luego en la trasera. Una vez colocado cosido todo, este fue mi resultado.
Collage making program: Fotojet Link
Translated from google translator Link
Photo editing program: PhotoFiltre 7
Las fotos fueron tomadas desde un Xiaomi Mi A2..
Programa para hacer el collage: Fotojet Enlace
Traducido del traductor de Google Enlace
Programa para editar fotos: PhotoFiltre 7
I say goodbye until another opportunity.
Thanks for your support.
Me despido hasta otra oportunidad.
Gracias por su apoyo.
Copyright @imargasa. All rights reserved.
Congratulations @imargasa! You have completed the following achievement on the Hive blockchain and have been rewarded with new badge(s) :
Your next target is to reach 3250 upvotes.
You can view your badges on your board and compare yourself to others in the Ranking
If you no longer want to receive notifications, reply to this comment with the word
STOP