Creepy Skull Halloween 2 ply Face Mask - easy handmade how to

Hello, friends!
Back to my needlework piece, and it's now 2 days before halloween.. So last weekend i started to make the hand embrodery for this mask then continue making it last two days, and this morning i finally finished this mask. I would like to share how i made it and i hope you will like it.
Materials and things needed:
Natural colour of fabrics, one thicker to embroider and one thinner for the back
a pencil
scissors
black embroidery floss/thread
embroidery needle
sewing needle
red sewing thread
white sewing thread
elastic rubber
How i made it:
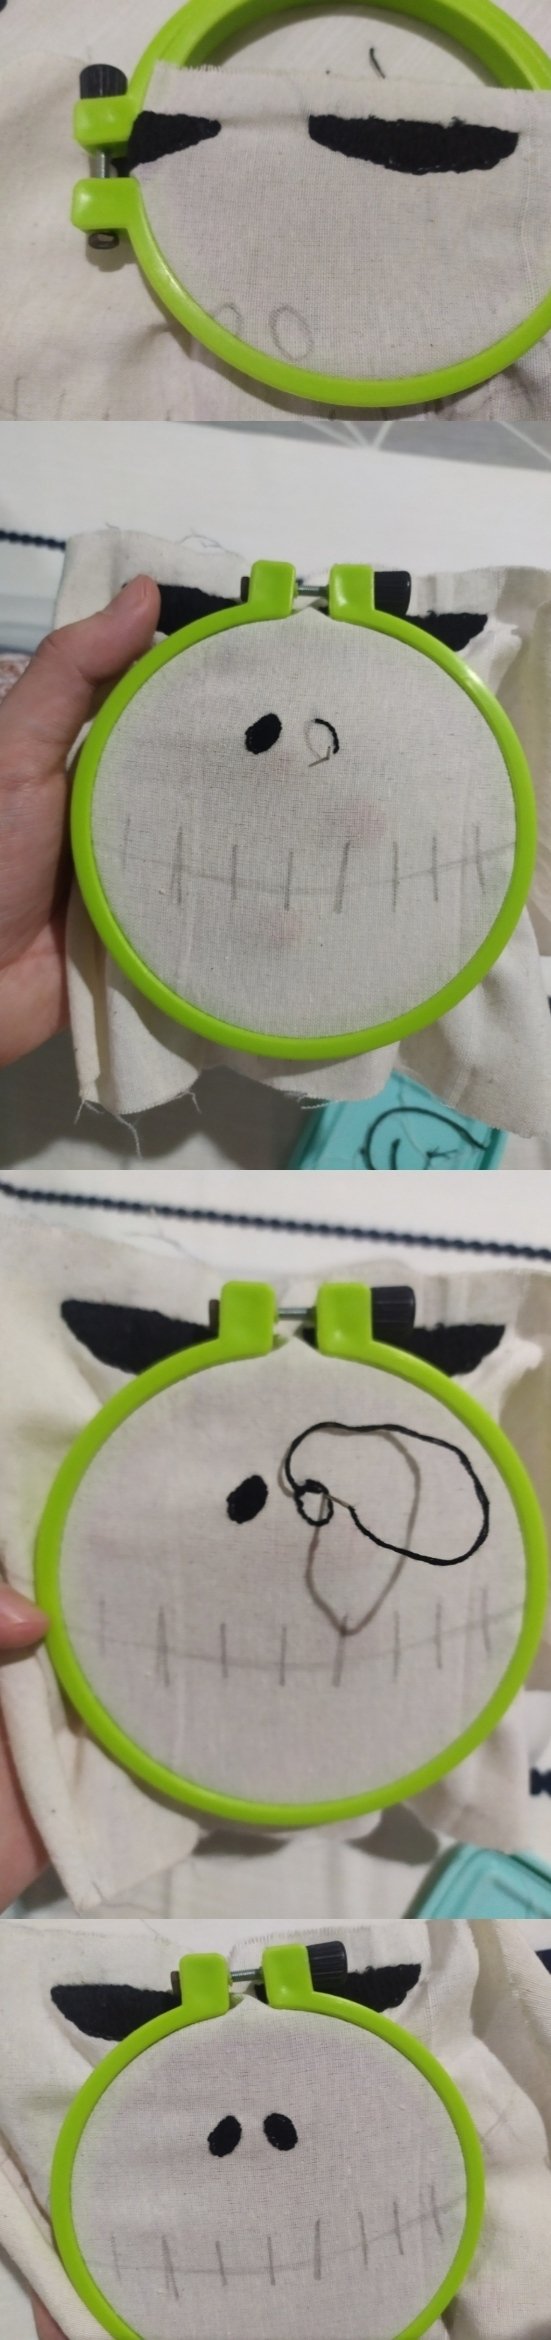
First i cut the fabric like below, then on the thicker fabric i draw the face of a skull: two holes for the eyes, two holes for the nostrils, and the mouth. Then start to do the hand embroidery with the 4 strands of black embroidery floss, i did it from the left eye. Embroider the outter lining first.

Then for the filling, go from the top to the bottom then to the right side from bottom to top. The use of this way of embroidery is to make the embroidery thick and better, you could use fewer thread and also for a better result of the embroidery and its' back too.

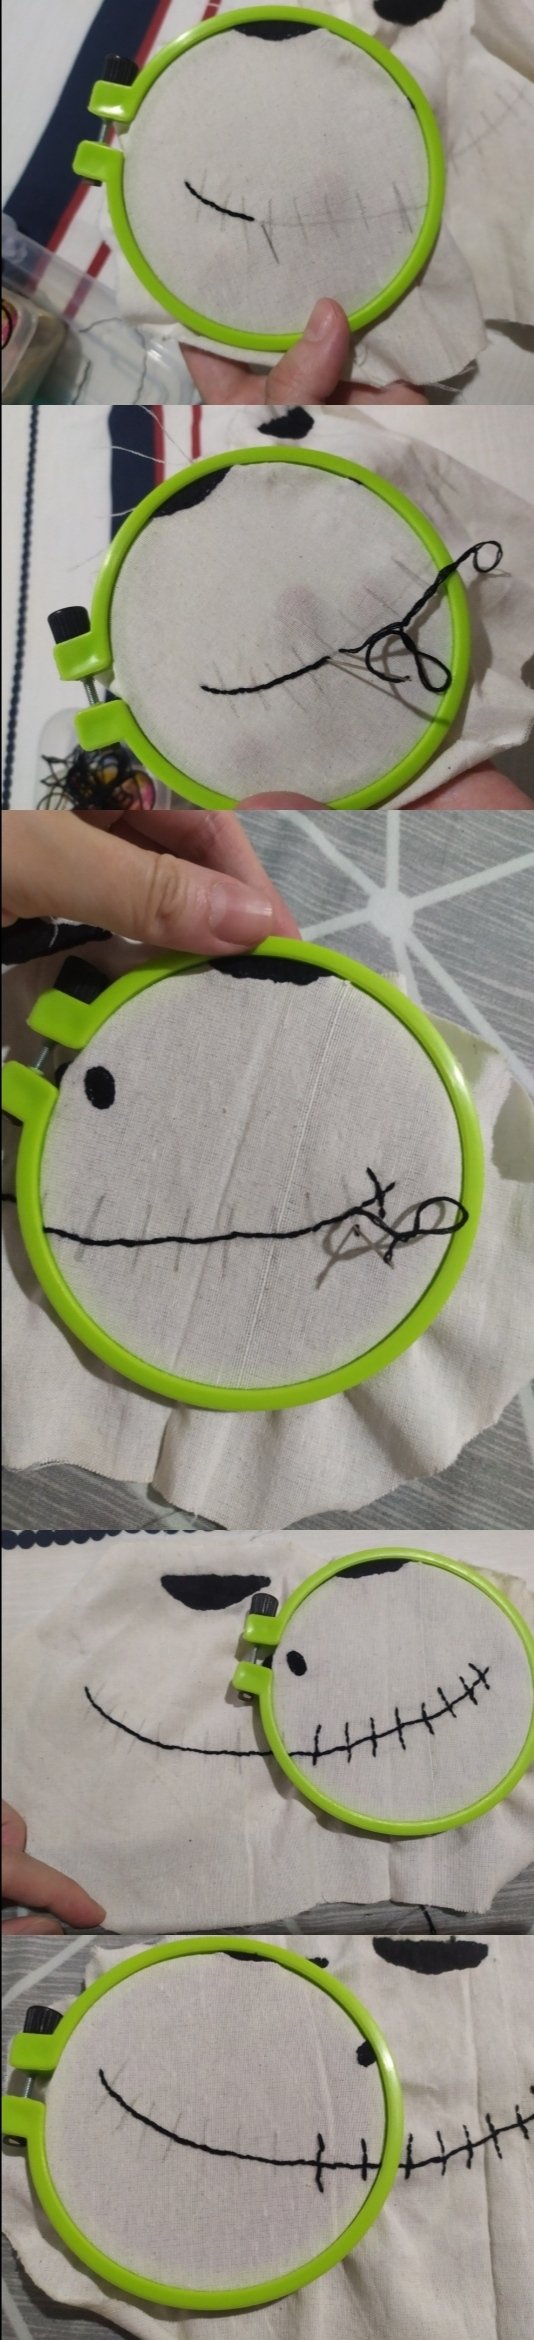
For the nostrils also embroider the outter line first then for inside, do horizontally embroider but with the same way with the eyes so it would be like from the left to right then down, right to the left and then repeat it.
For the mouth, only embroider from left to right then the horizontal embroider one by one. Then it means we finished the embroidery part.
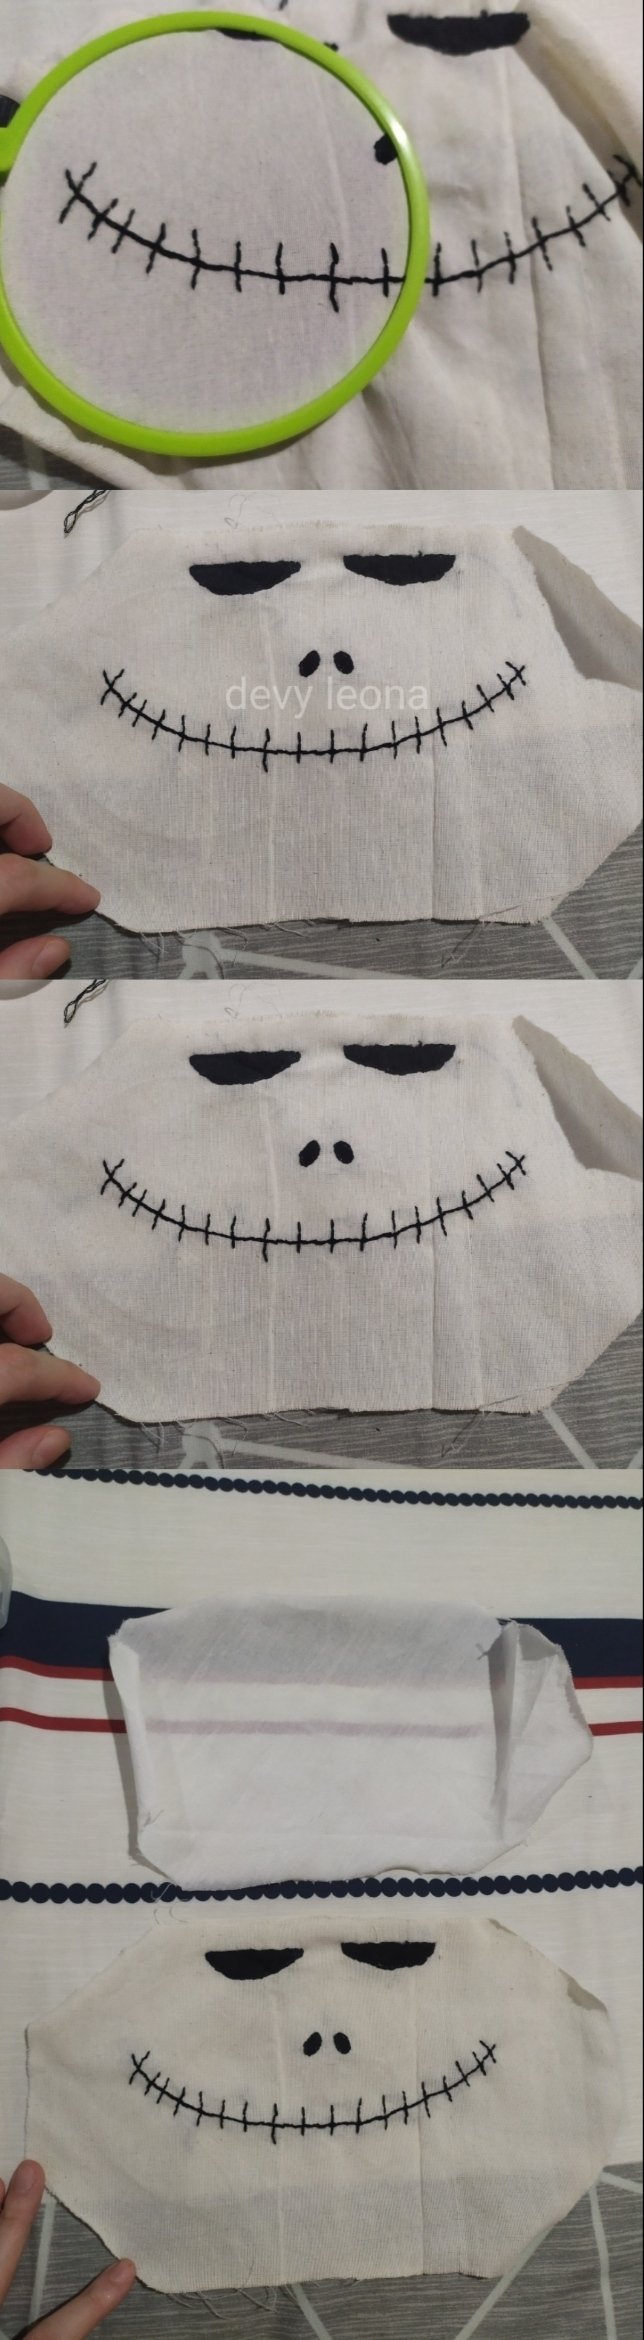
Goes to the sewing part now. Use the helper of red sewing, join the two fabrics from the back, sew on the top. Sew the the line down the fabric for the back and also front. Then sew the top of the mask using white thread (two strands) and release the red sewing helper.

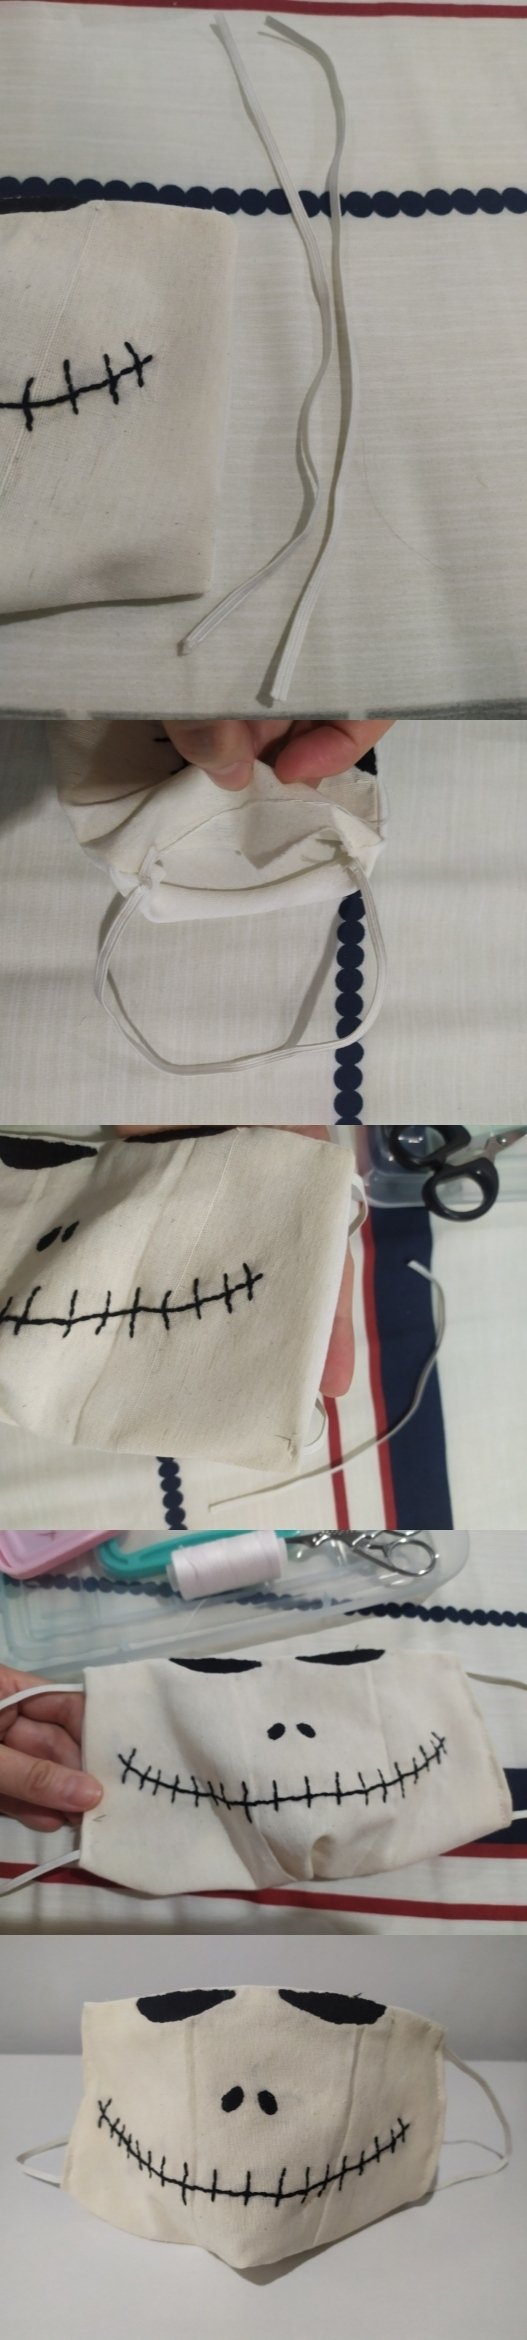
Do the same for the line below the mask for the front and also back, then also release. Now it's time to join the bottom part of the mask, front and back part. I also sew with the red helper first then white thread and last, release the red one. After finished, turn it up, so now you could see the skull's face.


Cut the elastic rubber, around 15 cm each. Then, add it to the mask. Sew to the back part of the mask (inside) then sew to close the right and left part. Voila, it's finished, now you could wear it for the halloween.
Happy halloween!