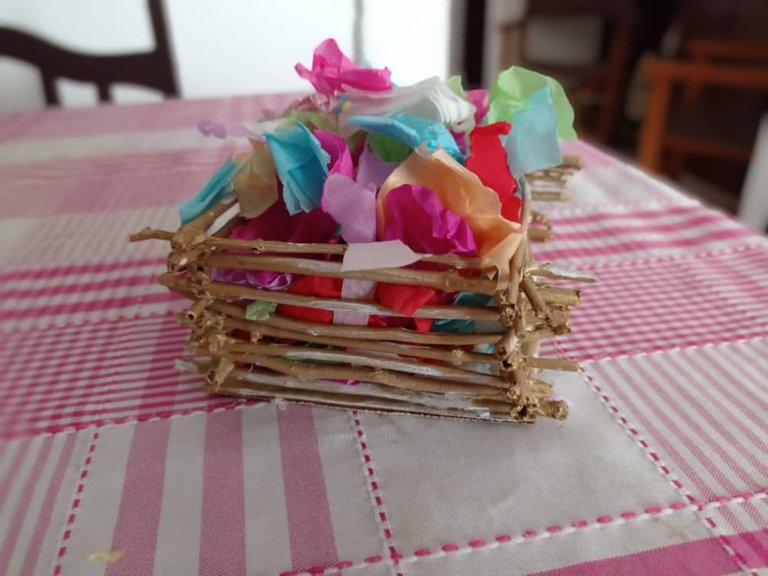
Linda cesta decorativa 👌
Hola amigos de hive, hoy quiero compartir con ustedes esta linda cesta decorativa que hice para mi casa, es bastante practica ya que se puede colocar en la mesa y meter por ejemplo las llaves, además que es súper sencilla y se puede hacer con pocos materiales, y lo mejor es que la podemos decorar con cualquier cosa que queramos.
Hello friends of hive, today I want to share with you this nice decorative basket that I made for my house, it is quite practical because you can place on the table and put for example the keys, besides that it is super simple and can be done with few materials, and the best thing is that we can decorate it with anything we want.
Hello friends of hive, today I want to share with you this nice decorative basket that I made for my house, it is quite practical because you can place on the table and put for example the keys, besides that it is super simple and can be done with few materials, and the best thing is that we can decorate it with anything we want.
Materiales - Materials
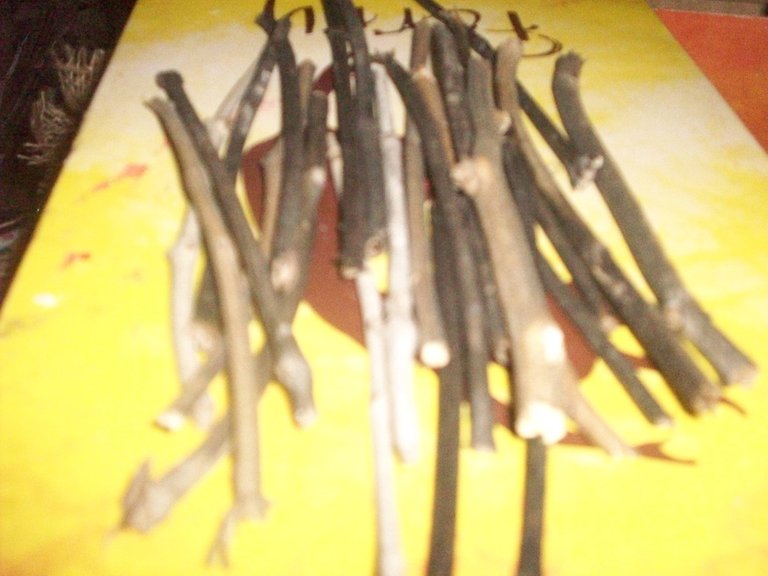
- Ramas secas
- Silicón
- Pintura
- Cartón
- Tijera
- Regla
- Dry branches
- Silicone
- Painting
- Cardboard
- Scissors
- Rule
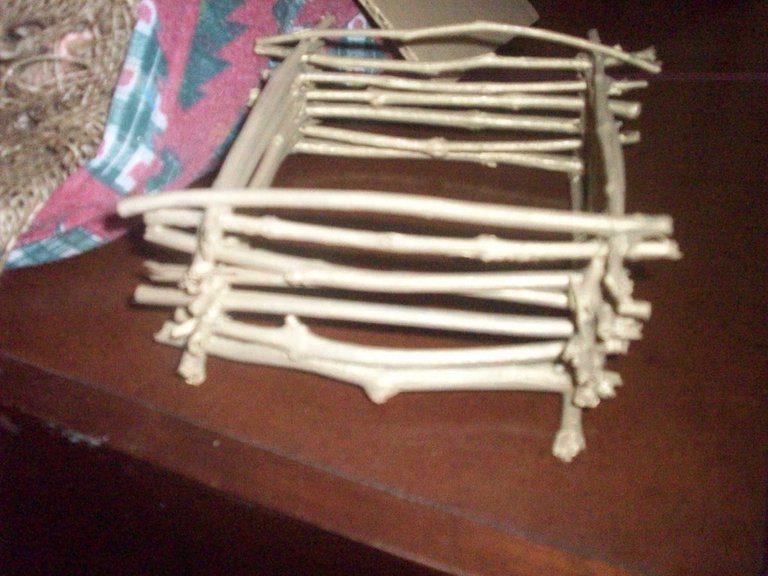
Primero conseguimos varias ramas secas y después las cortamos del tamaño que queramos todo depende del diámetro que será la cesta como quiero que sea pequeño corto todas las ramas del mismo largo, luego pegamos con silicón las primeras 4 ramas que serán la base ya que de ahí podemos comenzar armar la cesta de ramas.
First we get several dry branches and then we cut them the size we want everything depends on the diameter that will be the basket as I want it to be small I cut all the branches of the same length, then we glue with silicone the first 4 branches that will be the base because from there we can begin to assemble the basket of branches.
First we get several dry branches and then we cut them the size we want everything depends on the diameter that will be the basket as I want it to be small I cut all the branches of the same length, then we glue with silicone the first 4 branches that will be the base because from there we can begin to assemble the basket of branches.
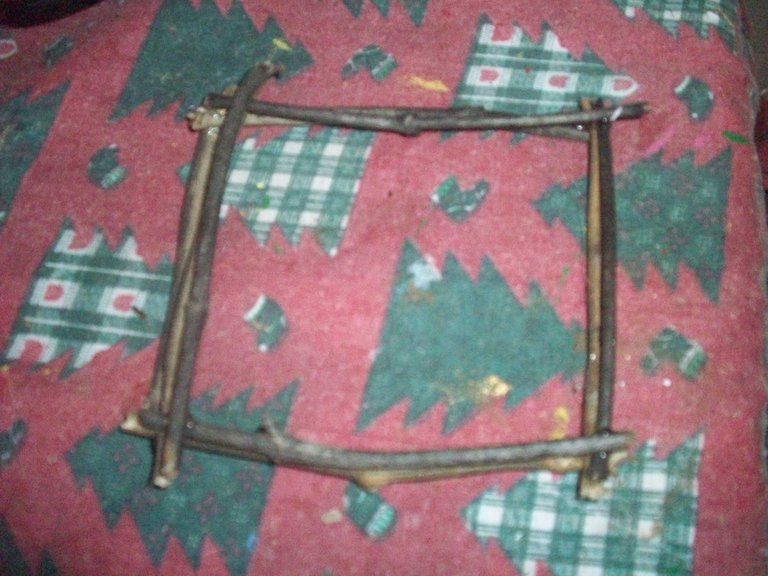
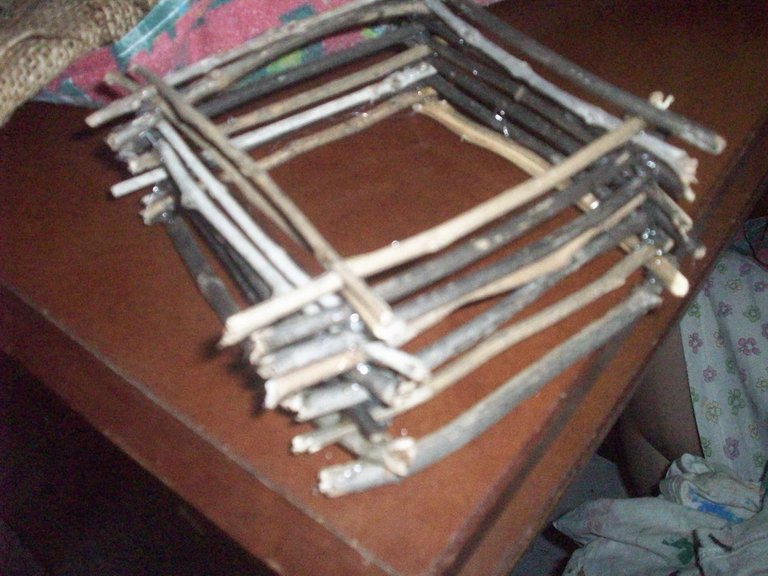
A partir de que hicimos la base comenzamos de ahí a pegar rama por rama una arriba de otra y repetimos este proceso hasta que consigamos la altura que queramos.
After we made the base we started from there to paste branch by branch one above the other and we repeated this process until we get the height we want.
After we made the base we started from there to paste branch by branch one above the other and we repeated this process until we get the height we want.

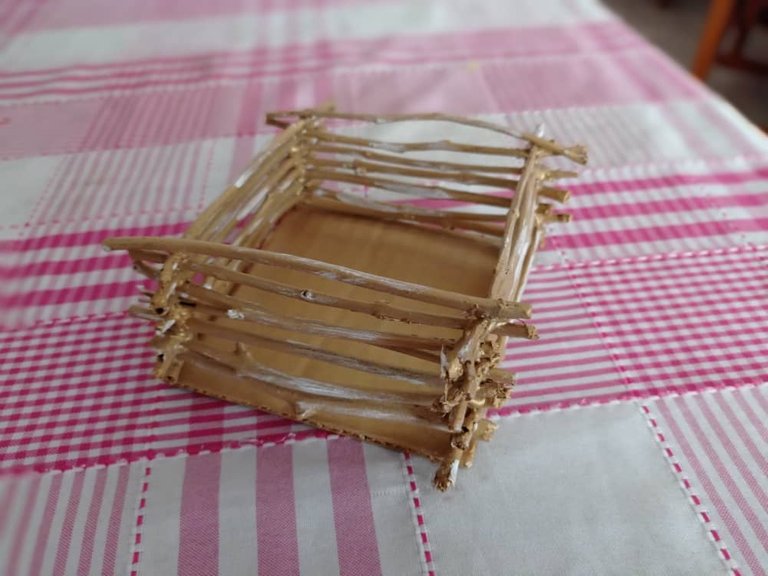
Cuando hayamos terminado de armar la cesta la comenzamos a pintar del color que queramos aquí escogí el dorado, a esta se le tiene que echar varias manos para que pueda quedar bien ya que cabe la posibilidad que las ramas absorban la pintura.
When we have finished assembling the basket, we start painting it with the color we want, here I chose gold, this one has to be painted several times to make it look good, since it is possible that the branches absorb the paint.
When we have finished assembling the basket, we start painting it with the color we want, here I chose gold, this one has to be painted several times to make it look good, since it is possible that the branches absorb the paint.
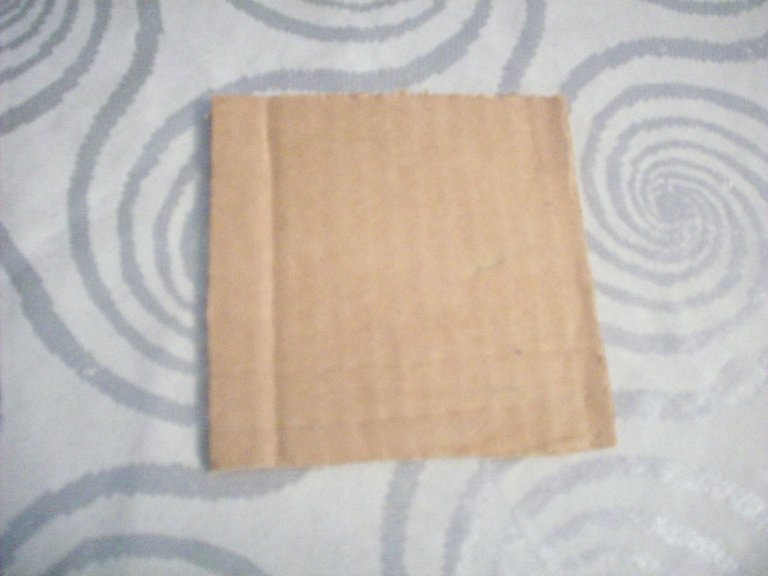
Ahora hacemos lo que será la base con cartón el tamaño dependerá de la cesta así que medimos para que la tapa quede exacta, por eso cuando medí corte un cuadrado de 11x10 cm y después de cortarlo también lo pintamos del mismo color de la cesta.
Now we make what will be the base with cardboard the size will depend on the basket so we measure so that the lid is exact, so when I measured I cut a square of 11x10 cm and after cutting it we also painted it the same color of the basket.
Now we make what will be the base with cardboard the size will depend on the basket so we measure so that the lid is exact, so when I measured I cut a square of 11x10 cm and after cutting it we also painted it the same color of the basket.
Por ultimo pegamos todo con silicón y ya tendremos lista nuestra cesta decorativa para colocarle cualquier cosa que queramos.
Finally we stick everything with silicone and we will have our decorative basket ready to put anything we want.
Finally we stick everything with silicone and we will have our decorative basket ready to put anything we want.
Espero les guste.
I hope you like it
Gracias por Leer.
Thanks for reading
Fotos de mi propiedad.
Camara: Telefono Xiaomi Redmi note 9

0
0
0.000
Congratulations @anyelit! You have completed the following achievement on the Hive blockchain and have been rewarded with new badge(s) :
You can view your badges on your board and compare yourself to others in the Ranking
If you no longer want to receive notifications, reply to this comment with the word
STOPDo not miss the last post from @hivebuzz: