Rebuilding My Travel Trailer, part 1
Hello, and welcome to my page!
This will be an on-going series of posts about my rebuilding work on my little travel trailer, or "tin tent" as some people like to call them.
I did a series of posts about this trailer in 2019, about rebuilding the back end of the trailer. A lot of the wood framing on this trailer was affected by rain water leakage over a period of time. I didn't realize how bad the water damage was when I bought the trailer, or I would not have bought it.
My last post about the trailer, part 11, was posted on October 11, 2019. Here are the links to all of last year's posts about rebuilding the trailer, if you would like to read them. I started with #2, because that's where the rebuilding process started.
https://peakd.com/travel-trailer/@amberyooper/restoring-a-tin-tent-trailer-part-2-starting-the-work
https://peakd.com/trailer-repair/@amberyooper/restoring-a-tin-tent-trailer-part-3-continuing-the-wood-work-on-the-lower-back-end-of-the-trailer
https://peakd.com/trailer-repair/@amberyooper/restoring-a-tin-tent-trailer-part-4
https://peakd.com/trailer-repair/@amberyooper/restoring-a-tin-tent-trailer-part-5-extending-the-back-of-the-trailer-frame
https://peakd.com/trailer-repair/@amberyooper/restoring-a-tin-tent-trailer-part-6
https://peakd.com/trailer-repair/@amberyooper/restoring-a-tin-tent-trailer-part-7
https://peakd.com/trailer-repair/@amberyooper/restoring-a-tin-tent-trailer-part-8
https://peakd.com/trailer-repair/@amberyooper/restoring-a-tin-tent-trailer-part-9
https://peakd.com/trailer-repair/@amberyooper/restoring-a-tin-tent-trailer-part-10
https://peakd.com/trailer-repair/@amberyooper/restoring-a-tin-tent-trailer-part-11
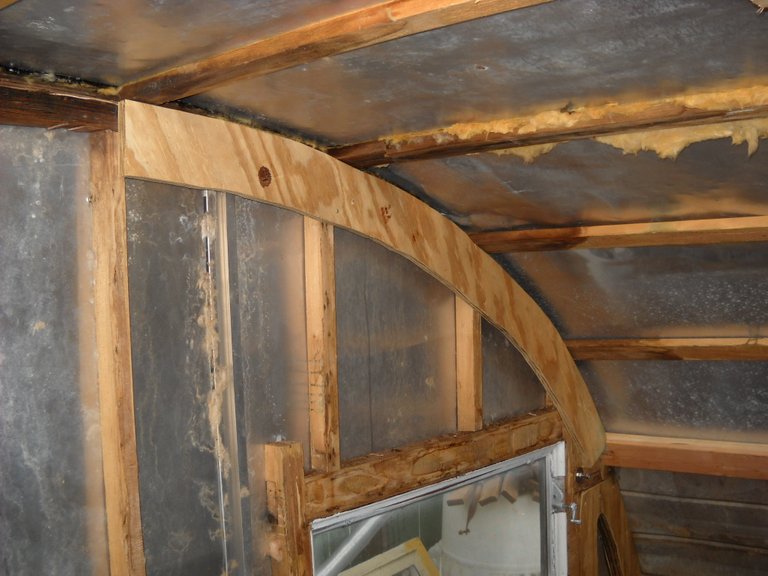
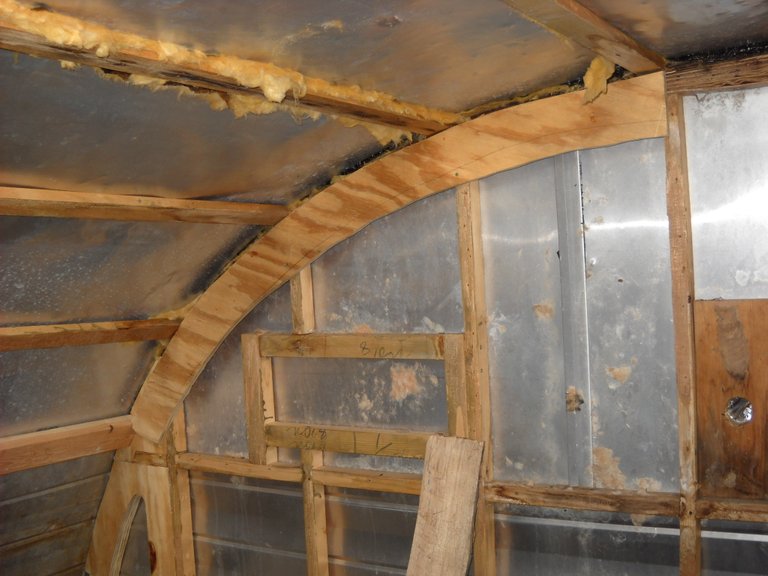
After October of last year, I didn't get any more work done on the trailer until March of this year. At that point, I started working on the upper roof edge frame in the back of the trailer. It needed some reinforcing, so I decided to make a couple of plywood pieces to add to the existing frame to give it more strength.
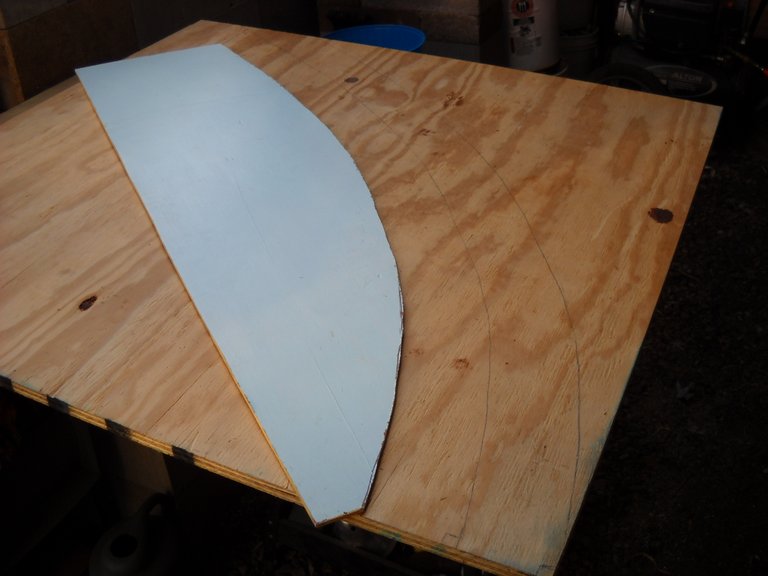
I started that process by taking a piece of thin plywood that I had and tracing the curve of the roof from the outside of the trailer onto it. Then I cut that curve with my jigsaw. From there I was able to fit that curve to the inside of the roof where I wanted to put the heavy plywood reinforcements.
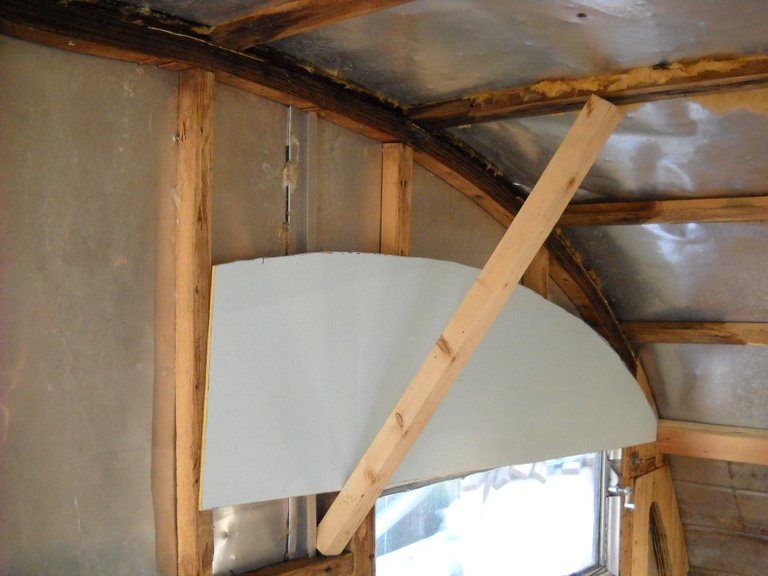
Once I had the thin plywood piece fitted to the curve, I was able to use it as a pattern for the 3/4 inch thick plywood that I was going to use for the reinforcements.
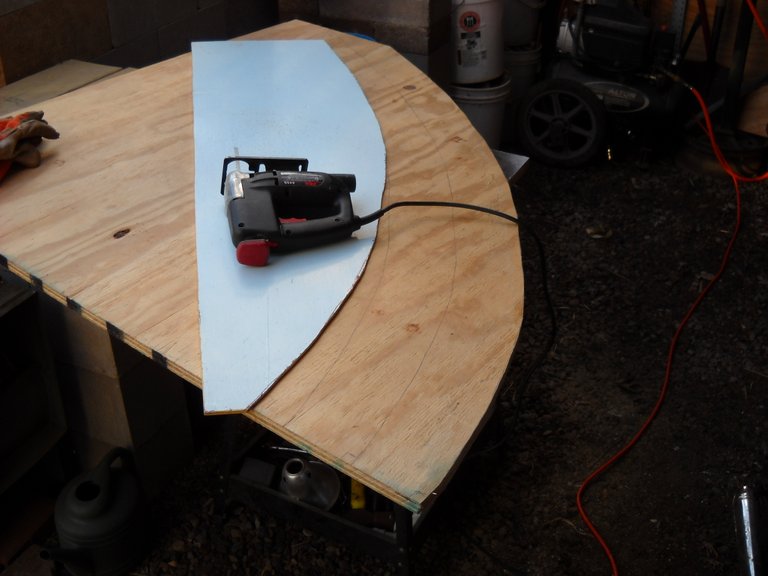
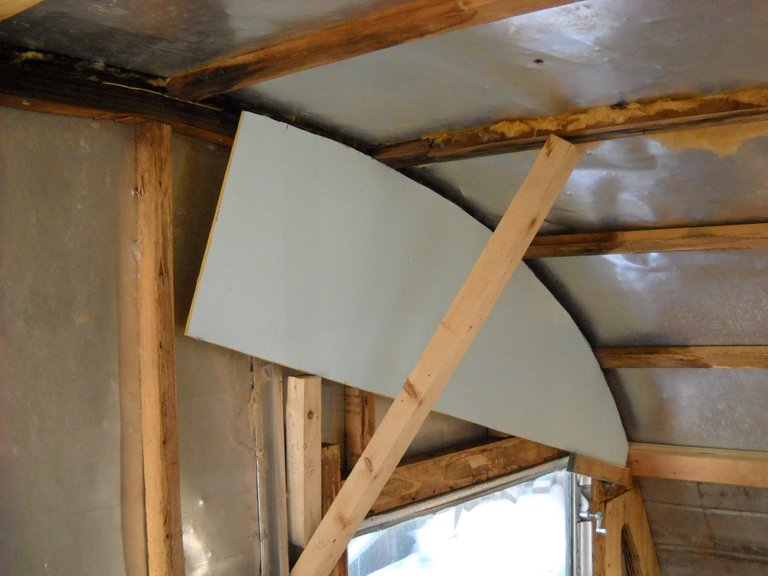
I cut the first piece out.
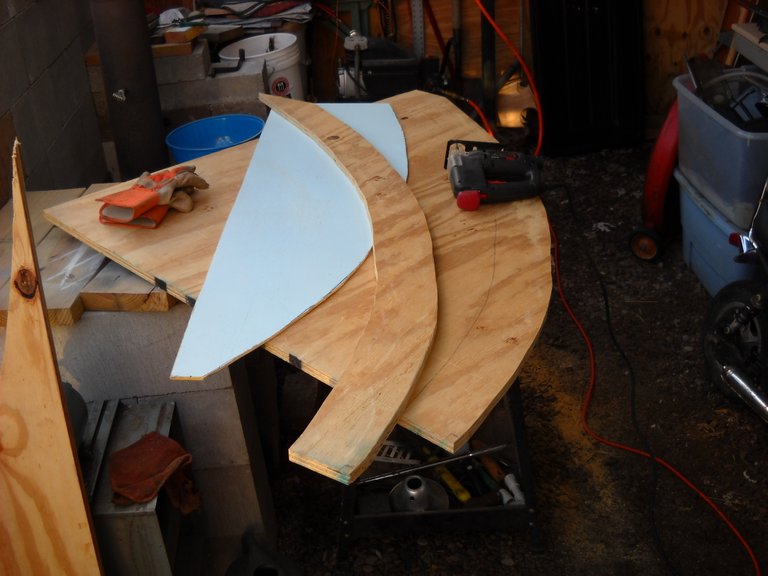
I test fitted the first piece on both sides of the trailer and found that the shape was a bit different from one side to the other, so I couldn't just use the first piece as a pattern for the second piece. I had to flip the pattern piece over and fit it properly to get the correct curve shape for the other side of the trailer.

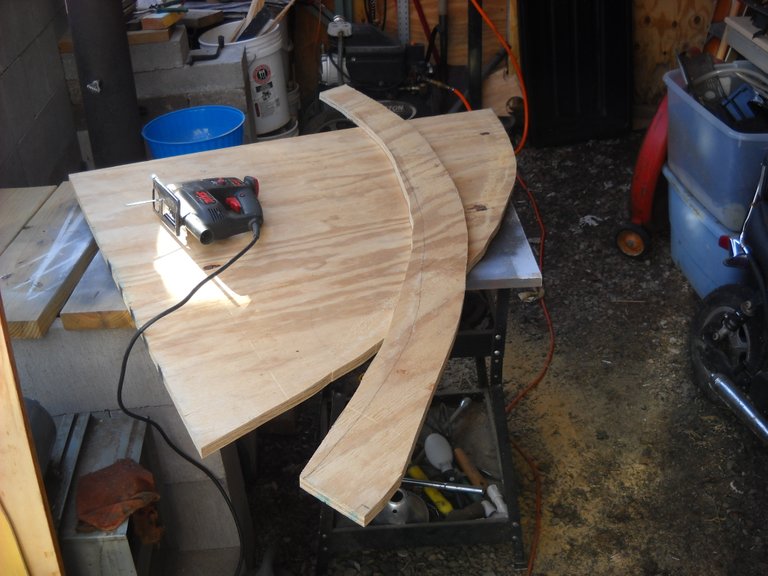
I had to do a bit of trimming work to each piece to get it to fit the way that I wanted it to. Once I had the pieces fitting the way I wanted, I screwed them into place.
After I got that process done, I didn't work on the trailer any more until June. I Probably would already have the trailer finished if I had worked on it consistently, but other things seem to get in the way of that.
In my next post in this series, I'll be talking about reinforcing the boards that hold up the roof skin.
That's all I have for this post, thanks for stopping by to check it out!

Congratulations @amberyooper! You have completed the following achievement on the Hive blockchain and have been rewarded with new badge(s) :
You can view your badges on your board and compare yourself to others in the Ranking
If you no longer want to receive notifications, reply to this comment with the word
STOPDo not miss the last post from @hivebuzz:
Looks like a fun project to make. But making curves can be a head wrecker.
Yes, that's why I needed to make a template to work with...