Restoring a tin tent trailer, part 10
Hello, and welcome to my page!
I've been able to get a bit more done on the back of the trailer over the past few days. I'm not done with it yet, but I'm a lot closer to being done now. Most of what I've managed to get done in the last couple of days is cutting the aluminum flashing to replace the bottom edges of the sides from the wheel wells back. There were several corrosion holes in the bottom area that I need to either fix, or just replace the section. I ended up replacing the sections.
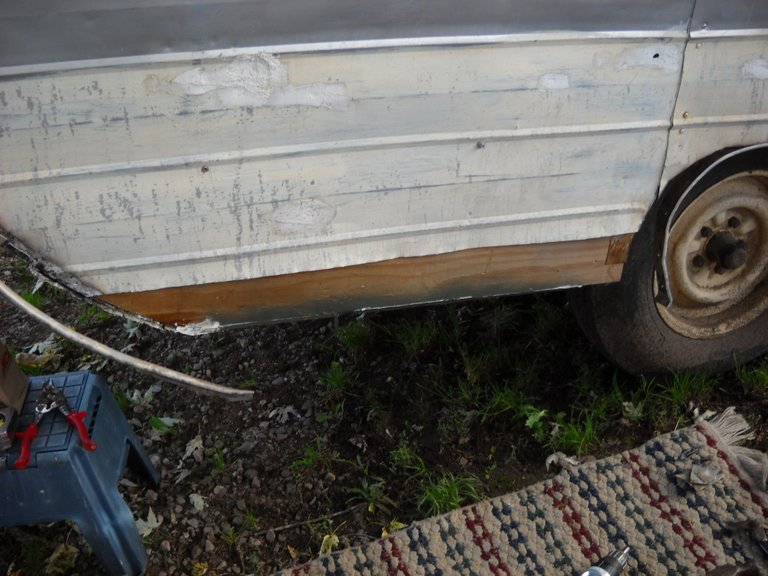
Here's a look at what I decided to replace. The bottom edge of this side had a couple of small holes in it and the lower edge was pretty rough. As you can see, I already cut the bottom edge off kind of roughly.
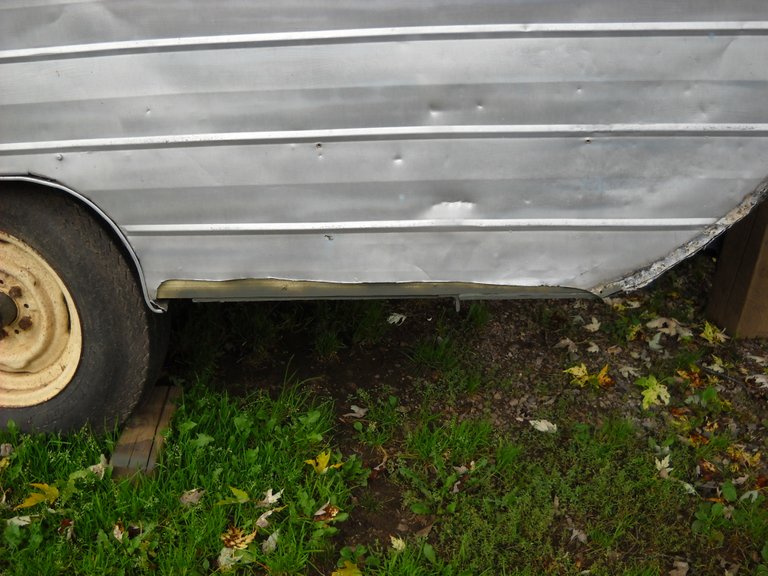
You can see the hole on this side. There was a couple more corrosion holes that were on the part that I cut off.
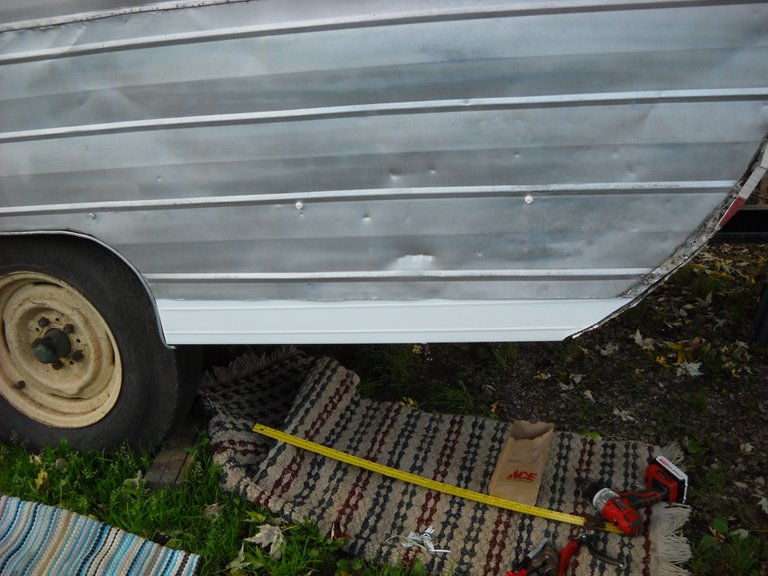
I had bought a piece of aluminum facia trim to use for the replacement metal.
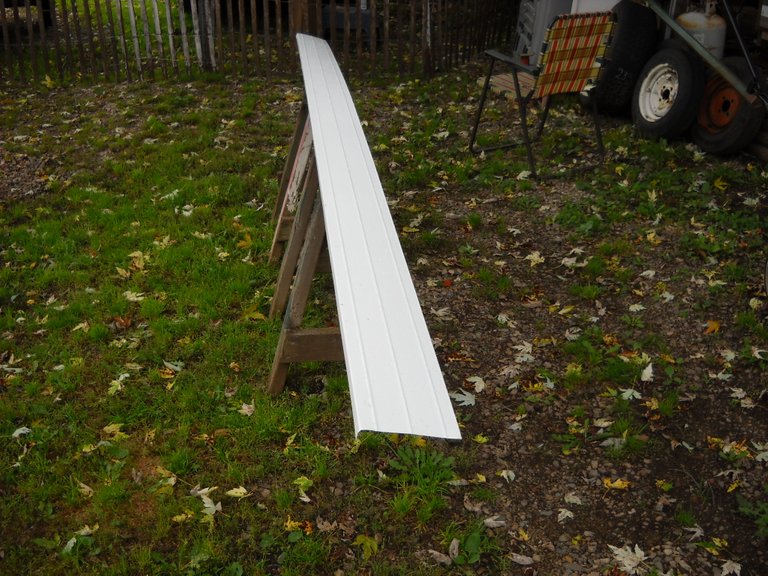
I measured the overall length that I would need for the replacement parts, and cut them a bit long to make sure I had enough.
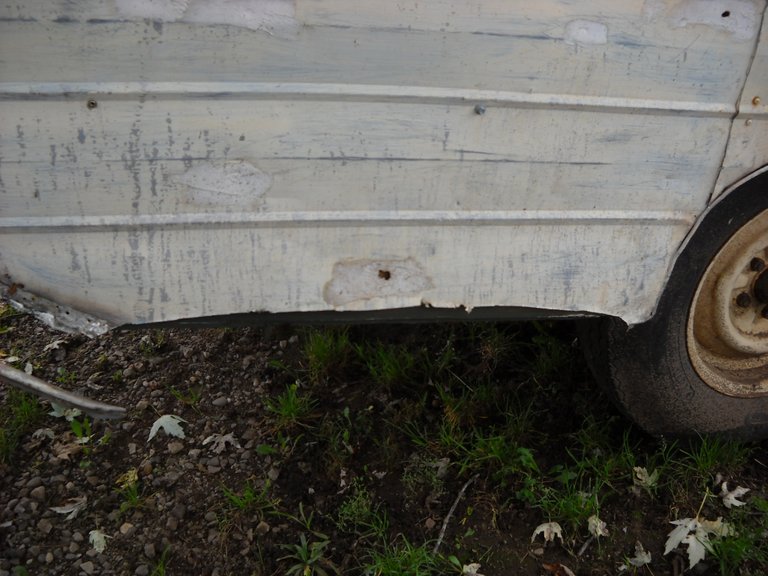
I decided to cut the lower edge off the trailer skin properly to make it easier to fit the replacement parts since the parts need to go up under the skin. I used a yardstick to mart a line below the rib to get a straight cut. I did that for both sides.
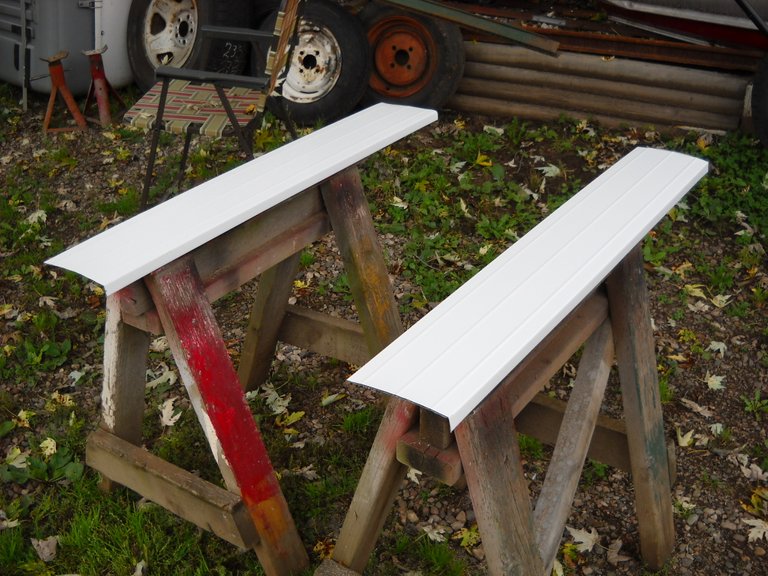
Then it was a matter of putting the replacement piece in place, marking it for the necessary cuts, pulling it out, and cutting it. I had to do that several times for both of the pieces to get them to fit properly. When I was done with the cutting, they fit pretty well.
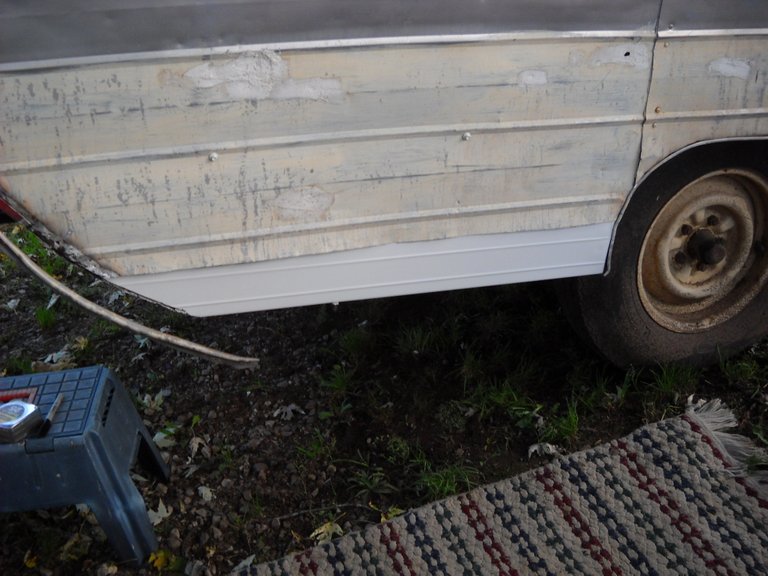
That is as far as I've gotten with it so far. The next step is to apply the silicone sealer under the overlap and screw that down. Then I can finish sealing up the edges of the back and put the drip rail trim on. Once that's done, the back end will be done. From there, I'll be moving to the inside to work on the framing and interior.
That's all I have for this post, thanks for stopping by to check it out!
This post was shared in the Curation Collective Discord community for curators, and upvoted and resteemed by the @c-squared community account after manual review.
@c-squared runs a community witness. Please consider using one of your witness votes on us here
Hi, @amberyooper!
Thank you for using the #diy tag. This post has been rewarded with BUILD tokens in the form of an upvote.
Build-it is a new tribe on the steem blockchain that serves as a central hub for DIY and How-to's contents on steemit. The recommended tags required when creating a DIY artcle are #diy, #build-it. #how-to, or #doityourself. You'll get rewarded with BUILD tokens, which can also be exchanged for steem on steem-engine when you use any of the recommended tags as well as posting via our website.
We encourage steemians to post their DIY articles via our website. Have a question? Join us on Discord and telegram
This project is run and supported by our witness @gulfwaves.net. If you like what we do, vote for us as a witness on the steem blockchain.