Some Crappy Camera Hulks, and Smoothing in Gimp
A few days ago I put up a post outlining how I used some sheets of paper and a trifold as an impromptu and makeshift 'lightbox', or 'infinte backdrop' stage (https://steempeak.com/photography/@wwwiebe/poor-man-s-photography-photobox). The example photographs were all taken with my Sony SLT-a58.
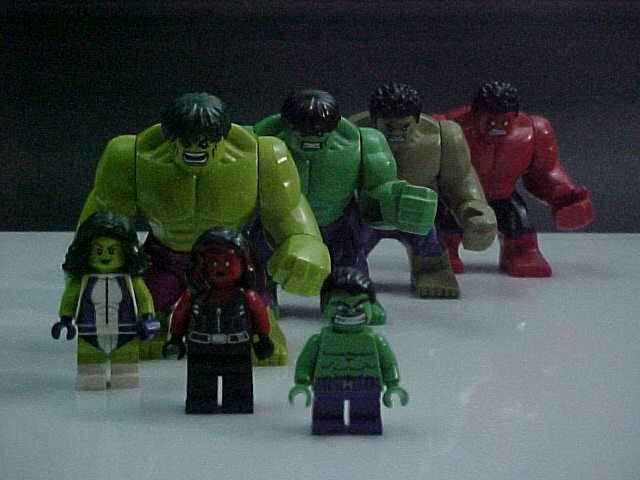
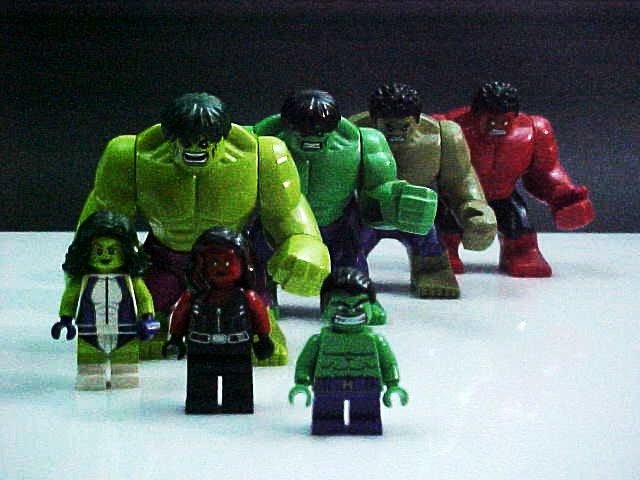
Being that I had left the makeshift stage on the work area, and the lego minifig hulks were still there, I decided to see what I could do with this same setup with my 'crappy camera.'
My 'crappy camera' is a Sony MVC-FD75 (yes, I do seem to have an infatuation with Sony cameras). This camera is ancient, has a 0.4 megapixel sensor, and saves it's images to a floppy disk. I like to challenge myself to use this camera to take good photos.
I did take several images with this camera and they all had the same thing in common: lots, and lots, and lots of noise. This is not a surprise with this camera; the sensor which collects the light is an antique, and just doesn't have the same number of receptors that newer sensors do. I chose one photo which I thought was nicely framed to edit.
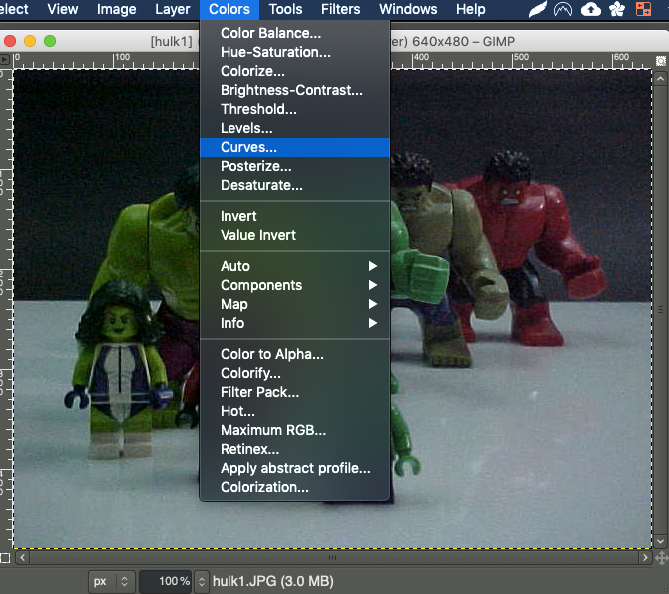
I like to edit my photos with Gimp (and some others, but Gimp is free, really and truly free, for whatever purpose you want to put it toward). So here I am editing my photo in Gimp. See the noise. It's very grainy.
The first thing to do with any digital photo is to perform some colour correction. Without getting into the technical details of it, colour correction is the process of removing 'null' values from the colour makeup of the picture. Basic colour correction in Gimp is performed by pulling down the Colours pulldown and choosing Curves:
This will open another window with ... well ... with the colour curves in it.
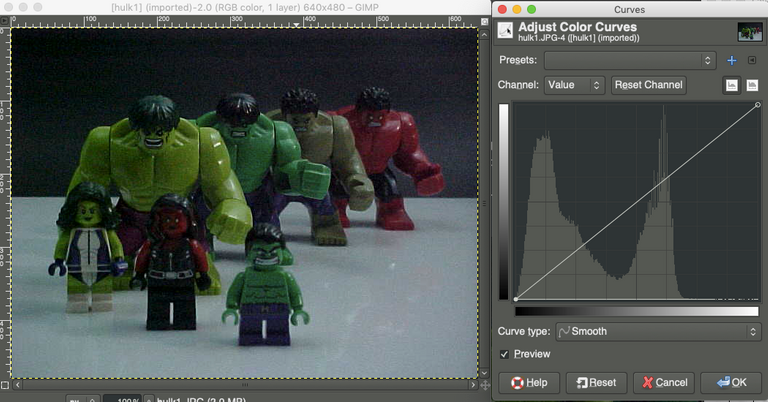
What do these curves mean? It's easier to understand with a simple arithmetic exercise: Imagine calculating the mathematical average of 10 numbers in a line with 10 slots:
- 1, 5, 6, 7, 7, 7, 8, 9, 9, 10
That average is easy to calculate: sum up the digits and divide by 10.
Now calculate the average for the following slots:
- 1, 5, 6, 7, 7, 7, null, null, null, null.
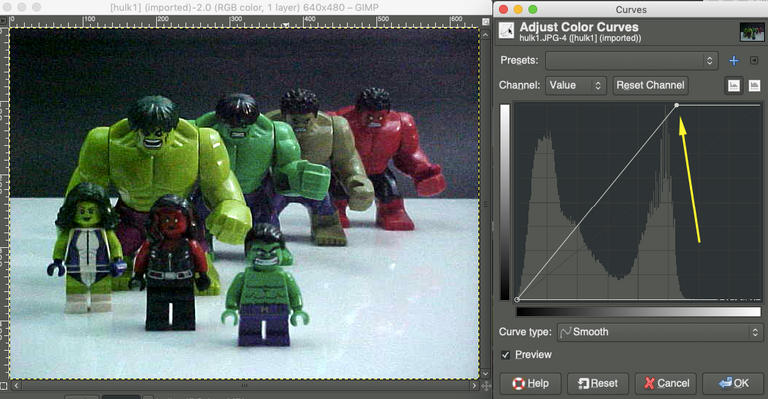
The calculation is still to sum up the digits and divide by 10; that value, though valid, is skewed by the null values. Look up... way up... to the curves screenshot above. See all that blank space on the horizontal access? You can view those as null values. We want to remove them, and we can do that by dragging the line on the top toward the left, thereby instructing Gimp to ignore all those null values. Essentially, the slots would now look like this:
- 1, 5, 6, 7, 7, 7
And the average would be the sum of those digits divided by 6. Gimp even provides a real time preview to show the changes. It already looks better! (side note: there is actually a lot more to colour correction and how it works, such as there are not 10, but 255 slots, per colour, but this is a good summary).
Here is my colour corrected version:
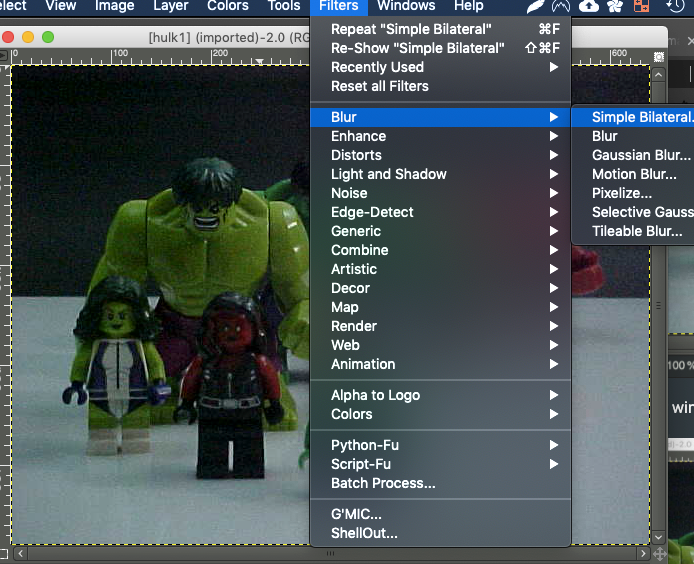
So that looks better than the original, but it's still really noisy/grainy. What do we do with that? Gimp has another feature (it actually has a lot of filters, and they're all fun to play with) called blur. Blur is similar in nature to 'smudge', I suppose; it's also very much an opposite to 'sharpen.'
Blur is found in the Filters->Blur->Simple Bilateral pulldown (there are multiple types of blur, but I'm only interested in this basic one):
This brings up Yet Another Menu with the options for size and threshold:
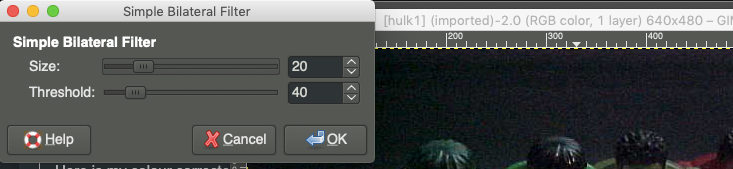
Honestly, at this point, the best course of action is to play with the sliders until you get the feel that you want. It will take some time, but it's pretty simple; just remember that "Undo" is your friend.
Ultimately the picture will be blurred, or smoothed, and will be something you can be proud of! Remember, however, the more you blur, the more you run the risk of the entire picture becoming out of focus. There is definitely give and take.

This final photo was taken with an ancient camera, saved to floppy, and edited using freeware Gimp. It even looks pretty cool in monochrome having used Gimp's desaturate tool!

(c) All images and photographs, unless otherwise specified, are created and owned by me.
(c) Victor Wiebe


(design by remyrequinart: https://steempeak.com/@remyrequenart)
good editing webie, even though you used a crappy camera. It's clearer than an old mobile phone. But I love the black and white image.
Thank you very much @mrnightmare89!
This post was shared in the Curation Collective Discord community for curators, and upvoted and resteemed by the @c-squared community account after manual review.
@c-squared runs a community witness. Please consider using one of your witness votes on us here
Thank you!
Hello!
This post has been manually curated, resteemed
and gifted with some virtually delicious cake
from the @helpiecake curation team!
Much love to you from all of us at @helpie!
Keep up the great work!
Very interesting!
Manually curated by @free-reign.
@helpie is a Community Witness.
Thank you!
We are SO proud to have you as a member of our
FANTABULOUS Power House Creatives family!
upvoted and resteemed!
❤ MWAH!!! ❤
#powerhousecreatives
JOIN US HERE
FOLLOW US ON TWITTER
Posted using Partiko Android
Thank you very much!
Howdy sir wwwiebe! I'm not much of a photographer but I can appreciate the technical aspects, well done!
Thank you! This is one of the small things that I really enjoy.
What, the Hulks?