Christmas shirt, a beautiful and simple craft project
Greetings dear friends and photography lovers
Today I bring you something very special, it is one of my creations. I remember that I told you that like photography I am passionate about sewing and fashion design. What I do not remember, is to have commented that I also love crafts. Although I don't have much time to do them, I always take a little time to make some creations for my dolls. What I do most are belts and ties, of course, that combine with the clothes that I make for my girls, at some point I will share some of the ones that I have made, I confess that they are many, hahahaha.
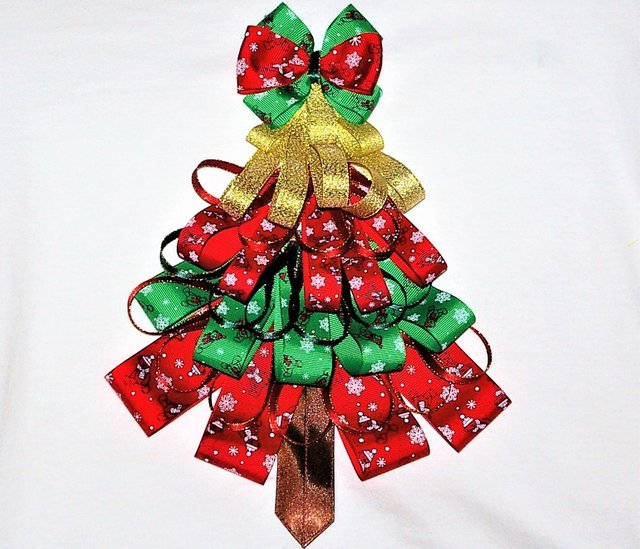

Well, but this time I want to share a very simple project to do to my oldest daughter. It turns out that at his school he was asked that for his year-end sharing, they should go with a Christmas shirt. When she told me the news, I stressed a little, it turns out that she didn't have a Christmas shirt, when she had a red sweater. But I said to myself, "myself on You Tube there must be something simple to do" hahaha ... and so it was, I found the beautiful project that I proudly show you today in my photographs.
It implies some sewing, but it is nothing of the other world, as you can see it is very beautiful and the best thing is that it does not merit much time. If you are encouraged, as I did, you can do it for Christmas, either for you, for your children, nephews, or someone special to whom you want to make a nice detail, for Christmas. Then I will place the materials that I use, and I will explain more or less how the process was.
Materials
1.- A flannel, may be new or some that they have at home, but that is in good condition.
2.- Ribbon with Christmas motifs, or Christmas colors.
3.- Thread and needle.
4.- Adhesive tape.
5.- Scissors.
As I told you, I usually make my daughters' headbands and ties, which is why I always have ribbons of different colors and designs at home. Luckily, I had some with Christmas motifs, which I had bought a few years ago and that I had not used. And as you can see they were ideal for the project. But now, we do go step by step.
Step 1:
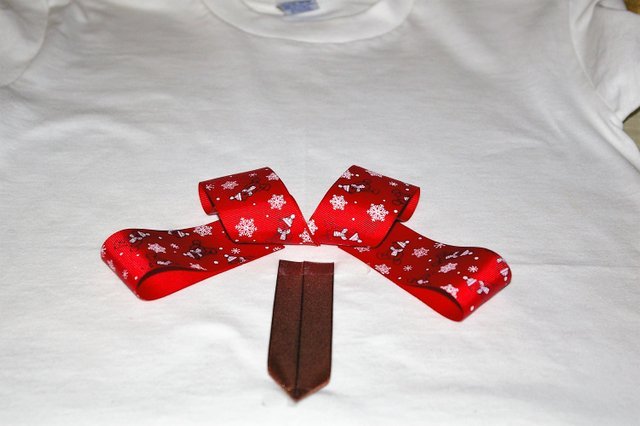
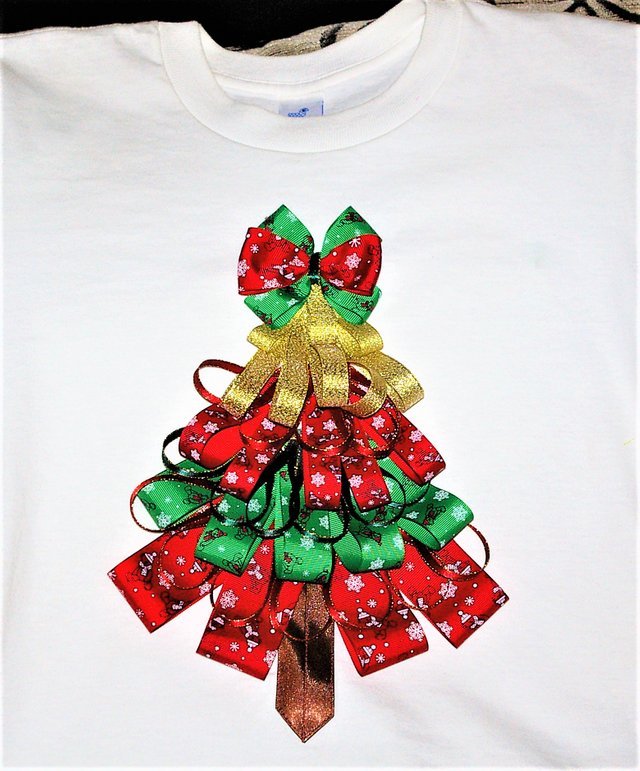
The first thing I did was iron the shirt or flannel well. Then, as the motive is a Christmas tree, the first thing was to place the trunk. For this I cut 15 cm of Razo tape, as it was not wide enough, as you can see in the image, fold it in half and sew it to the fabric. I do machine sewing, but if you don't have or don't know how to use it, you can perfectly do it by hand.
Step 2:
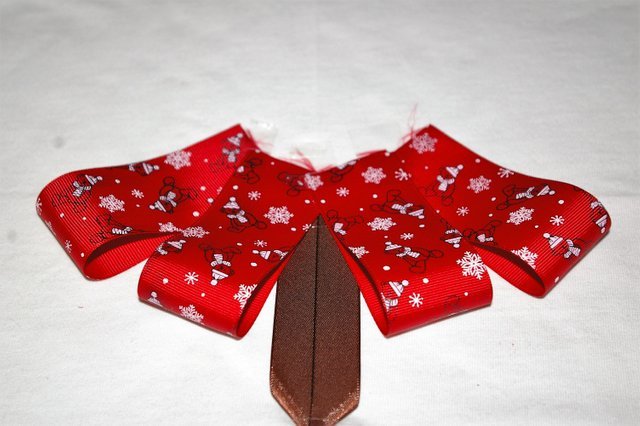
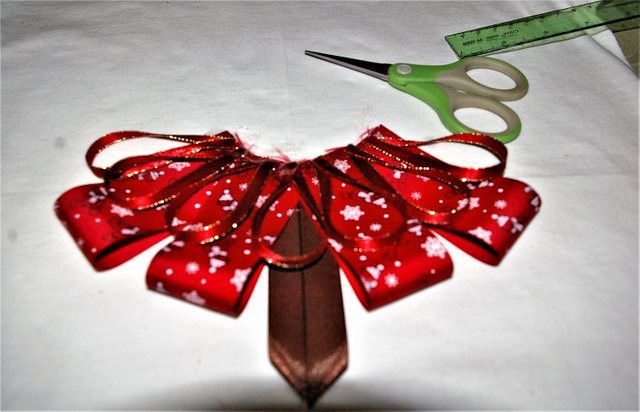
The next thing was to place what would represent the branches of the tree. For all levels of branches, cut pieces of 15 cm tape. In the case of the first level, use only 4 pieces of tape, so that the trunk could be seen. To help me, I was placing and sticking each tozo of tape to the fabric with adhesive tape, that way the subsequent sewing was easier. Once sewn very carefully remove the adhesive tape. Once the first level has been set, the second level will be carried out in the same way, except that, on this occasion, place a thinner Razo ribbon. I wasn't in the original model, which I saw on You Tube. However, I thought it would be a nice addition and I was not mistaken, the detail was very good. As you can see in the images, I was interspersing at each level of branches, the ribbon with Christmas motifs and the thin Razo ribbon. In the images, you can also detail the number of pieces of tape that I used in each level.

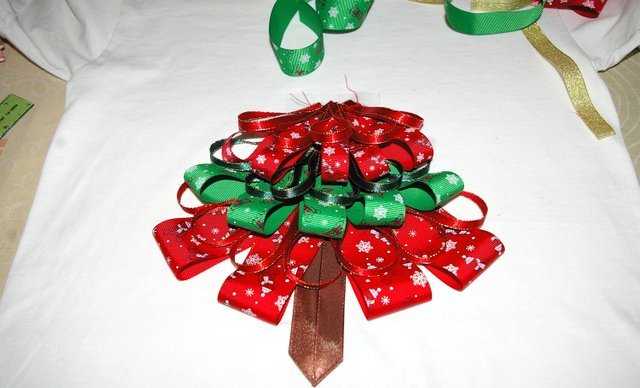
Step 3:
To give a more colorful detail at the tree's peak, as you can see, place the last two levels on gold ribbon. To finish, and finish off the work I made a small and simple loop that I placed on the whole tip of the tree. You can place a star, a flower, in short, whatever you prefer, the important thing is that you like it. This project is very simple to elaborate and is very beautiful, so I hope you are encouraged to do it.
Content and photographs of my intellectual property
Technical information
| Camera | Pentax * istDL |
|---|---|
| Lens | Pentax 18-55 |
| Lighting | Natural Light |
| Location | Barcelona, Anzoátegui State, Venezuela |


Posted from my blog with SteemPress : http://esencia-imagenes.mipropia.com/2019/12/24/christmas-shirt-a-beautiful-and-simple-craft-project/
Hermosa idea, Pura creatividad! (: