HOW TO CREATE A NICE TOILET PAPER HOLDER FOR YOUR BATHROOM.
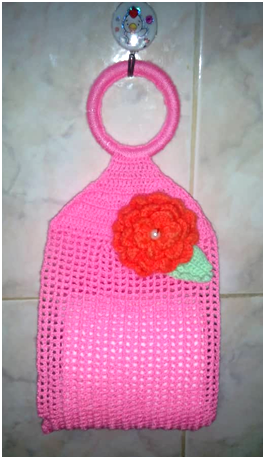
Hello my dear friends of Hive, especially the artisans who make crafts on different materials, such as wool, cloth, wood, foami among other things, creating wonderful things. Today I want to show you the step by step of a toilet paper holder that I made to give to my mom on Mother's Day, but during the week I was full ordering cupcakes and mini cakes decorated with woven hearts that I didn't have time to finish the paper holder, today I will show you a part of it and later I will show you the finished details.
The paper holder will not only decorate your bathroom, but it will also be useful to store your toilet paper rolls. You can make it in any color and thread you want. It is very simple, to make, there are many models you can choose
Materials to Need
- Pink crochet thread, but you can use your own.
- Knitting needle.
- Scissors*
- Plastic ring
Step by step
- First make some chains, considering how long you want to do it.
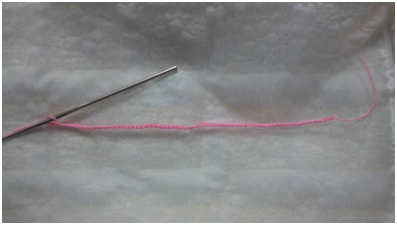
Source : Photo taken by the author @xeliram on a cellphone.
Make three chains to lift and one more to separate, making a high point in the fourth chain, we make a chain and a high point leaving a chain, we repeat again 1 chain and a high point leaving a chain from the previous lap, this way until finishing the lap.
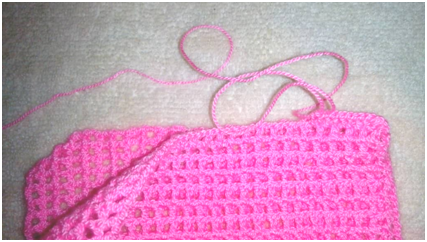
We make 4 chains, we turn and make a high point in the high point of the previous lap, 1 chain and a high point in the high point of the previous lap, we repeat until we finish. This way we do the other turns until you get the desired length.
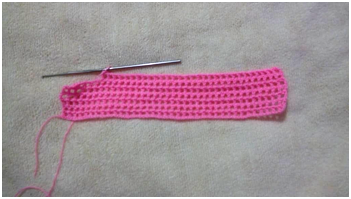
Source : Photo taken by the author @xeliram on a cellphone.
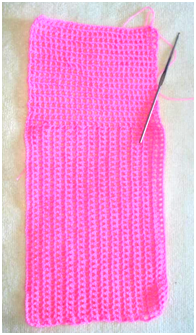
- Then we fold it in half and join it with high points, making a high point in each high point of the previous lap and a high point in each gap.
Source : Photo taken by the author @xeliram on a cellphone.
- We are making decreases at the beginning and end, first I started with a decrease at the beginning and end but later I made two decreases at the beginning and end. We cut thread and hide. I stay as in the image:
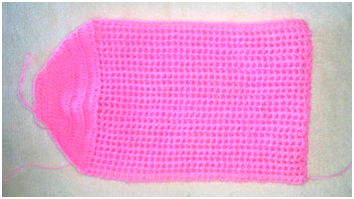
Source : Photo taken by the author @xeliram on a cellphone.
- With the plastic ring we cover it with the pink thread with low half points.
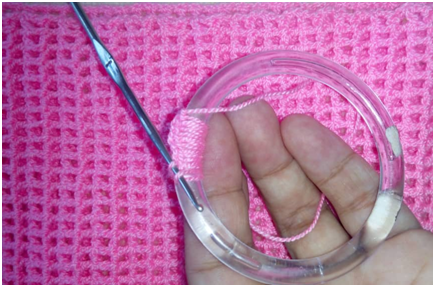
Source : Photo taken by the author @xeliram on a cellphone.
- Y cosemos la pieza anterior con medio punto

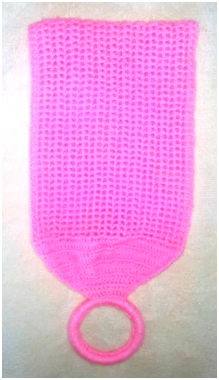
Source : Photo taken by the author @xeliram on a cellphone.
- Then you can put any detail, for now I took some roses that I had at hand but then I will make the flower and leaf with the finished work. Here I place some models:
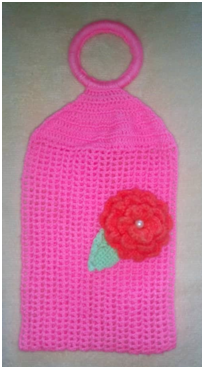
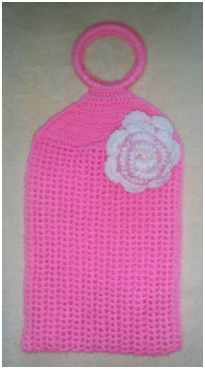
Source : Photo taken by the author @xeliram on a cellphone.
I hope you liked it. In my blog you'll find articles about patterns, step by step. Any doubt you can ask me in the comments I will gladly answer you

I'm Marilex Porteles Math teacher, researcher, dreamer, I like knitting, swimming and I'm the mother of a beautiful girl.
Dale UPVOTE if you like me, COMENTA and RESTEEM for others to know GRACIAS

Dale UPVOTE if you like me, COMENTA and RESTEEM for others to know GRACIAS
ay que bonito, yo tambien me voy a poner a tejer algo ahorita, te quedo hermoso.
Gracias por tu comentario. Ahora paso por tu blog. Me gustan tus diseño.
You have been curated by @ashikstd on behalf of Inner Blocks: a community encouraging first hand content, with each individual living their best life, and being responsible for their own well being. #innerblocks Check it out at @innerblocks for the latest information and community updates, or to show your support via delegation.
Thanks for sharing your creative and inspirational post on HIVE!
This post got curated by our fellow curator @ashikstd and you received a 100% upvote from our non-profit curation service!
Join the official DIYHub community on HIVE and show us more of your amazing work!
A lovely idea for the bathroom.!
Gracias.