How To Make A Sound Controlled Light Module
#DIY IS FUN
Hello there fellow Steemians and welcome to my quick tutorial on how to put together a DIY kit I purchased from Banggood that they call a Voice Controlled Melody Light. I enjoy these little DIY kits and have put several together in my time. I find them good soldering practice and I'm relatively new to electronics so I find these kits handy, fun and pleasing.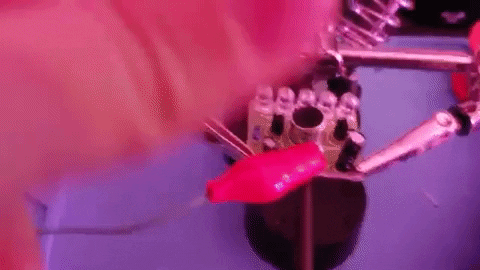
Step 1: Sort the parts
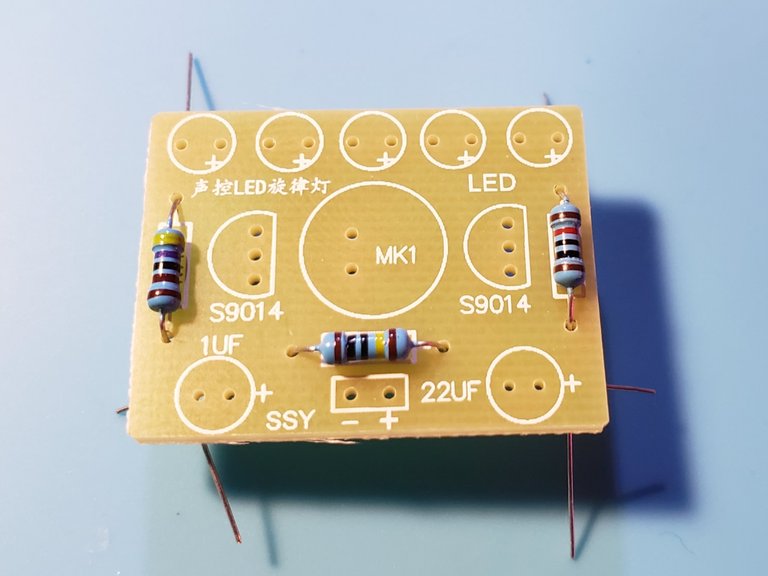
Every good build begins with organization. I lay out my components so that I can easily grab the part I want as well as confirming I have the correct number of parts.
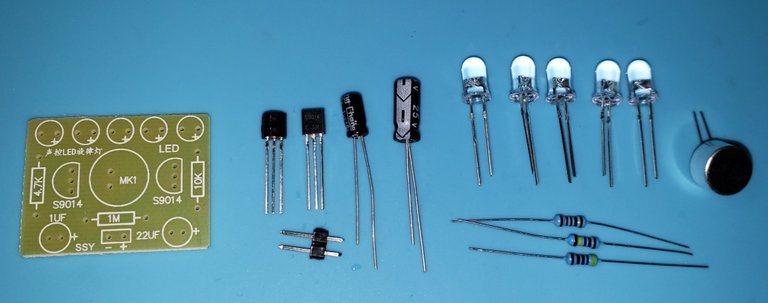
- 5 LED's
- 1 Microphone
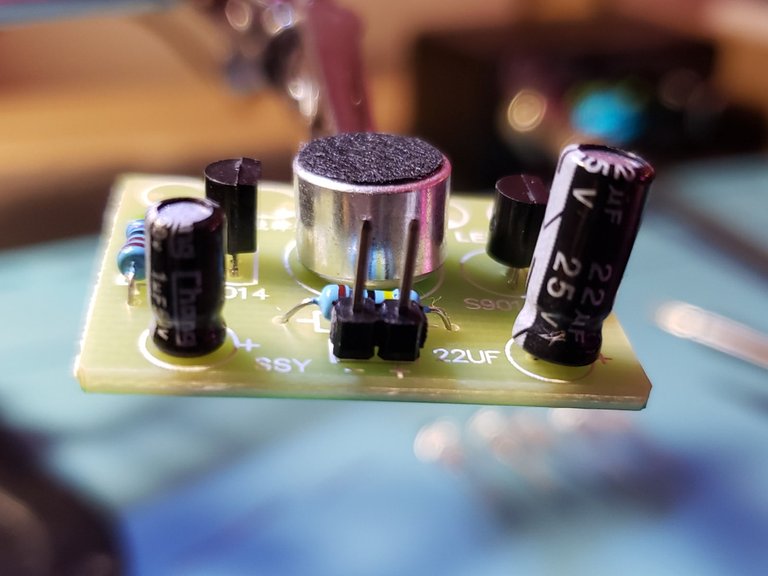
- 1 1μF Electrolytic Capacitor
- 1 22μF Electrolytic Capacitor
- 1 4.7k Resistor
- 1 10k Resistor
- 1 1M Resistor
- 2 9014 Transistors
- 1 2-pin connector
- 1 PCB
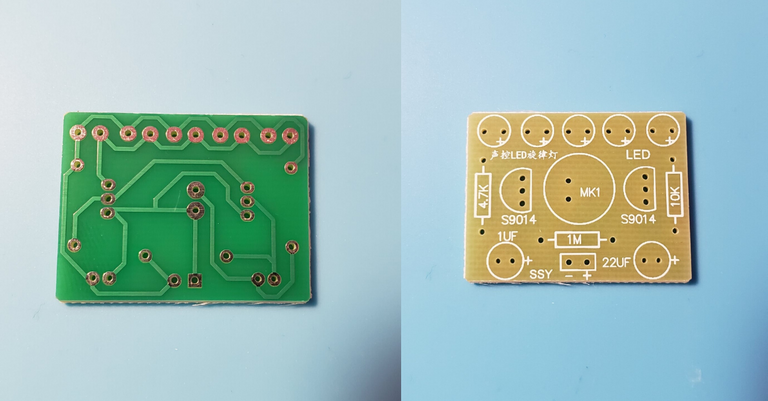
Speaking of the PCB, here's a close up of the top and bottom for you just incase you want to save a few dollars and reverse engineer this!
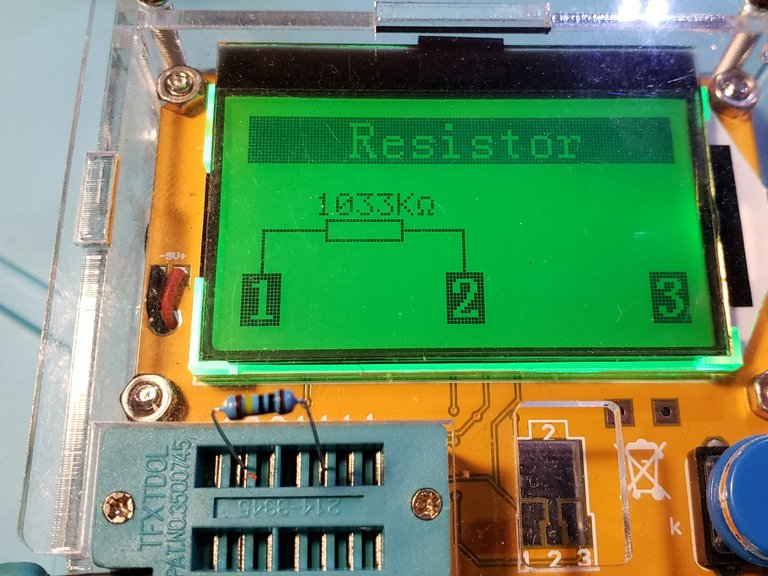
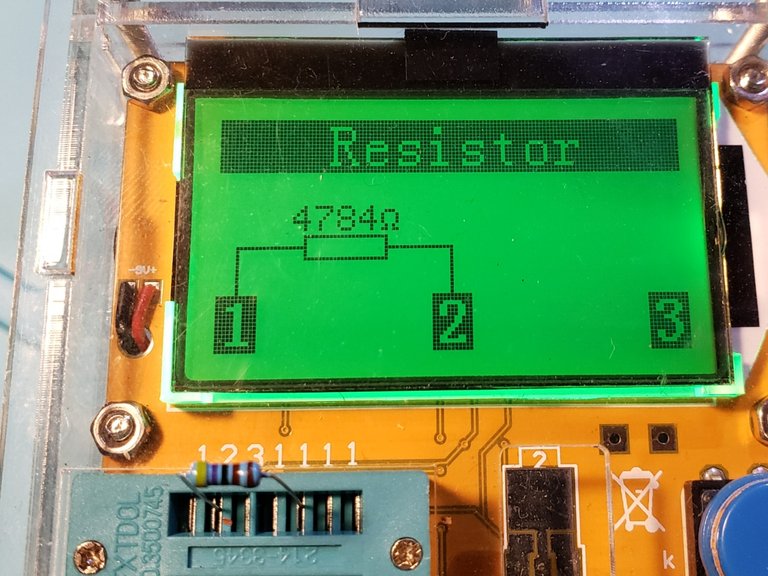
While I'm not colorblind, I do find reading resistor values to be a royal pain. So I purchased this handy component tester which tells you the value of your resistors as well as many other components. You can also do this with a multimeter. But I find this quick and easy.

Soldering time
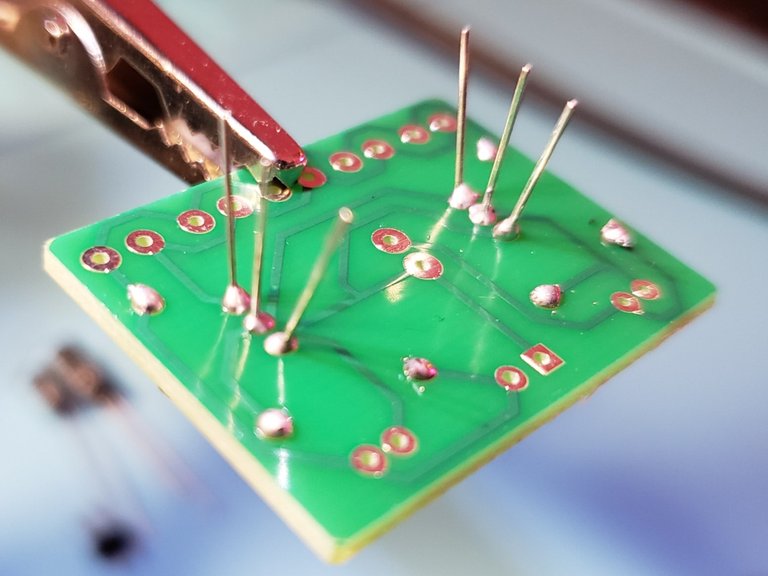
Well, since we got those resistors sorted out we might as well start by putting them into the PCB. It's best to tackle the components from smallest to large when the design allows it.
Bend those legs out
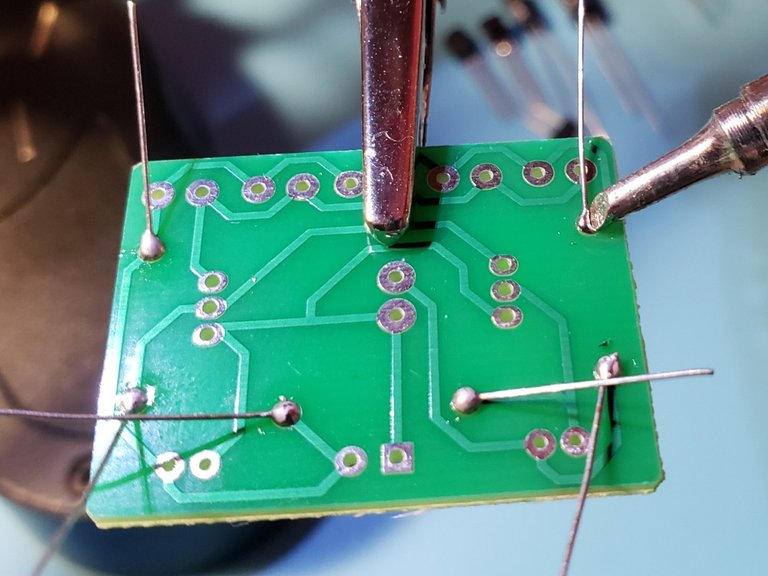
Solder them into place
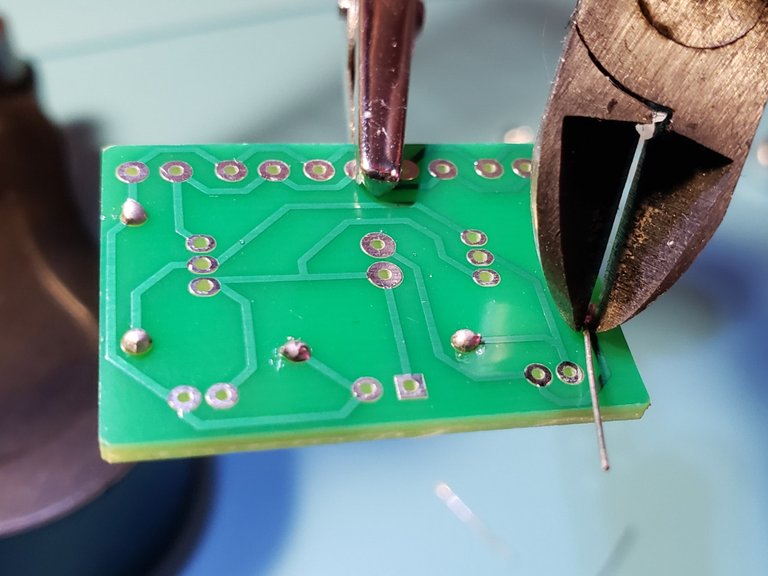
And snip those leads off.
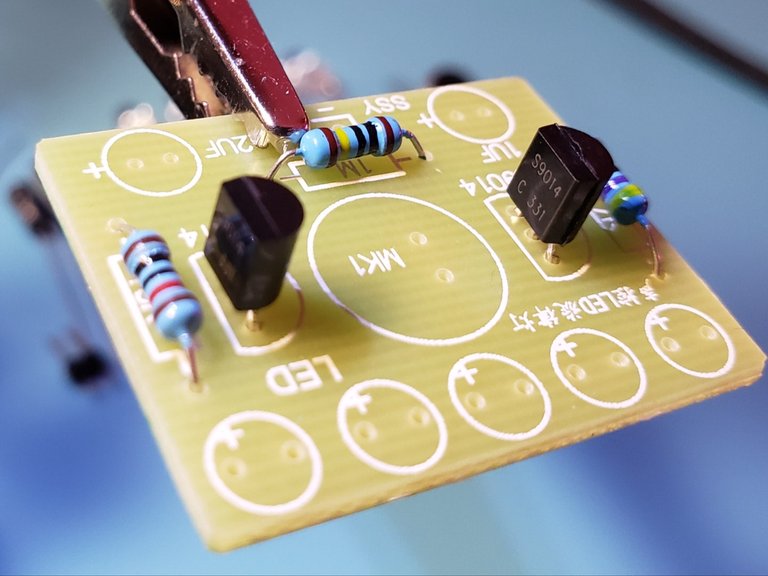
Next up are the two transistors
Be careful soldering these together with the holes being so close together.
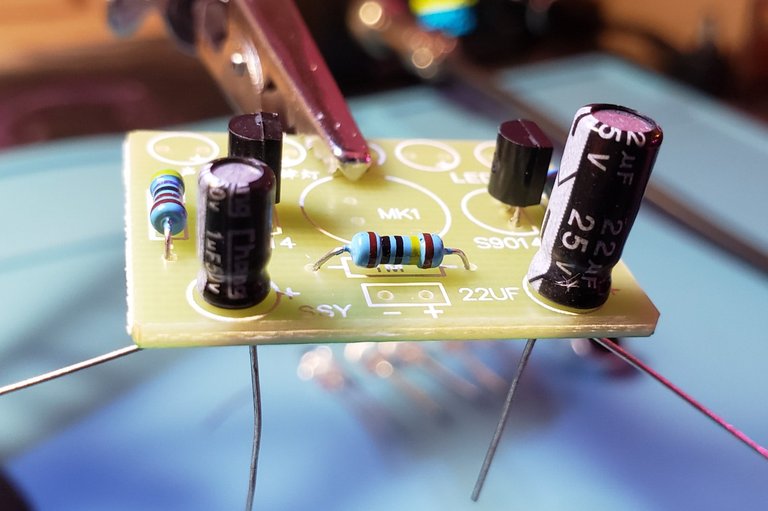
Electrolytic capacitors. Mind the polarity. The long lead is positive. The short leg also has a white stripe, which is negative.
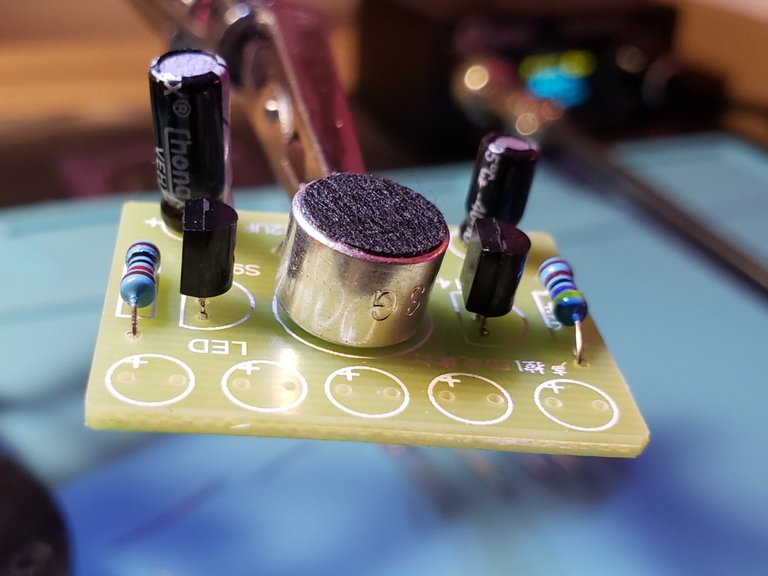
Time to slap that microphone in place. By virtue of the design of this PCB and microphone combo, it can only be put into place in the proper direction. If you are reverse engineering this make sure to figure out the polarity of the microphone.
Remember when I said go smallest component to largest? Well, I forgot. And this guy is a bit tricky to hold in place when you're soldering it, but I managed.
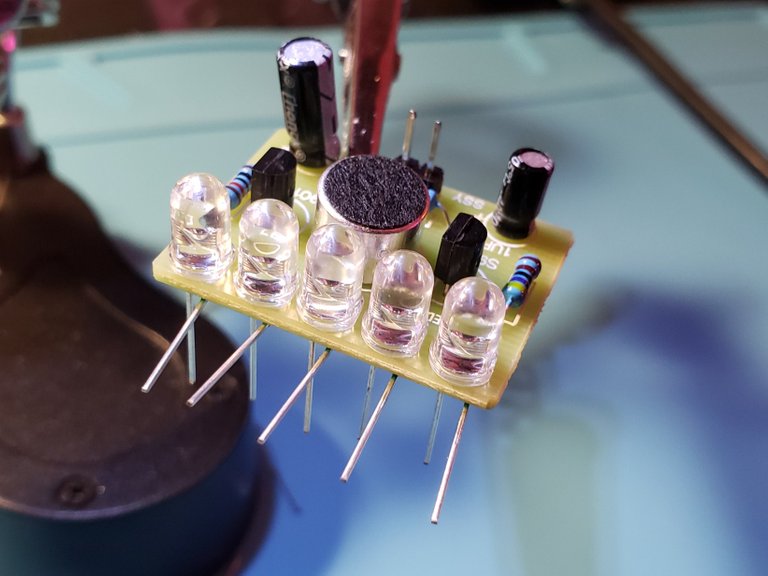
Woo, home stretch! Just 5 LED's to go! Remember that LED's have a polarity and the long leg is the anode or positive lead
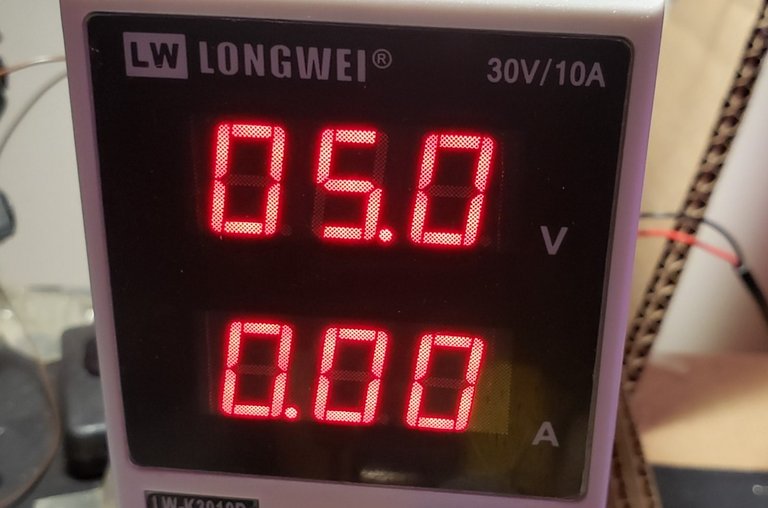
And finally, apply 5V to the +,- pins
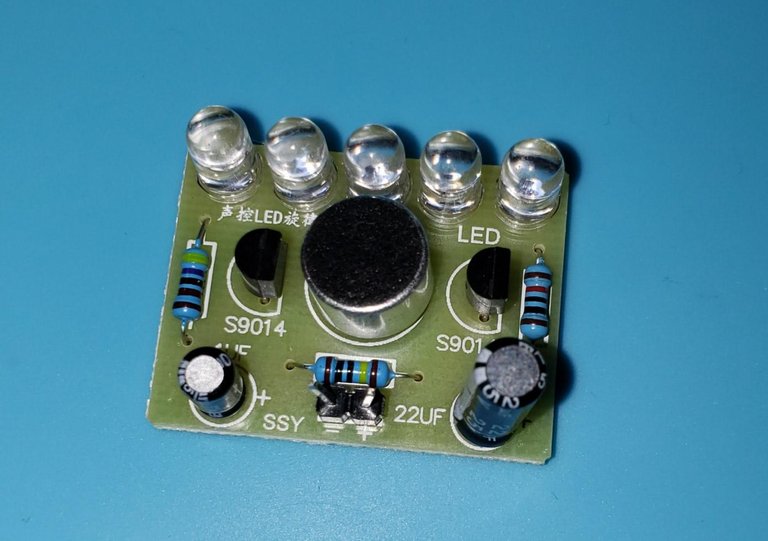
Here is a very short video of the completed module in action. It's quite simple in its design yet rather amusing to mess around with by playing various songs or seeing if the snoring from your pet dog can make it light up.
Thank you for taking the time to read this blog. If you found this trying to find a tutorial on how to put together this Diy Voice Controlled Melody Module, congratulations on completing it.
A piece of very useful and vital information on how to make a sound controlled light module. Very impressive buddy!
As a matter of interest, @build-it and @neoxian-city has collaborated to reward steemians with over 200 liquid STEEM and a couple thousand of their tribes tokens in an ongoing, do check it out and considering participating :
https://www.build-it.io/neoxian/@neoxian-city/build-it-x-neoxag-tribe-contest-205-liquid-steem-1950-build-tokens-1950-neoxag-tokens-new-year-bonanza
I also made a post about this blog slash tutorial on my twitter account https://twitter.com/NoCryptoValue1/status/1217963607557693440?s=19
Saw this on PYPT
!SHADE 5
@lacking you have received
5 SHADEfrom enginewitty!View and trade the tokens on Steem Engine.
This tip bot is powered by witness untersatz!
I know where to go if I ever need to do this! Very nicely organized post. I;ve come here through #PYPT.
Very cool technical post here buddy shame about your internet connection so glad you presented it in pypt. I hope to see much more from you 😃
I have SO MANY GAMES TO PATCH! I can't wait to fly south in the summer and update all my favorite games and get online for a few sessions to scratch this itch. Luckily I have all these fun diy kits to pass my time and a 3d printer!
Woah this is really cool! Great song choice too, reminds me of growing up in Nova Scotia haha
Thanks! Gotta do something to hold off the boredom and cabin fever up here! Haha
good tutorial about making your own but I think it's far from my league. Anyway a good and valuable post for everyone.
found it in #pypt
I was thinking maybe this is a blog for tag DIY instead of howto, i dont think that one excited untill you used it. And you might want to see steegsten as a tag maybe it can belong there aswell
Ah, I didn't know I "created" a tag for steemit hehe, that's kinda cool but I'll definitely make sure to swap those tags in the next post. Thanks for the tip!
Congratulations @lacking! You have completed the following achievement on the Steem blockchain and have been rewarded with new badge(s) :
You can view your badges on your Steem Board and compare to others on the Steem Ranking
If you no longer want to receive notifications, reply to this comment with the word
STOPTo support your work, I also upvoted your post!
Hi lacking,
Visit curiesteem.com or join the Curie Discord community to learn more.
It does look like an interesting project. I constantly wonder if I should start on learning to do these kind of electronic projects. Then somehow I get blocked on what will I do with all these things.
Does your project ends here? Or do you manage to use this Voice Controlled Melody Light in something else? Does it get stored for spare parts for a later project? What is the afterlife of these small projects?
There is definitely passion in building this controller and the result is amazing. The demonstration in the video of the operation of the light contractor with sound is almost magical.
You have taught me a lot today. I am NOT going to build something similar like what you did because I don't even have the basic knowledge but I learned that plates like these should be the ones used in the water fountains at night. There the lights are colored and I imagine that they also contract it.
A big hello @lacking
hi dear @lacking, great post !! very funny, although I don't think I'll ever do one;)) in the end it turns on if the dog snores ?? !! congratulations on your work and on your curie vote
Yea, I have to slide it fairly close to her, but it will light up and flash along with her snoring. We've woken her up several times giggling about it
super!! It's very funny ;)) have a good sunday
Congratulations @lacking, your post has been featured in the latest Curie Author Showcase.
On behalf of @curie I thank you for your time and for creating amazing content. Keep up the good work!
Sincerely,
Ivan (@curie curator)
Thank you so much, it means a lot to be Curied at such a young (account) age
I liked this information, you make it look like something anyone can do, I don't know about electronic and yet I understood the tutorial.
Congratulations, you have been deleted for a Curie vote, which brings a lot of traffic to your blog!