Ender 3 Pro: How to Upgrade Extruder Feeder
What's up everyone?
Hope your weekend is off to a great start. I go back to work on Monday for a day then work from home so excited to try that out. I showed how to replaced the Bowden tube in my last post so I figured I'd go ahead and replace the plastic extruder feeder with a metal one. The directions that come with the kit are nearly unusable. Worse than Ikea directions by a long shot. It's not directions, it's a shitty diagram. So, here's my hopefully less shitty guide that I figured out on my own.
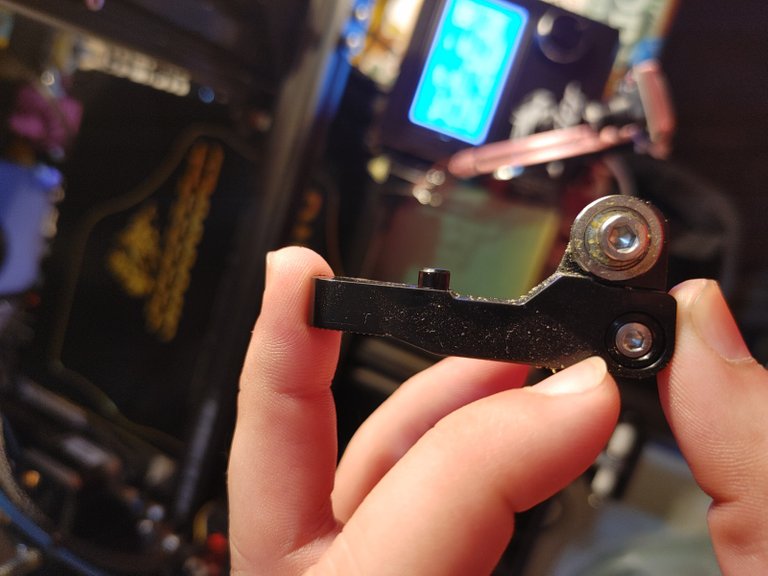
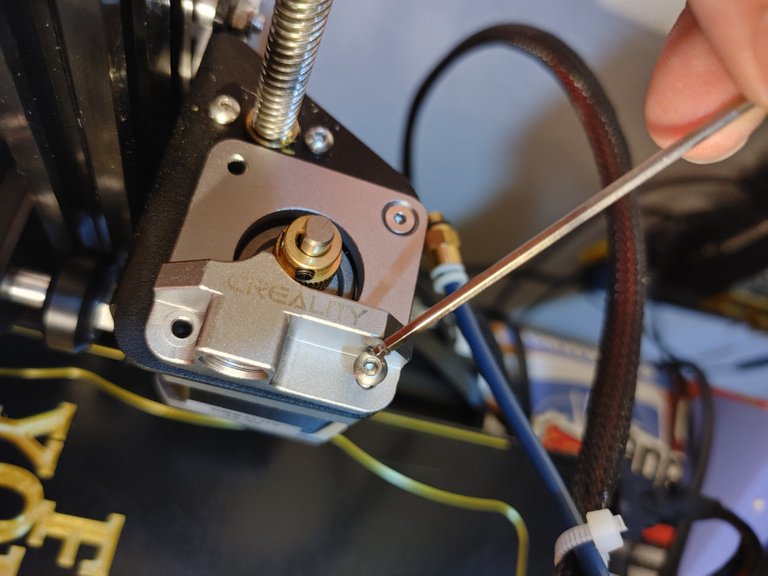
Step 1: Remove this bad boy. As you can see there are 2 different size bolts but you only need to remove the one I'm pointing at as the other just holds the bearing. There are 3 different sizes in total so you'll need some allen wrenches.
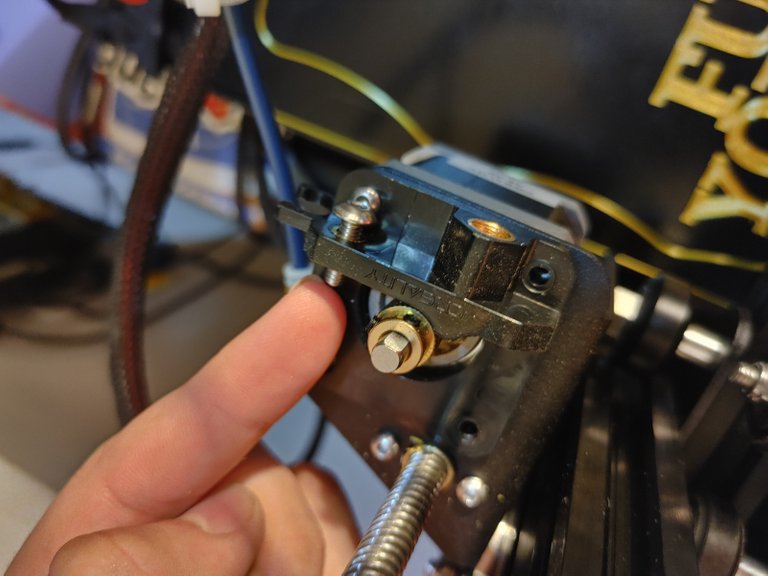
Step 2: Remove this horizontal screw that the spring was held in place by. You have to remove it in order to remove the mounting screw below it.
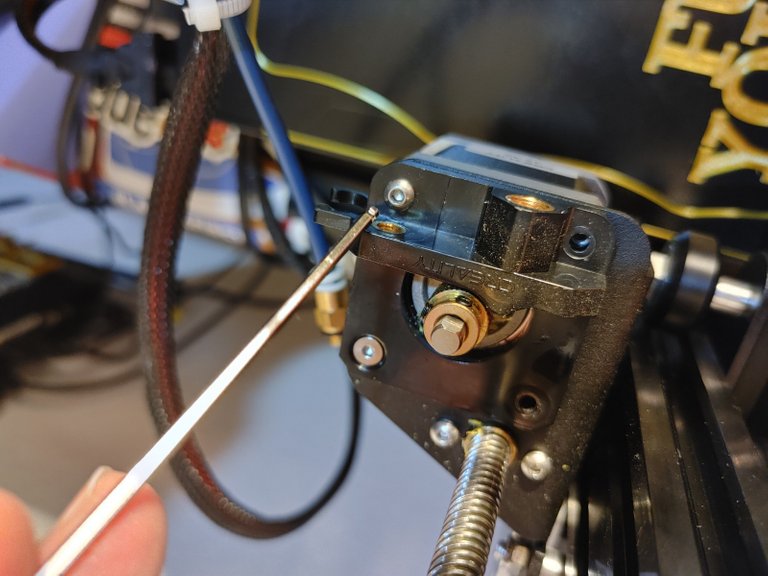
Step 3: Remove the remaining mounting screws and the feeder motor will be free.

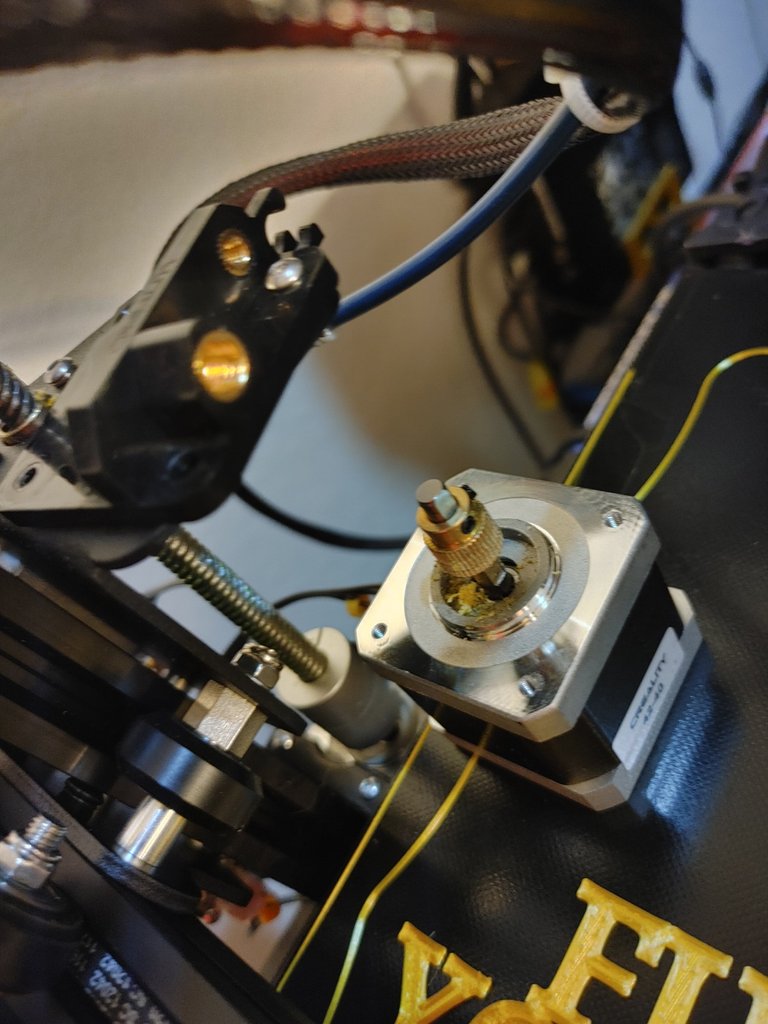
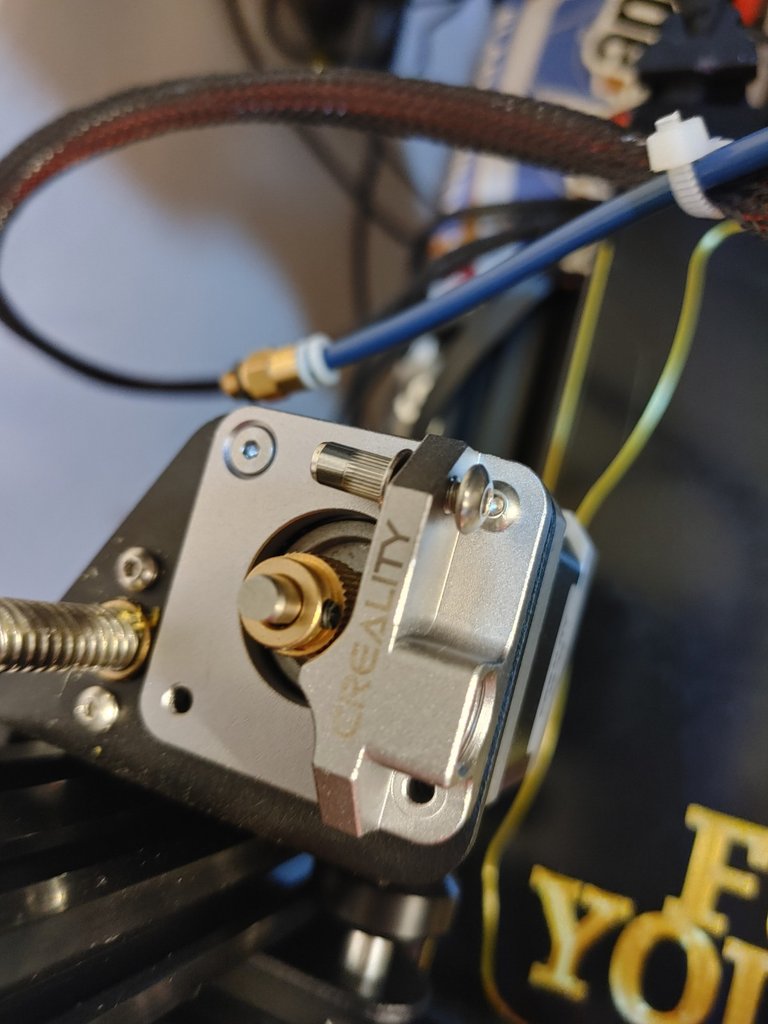
Step 4: You can set the feeder motor down on your print bed out of the way for now. Pull off the last part you can see here, unclip the cable, and you're ready to install the new extruder feeder. As you can see, i needed to do some cleaning up anyway so give it a blast with some duster to clean things up.
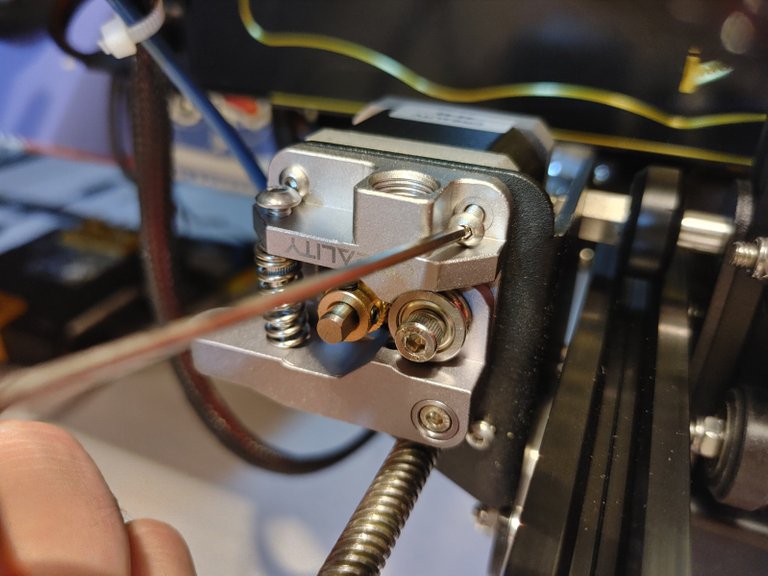
Step 5: Hold the feeder motor in place and set the new metal mount on top. align holes and begin inserting screws. Getting the first screw in was annoying because you have 2 parts to hold in place, but after that it's easy.
Step 6: Insert screw and rivet piece. This is what holds the spring in place instead of a little knob like on the plastic mount. This screw does not have to be tight. It will stick out a bit as it only holds the spring in place.
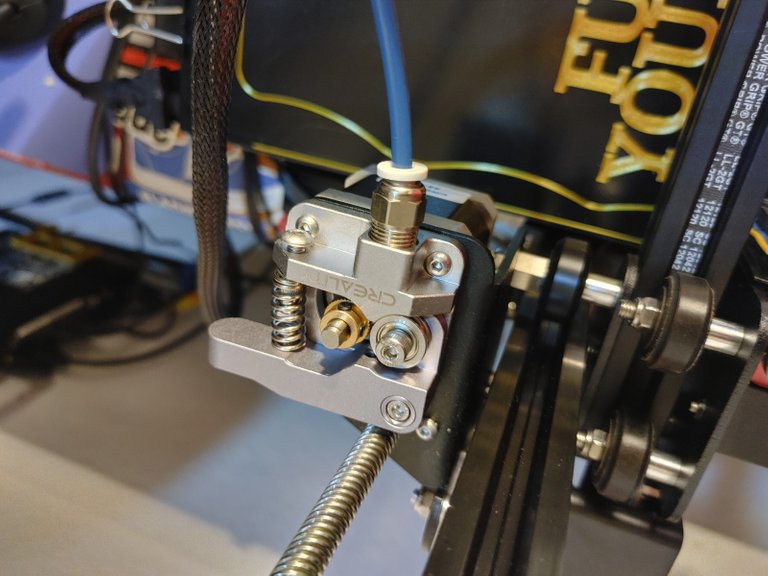
Step 7: I forgot I had already put the other piece of the feeder extruder together. So here's what it looks like assembled. All you need to do now is line up the spring and screw it on. It's held in place by the one single screw.

Step 8: Screw in remaining screw. This could have been done earlier but I forgot. So here it is.
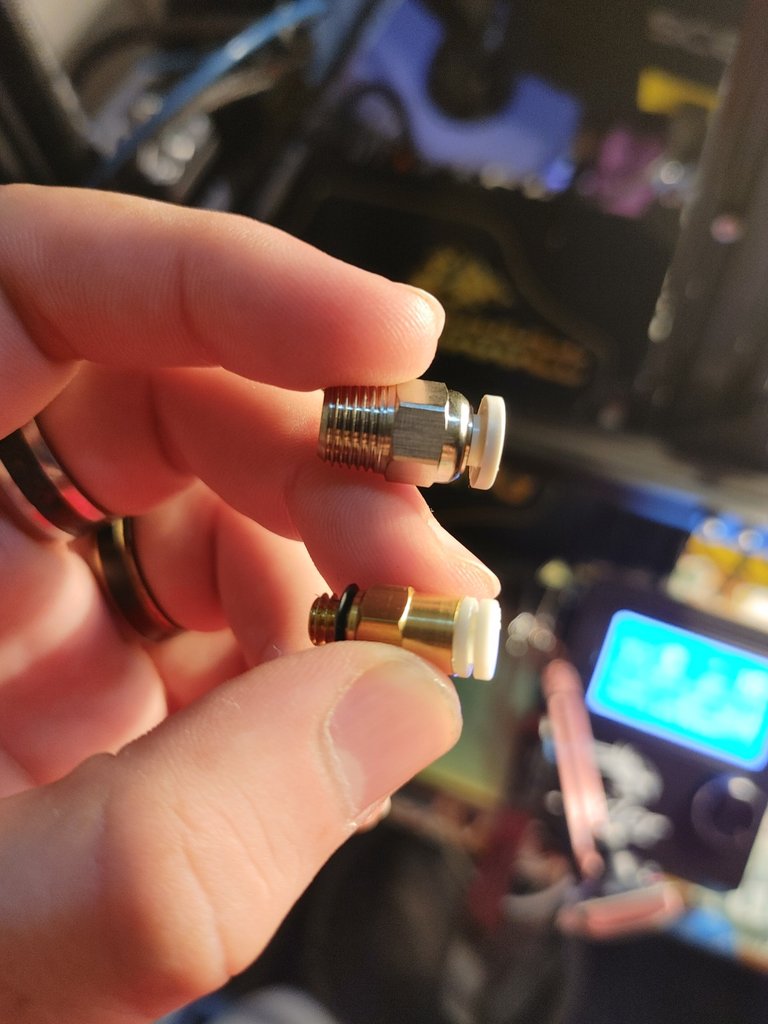
Step 9: Replace coupler on bowden tube with the larger upgraded one. Here's the comparison. Insert bowden tube, lock the coupler, and begin screwing it in. Be sure it lines up straight.
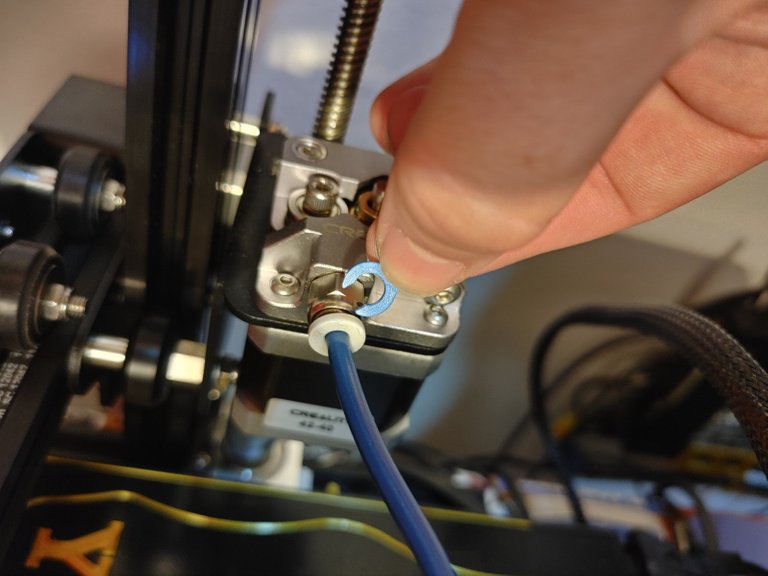
Step 10: Don't forget this little guy. It clips on the coupler so the tube can't move.
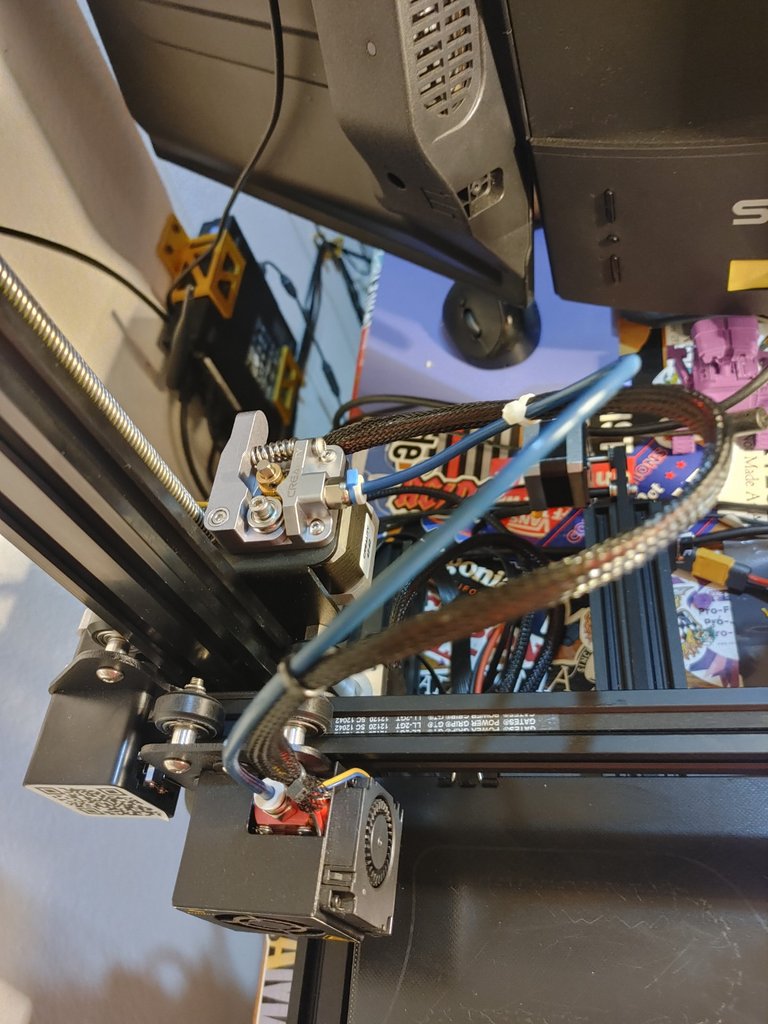
Step 11: There isn't really a step 11, so just ensure all screws are tight, and take a step back to admire your work. Look at that beauty.
I hope this helps!
I enjoy tinkering with things so this was fun for me. If you have questions, please feel free to drop a comment. I had no idea what I was doing and learned along with you. This upgrade not only looks better but will last much longer than the plastic parts. Now get to printing!
Thanks for reading! Have a great day!
Upvoted by GITPLAIT!
We have a curation trial on Hive.vote. you can earn a passive income by delegating to @gitplait
We share 80 % of the curation rewards with the delegators.
To delegate, use the links or adjust 10HIVE, 20HIVE, 50HIVE, 100HIVE, 200HIVE, 500HIVE, 1,000HIVE, 10,000HIVE, 100,000HIVE
Join the Community and chat with us on Discord let’s solve problems & build together.
Congratulations @l337m45732! You have completed the following achievement on the Hive blockchain and have been rewarded with new badge(s) :
You can view your badges on your board And compare to others on the Ranking
If you no longer want to receive notifications, reply to this comment with the word
STOPDo not miss the last post from @hivebuzz:
Congratulations @l337m45732!
You raised your level and are now a Minnow!
Do not miss the last post from @hivebuzz: