Our Homeschooling Journey: DIY Toy Clock

We're a bit past this lesson but my kid insists that we should have a clock that she can play with. She loves telling time. I had to turn off the digital clock on the microwave because she kept reading the time display to the point that it is already distracting her during our study time.
When I first taught her how to tell time, I just drew a picture of a clock on our makeshift whiteboard. She would just draw the arrows and tell the time, then she would erase them and draw again.
Just a couple of days ago, I had to replace the plastic covers on the wall because the plastic has been looking to use up and dirty. In the process, I removed the picture of the clock she was practicing on. She kinda moved on for a few days but soon enough she was still looking for the clock. And so, as an art lesson, I took out all the art materials plus the items for recycling we have in our recycling corner. I made this DIY toy clock while she was making all of her doodles.
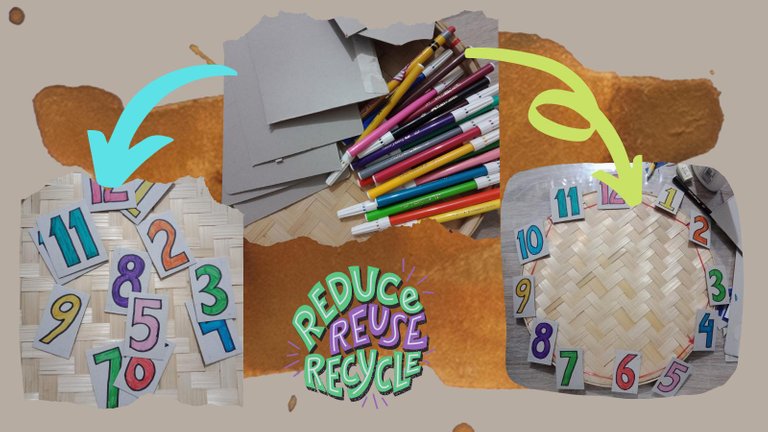
Amongst the items that I couldn't get myself to throw is the bilao or the round winnowing basket that had been used for the *biko or sweet rice cake. My husband has attempted to throw these out but I always intercept his attempts. He doesn't seem to believe when I say I'm gonna have a use for these one day, well now, I am flashing my I told you so face on him all day.
I used the old milk cartons for the numbers. I was not sure if the cut-out numbers would stick to the winnowing basket but I just had to try. I used so much glue and had to wait overnight before I checked again. The following day, I was so happy to see the numbers did not fall off.
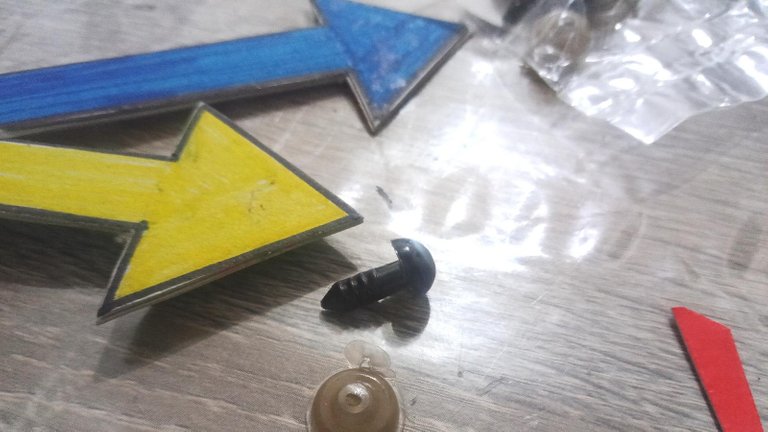
The next part is attaching the arrows. I double layered the cartons because I know these are the parts of this toy clock that would be used up a lot. The knob that I used to attach it to the winnowing basket is the safety eye that we normally use for amigurumi projects. I punctured the other end of the arrow using a push pin but I used my crochet hook to enlarge the hole so the safety eyes can fit into it.
Another challenge - or I thought would be a challenge - was attaching the arrows and the safety eye into the winnowing basket itself. But since it is made of really thin material, I was able to puncture it with ease.
 |  |  |
|---|
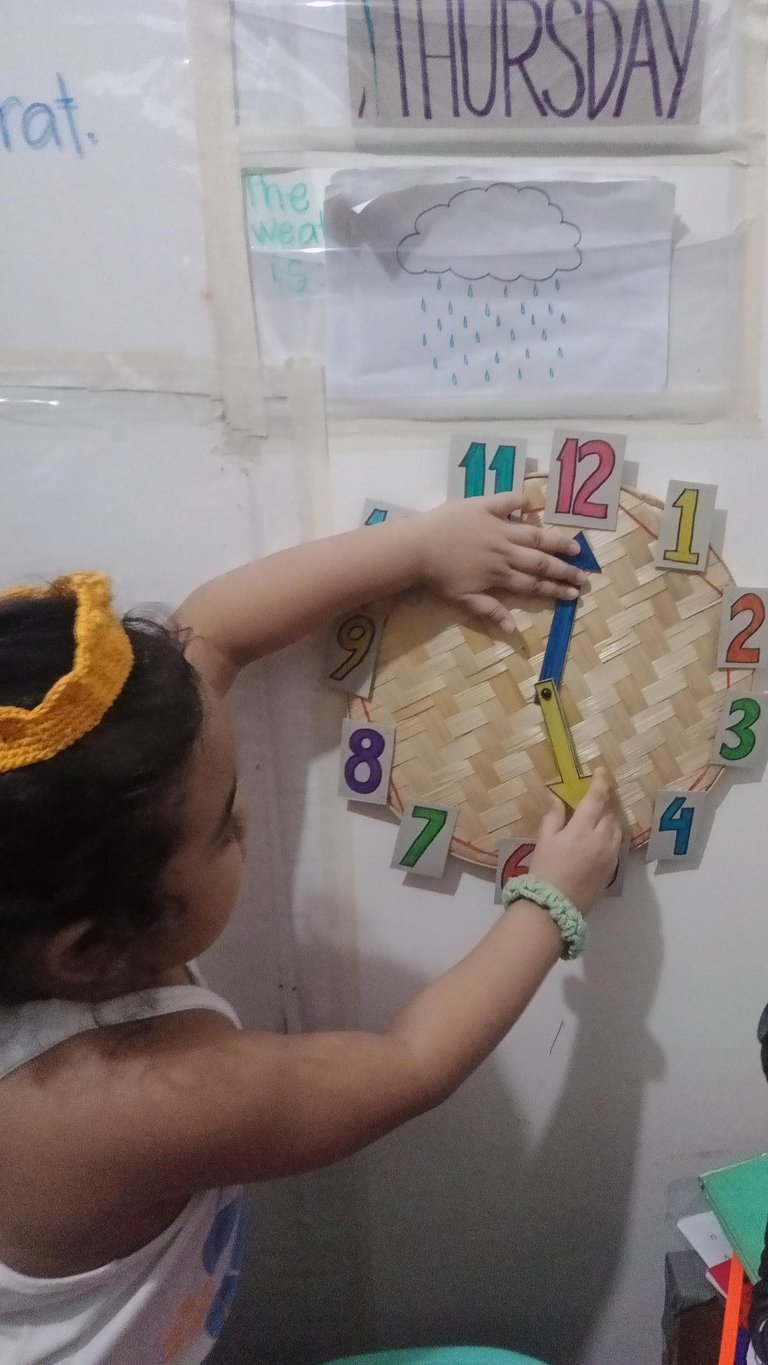
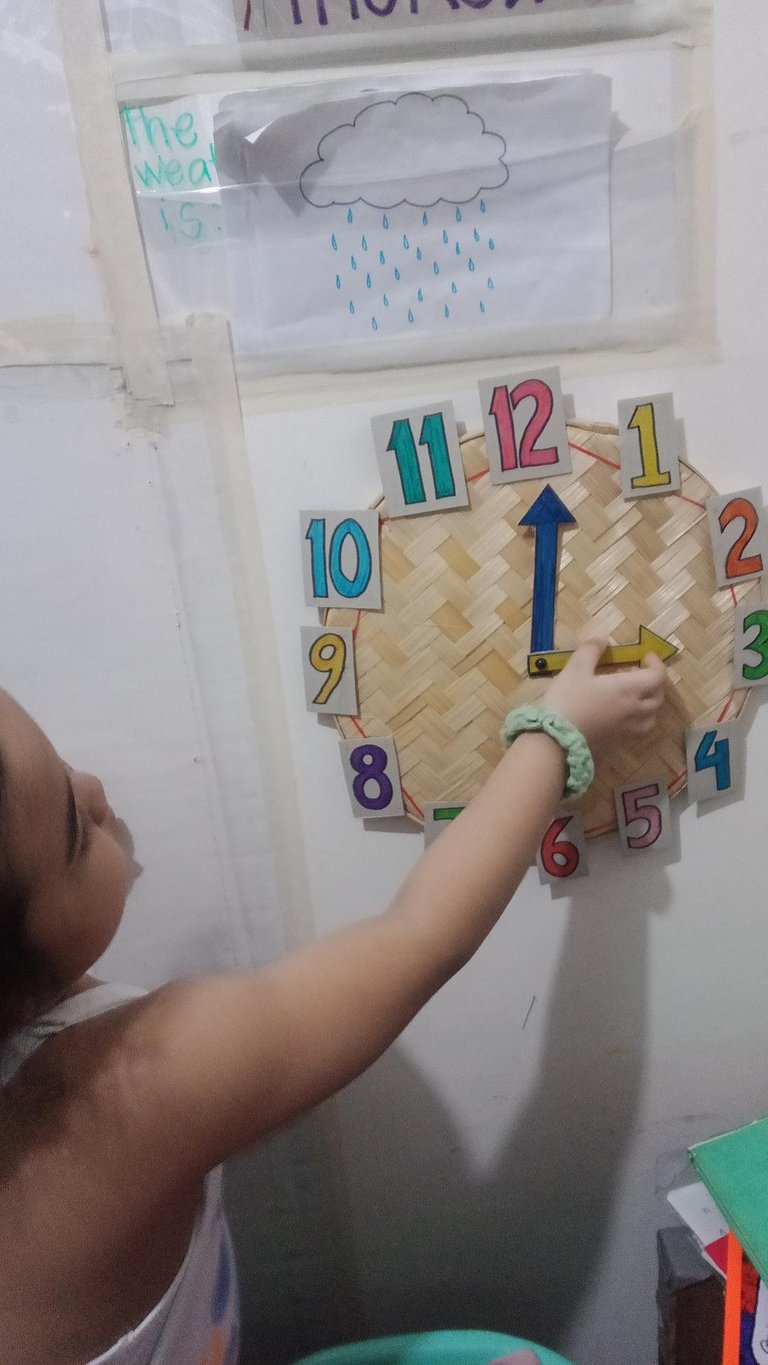
The real test is if it will stand the wear and tear when Aya starts playing with the toy clock. So for the whole day today, I let her tell the time just to see if it could withstand the stress test. It seems like it did. Elmer's glue did the trick, amigurumi safety eyes for the win!


@romeskie is a full-time stay at home mom juggling homeschooling, crocheting, and homemaking. A Business Administration graduate with a major in Marketing who ended up in the contact center industry, on the frontlines, climbing her way up to Workforce Management where she found her passion in real-time analysis and management. A once self-proclaimed careerwoman who soon realized homemaking was her real calling. Her passion varies from reading, writing, photography, and most of all, crocheting.
Connect with her through her Facebook Page: The Leftie Crocheter and on Instagram. Feel free to subscribe to her Youtube Channel: The Leftie Crocheter

Just because you're past a lesson doesn't mean going back is fun sometimes ;D
The toy clock you made seems like it would be much better for playing with and telling the time than constantly drawing clock faces too!
Since I'm freestyling our curriculum, I just kind of follow what the little kid wants to learn. And these past few days, she seemed to be on "review mode". We revisited all the topics we discussed in the past.
Thank you for sharing this amazing post on HIVE!
Your content got selected by our fellow curator @rehan12 & you just received a little thank you via an upvote from our non-profit curation initiative!
You will be featured in one of our recurring curation compilations and on our pinterest boards! Both are aiming to offer you a stage to widen your audience within and outside of the DIY scene of hive.
Join the official DIYHub community on HIVE and show us more of your amazing work and feel free to connect with us and other DIYers via our discord server: https://discord.io/diyhub!
If you want to support our goal to motivate other DIY/art/music/homesteading/... creators just delegate to us and earn 100% of your curation rewards!
Stay creative & hive on!
Thank you! :)
Recycling and education in one. What's not to love! I've featured your post in the @HomeEdders weekly curation.
Curated by @minismallholding on behalf of @HomeEdders.
Supporting home education and educational content. If you're a home educator, home educated or are thinking about home education, find out what we're about HERE.
You can join the community by clicking the subscribe button on Hive or Peakd.
please feel free to join us on discord.