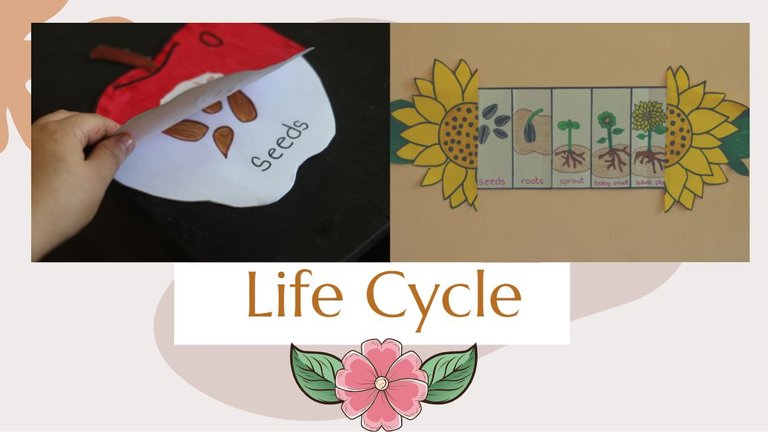
Make an Educational Life cycle
In the past few days, I had a busy schedule and no wonder on weekends. Every time I do blogging, I love the area where I am facing the trees it helped me to get focus on my work. Staying alone in the house during the daytime is not easy because there are times boredom strikes but I want to make it into a productive day. Instead of sleeping or wasting my free time on useless things, I ended on doing DIY crafts and I just love how HIVE has been the bridge to transport my ideas, skills, and creativity to the community. Through the help of @homeedders, my days became more exciting and how they welcome and appreciate my work. With the support, I will continue providing educational tips to both parents and children in homeschooling.
Tonight, we are exploring Science. We are going to make something creative on how are we going to present a life cycle of a living thing. I chose apple and sunflower because they are my favorites. It is a good strategy if we will teach our kids how the plants, fruits, and vegetables develop. By looking at our surroundings, some of us were surrounded by green scenery which is soothing to look at with our eyes. So join me for a science lesson.
I really wanted a kid to draw these beautiful drawings but sad to say my place has fewer children and I cannot let myself be with a kid since I am new to the place and I don't usually go out for safety as well. So some of you may wonder where all this art stuff I made will be distributed? well, I give it to kids and let them learn from it on weekends. I make sure that it matches according to their levels.
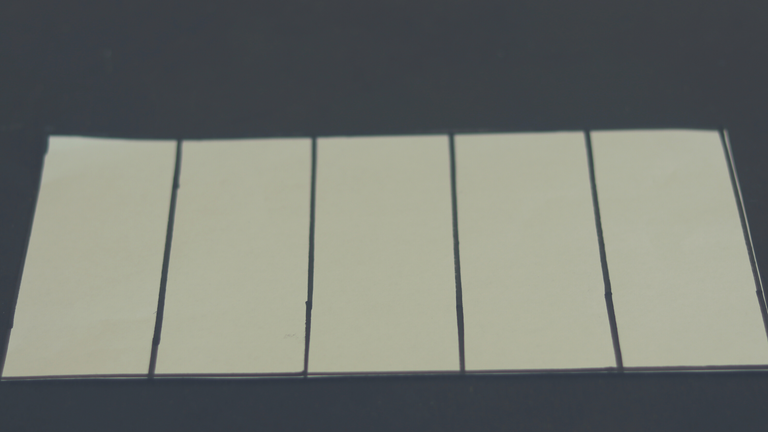
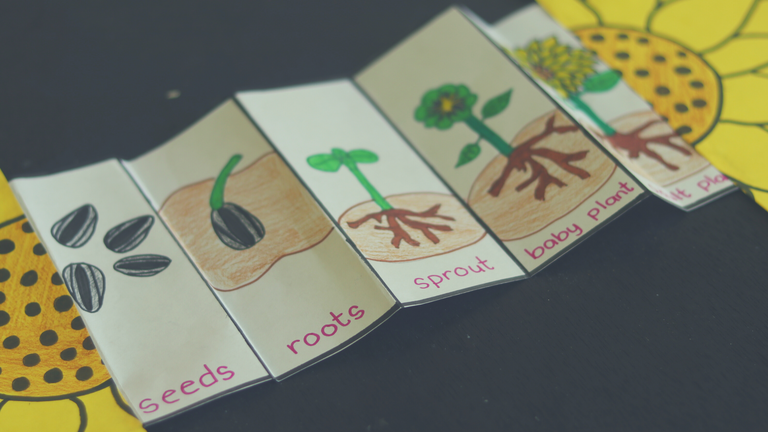
My target for this activity is for children that's why terms or vocabulary I will use will be basic and easy to understand. To begin with, we are going to divide the paper into five sections. There will be respective stages on each page about the life cycle of a sunflower. Every side should be marked or bold with a marker. You can have your own choice of colors.
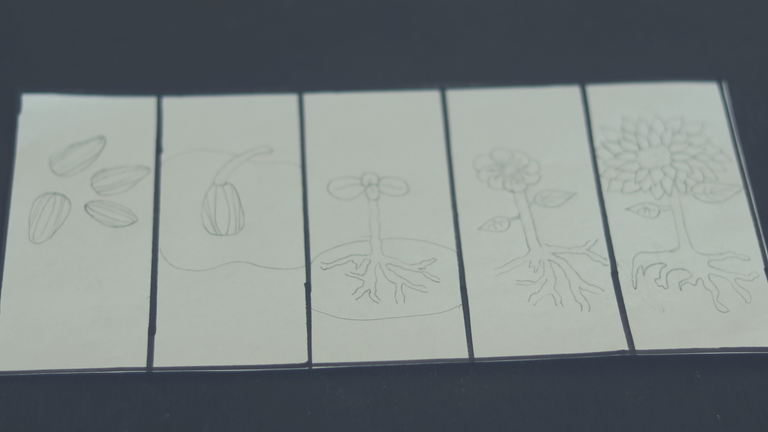
I quickly draw it since it's easy and simple. Let's not make it complicated so that it is achievable especially the young learners. Let's always remember to make our drawings visible so that the students will easily identify what it is and easy to follow.
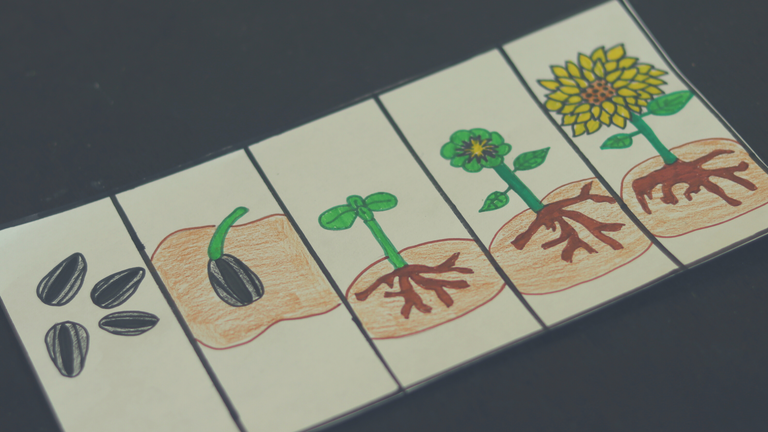
I just love watching its simplicity. I was able to use common colors such as black, brown, green, and yellow. Again, it will be good looking if we outline it with hard color using the markers and shade it with the light one by using the color pencils especially if your paper is too thin it might create holes if the ink excess onto the paper.
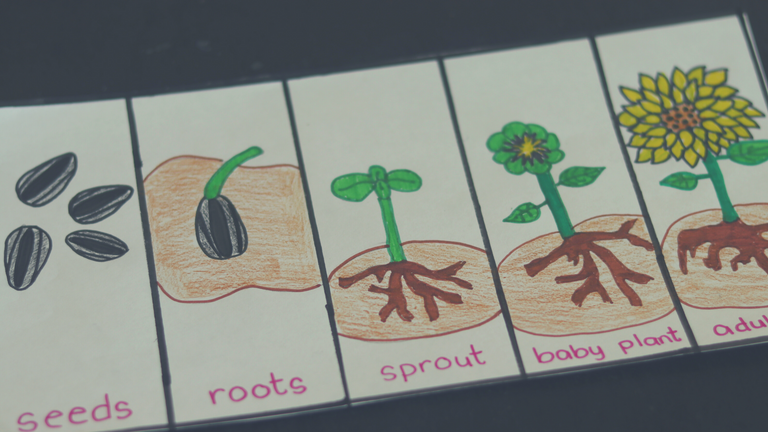
This time, let's start labeling the drawings. By writing, it will help the student to easily remember it and to learn the correct spelling of the words. The good thing about learning English is that it will not only focus on one specific topic but it integrates to others and that's what makes English is more fun.
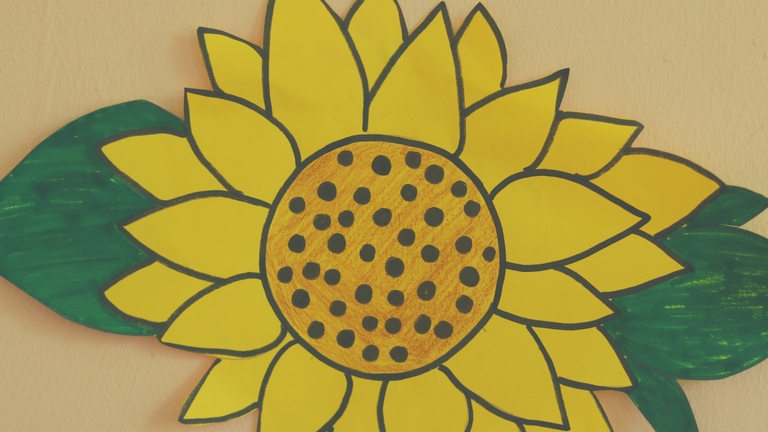
To share with you a quick and easy tip, take a yellow paper and start drawing the seeds, petals, and leaves. Instead of coloring the petals into yellow, it saves the ink. In my case, I was actually running out of yellow marker or color pencil so I have to be strategic at this time to make it successful since this drawing is one way more important too.
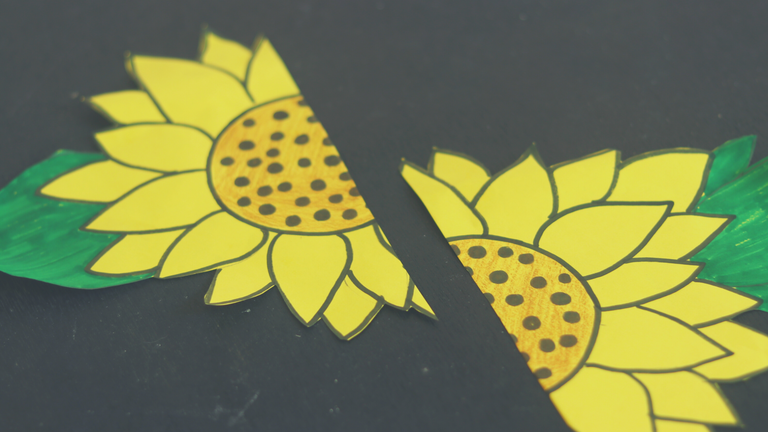
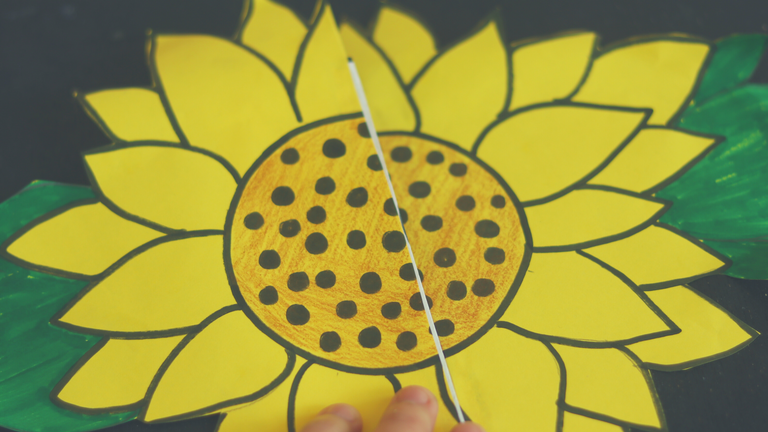
Let's start cutting the sunflower in half. Make sure that they are perfectly divided to create a balance of the spacing.
Start folding each part of the drawings. It should end up for something that they are folded as one.
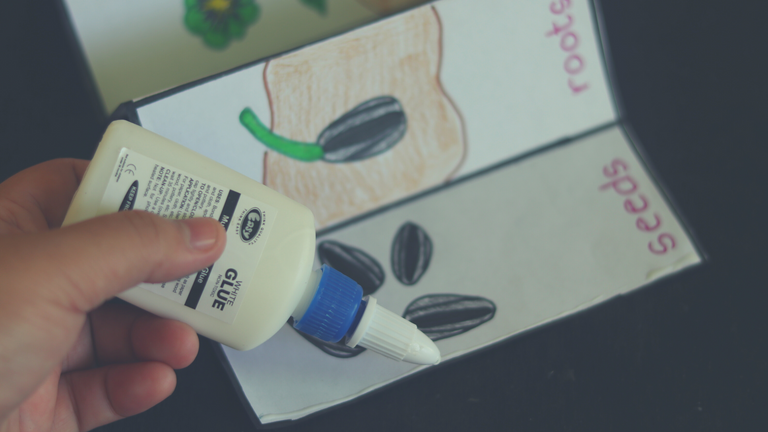
For you to stick the first half part of the sunflower, spread some white glue on the left side of your first drawing.
Then slowly place it on the top with white glue.
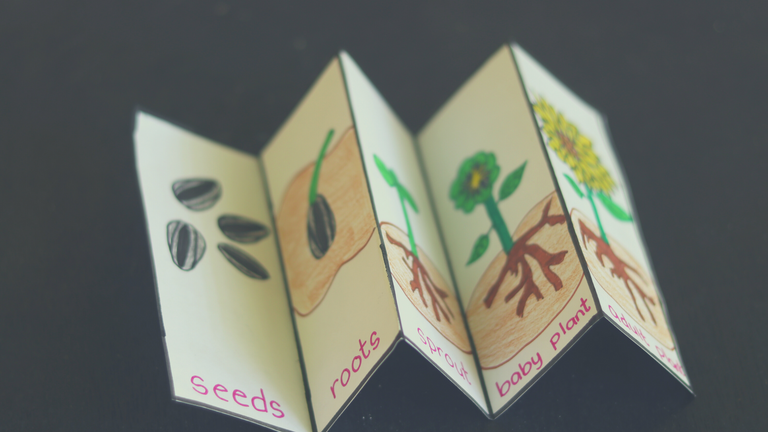
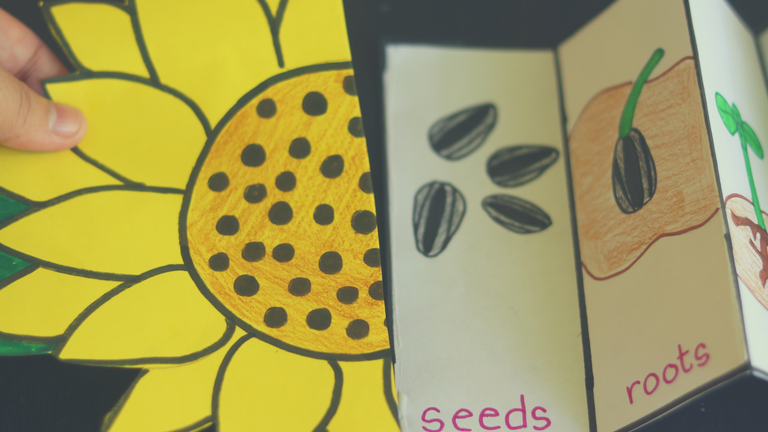
Look how it was perfectly connected as one. I just want to share some ideas on folding the paper to make sure it closes the sunflower because on my first attempt it was unsuccessful but luckily, I was able to find a way.
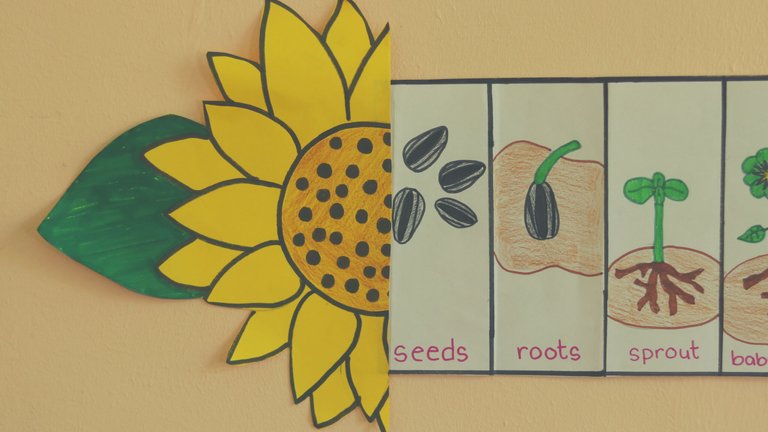
This is the finished product of my life cycle of a sunflower. It is easy to open and close by letting your two hands extending in each direction to left and right. This is a good display too on your kid's activity room.

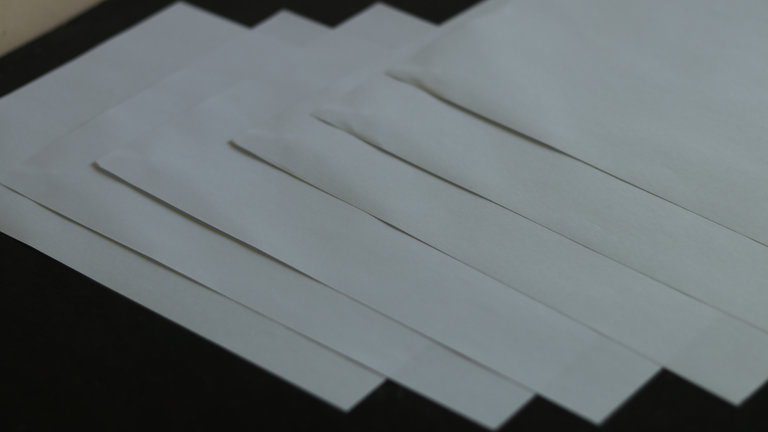
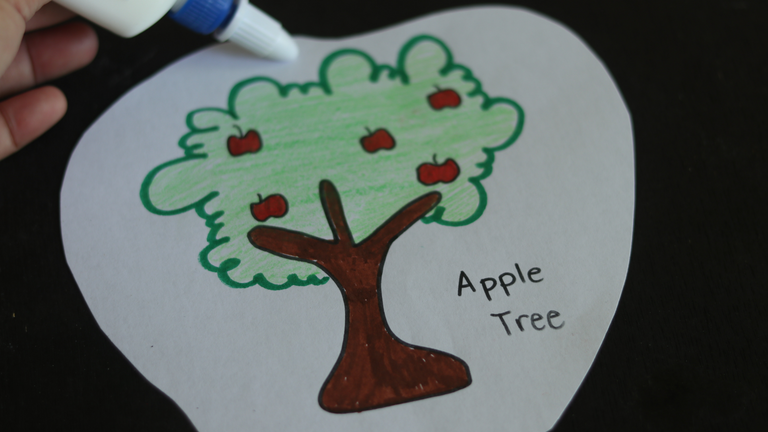
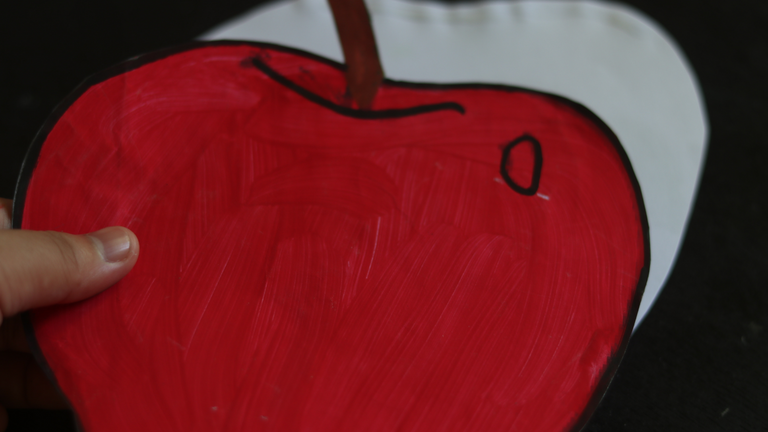
Apple is the only fruit that I can eat every single day. I can still recall how my sister's doctor advised her to drink fresh apple juice every day to cleanse her gall stones. This time, I am going to teach you the simplest way to make a mini flipbook about the life cycle of an apple. You can simply draw an apple and color it to what apple you like as we all know there are red apples, yellow apples, and green apples. I was able to reuse this drawing so I decided not to draw a new one since I can utilize this.
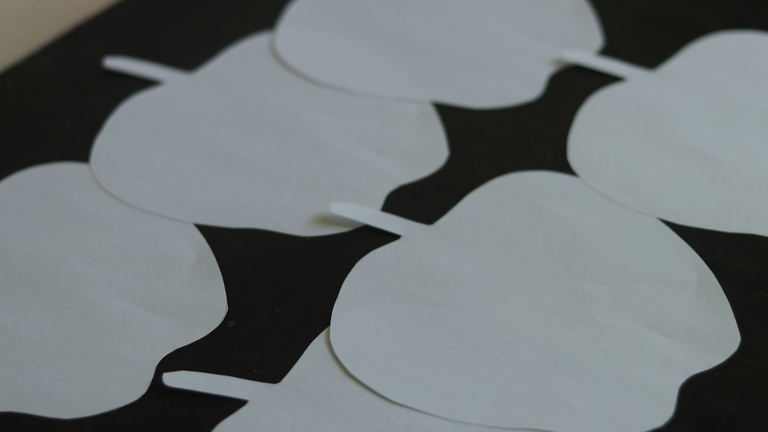
I forgot that I don't need the stalk of the apple so I cut it that's why you wonder it is no longer there in the second photo.
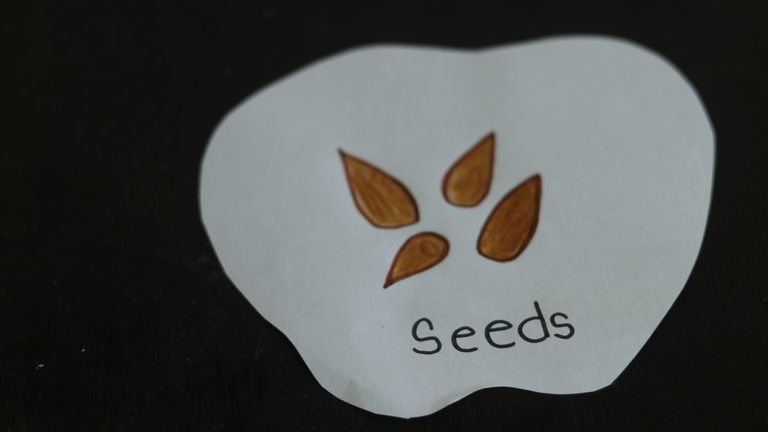
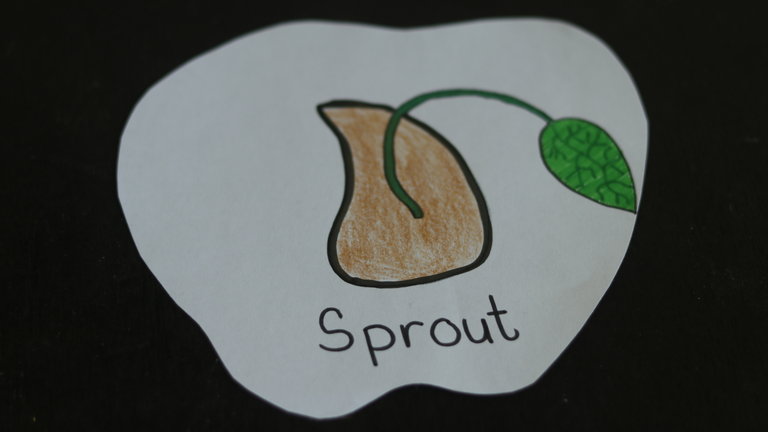
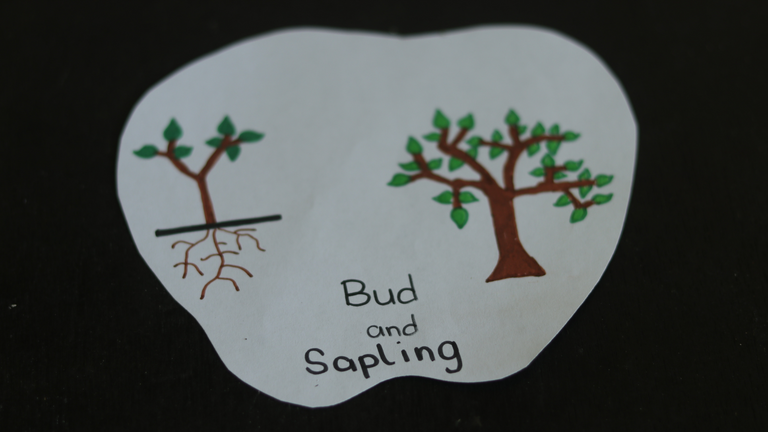
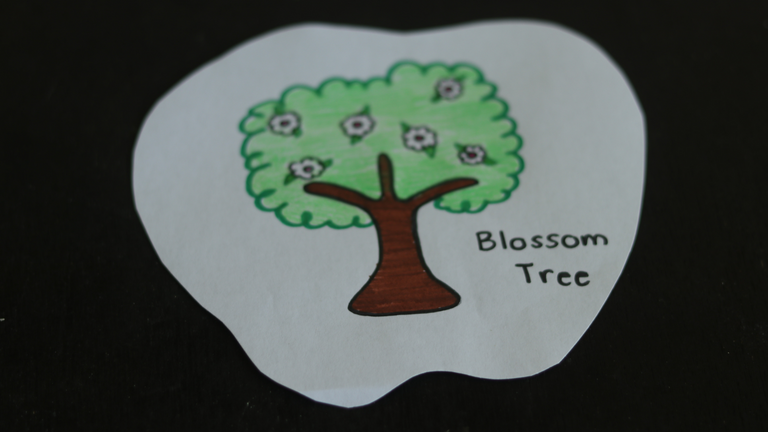

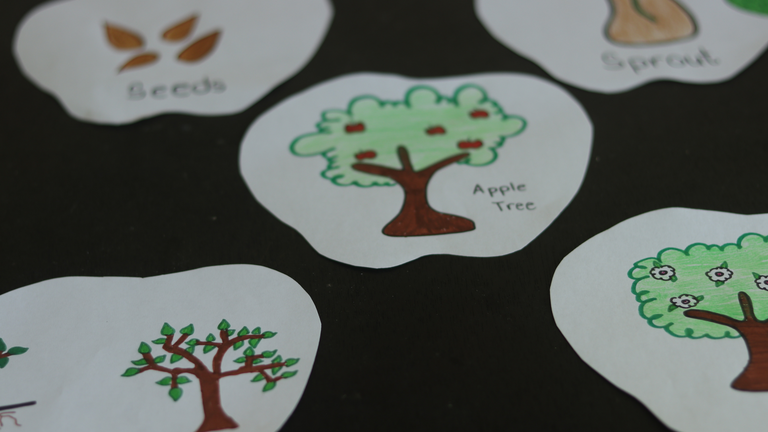
These are the following cycle of an apple ;
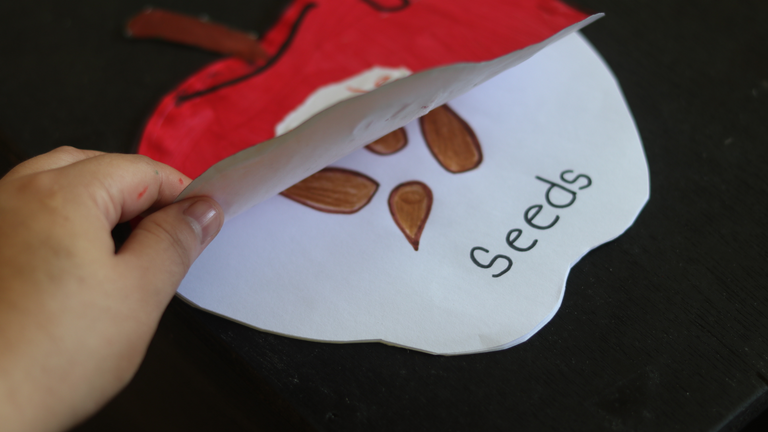
1. Seeds- When you slice an apple, you can see those tiny dark brown seeds from it. Those are the same seeds that you can see on the drawing.
2.Sprout- You can see from the seed, there is something small plant growing with a leaf or leaves. It shows a new beginning.
3. Bud and sapling- In bud, you can see those thin roots are growing underground and leaves too on the top, and in a sapling, the roots are now getting firm and more leaves are growing on each branch of the tree.
4.Blossom tree- We can start to witness the small flowers are growing on the tree.
5.Appletree- Finally, we can look at those red apples hanging on the tree. Planting and Harvesting apples will take a longer time compared to those normal plants or trees.

I advised if you have actual plants from your garden, you can try some flowers and let your child answer your questions. By this, we can see if our way of teaching is effective and be long-term to your child meaning, the lessons he or she learned remained in her memories.
Sources:
Life cycle of an apple tree :
Life cycle of a sunflower:
This post has been manually curated by @bhattg from Indiaunited community. Join us on our Discord Server.
Do you know that you can earn a passive income by delegating to @indiaunited. We share 80 % of the curation rewards with the delegators.
Here are some handy links for delegations: 100HP, 250HP, 500HP, 1000HP.
Read our latest announcement post to get more information.
Please contribute to the community by upvoting this comment and posts made by @indiaunited.
It is creative and ingenious. The photos are good too. The write up is is well-written. This is a good activity for student at home. !discovery 25
Hi @juecoree, it's another day to say thank you.
This post was shared and voted inside the discord by the curators team of discovery-it
Join our community! hive-193212
Discovery-it is also a Witness, vote for us here
Delegate to us for passive income. Check our 80% fee-back Program
The sunflower caught my attention. Favorite ko Kasi. Another activity I can do with my daughter. Thank you so much for sharing this, hindi talaga ako mauubusan ng activities na. 😍😍😍
It's applicable po talaga sa mga kids. ilang taon na po yung daughter niyo mam?
She's only 4 and very active and loves lots of activities. Her learning is based on her mood so I always need these kinds of activity to keep her interested.
Oh, that's good to hear that she loves to engage herself in sets of educational activities .:-)
Wow. I !LUV this project. Simple and educational, even I can do it. lol. haha... Have a !PIZZA, Miss Donnabel. :)
@missdonna! I sent you a slice of $PIZZA on behalf of @juanvegetarian.
Learn more about $PIZZA Token at hive.pizza
Thank you for your good words. I appreciate it.
Welcome. :)
Hi @missdonna, you were just shared some LUV thanks to @juanvegetarian. Holding 10 LUV in your wallet enables you to give up to 3 LUV per day, for free. See the LUV in your wallet at https://hive-engine.com or learn about LUV at https://peakd.com/@luvshares
Really appreciating the ideas that you're bringing to the community and they are always so well presented. 💚
Oh, this is so sweet. thank you always @homeedders :-)
Super creative! Love this, Donna. 😍 Sad tapos na kami sa topic ng plants, but will definitely keep this in mind for my youngest. Thanks for sharing!
Ganon po bah, hehehehehe hopefully yung youngest ma enjoy niya this kind of activity soon. maraming salmat po mam @arrliinn
Interesting, easy and fun proposal. I like the way you talk about the simplicity that some strategies should have, in the case of vocabulary with younger children the simpler the better and especially if they help us in the process of elaboration as they grow they like a little more complexity. Excellent.
That's my objective on how I begin with the goal because it would always be better to start with the basics before letting our students or children cross to the higher level. Thanks for your great words @emimoron
Great artistry, amazing idea, and you are definitely great in teaching. Having someone like you in the community helps a lot in educating the children of Home Edders community members and Hive as a whole.
Wow, nakaka motivate naman po yan sir mga words mo. maraming salamat po. A teacher like you also has a great contribution to the community. I am glad to know you here and the rest too.
Thank you (^_^)
beautiful activity and super interesting the way you propose its use. I loved the apple and I think all the figures. Thank you for teaching us this beautiful way of teaching and learning.