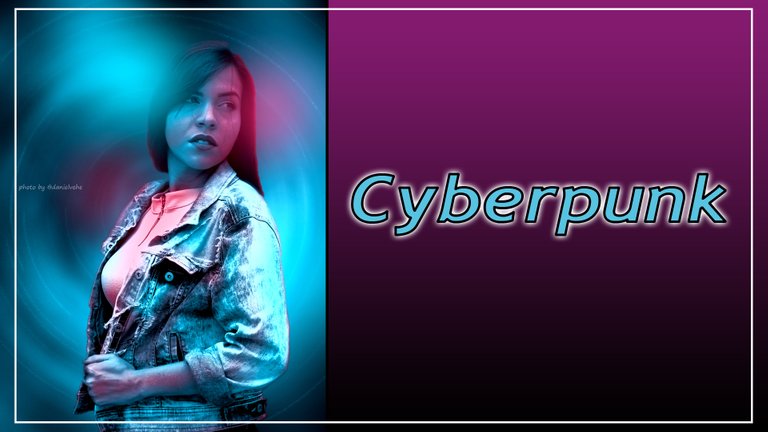
📷 Cómo crear Efecto Doble Iluminación Cyberpunk en una foto 📷 How to Create Cyberpunk Double Illumination Effect on a photo
Saludos amigos. Hoy con nuevo tutorial para que tus fotos tengan unos efectos especiales y no las dejes como el común de todas.
Este efecto se llama "Doble Iluminación Cyberpunk", dondea una modelo le aplicamos dos colores de luz.
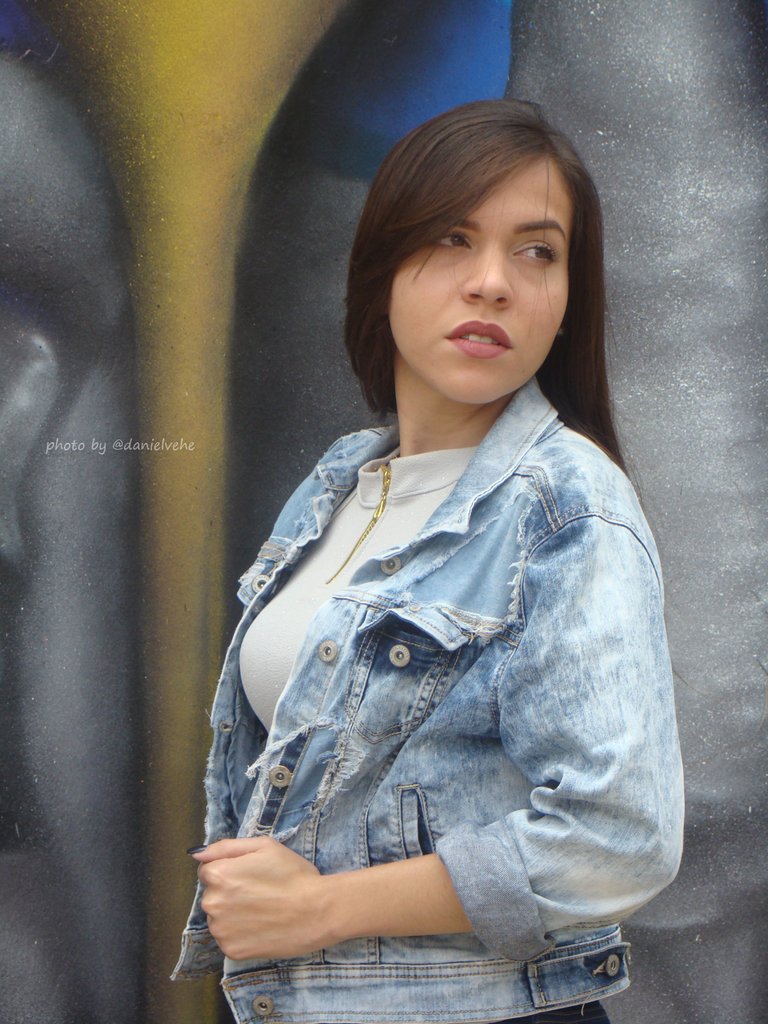
Usé una de las fotos que le tomé a @tynmar6 en 2019.
Greetings friends. Today with a new tutorial so that your photos have some special effects and do not leave them as the common of all.
This effect is called "Double Cyberpunk Lighting", where we apply two colors of light to a model.
I used one of the photos I took of @tynmar6 in 2019.
Comenzamos...
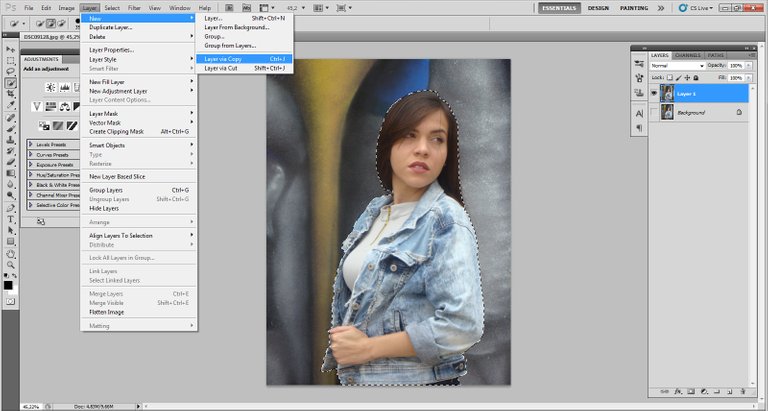
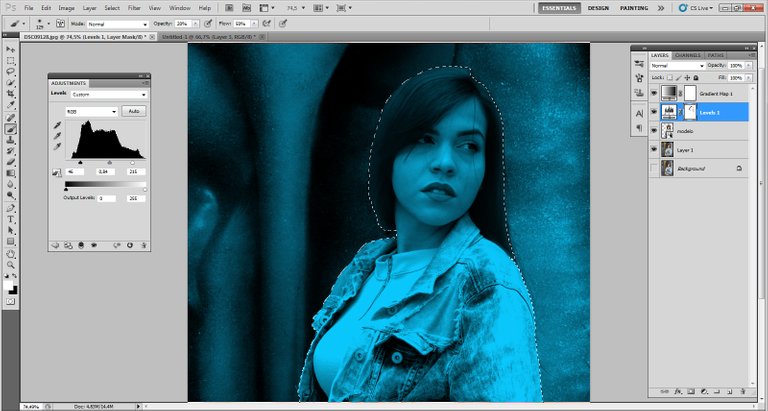
Abrimos la foto de la modelo y recortamos su silueta para crear una capa con eso. A esa capa la nombramos "modelo" y la convertimos en objeto inteligente.
We open the photo of the model and cut out her silhouette to create a layer with it. We name that layer "model" and turn it into a smart object.
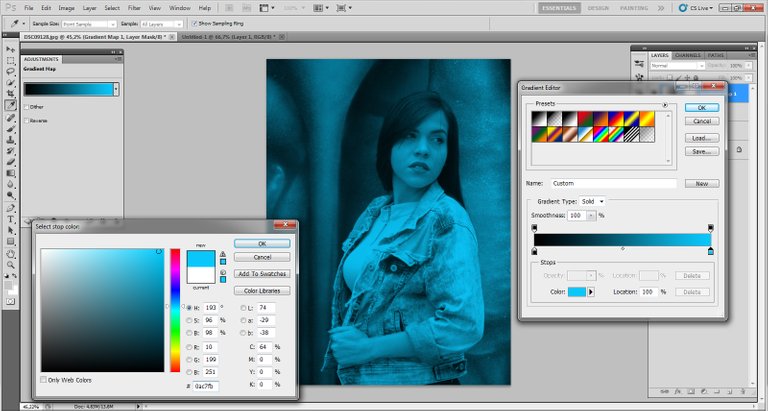
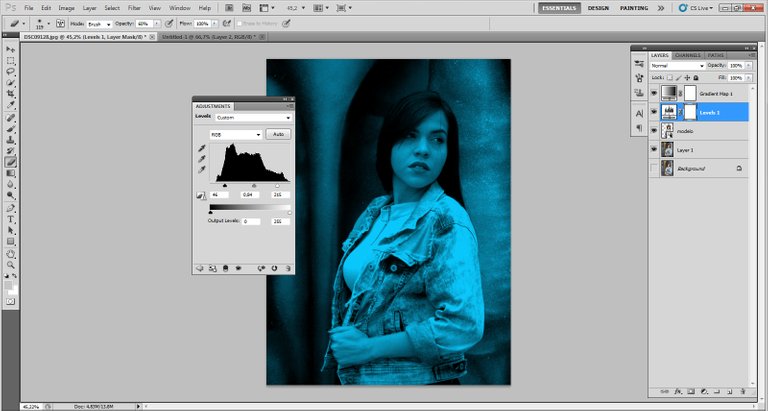
Creamos una capa de ajustes, mapa de degradado. Seleccionamos el degradado de negro a blanco sólido y saleccionando el blanco lo cambiamos por: 0ac7fb. El negro lo dejamos como está. Es suavizado colocamos el 0%. Después una nueva capa de ajustes, niveles y ponemos el contraste a gusto nuestro.
Create an adjustment layer, gradient map. Select the gradient from black to solid white and change the white to: 0ac7fb. Leave the black as it is. In smoothing we set it to 0%. Then a new layer of adjustments, levels and set the contrast to your liking.
Luego damos click en la máscara de capa y con el pincel retocamos algunas zonas que hayan quedado muy oscuras o muy claras.
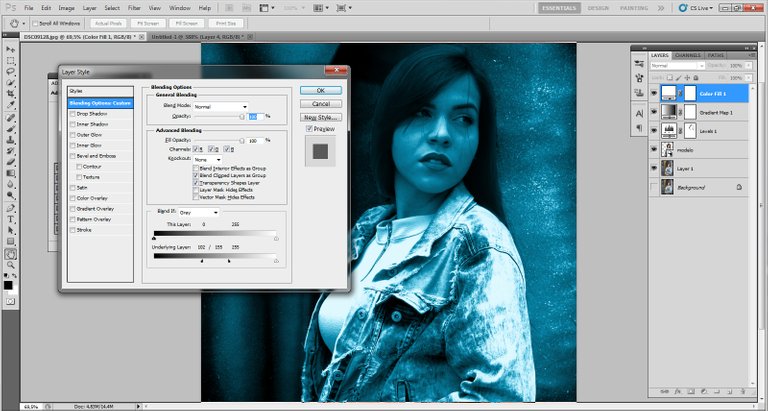
Despues creamos una capa de ajustes, color sólido, blanco. En opciones de fución colocamos en capa subyacente, movemos hacia la derecha para difuminar y luego presionando "Alt" tomamos la mitad del cursor y la movemos más a la derecha, para suavizar la imagen.
Then we click on the layer mask and with the brush we retouch some areas that are too dark or too light.
Then we create an adjustment layer, solid color, white. In the function options we place on the underlying layer, move it to the right to blur and then pressing "Alt" we take the middle of the cursor and move it further to the right, to soften the image.
Creamos otra capa de ajustes. Tono - Saruración. Yo le coloqué un valor de +139 y presionamos control + I. Aquí es donde añadimos el otro color.
We create another adjustment layer. Hue - Saturation. I set it to a value of +139 and press control + I. Here is where we add the other color.
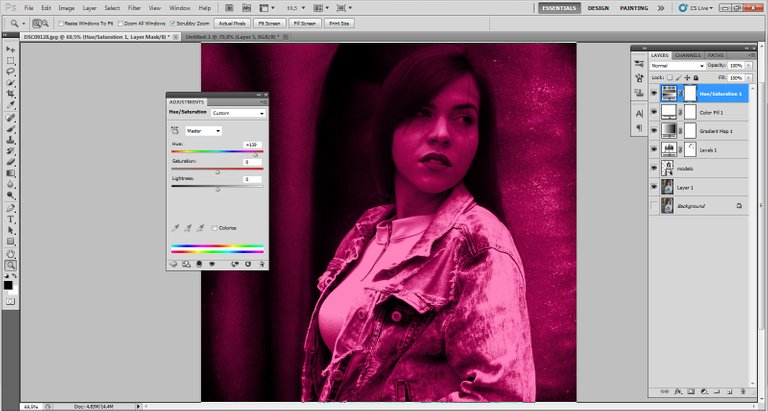
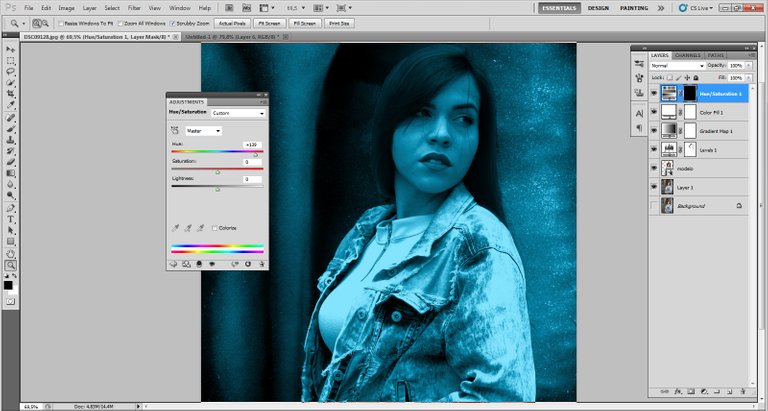
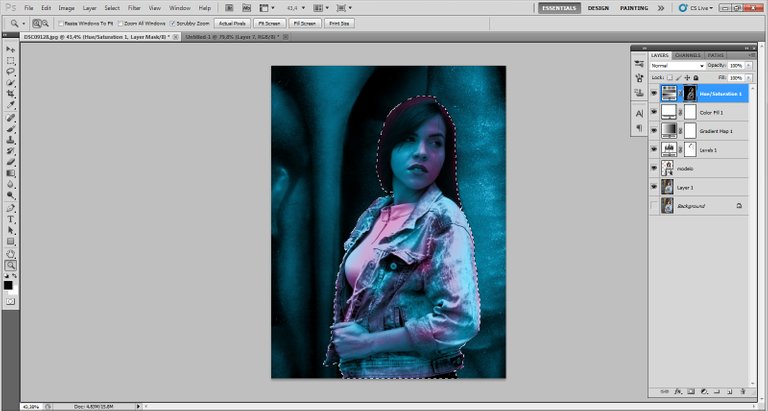
En la máscara d capa comenzaremos a restar con blanco para que vaya apareciendo el color magenta y usaremos el pincel con negro para corregir donde nos hayamos equivocado o para suavizar el tinte.
In the layer mask we will start to subtract with white to make the magenta color appear and we will use the brush with black to correct where we have made a mistake or to soften the tint.
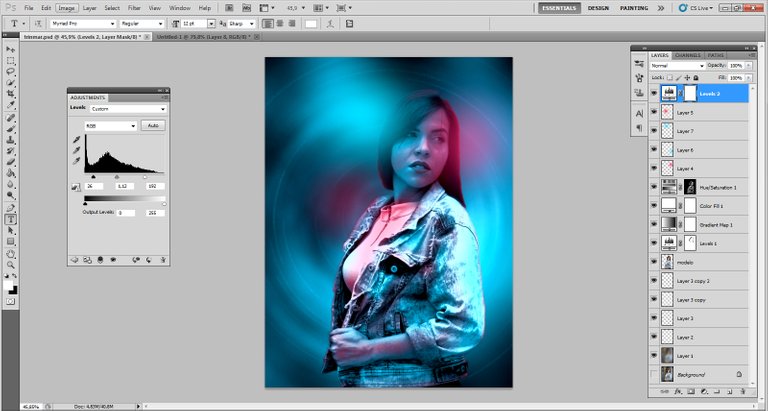
Añadimos unas capas nuevas y pintamos "manchas" de color azul y magenta con una punta de pincel redonda y con dureza al 0%.
Después aplicamos al fondo un efecto de desenfoque radial y tenemos nuestro arte terminado.
We add a few new layers and paint blue and magenta "spots" with a round brush tip and 0% hardness.
Then we apply a radial blur effect to the background and we have our art finished.
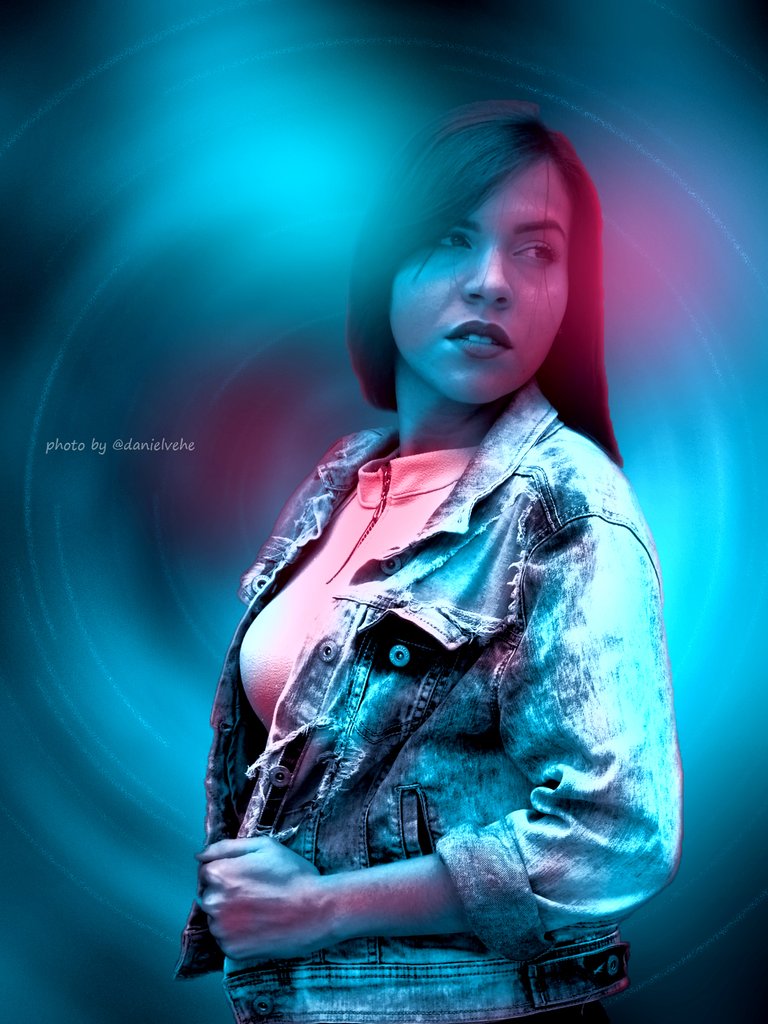
Espero que les haya gustado este bello efecto que podemos usar en nuestra miniaturas en HIVE.
I hope you liked this beautiful effect that we can use on our thumbnails in HIVE.
Me inspiré en este video
Inspired me in this video
Excelente imagen @danielvehe ....me encanta el tema de cyberpunk....supuestamente es un excelente juego.
Gracias :D