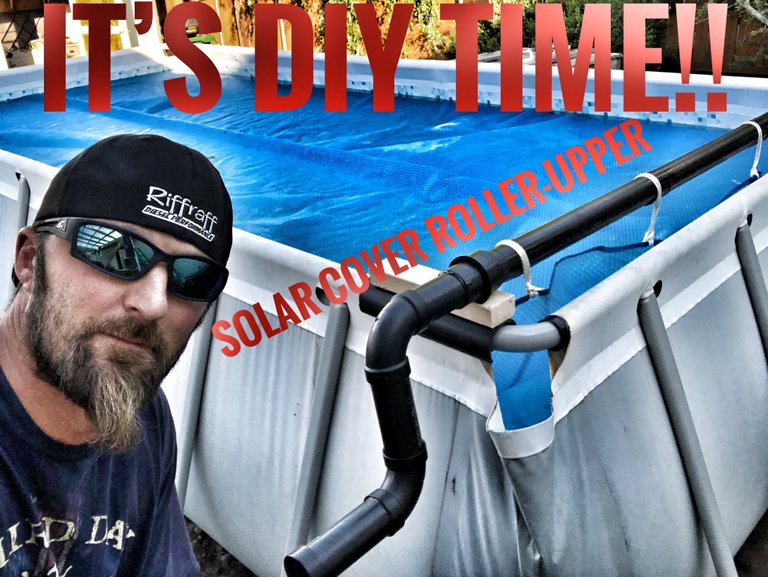
It’s DIY Time!!! Solar Pool Cover Roller-Upper
My fellow DIY’ers, I am back with a little summertime creation to make rolling up that solar pool cover a breeze. Ya, we could keep grabbing one side and folding it half, then in half again, then in half again. Then drag it off the pool and lay it on the ground, which is a two-person operation and a bit of a pain. So what is a DIY’er to do??
In an attempt to get a few more pool days throughout the year, we purchased a solar cover to heat the water up on those sunny but too cool to swim days. I never realized how dang expensive a sheet of extra strength bubble wrap is!!! Good grief!! Anyway, how about I get right into this DIY pool cover roller-upper project...
After getting a basic idea of what I wanted to accomplish, I headed to Home Depot and hit the plumbing isle. I found the ABS plastic to be a bit cheaper than the PVC plastic so I went that route. Putting pieces together, taking them apart, my initial idea changed shortly after looking at the available parts and pieces. $40 and 20 minutes later and I think I have all the parts I need to create this pool cover roller-upper unit. My pool is a 9 foot by 18 foot rectangle pool and here is a parts list needed for my size pool.
- 2 - 2 inch caps
- 1 - 2 inch coupler
- 2 - 3 inch clean outs
- 2 - 2 inch 90 degree elbows
- 2 feet of 3 inch pipe
- 10 feet of 2 inch pipe
- 2 - 1 foot pieces of scrap wood
- 10 - 1 inch screws

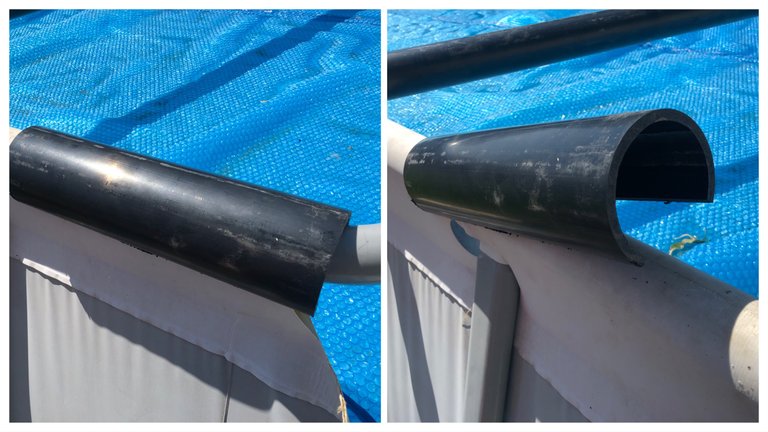
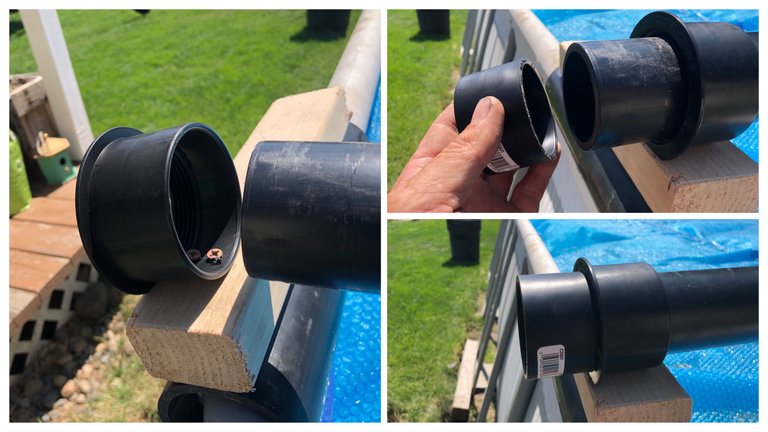
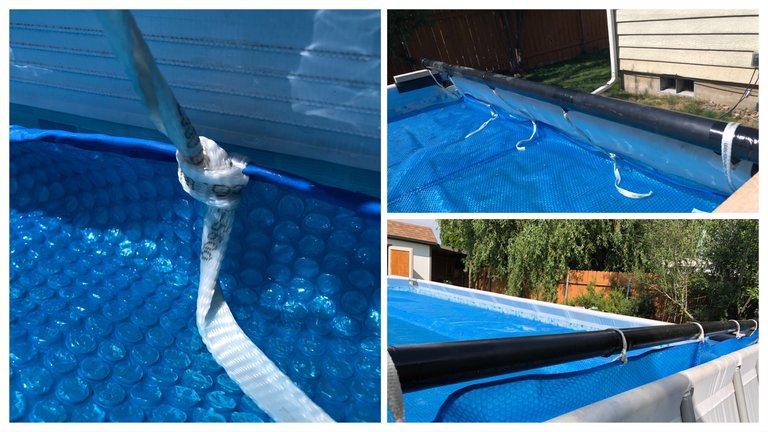
First, I made a way for it to attach to the pool rails. Easy on and easy off, yet it won’t just fall off. So using a piece of 3 inch pipe and a sawzall, I cut out a strip so it would “snap” over the upper bar on the pool.

After a couple cuts, taking a little out at a time. These pieces are fitting nicely and come off rather easily when pulling up on them.
Next I screwed those pieces of pipe to a 2x3 scrap block of wood with 3 1 inch screws. This will give me something to attach the collar to. The collar is what the long piece of 2 inch pipe will roll in on each side of the pool. You will see what I am talking about in a minute.
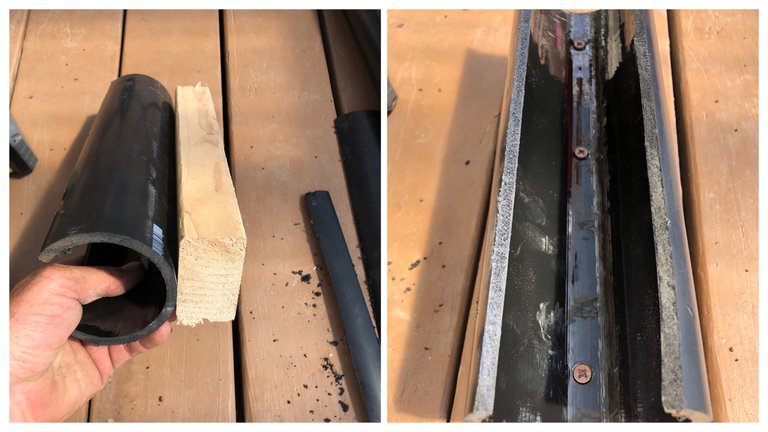
For the collar I used a 3 inch clean out. One side of the clean out is threaded and the other is a slip fitting. I cut the lip off of one side so it would sit flat on the piece of wood. The. Attached it with a couple 1 inch screws.
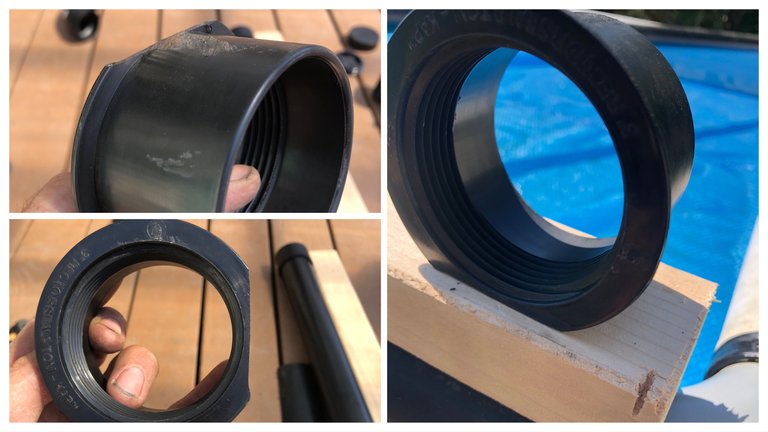
With the collar screwed down to the wood which is attached to the 3 inch pipe that fits over the top rail of the pool, I stuck the 2 inch pipe through it and glued a cap on the end. The cap is big enough in diameter that it won’t pull through past the threaded portion of the clean out coupler. This is done on the opposite side of where the hand crank will be made. That way the length of the pipe will be correct and won’t have a lot of slop.

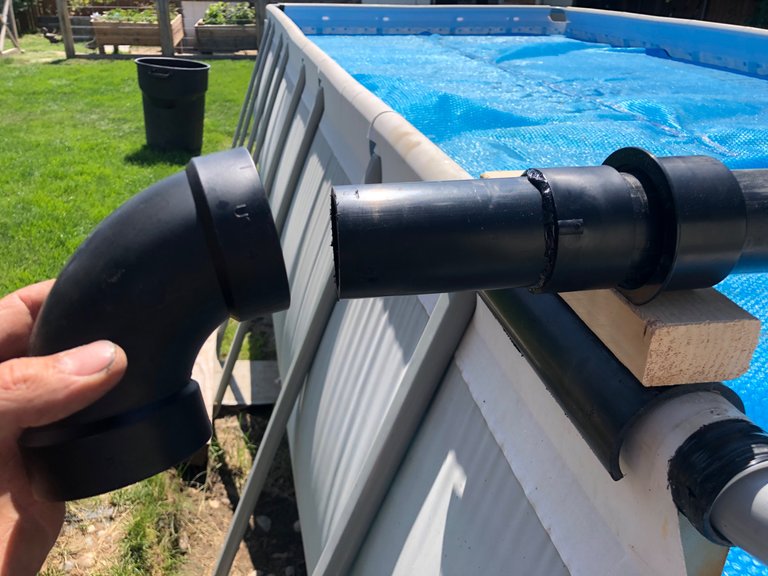
Now on the hand crank side I couldn’t use a cap because I needed to make a handle. So I cut the 2 inch pipe far enough past the clean out piece to accommodate a 2 inch coupler. Now the pipe can’t be pulled through either side of the “rail mount”
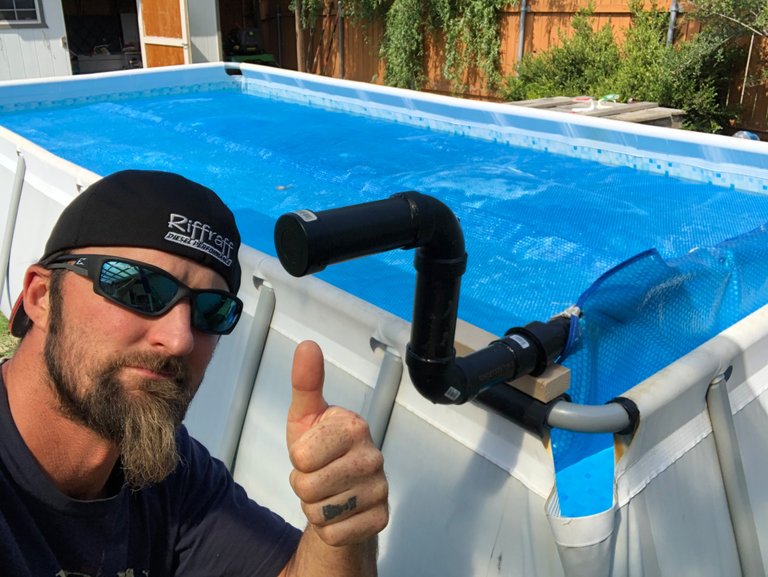
Next it is time to make the crank handle. I cut about a 4 inch piece and glued it into the coupler, then I glued on a 90 degree elbow.
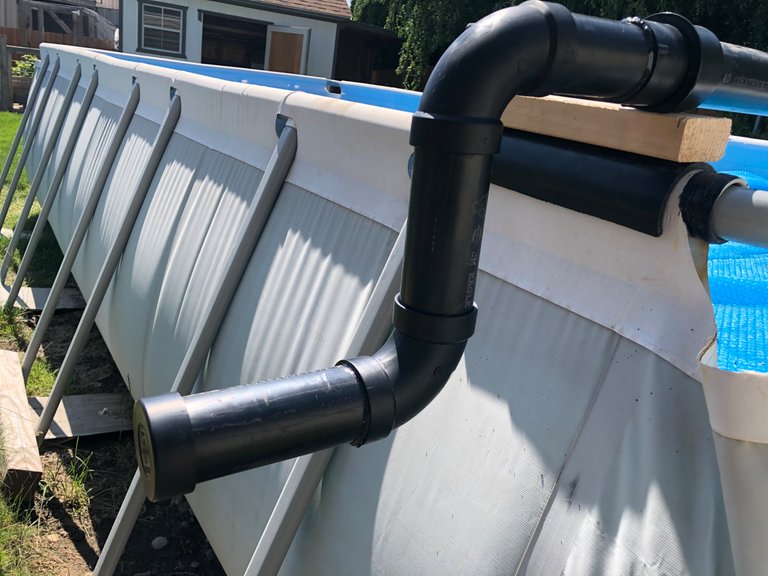
This next piece will determine how big of a circle your crank handle will make when turning it. I chose about a 6 inch piece for that, glued on another 90 degree elbow, then another 6 inch piece for the handle. Glue on one more cap and the handle is complete.
In order to attach the cover to the 2 inch pipe I used a step bit to drill 5 holes evenly spaced in the pipe. Then I turned the pipe 90 degrees and drilled 5 holes inline with the other side.

I found some rope and put it through the holes and tied them off to the pipe. Then when the pipe is turned the ropes wind up on the pipe.
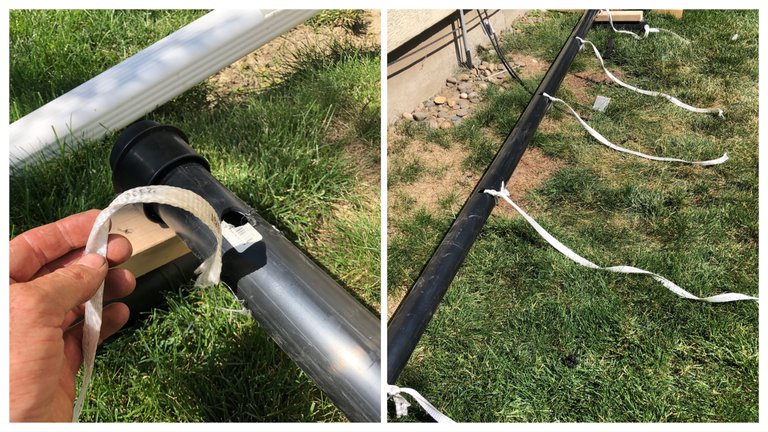
To attach the ropes to the cover, I cut a little slit on the edge next to the seem. Trying my best to tie them off at even lengths. Which did take a little adjusting, so don’t tie them really tight to begin with.
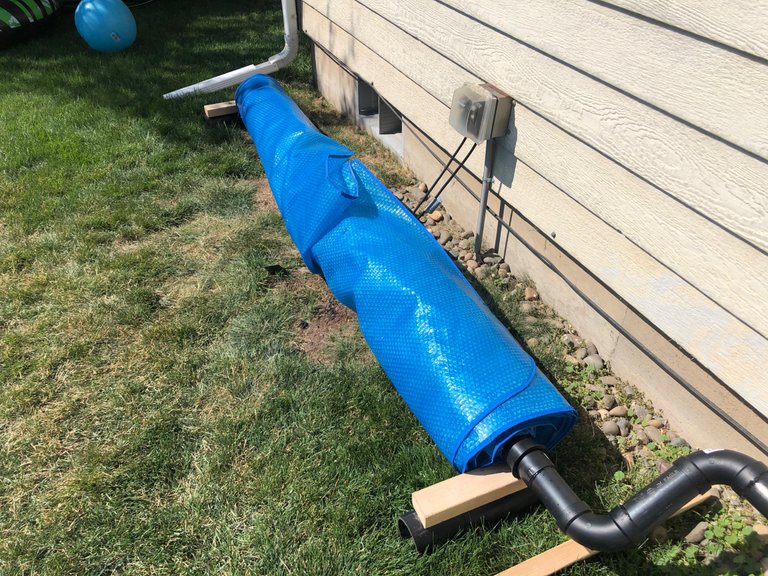
After a couple test roll-ups, some adjustments to the ropes, and creating a little overlap in the middle to prevent the sides from catching, it is is working like a champ!! A one person operation!!
Once it is rolled up, it is really easy to lift each side off the edge of the pool and pick the whole thing up in the middle and set it off to the side in the grass.
So there you have it my DIY junkies, another little project to make things a little easier and more convenient around the Splatts house. If you have a circular pool... that is gonna take a lot more research and development than this simple rectangle pool. My buddy has a big round pool, maybe he wants to make one??? Maybe....

Hive On
and
Save Money
And
Time...
Do-It-Yourself

This works a treat man! Nice work. You're a handy bugger aren't you! It's amazing what a few bucks and some injenuity can create. Well done. So many people would never give DIY a try and here's you getting it done, and probably feeling very pleased with the result.
My first thought is always, "*I know I can buy one, but can I make one that is cheaper and better than what I can buy?" Most often cheaper is a yes. Better??? Now that may be questionable. 😉
On a side note: Remember my axle swap project... well it is basically done! The truck drives and feels like a new truck. I just have to wait for a u-joint and an adjustable tract bar to come in and I can finish. Then it is camping time!! Which reminds me. I have a guy coming over today to hopefully buy my old front axle.
Rewarding to do things yourself.
Nice work on the truck...Some camping sounds like a decent reward for putting in the effort of getting that truck sorted. Nice work.
Nice job...now if only the grand kids pool wasn't round...lol. It doesn't have a solar cover, it's vinyl to keep out debris and help keep algae from growing in it also I imagine. It has small holes in the center then other small holes punch out in different area's. I've never seen one like that and since the pool was donated to us by someone moving out of state it's way better than buying a new one. I am not sure the holes are there for safety reasons or to let rain water run off the cover into the pool or excess water that somehow gets on the cover to drain so it's not logged down with water while getting the cover off....but it doesn't quite work that way and often would have water on top and made it difficult to get the cover off....until this bright light went off in my head and said "hey leave the kids tubes in there and the cover will sit over top of them therefore not touching the water....and it works wonderfully! Sometimes you just got to be thankful for the small things in life....lol.
I think with a round pool, you could set it up in the middle where it is the widest. Then have your ropes at different lengths to accommodate the radius. It would definitely take some monkey-ing around with but I know I can be done. 😉
We had that same type of cover. The water would get on top and make it difficult to get out of the pool. Funny thing is, we did the exact thing... leave a tube in it. Lol.
That looks awesome. You should totally make it so you can roll it up using your power drill. Cranking things manually is ghetto.
DAHAHAHA High speed only!! I won't be the one crankin' the handle... I got kids. Lol.
Thanks for sharing your creative and inspirational post on HIVE!
This post got curated by our fellow curator @tibfox and you received a 100% upvote from our non-profit curation service!
Join the official DIYHub community on HIVE and show us more of your amazing work!